Last time I wrote about the thickness planing jig. The second jig needed for the square-based kumiko is a cross-cutting jig. It's basically a tiny miter box for 90° cuts. The jig includes a 3/4" x 3/4" piece glued to a 3/4" x 2 1/2" piece. A couple of 90° saw kerfs are made into the smaller piece, as accurately as possible. These kerfs guide the saw when making the half-lap joints that make up the frame of square kumiko designs.
 |
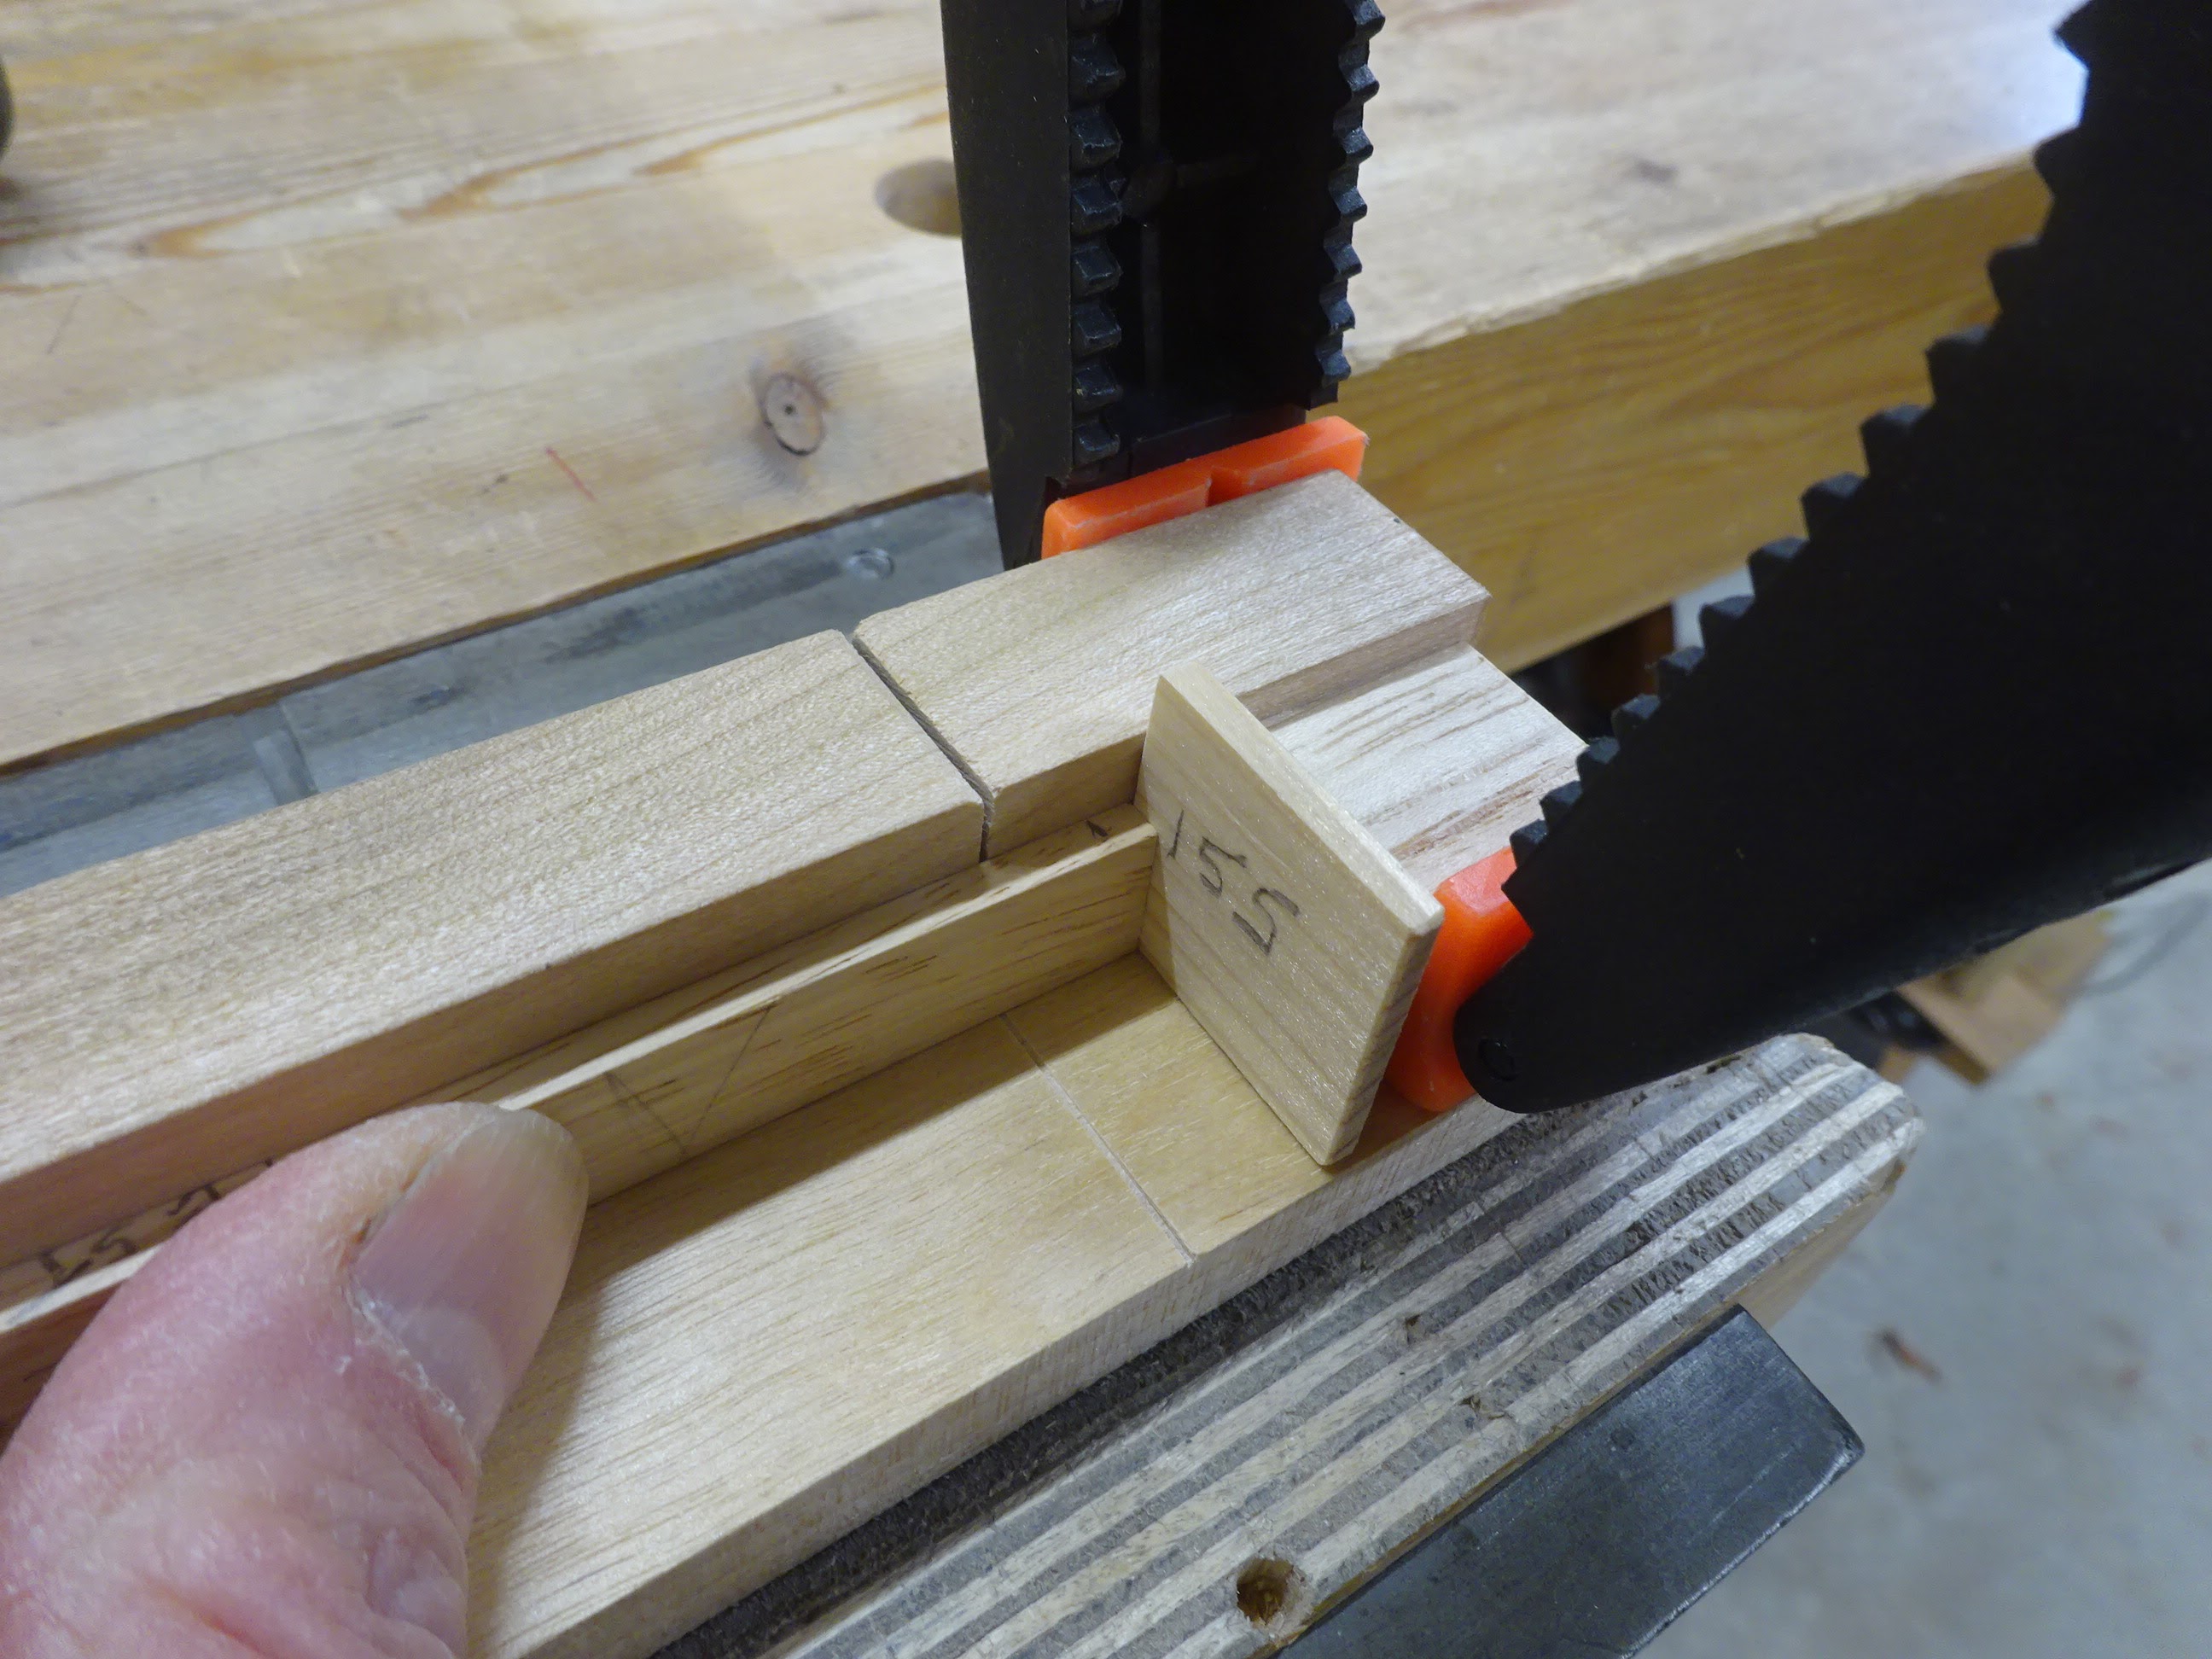
The cross-cutting jig, with stop block clamped in place and a 0.155" spacer.
The spacer adjusts for the saw kerf to make a lap joint about 0.139" wide. |
 |
| With spacer in place, butt the workpiece against the spacer ... |
 |
| Cut half way down ... |
 |
| Then remove the spacer, butt the stock against the stop block, and make another cut |
At first, I removed the waste with a 1/8" chisel, but later found it easier to poke it out with a thumb nail. Here's an early test fit of a stick into its half-lapped partner.
 |
| Testing the fit |
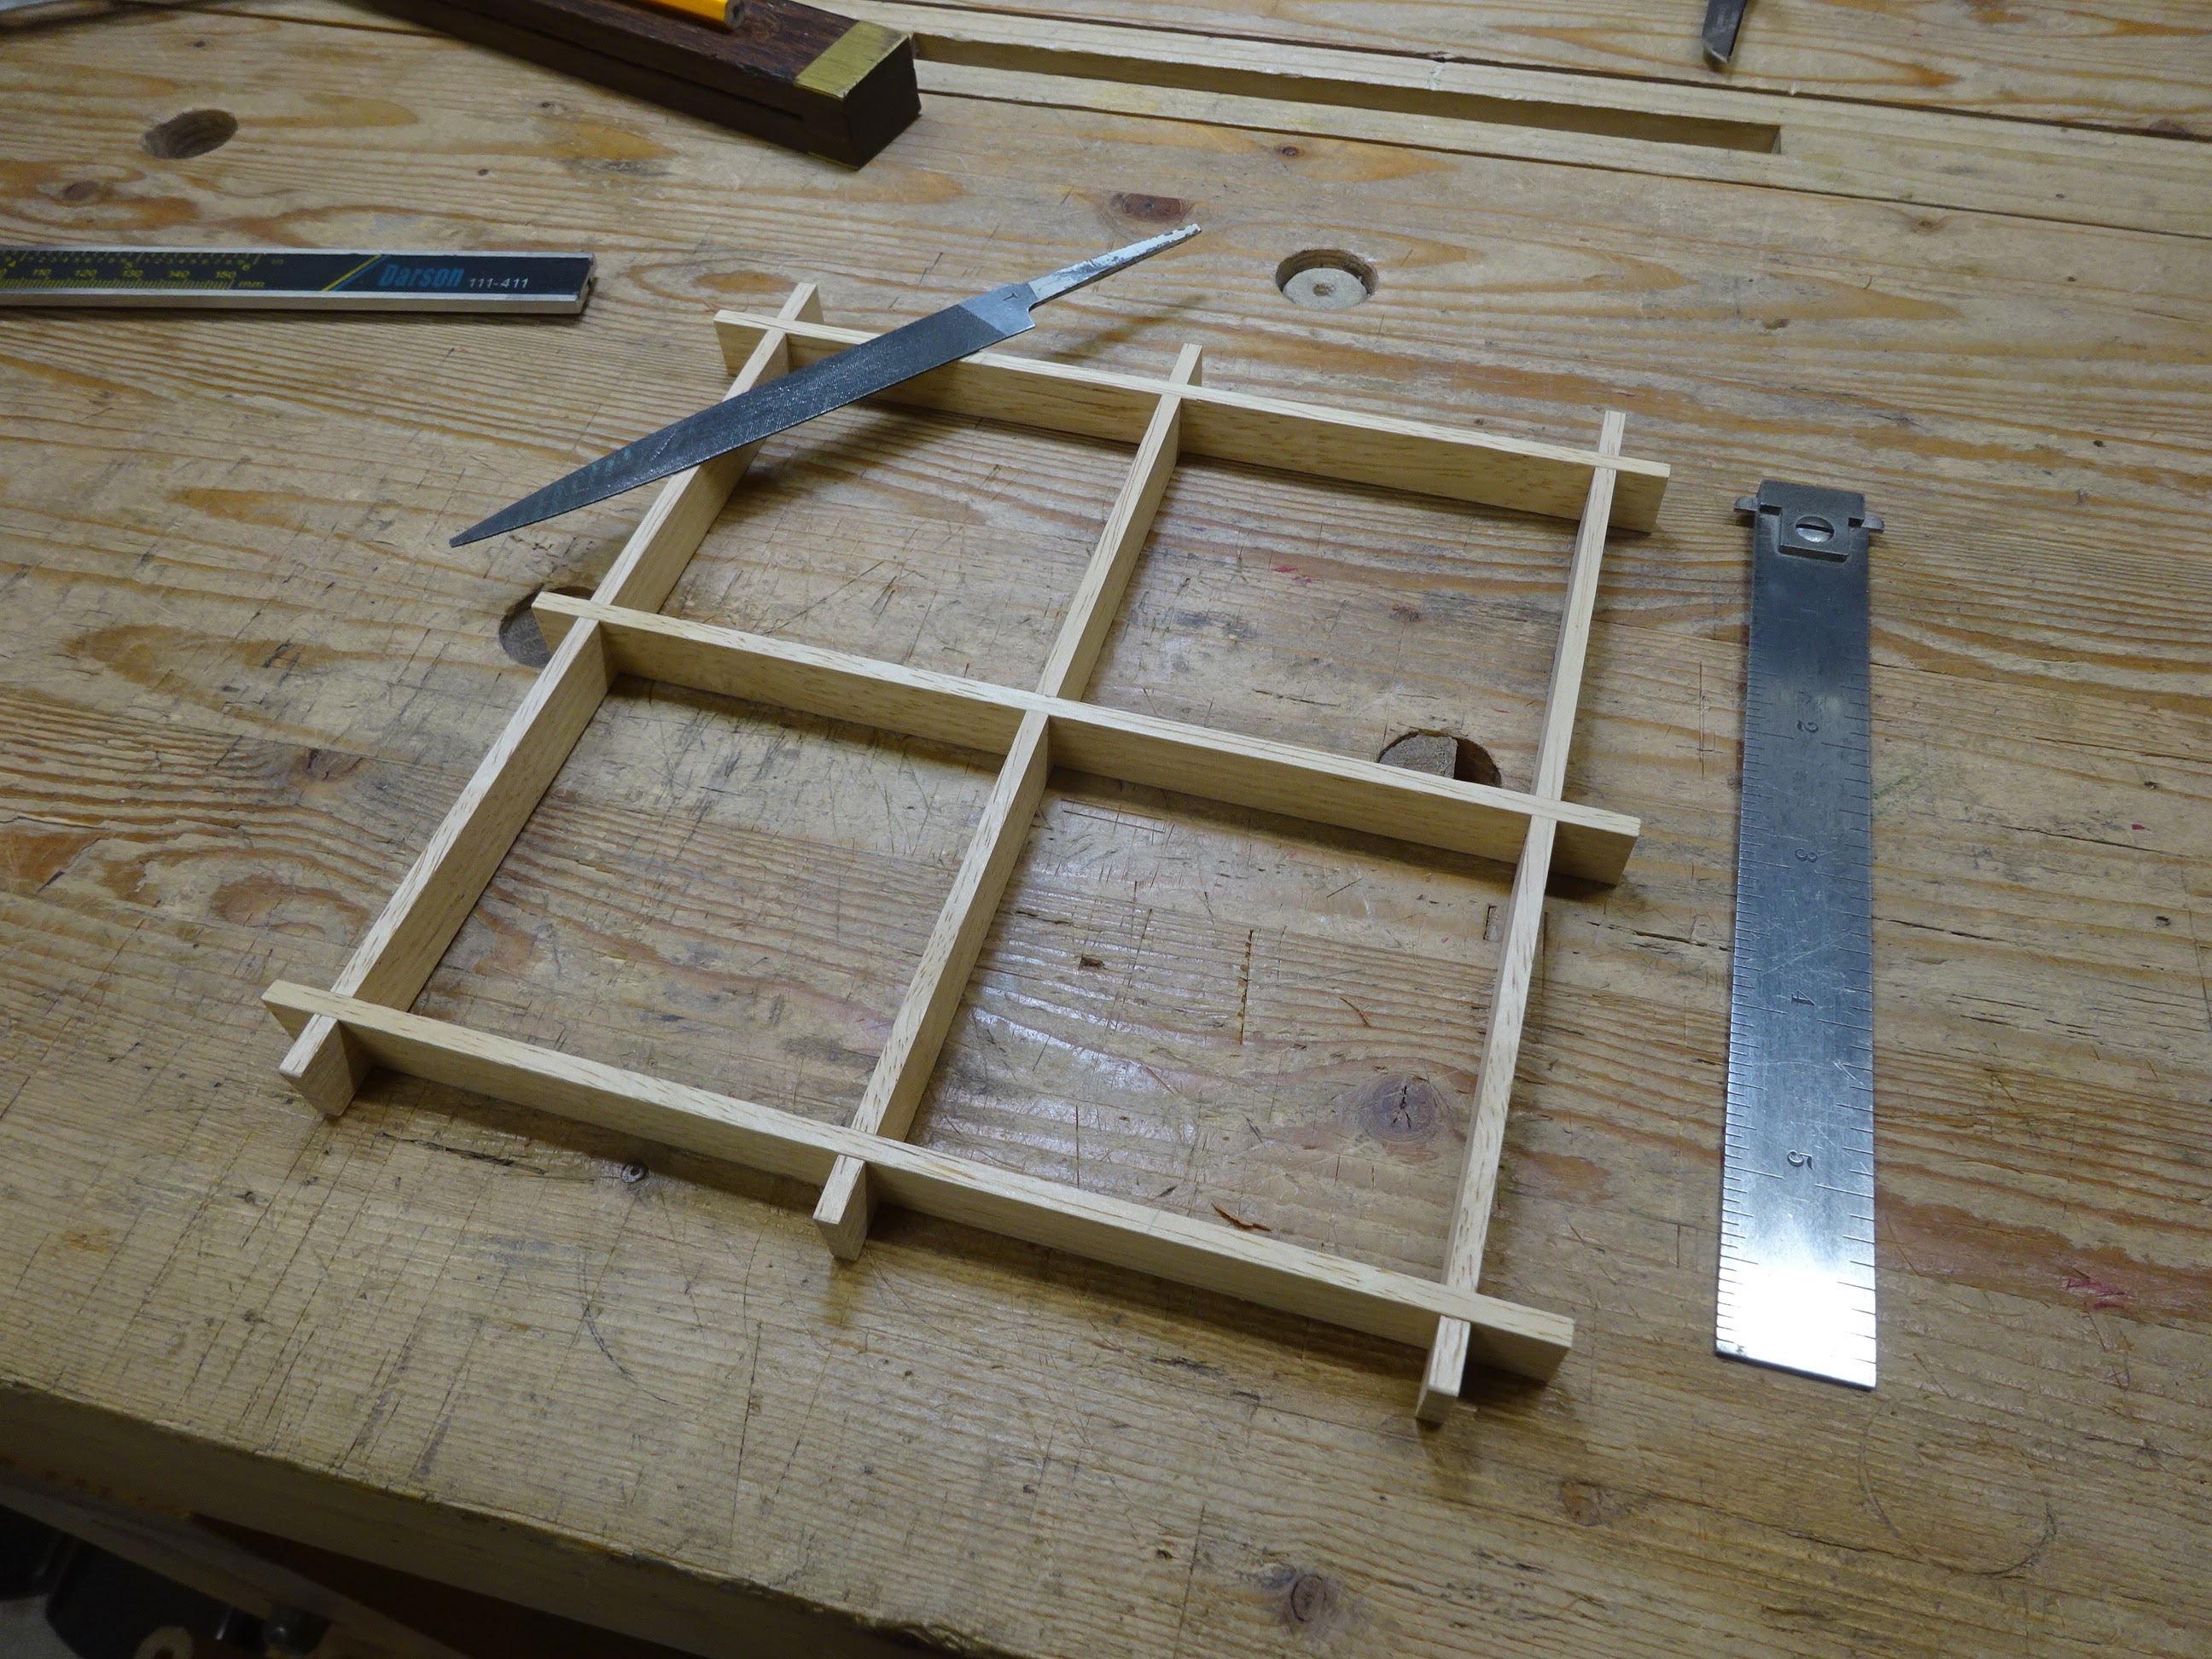
In the first pic of this jig above, you'll notice there are two kerfs in the top piece. This was the spacing I chose for my first trial kumiko. After making a few more test cuts, I fit together a frame.
 |
| The frame fit together nicely, but a small file "sweetened" the fit of a few tight joints. |
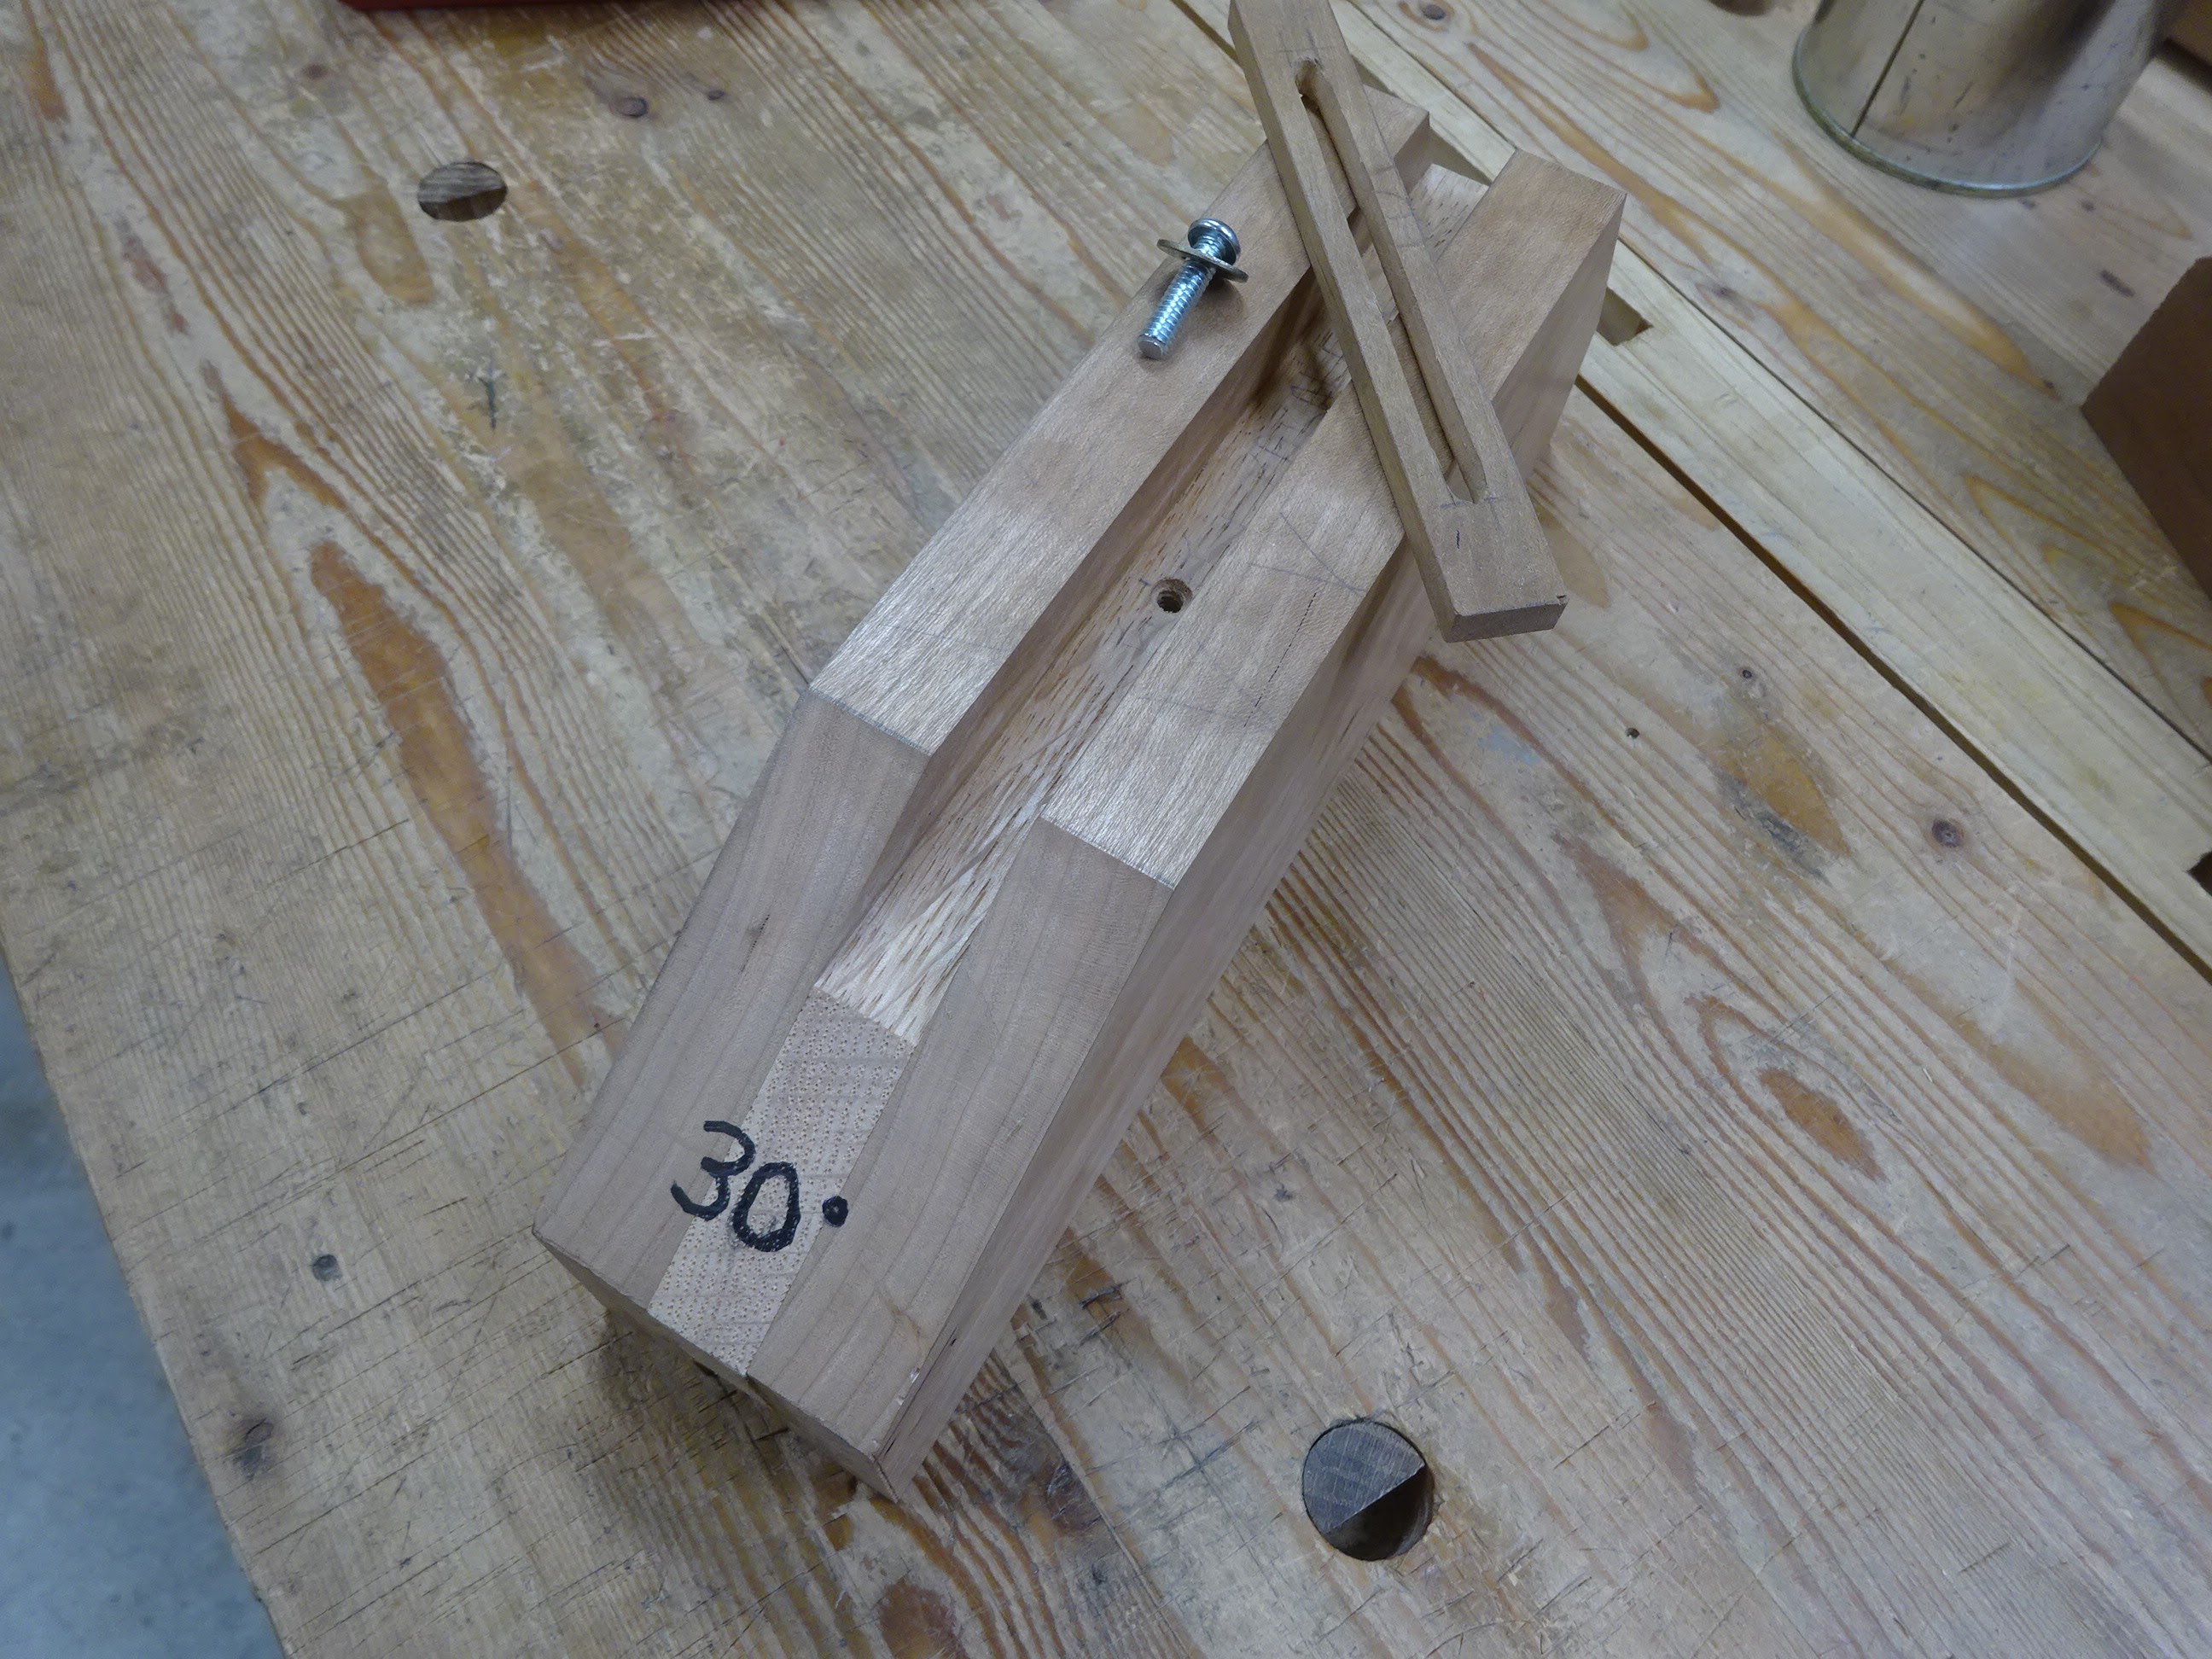
The next step in my first kumiko pattern is to fit pieces into the diagonals of the four smaller squares, radiating out from the overall center. This leads us to the third jig that is needed, which allows precise angles to be cut on the end of a workpiece. The jig is a chunk of wood, about 2" thick, with a groove running down the center of one edge. An adjustable stop slides in this groove and can be locked down to allow repeatable cuts. The end of the chunk of wood is sawn and planed precisely to the angle needed.
 |
| The jig and accessories |
 |
| Stop block locked down to allow just a little of workpiece to extend beyond the 45° angle front |
 |
| I made some tiny wedges to hold the workpiece tight against one wall |
 |
| Also have 22 1/2° and 67 1/2° angles on the other end |
Before I forget to mention it, the groove is about 5/8" deep. It needs to be deep enough so that, after an angle is sawn and planed on the end, there is enough reference surface on which to register a block plane or chisel when making cuts. This seemed about right.
In use, I clamp it in a vise and use either a chisel or block plane to shave a little bit off the end of a workpiece.
 |
| The jig clamped in a vise |
To use the jig, a workpiece is placed in the groove, its back end butted up against the adjustable stop. Then a chisel or block plane can be used to trim the end of the piece at the proper angle. Turn the piece over and put the angle on the other side and you get a perfectly centered point on the end of the piece.
 |
| Trimming the end of a test piece |
I cut two small shims from brass shim stock, one of 0.005" and one of 0.010" thickness. These allow very fine adjustment of parts to close in on the right length.
 |
| Arrow shows placement of thin shim that pushes out the workpiece 0.005" |
I later made improvements when making another jig for hexagon-based kumiko. The jig shown above was made form VERY soft redwood. When trimming a workpiece with a chisel, often the far end of the piece would blow out because there wasn't good enough support.
 |
| Arrow shows where blowout was possible |
So the next jig was made from hardwoods. I laminated 5/8" oak between two 3/4" pieces of cherry. The hardwood also allowed me to tap a hole in the oak so that a machine screw could be used to lock the sliding stop in place. The original jig had three holes for further adjustability of the stop, but so far I've only used the middle one. So I put only one in the newer jig.
 |
| Jig for hexagon-based kumiko |
Because this jig was laminated, I had to make sure the top edges of the sides were aligned properly and also that the bottom of the groove was parallel to those trued up cherry edges. I used a router plane to do the latter step.
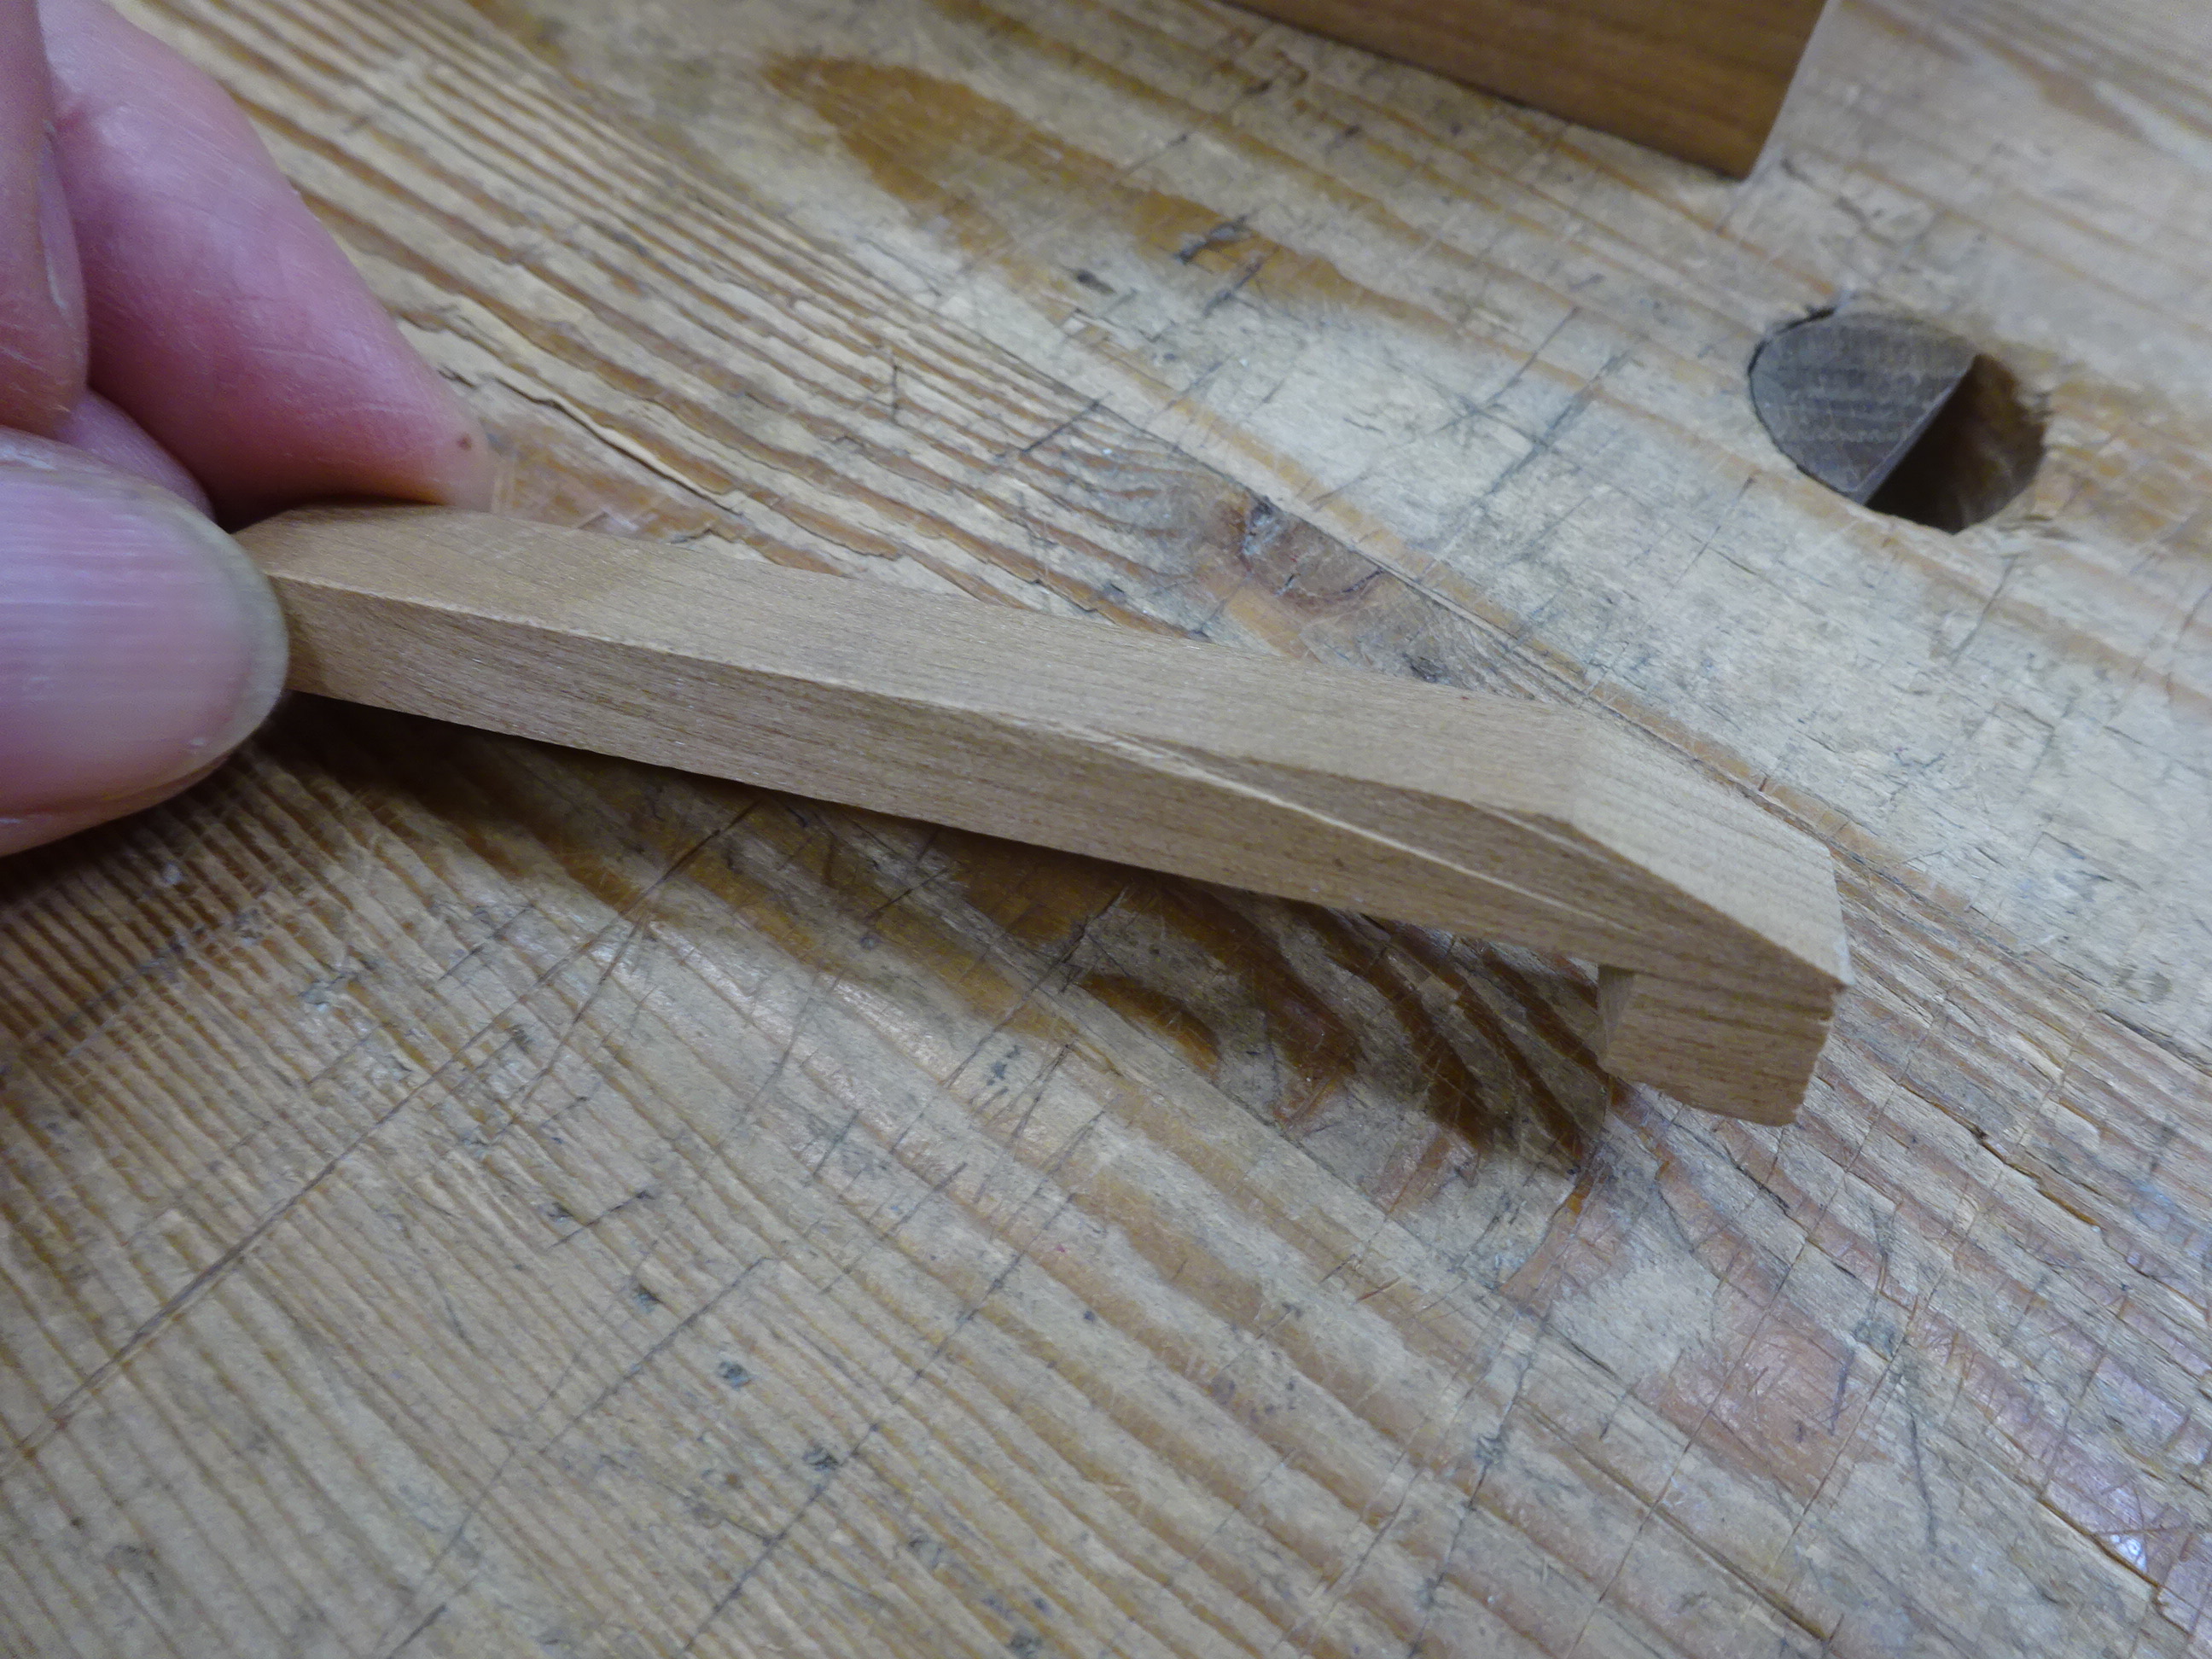
For this new jig, I made a couple different helpers to keep the workpiece stable. One was a small wedge, a scrap piece of kumiko stock with a bevel on one end. This bevel fits into the gap between workpiece and side of the groove and can be used like a lever to force the piece against the far wall.
 |
| The little wedge |
 |
| Levering the workpiece against the far side of the groove |
I also stole something from a Fine Woodworking video - a little hold-down that presses the workpiece down to the bottom of the groove.
 |
| The hold-down ... |
 |
| ... and how it is used |
No doubt more than most people want to know about these jigs. But it helps me to write it down. Next time I'll get into the actual making of square kumiko patterns.


I like your little wedges and will make some for my jigs. Jim B
ReplyDeleteExcellent, Jim. Glad something I wrote could add to another's skills.
Delete