A few years ago while rehabbing a wooden screw-arm plough plane, I looked into making wooden screws. Let's just say it was not a stunning success. I have Roy Underhill's "The Woodwright's Workbook", which has a section on making wooden screws and nuts. But as many times as I've read it (several!), some parts still don't sink in.
After recently seeing something about it on YouTube, I thought I'd give it another try. This time, I'm making a much larger screw and nut: the root diameter will be 1 3/4". I'm just winging it with regards to the thread pitch. It seemed that 3/8" peak to peak would be about right. With a 90° angle between threads, the geometry works out that each gullet will be 3/16" deep.
 |
| Mistake at bottom: should read 1 3/4 diam --> 5 1/2" circumference |
There are two parts to the tap that is used to cut inside threads. The first is a dowel that has a spiral kerf sawn into it and a cutter mounted in a mortise through the dowel. The second is a special "nut" that pulls the dowel and cutter into a workpiece.
First the nut - a block of wood and a piece of steel . I needed to make a 1 3/4" hole in a block of poplar. I have a 1 3/4" Forstner bit, but with my drill press in storage, my holes when using a power drill were not even close to square to the surface. I have expansive bits for the brace, but for the life of me I can't get them to work well for holes this size. Though it was far slower, I had better results marking the hole centers on front and back, marking the holes with a compass, sawing with a coping saw and paring to the lines with an incannel gouge.
 |
| Poplar block with 1 3/4" hole |
There needs to be a piece of steel let into this block and I used a piece of a mending plate. It's thickness was in the range of .030 or 0.040" - something that would fit a saw kerf reasonably well. In the pic below, you can see that I inserted it into a saw kerf that was cut at an angle into the top of the block. The kerf extends about 1/3 of the way into the hole.
 |
| Sheet of metal in the angled kerf |
The angle is the same as the angle of the threads that will be cut and is calculated as follows. For my screw's root diameter of 1 3/4", the circumference is pi times diameter, or 5 1/2". The block above is 5 1/2" long, same as the circumference. For a thread pitch of 3/8", I cut the kerf in the block so that the right side is 3/8" further away from the front of the block than the left side. When the piece of steel is inserted, it is marked for the arc of the hole and then shaped with hacksaw and file to leave about 1/8" to 3/16" showing inside the hole. The ends of that arc are also rounded to make it easier for the cylinder to start threading onto it.
 |
| The metal piece is shaped to leave about 1/8" arc of steel within the hole |
The cylindrical dowel starts out as a squared up piece of stock. As you'll see later, I chose rather poorly the first time using Douglas fir. Poplar worked much better. It's far better to mark this out while it's square. First, I drew centerlines and octagonizing lines on all four faces. Then I marked a knifeline every 3/8". On each adjacent face, these lines were offset from the previous face by 3/32".
 |
| Marking center and octagonal lines |
 |
| Using a 3/8" setup block, square and knife to mark every 3/8" |
It's also far better to mark out and chop the mortise for the cutter and wedge while the stock is square.
 |
| Chopped the1/4" x 3/8" mortise for the cutter / wedge |
 |
| The opposite side is 3/8" x 3/8". |
 |
| 1/8" x 3/8" piece of O-1 steel and wedge |
 |
| Fitted to the mortise - cut the length down later |
 |
| Making the dowel octagonal with jack and smoothing planes |
 |
| Rounding with homemade spokeshave |
 |
| Testing for high spots and fit in a pine scrap with 1 3/4" hole |
Once the dowel was round, I penciled in the spiral by joining the 3/32" offset knife lines that had been struck earlier. The dowel started out at 1 3/4" square, so no material needed to be removed at the center of each face when rounding the dowel, thereby keeping the knife lines. Then I sawed the spiral kerf.
 |
| Setting sawing depth to 3/16" with blue tape |
 |
| Sawed the kerf along the laid-out spiral |
 |
| Sawed and ground the cutter to shape |
 |
| First test cut on that same pine scrap |
 |
| It's working! |
 |
| With deeper cuts, ran into difficulty |
 |
| The Douglas fir tap was not up to the challenge ... |
 |
| The kerfed tap completely disintegrated |
 |
| Starting with a new poplar dowel and better method of ensuring depth of kerf |
 |
| Testing in a piece of poplar, using grippy mat to turn the tap |
 |
| Relieved some material in front of the cutter to give shavings a place to go |
 |
| Wow! This is exciting, but ... |
 |
| ... the cut at end grain was very rough |
 |
So I wetted the end grain areas with mineral oil, waited a while
and made a few more passes. Got a MUCH smoother cut. |
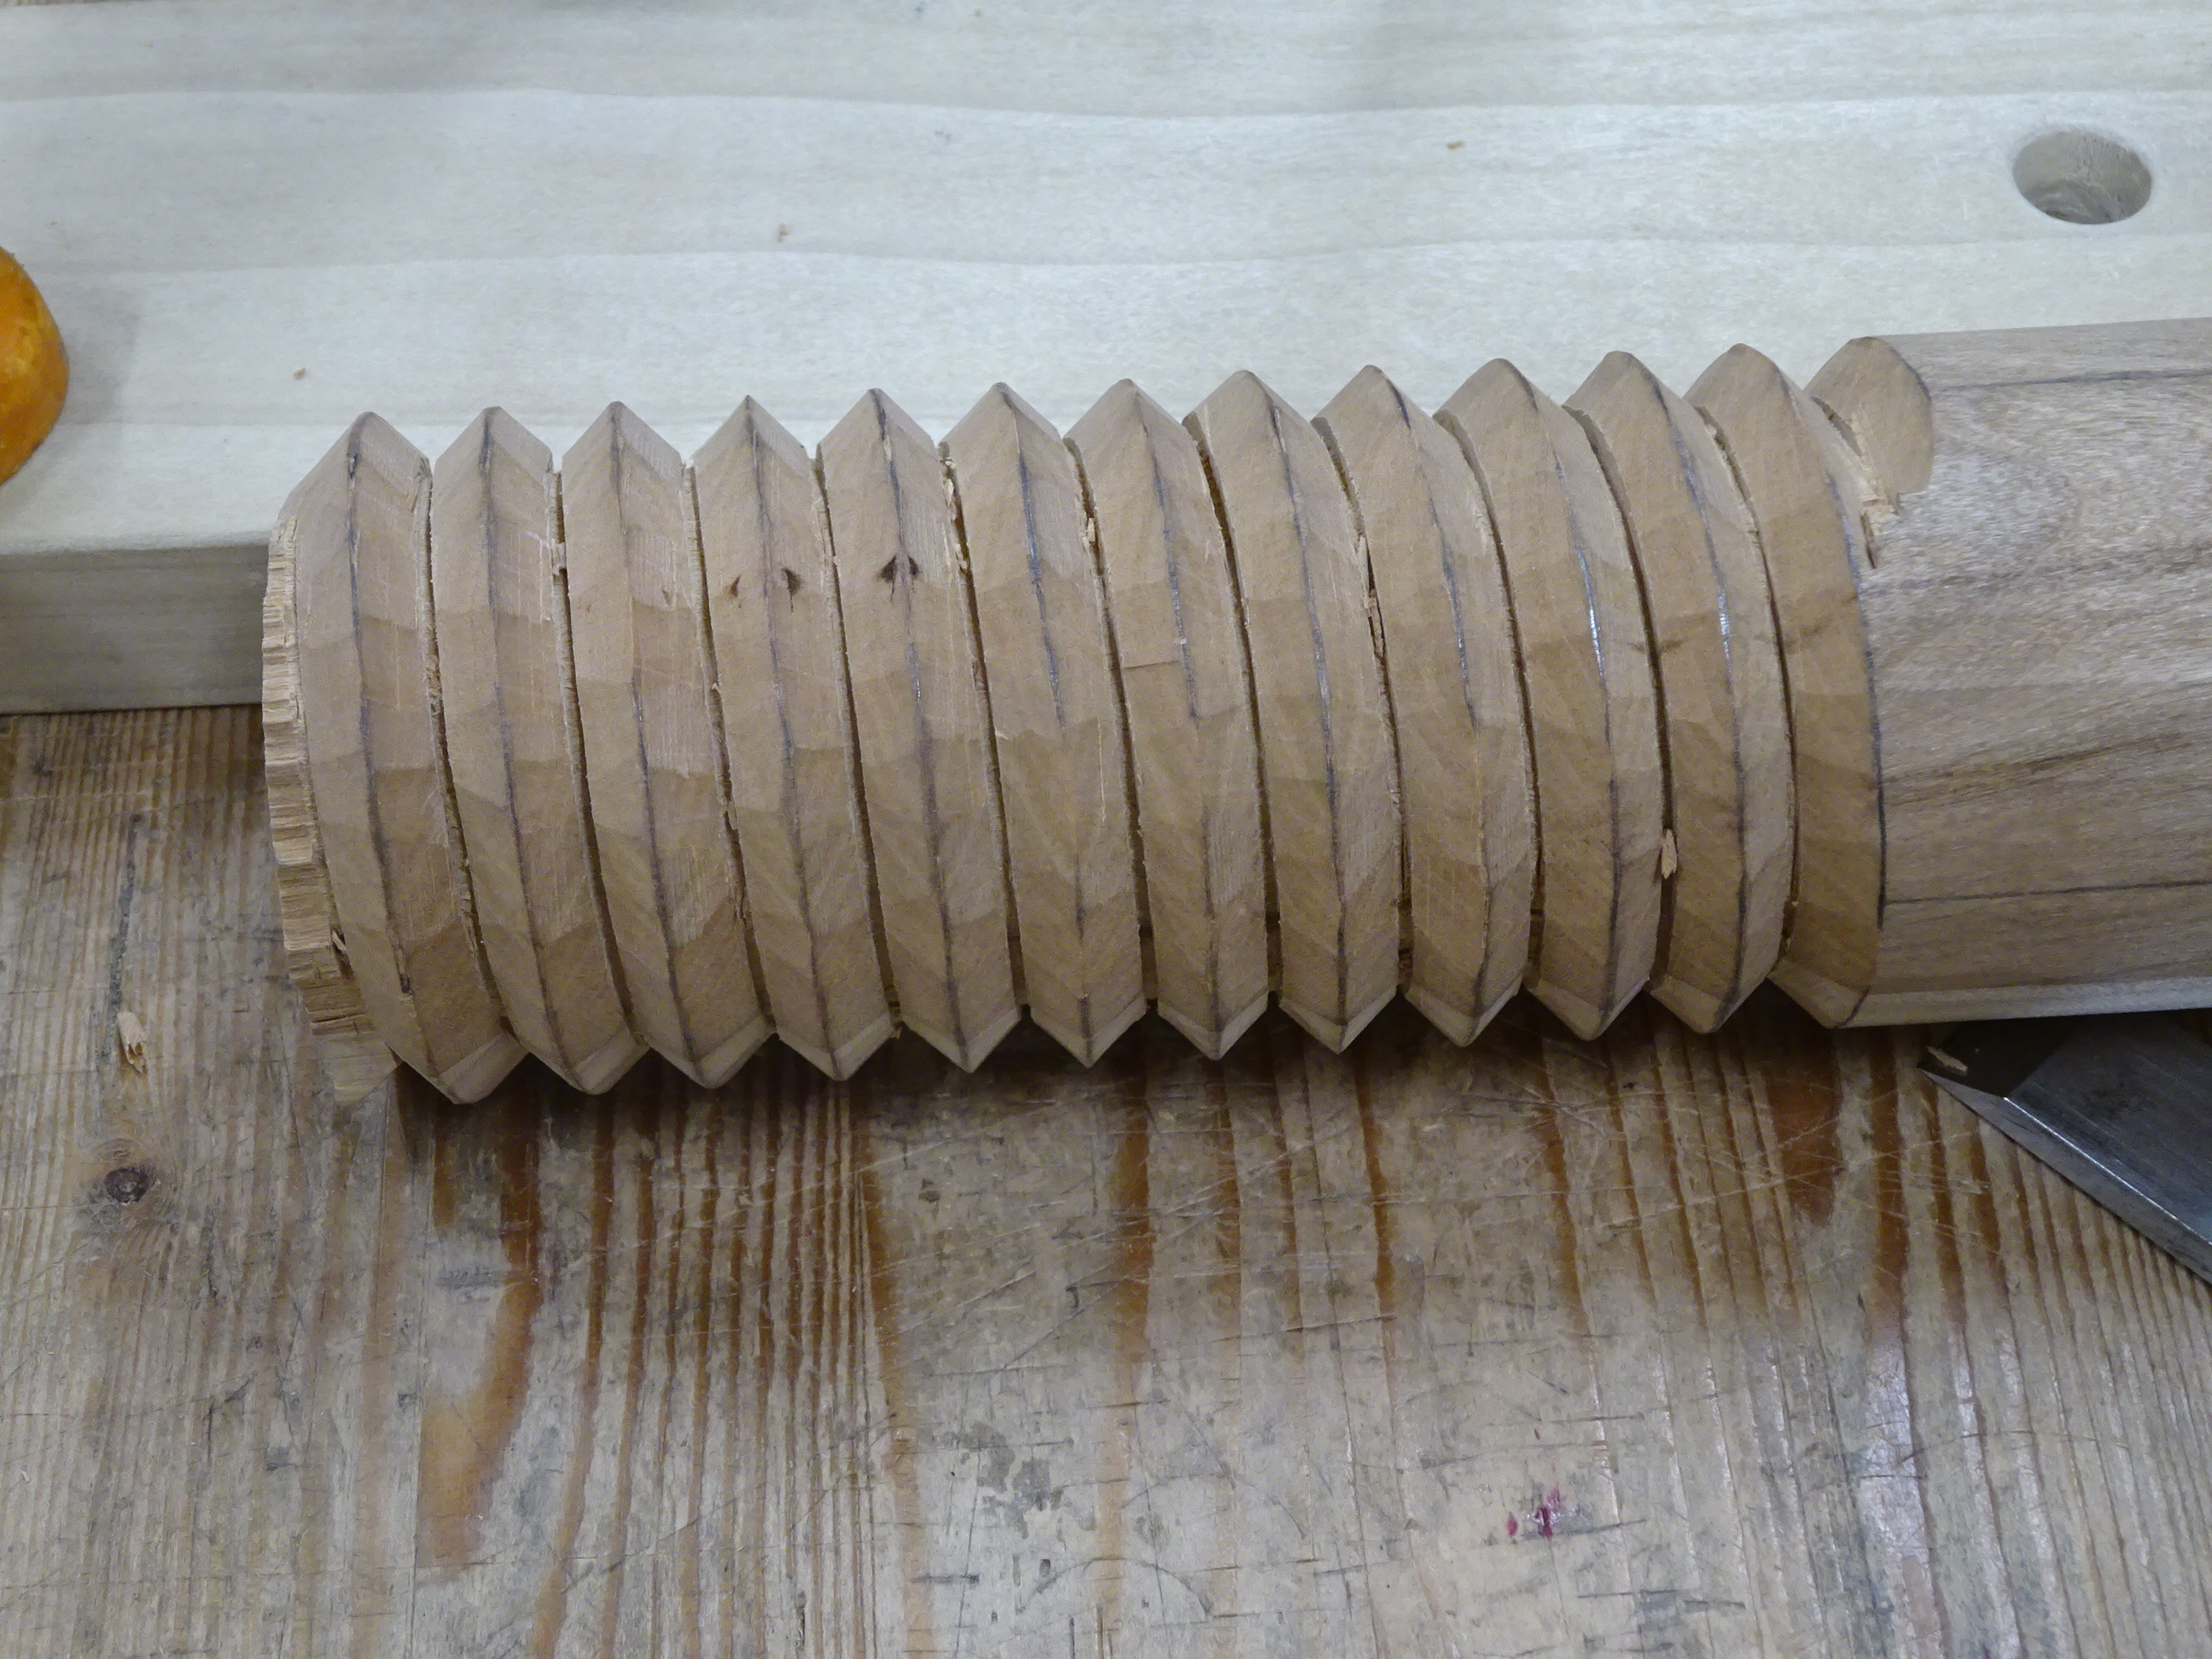
OK, so I got a nut made. Now to make a screw. The geometry of this thread pitch made it necessary to use a dowel with 2 1/8" diameter. Normally one would make a screw box to make the outside thread, but I wasn't ready for that yet - maybe next week. For now, I'm going total Neanderthal and using a saw and chisel.
 |
Started by laying out and cutting a kerf similar to the tap.
Added a spiral pencil line centered between kerfs. |
 |
| Then got to chopping with help from a mirror and bevel gauge set to 45° |
 |
| After chisel work - note pencil lines remaining |
 |
| After filing with a course square file |
 |
| Testing in the nut. Needed a little extra filing on a few threads, but it's a damned good fit! |
Well, this is exciting! What am I going to do with this wooden screw and nut, you ask? I don't know yet; I was just having fun. But the possibilities are many. For now, though, I'm going to look into making the thread-box. That's the part I had no success with a few years ago. Until then ...