Here's another bucket list item. I've wanted to try kumiko for a long time. Geometric patterns appeal to me and this definitely scratches that itch. It's not as hard as I thought it might be - especially the patterns based on squares. You just have to be meticulous - and have a few jigs that allow for precise cuts. I used scrap pieces of wood, planed accurately to 1/2" x 1/8+". My thickness was actually about .139", so that I could fit a 1/8" chisel to remove the half-lap waste without worrying about cracking the keeper wood (turns out 1/8" thickness would have been fine).
 |
| My first kumiko |
Three jigs are involved in making this particular pattern. First is a thicknessing jig, second a cross-cutting jig for small parts and third, an angle trimming jig.
Kumiko starts with accurately preparing the sticks. I had made a thicknessing jig some years ago, but wanted to make a new one with greater accuracy and adjustability and I saw this design on YouTube (sorry, can't seem to find it again to provide a reference).
 |
| This thickness jig was made for my trusty #4 |
 |
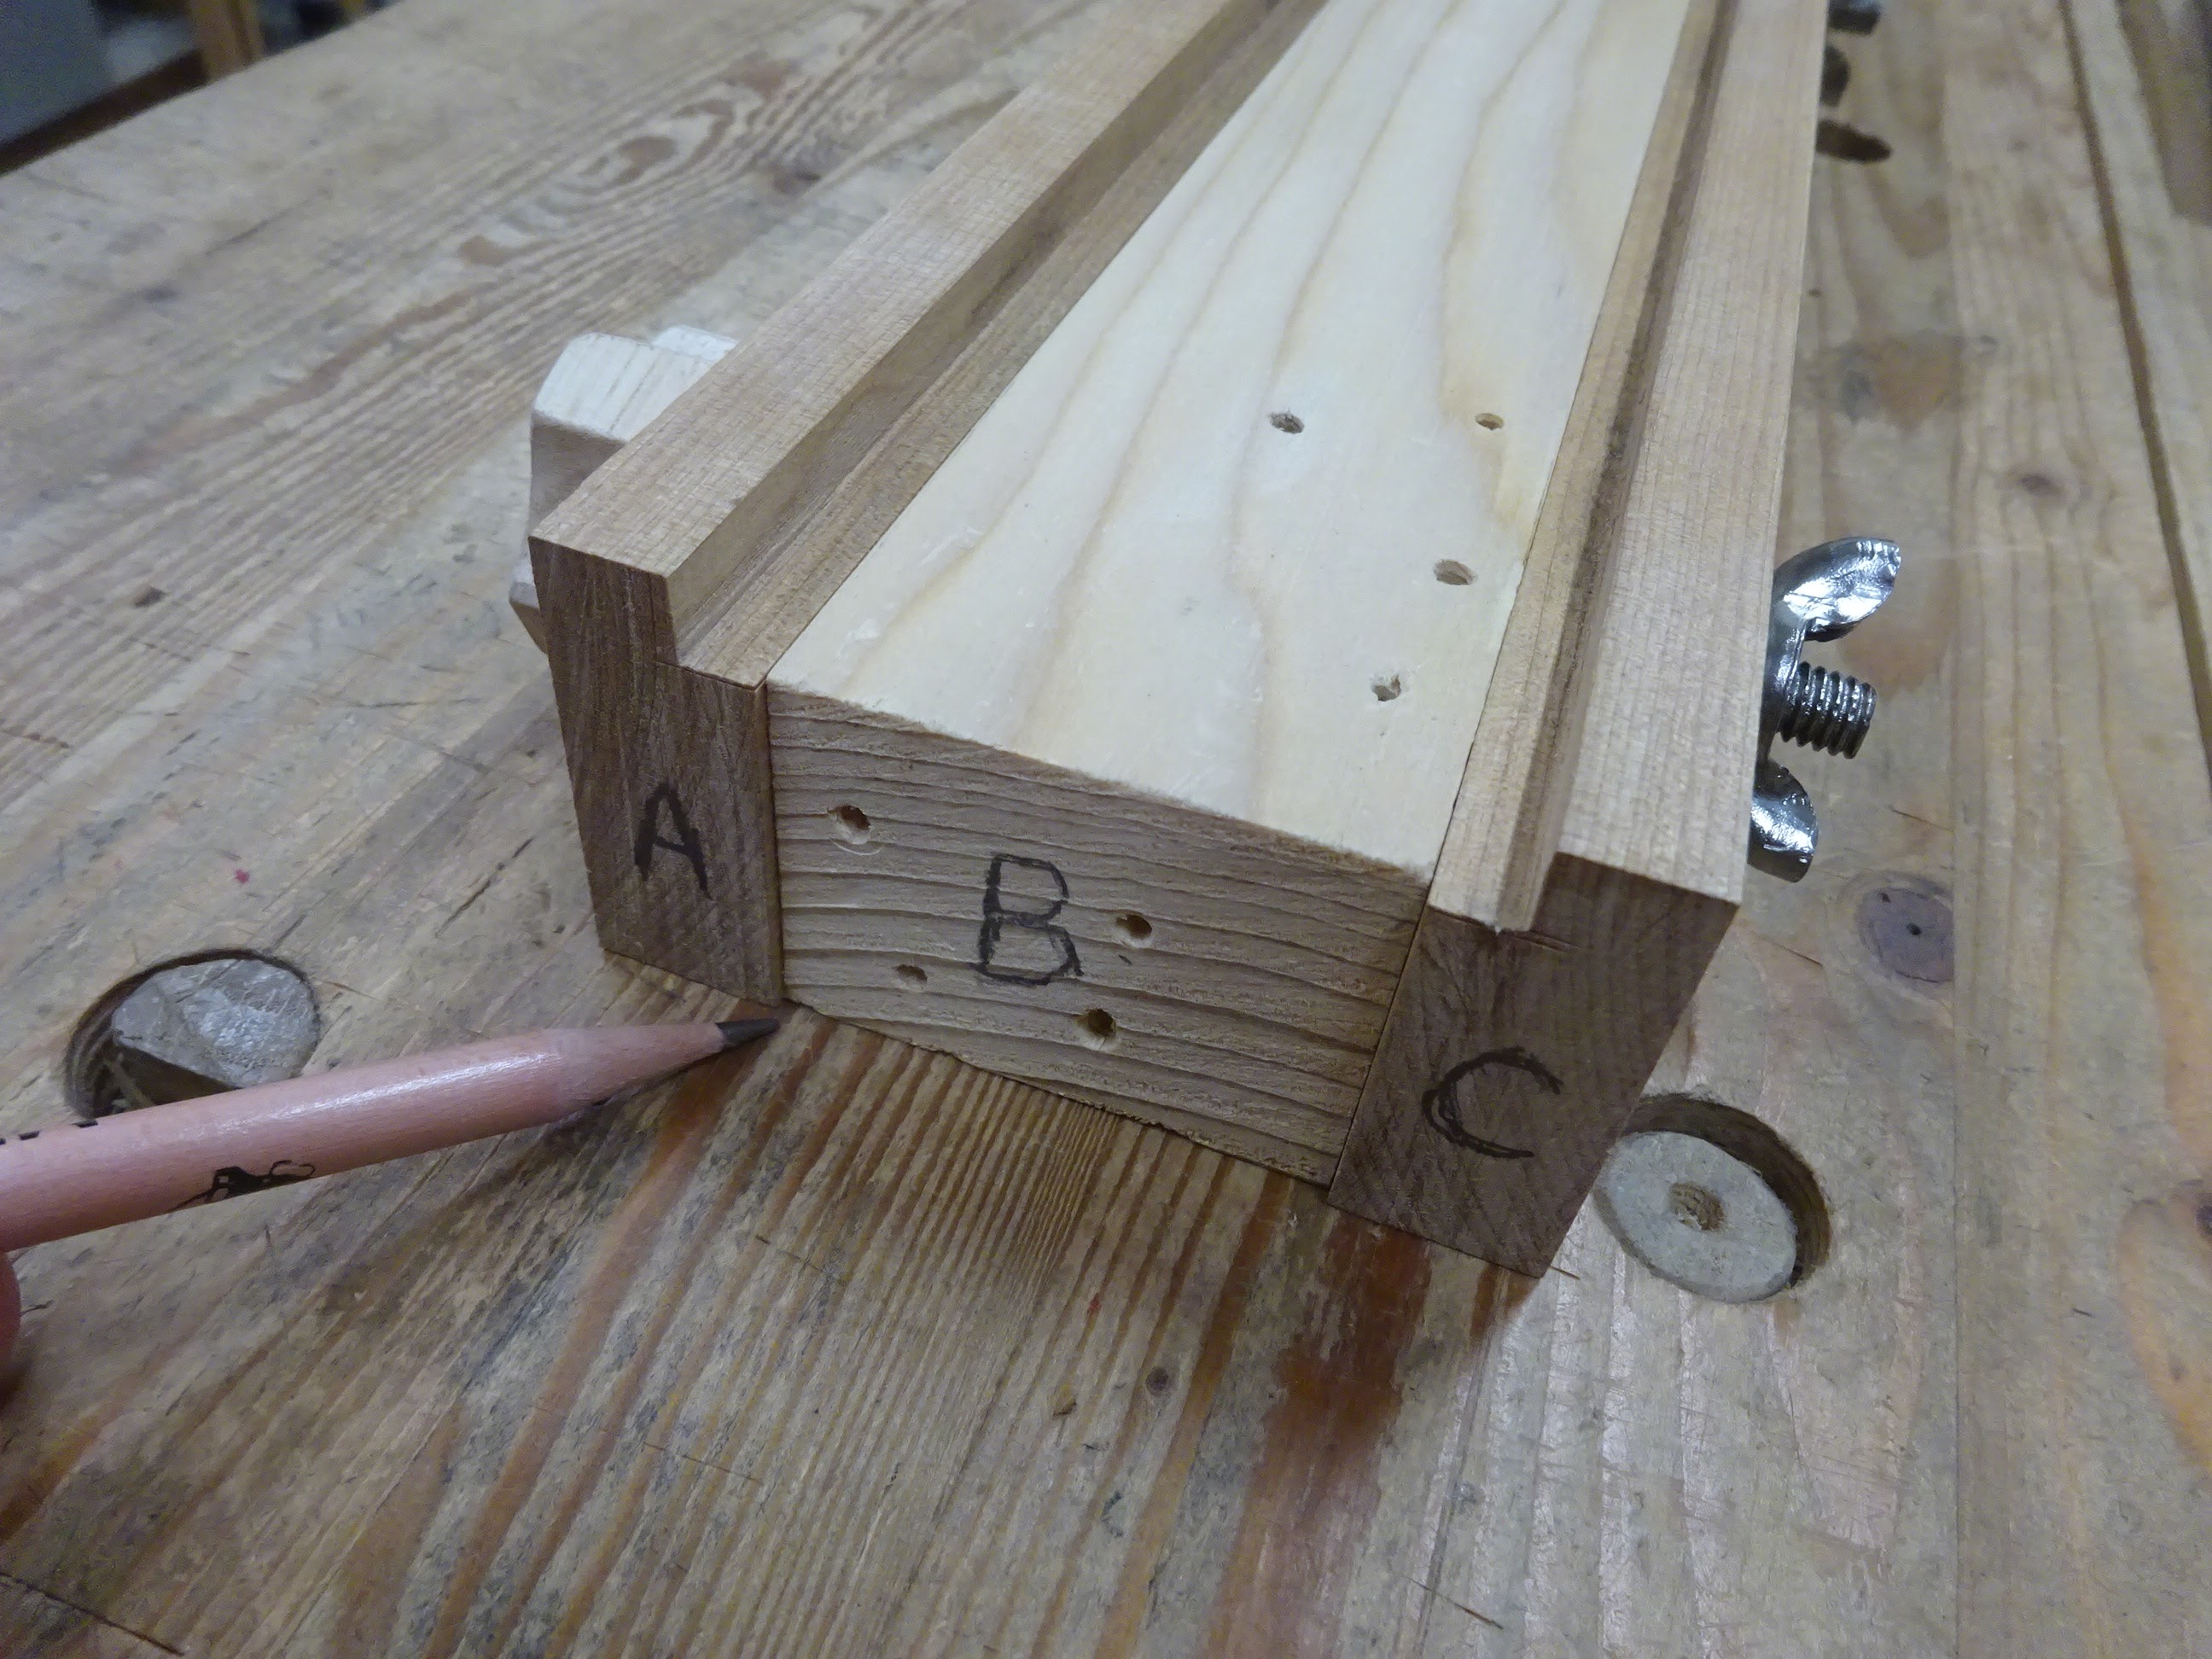
| Three main parts: sides A and C, and base B |
 |
| The sides are adjustable using slots over hanger bolts screwed into the base |
Here's the key to this design. The rabbets on the inside top edge of the side pieces are cut so that the distance from the bottom of the side to the bottom of the rabbet is exactly the same as the height of the base.
 |
| Here, the side and base are both bottomed out on the benchtop and the bottom of the rabbet is exactly co-planar with the top of the base |
When cutting the rabbet, don't plane it to full depth, but get close. Then clamp the base and side together with their bottoms precisely lined up, and with a chisel referencing on the base, trim the rabbet to proper depth. This allows for easy setting of an exact dimension when planing to specific thickness.
 |
| Using a set-up block to set the thickness precisely |
 |
| 1/2" set-up block used to set the thickness that will be planed |
 |
| Exact!! |
The last part of the jig is the planing stop at the front. It's just a chunk of scrap wood with a slot in it for adjustability, though I've not yet needed to adjust it. It needs to be set so that its highest point is above the base but lower than the rabbets.
 |
| The stop at the front end (ignore the two other holes) |
 |
| The stop doing its job in holding the workpiece while planing |
When making a jig like this, you have to take into account the width of the plane you intend to use with it. The distance between the left side and right side vertical rabbet walls should be slightly greater than the width of your plane.
Here's an interesting feature. You can imagine that if the jig is used on the benchtop and if the sides weren't tightened securely, they might start dropping while planing a stick. When planing a stick to 1/2" thickness, enough of the base sticks down below the sides that you can clamp the base in the vise with the bottoms of the sides resting on the vise chops. This reduces the chance of the setting gradually changing while you plane.
 |
| Thicknessing jig in the vise (here, it's only set for 1/8"+ thickness, but you get the idea) |
When planing the 1/8"+ pieces, I had it on the benchtop using my regular planing stop to keep the jig from shooting off the end of my bench. I cinched down pretty hard on the nuts holding the sides in place and I had no issues with any drift in the setting as I planed.
Finally, there is one minor annoyance that I'll fix when I get the chance. The vertical walls of the rabbets can be angled or chamfered so that its easier to get the plane in and out of the jig. My plane doesn't have much side-to-side play in the jig, and there have been times when it was frustrating to get the plane back into the jig to sit on the rabbets.
This is getting long, so I'll write about the other jigs next time.
I haven't checked it off my bucket list yet. Had all the wood and jigs for over a year now but...
ReplyDeleteWell, you've been a busy guy since you retired. It is fun, though. I hope you get a chance to try it.
DeleteI might try to make your jig. I made one with a fixed height and use shims (long bamboo sticks taped together) to get the final thickness. I also sized it for my #7 plane so I can do as wide as possible.
ReplyDeleteThanks for the comment, Tom. I've used shims in the past, too, but it's nice having it be adjustable. I saw one somewhere that was sized for a block plane - not as wide as your #7 - but it had an interesting advantage. The user could operate the plane with one hand for longer, thin sticks that might buckle while planing - the other hand could hold down the stick while pushing the small plane. On the other hand, the #7 has a fairly long fore end holding down the sticks before the iron gets to it.
Delete