Friday, June 30, 2017

The Humble Holdfast

I missed my blog entry last week because I was in Florida at my 40th high school reunion.  Hard to believe it's been that long.  Some folks changed very little and some changed a lot, but everybody had a great time.

I think The Schwarz has found evidence of holdfasts being used a thousand or more years ago.  Like some of my high school classmates, holdfasts have changed very little over time.
The holdfast doing it's thing
I love the simplicity of holdfasts.  A long chunk of iron is bent so that one end fits into a hole in the bench and the other end can rest on your work.  A tap or two with a mallet drives the shank into the hole and the pad clamps a workpiece firmly to the benchtop.  How simple is that!?

I'd been thinking for a long time about getting a couple of holdfasts to help with my work holding. And finally I plunked down some cash to make it happen.
My first holdfast
My holdfasts come from Black Bear Forge, out of Colorado.  These holdfasts have shanks with diameter slightly smaller than 3/4", so they fit in my standard dog holes (they also make holdfasts for 1" diameter holes).
The Black Bear Forge logo, just above the pad
I splurged and got the leaf-shaped pads.
A nice ornamental and functional touch
When using a holdfast, it's good put something between the iron pad and your work so that the workpiece doesn't get dented.  One option is simply to slip a scrap of wood between the pad and your board.
Using a 1/4" scrap to keep the holdfast from damaging the work
However I wanted something that would stay with the holdfast so that I wouldn't have to remember to slip in the scrap every time.  I had a couple of scraps of thick leather (off-cuts from making a strop) that I used to line the underside of the pad.  This thick leather will not only keep the holdfasts from marring the wood I'm clamping, but also they'll add some "grip" to it.  I cut the leather to the leaf shape and glued it to the pad with wood glue.
Leather shaped like the pad
When I glued it, I used wedges to get the leather to take the curve of the pad while the glue set up.  It's holding fine after a few weeks.

So far, I've found several uses for the holdfasts.  I've used it to clamp boards to the benchtop while mortising.
A mortising hold-down
I've used it to clamp a plant stand upside down on the top slats for positioning and marking.
Handy for an unusual clamping situation
When a board is clamped under a holdfast, it's tough to move it in the direction of the length of the board.  However, it is quite easy to pivot the board with the holdfast pad as the pivot center.  This is where an accessory that I've heard called a "bird's beak" or a "doe's foot" is helpful.
Using a "bird's beak" to keep the work from moving away from me
With this setup, the workpiece and the bird's beak create an angle.  With both the workpiece and the bird's beak held at the far ends, you cannot move the vertex of the angle to the left.  If I was doing some work on the near end of this workpiece and pushing the tool away from me (I stand to the right of the bench in the above picture), the bird's beak would keep the workpiece from pivoting.
A closer look at the bird's beak, moved slightly away from the workpiece.
Up until now, I've used only my bench's dog holes for the holdfasts.  But I'm sure that over time I'll figure out where to put some extra holes so that I can make the best use of these remarkable devices.

And like any new tool in a shop, you've got to find a home for it when it's not in use.  I drilled a hole in the right front leg of my bench to store it.  This location can also be used to clamp a board to the front of my bench when planing long edges.
I ended up turning it around in this hole
However, my bench's top is flush with the legs and I kept hitting the holdfast with my thigh.  So I had to turn it around in the hole.
Holdfast turned around - totally out of the way
I'm still thinking about where the other holdfast of the pair will go.  I'm really looking forward to using these.  So far, they've been great.  I'm sure there will be many uses that I haven't even considered.

Friday, June 16, 2017

Rehab a Side Bead Plane - Part 3, Working the Iron

Part 1 of this series was about cleaning up the plane and fixing the boxing.
Part 2 of this series dealt with reshaping the profile.


This post is about working on the iron.  If you're shaping (not sharpening) your first molding plane iron and think you've gotten the shape right, you're probably wrong.  I don't mean to sound like a jerk. It's just that you really need to keep at it to get it right.  During this rehab, I've learned a lot about how well the iron should match the plane's profile.  If it is off just a little bit, it's not going to work as well as it could.

First, let's look at how to remove the iron from the plane.  This was not obvious to me at the start.  I forget where I read this technique, but it really works.
Hold the plane with first finger in the wedge's recessed area
Then give the rear end a good smack with a wooden mallet and the iron and wedge will come loose
Try not to hit the whole of the back end - the mallet should hit the curved upper portion of the back end.  You don't want to risk chipping a section off the sole. Previous owners apparently used metal hammers that left large bruises in the heel end.  Wood is a much better choice.

You can also tap the back end of the iron with a metal hammer (I'd use brass if I had it) to push the iron forward until it comes loose.  But the iron on this plane only barely extends further than the wedge, so I risk damaging the wedge with the hammer.

Here's a sketch of the profile of a side bead plane.  The plane is upside down, with the front end towards you (like it is when you sight down the sole to check the projection of the iron).  The iron is shown as a gray color.
An even 1/64" all around
In the above sketch, there is an even 1/64" reveal of the iron all around the profile.  On the left side, the iron will leave a small rabbet on the outside of the profile that it cuts.  In Bill Anderson's article, he mentions that the reveal of the iron should taper out on the left side.
Iron's reveal tapers into the fence
Bill's article doesn't mention this, but I think the right side of the iron should also taper into the quirk, like in the following sketch.
Both sides of the curve of the iron recede into the plane's profile
If you think about how the iron cuts, the deepest part of the bead profile and the quirk are the only parts of the iron that cut like we normally think a plane iron cuts.  That is, those parts of the iron are roughly perpendicular to the surface being planed, so they can make a nice shaving.  The sides of the bead profile are angled relative to the surface being cut and they perform more of a scraping action.

It's really tough to get decent pictures of the iron when it's in the plane, but I tried anyway.  In the following pics, the front end of the plane is very blurry, as I've tried to get the iron in focus.  And since I'm taking these pictures from a slight angle relative to the sole, it will look like there is a little bit more iron protruding than what is actually presented to the wood.
Left side recedes into the fence too early and also too abruptly, curve shape is a little bumpy
I first tried shaping with sandpaper wrapped around small screwdrivers, but found that to be far too slow.
Not the optimal equipment for shaping iron
I had ordered some chainsaw files of different diameters and these did the rough shaping far better.  It turns out that the part of the iron hidden in the fence had been shaped too aggressively (by someone else) and I couldn't get the shape along the left side to taper into the fence like I wanted it.

I went through at least 20 iterations of shaping and checking, so I got good at installing and removing the iron.  I thought the shape was getting better - and it was - but it was only marginally better.
Still too heavy a cut on bottom left, not enough taper into fence
A little better, but still not where it should be
When the iron recedes into the fence too soon, you get this result.
Arrow points to a visible line between curve and flat - should be seamless
Instead of a nice rounded curve on the outside of your workpiece, this leaves a distinct line where the plane left off and the flat part of the workpiece begins.  It's easy enough to sand that line away or hit it with a block plane, but you shouldn't need to.  I finally realized that the part of the iron hidden by the fence was too far into the fence and I would have had to remove about another 1/8" of iron to get it right.  I had already removed 1/8" or more of the iron with all the shaping attempts, so I called it "good enough" for this plane.  I had taken so much off the iron that I had to take a shaving or three off the wedge - in effect, shortening it so the iron was still extended further than the wedge.

I had a much sweeter result for the second beading plane, a 1/4" beader (though it had "5/16" stamped on back) from A. C. Bartlett's Ohio Planes.
My second beading plane to rehab
I believe there used to be a "16" under the "5" and the "--"
You can see the effects of several metal hammer blows.
After just a few rounds of shaping, the iron looked like this:
This is exactly what I'm looking for
And that gave me the beautiful profile I wanted on a test piece
Sharpening:

After the shape couldn't be improved any further, I needed to sharpen.  All the shaping was done with files at an angle of about 25°.  The sharpening was done at about 30°, so only a small amount of metal needed to be removed to get a sharp edge.

I made a jig for sharpening molding plane irons, based on the one Ralph uses.
Molding plane iron sharpening jig
To use sandpaper to sharpen, I needed a stiff rod with diameter just shy of the bead profile.  I tried small screwdrivers first, but one thing that worked very well was my burnisher.
Burnisher used for sharpening with sandpaper

End view of burnisher
The oblong cross sectional shape of the burnisher was great for wrapping sandpaper around and sharpening the irons.  Even though the iron cuts a round profile, the shape that needs to be sharpened is actually oval.  I went through 400, 600, 1000 and 1500 grit papers, and stropped it with a piece of leather with polishing compound on it.
Leather "strop" for the shaped bevel

Well, that's about it for the rehab of the H. L. James beading plane.  I'm off to work on the others.
Ready for another hundred years of use

Friday, June 9, 2017

Rehab a Side Bead Plane - Part 2, Reshaping the Profile

Part 1 of this series ended with the plane cleaned up and the boxing shimmed and glued back in place.  This post will deal with the re-shaping of the sole and to do that, I thought a sketch would be helpful.
Schematic of rear end of beading plane (iron not shown)
This model is not necessarily to scale; it is simply meant to aid in the discussion.  I'm borrowing heavily from Bill Anderson's excellent article on restoring beading planes.

In the drawing, you'll see that the fence is merely an extension of the bead profile.  The planes I've obtained all have their boxing vertical, though other planes have the boxing slanted at an angle towards the left.  Note that part of the boxing is shaped and the entire quirk is from boxwood.

If you think about how a beading plane works, it makes sense that certain features should be properly done so that the plane cuts nicely.
  • The fence should be straight.  On many old planes, the fence is worn at the toe and at the heel.
  • The right side of the quirk should be parallel to the fence.
  • The bottom of the quirk should be parallel to the depth stop.
  • The deepest part of the bead profile should be parallel to the depth stop.
To get these things right, you have to start with a reference surface.  So I flattened the left side of the plane ...
Checking left side for twist - lookin' pretty good
... and then planed the sole straight and square to the left side.
Squaring the sole to the left side
Getting the sole flat and square doesn't make it into my bullet list above.  The sole won't affect how the plane works, but it's crucial to getting all the other features in the right condition.

I took a very thin shaving or two from the fence to straighten it a bit, but didn't get a picture.  I was nervous that I wouldn't be able to get the profile right if I plane the fence too much.

The shims that I added to the sides of the boxing gave it more thickness to plane parallel to the fence. I was glad to have had the extra thickness and it planed easily with a shoulder plane.
Maple shims glued to side of boxing, but not yet planed parallel to fence
I planed down the quirk parallel to the fence, checking with a small square that referenced off the sole.
Checking quirk for parallel to sole
By planing the quirk down, it revealed a wider surface that I could later shape the bead detail into. You can see in the second picture above (the one showing the maple shims glued in) that the boxing is proud of where it was previously - note how the bead profile is not continuous.

OK, so the picture doesn't show that so good.  Here's a drawing of what I'm talking about - the boxing is proud of the rest of the profile due to the shim deep in the boxing's groove.
Drawing showing shim at bottom of groove that makes the boxing proud of where it used to be
Here's the shim I glued on to the bottom of boxing
No pictures here, but I also planed the fence parallel to the sole.  I checked it with a small square, just like I did with the quirk.

With those surfaces prepared, next was to reshape the bead.  So I shaped a piece of saw steel with hack saw and files to make a scratch stock cutter.  I did my best to refine the curved section on my diamond stones to remove any file marks.
3/16" diameter profile at left for the H. L. James plane, 1/4" diameter marked out at right for another plane
Cutter mounted in the scratch stock
Here's another good reason why the left side of the plane needed to be flat: the scratch stock needs to reference off it when cutting the profile.
Scratch stock referencing off left side of plane
Setting the cutter was trial and error.  I had to eyeball how straight it was - I don't want to shape a bead profile that's at an angle to the plane!  The cutter needed resetting at it cut deeper, but it did a great job of cutting a consistent bead profile.
Bead profile after using scratch stock
Finally, I sanded the bead profile with a sanding block and sandpaper.  The thickness of the block was equal to the 3/16" diameter of the bead profile minus two thicknesses of sandpaper.
Sanding the bead profile smooth
Well, that's it for the shaping part.  Very interesting and fun, if not a little nerve wracking.  Next time I'll post about getting the iron in order and making the first cuts.

Thursday, June 1, 2017

Rehab a Side Bead Plane - Part 1, Plane History and the Boxing

Due to an extreme act of kindness, I'm the proud new owner of four old beading planes.  As far as where I got them, well I won't mention any names, but you know who you are, Ralph.

In this series of posts, I'll discuss the rehabilitation of the smallest of them, a 3/16" beader by H. L. James that was made around 1854-1869.
H. L. James 3/16" beading plane
There seems to be some inconsistency in how beading planes are sized: some exclude the quirk in the measurement and some include the quirk.  This plane makes a 3/16" rounded bead plus a (approx.) 1/16" quirk, and I'm going to call it a 3/16" beading plane.

The manufacturer was not easy to figure out.  All I could make out was

________ES
WILLIAMSBURGH
MASS
If you squint, you can see the info I wrote above
When I searched the internet for plane makers from Williamsburgh, MA, I found this fantastic article from Ken Greenberg who happens to be a member of a couple organizations I recently joined.  The article was, in fact, the only article I found on H. L. James.  If I had a copy of Pollak's "A Guide to the Makers of American Wooden Planes", I might have found a little info, but without it Ken's article was just what I needed.  Ken just happened to have researched this because he had some H. L. James planes and Williamsburg is very close to where his mother lives/lived.

Notice I spelled Williamsburg here without a trailing 'h', whereas my plane has an 'h'.  There is a town with the no-h spelling in Massachusetts, and it existed with this spelling in the 1800's.  Ken says that in the mid 1800's spelling was a bit looser and that there are planes with either spelling.

Apparently, Henry L. James was a businessman who bought the plane making business of H. S. Wells in 1854 and managed it until it burned down in 1869.

On to the refurbishment.  The first thing was to give the body and wedge a good cleaning, which I did with steel wool and mineral spirits.
Before cleaning, showing grunge on the heel (former owner - M. Hart)
As I was cleaning the plane I noticed the boxing was loose and with a little urging it came right out.  I don't know if mineral spirits loosens some glues, but it certainly loosened these strips of boxing.
Boxing strips
I had read in Garrett Hack's "The Handplane Book" that boxing was typically cut so that the grain is oriented about 45° to the long axis.  This is so that the bearing surface is a combination of end grain and long grain.  I wasn't sure if the lines I saw on the side of the boxing strips was grain or circular saw marks, though I suspect the latter.
Interesting pattern on side of boxing strip
When pulling out these strips and cleaning them up, I noticed they had been shimmed with paper.
Paper shims on the boxing - original or added later?
Can also see paper in the boxing groove
Pulled this out of the groove
Never having done this type of restoration before, I'm in uncharted territory.  So I did a little searching and found this outstanding article by Bill Anderson on Joshua Farnsworth's Wood and Shop site.

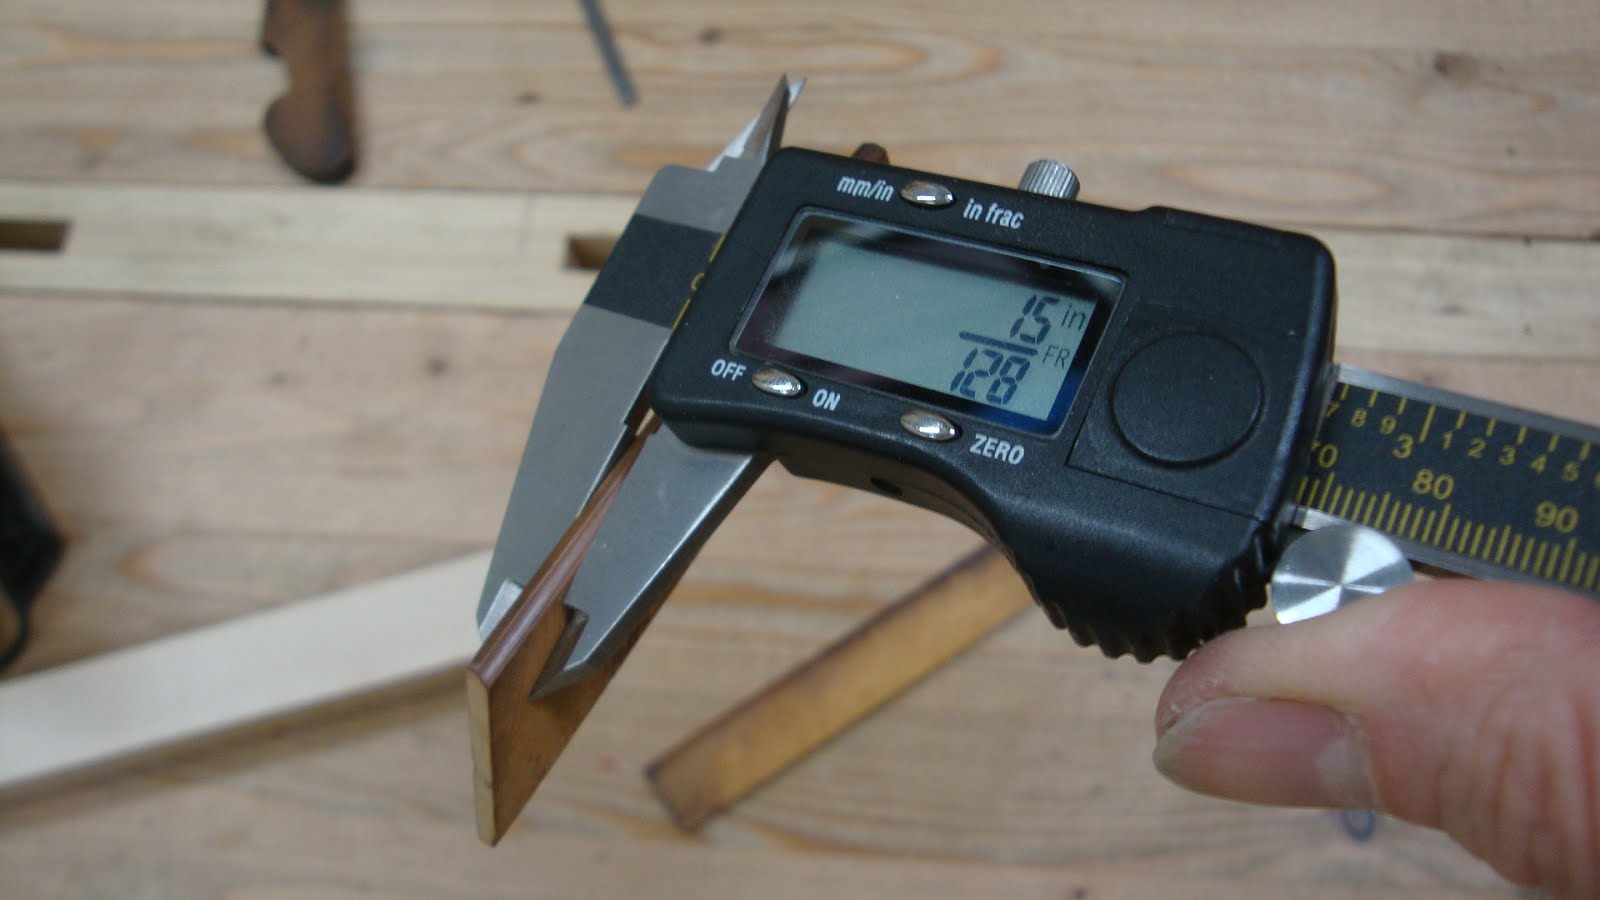
The boxing thickness varied from 7/64" to 1/8", the thickest areas being at the profiled edge.
Front boxing near toe
When the boxing was inserted into its recess, you can see a big difference in how much is revealed.
Rear boxing (right) much higher than front boxing
The boxing strip edges - both the profiled edge and the edge that is inserted into the groove - were also not straight.
Big gap on left
Planed them straight and square on the shooting board
The bottom of the groove was also not flat, so I flattened it out with some adhesive-backed sandpaper on a thin strip of maple that I planed to fit the groove.
Sanding strip for groove bottom
That maple strip did double duty.  Since I made the groove slightly deeper than it had been, and I also shaved a little off both edges of the boxing strips, I needed to make the boxing strips wider so that the proper amount sticks up out of the groove.  I glued the maple to the boxing and then cut and planed it to be a little wider than I would need it.
Gluing a maple strip to the boxing - I know, not a great color match
Front boxing dry-fitted
In the above picture, you can see a large gap between the boxing and the right cheek (top, in above pic) of the plane.  So I glued shims (thick plane shavings made with the iron skewed) to the right-most surface of the boxing, to force the boxing to the left and firm up the fit.  It took three rounds of shimming to get the front strip to fit well.  I used a scraper to fine tune the shims after the glue dried
Front and rear boxing with "shims" glued on
Rear shim was mostly scraped off to get the right fit in its groove

I knew that I would want to glue the boxing back in place using hide glue, so I bought a small bottle of Patrick Edwards' liquid hide glue just for this.  I used this glue to attach the shims to the boxing, so if I ever have to remove the boxing again, the shims will probably come loose when the boxing comes out.

My hide glue setup is like this: microwave about 2 cups of water in a Pyrex measuring cup.  Place candy thermometer in cup to monitor temperature.  With water temperature about 150°, place small plastic cup of hide glue in the water (it's under the wood block in the picture below).  Placing a wood block on top lowers the plastic cup down into the hot water, but not so far that water gets into it.  After a few minutes, the hide glue is about the right temperature to use.
When you don't have a fancy glue pot, you've gotta make due
I clamped the boxing strips into the groove using the front vise.
Clamped up
The next day after cleaning up some glue squeeze-out I used a shoulder plane to remove (most of) the shims on the outside of the quirk where it stands proud of the depth stop.
Shims looking kind of ugly
I'm very pleased with the result.  The strips are solidly in place with no movement.  And they're a bit proud of where they had been before so I can reshape them.

Next time I'll post about shaping the sole and sharpening the iron.