Thursday, October 28, 2021

Expansive Auger Bits, Part 1

In my recent investigation into making wooden nuts and screws, I needed to bore some holes larger than my standard auger bits could handle.  I ended up marking circles on front and back of wood blocks, sawing, drilling and/or chopping out the waste and paring to the lines with incannel gouges.  This was way too slow and I wanted to look more into the expansive bits and why I've never gotten them to work for me.

Over the years I've acquired three expansive bits.  One I bought at a tool meet (the Irwin No. 22) and the others I found at garage sales.  

The expansive bits and their markings
Top: Irwin | No. 2 | US of A
Center: Clark Expansive | T&L Co. NY
Bottom: Irwin - No. 22 - US of A

I've had some trouble researching expansive bits.  Aldren Watson's "Hand Tools" talks about them, but it doesn't give the type of detail on tuning them up that I needed.  On YouTube, I found a channel (Old Sneelock's Workshop) that addresses it very well.

In this post, I'll write about how they're supposed to work.  Let's look at the Irwin #2.

The Irwin #2 with 4 key locations shown in order

I have the bit on a piece of lined paper so you can see in what order the various parts of the bit contact the wood.  When boring, the lead screw (1) starts us off and pulls the bit into the wood as it turns.  The cutting spur (2) is next, scoring the circumference of the hole for a nice clean entry.  As the bit goes in further, the radial cutter on the main body of the bit (3) starts cutting a smaller hole within the hole being bored.  Finally, the radial cutter of the adjustable arm (4) cuts away the remaining waste.

Here's how the cutter arm is held in place.  The lower edge of the arm is angled and it that is captured by a similar angle on the main body (yellow arrow).  The upper aspect of the arm is captured by a dovetail lip (red arrow).  When the screw (see above pic) is tightened, the adjustable arm is forced up into the dovetailed way and gets locked into whatever setting you've chosen.

How the adjustable cutter is held in place

Note how the adjustable arm is forced tight against the main body (pointer)

This angle shows no gap between adjustable arm and main body

This is important and something I learned from Old Sneelock.  If the cutter arm is not tight up against the main body, shavings will get caught in the gap and cause the bit to stop cutting.  I believe this is the problem I've had with these bits.  Fortunately on this Irwin #2, there is no gap.

Aside from that gap issue, for an expansive bit to work well, it needs to be sharp.  That means all the cutting parts need to be sharp, not just the spur.

Using an auger bit file (with safe edges) on front, inside aspect of spur.
I also used an extra fine diamond paddle and strop.

The front cutting lip of the adjustable arm needs to be sharp

This entails working the front curved portion on a shaped stone, or
in my case, sandpaper on a dowel and later stropping

But never remove metal from this (top) surface, as it might cause a gap
 between the adjustable arm and the main body.  Only treat it lightly enough
 to remove any burr caused by honing the curved side.

Sharpen the radial cutter of the main body the same as you would any auger bit

After sharpening, I tried out this bit and it was cutting very nicely, but started getting harder to turn as I got about 1" down into a 2x4.  I used the largest brace I have (12" sweep) and started using the ratcheting feature to get more power to finish the hole.

A couple of practice holes

This hole started out at 1 7/8 diameter ...

... but on the exit side, was a bit more than 1 15/16" diameter

Apparently the cutter slipped a little bit, so I'll have to look into that.  But look at the side walls of the hole!  They're pretty danged smooth!

I'm surprised I had this good a hole using the Irwin #2.  Maybe it was the other bits that I've had problems with before.  Certainly, getting it sharp makes a huge difference, but I think what makes the biggest difference for me was having no gap between the adjustable cutter and the main body where shavings can get caught.

Next posts I'll look into the other two bits and what I can do to get them in better working order.

Thursday, October 21, 2021

Smaller Wooden Screws, Part 2

At the end of the last post, I had a little success cutting outside threads in a 13/16" poplar dowel, but the thread-box started getting bogged down.  I thought the problem was that shavings were getting caught in the box and messing things up.

I tried running another poplar dowel through the screw-box without the cover plate on so that I could see how shavings were getting caught.  This is using the same screw-box that has some partly damaged inside threads.  Out came beautiful shavings.  No shavings were getting caught inside the box.  Last time I probably just didn't have the escapement oriented properly to expel the shavings.

The open screw-box with cutter clamped in place

Getting nice shavings with nothing getting caught anywhere

Out the other end

Continued for the length of the dowel - some damaged threads, but overall pretty good

Testing with the nut from the plough plane - it a bit tight after first 6-8 threads

Turns out that even though my thread-box has exactly 7 1/2 threads per inch, I'm cutting the outside threads a little narrower, close to 7 3/4 threads per inch.  This is probably due to a little bit of slop.  It would make no difference with a nut that only has 5-6 threads, but with a long nut like the plough plane has, it gets stuck after 6-8 threads.  So I tried deepening the threads by positioning the cutter to cut a bit deeper and running the screw through again, but that just destroyed most of the poplar threads.

Tilted the cutter down by shimming at the pointers

Only succeeded in destroying the existing threads

I don't know what wood was used for my plough plane's screws and nuts.  They might be boxwood.  Of course, I don't have any boxwood, so I tried some cherry, which is a fairly tight grained wood.  No oil was used and the inside threads came out pretty good.  The peaks of the threads were a bit rough in the end grain areas, though.

Threads along the grain looked great

Threads along this end grain had rough peaks ...

... although the other side end grain was pretty good.

So I made a new screw-box using cherry as the rear block.  After creating the inside threads and chopping out the cutter mortise and escapement, I gave it a whirl.  This time I used a maple 13/16" dowel.  As I fed in the dowel, out the other end came nicely formed threads.

New screw-box of cherry (with inside thread) and poplar (with 13/16" guide hole).
13/16" maple dowel getting threaded.

Checking the fit of the plough plane nut - it fits, but it's a little too loose

The maple threads were a bit pointy at their peaks, probably due to cutting a little too deeply.  So I shimmed the cutter to move it up slightly away from the dowel and tried again.  And re-sharpened it, too.

Got nice threads in the maple dowel, but the plough plane nut was tight

Here's a nice feature of this type of screw-box.  When you get to the back end of the dowel being threaded, you can remove the guide plate and keep threading.  I was able to thread this dowel all the way to the square end that I made to fit a handle.

Here's the thread-box with guide plate removed

And just because it's so cool, here's a close-up of the curly
 shavings coming off the V-cutter

This wooden screw stuff has been an interesting journey.  I've learned a lot and have a lot of respect for those who did this without the help of the internet.  I had Roy's book to learn from, as well as some YouTube videos, but there are so many small details that you'll never know about unless you try it for yourself.  I'm glad I did.

Thursday, October 14, 2021

Smaller Wooden Screws, Part 1

Having finally had success making a 1 1/4" wooden screw, I wanted to try one like the item that originally started me down the wooden screw rabbit hole.

Around 2015, I bought an old Ohio Tool screw-arm plough plane.  Among many other things that needed fixing were the wooden screws, whose threads were not in great shape.

Before repair, showing damaged threads

The threads close to the fence were completely toast, and I eventually cut out the bad portion (about 1") and doweled the screws back together.  But it had me wondering what it would take to replace the screw arms.  The original screws have (approx.) 13/16' major diameter, 11/16" minor diameter, and 7 1/2 threads per inch.  The angle between peaks is 60°.

At that time I made a screw-box that didn't work and I had made a screw from maple using a saw and files.

The maple screw with chipped threads.  It's ugly, but it could thread onto the
plough plane's nut.  The paper template at right was used to guide the saw cut.

So having had some recent success making a larger screw using a homemade screw-box, I thought I'd try making a screw like the one on the plough plane.  First comes the nut and these have been relatively easy to make.

Here's the kerfed 11/16" rod with cutter for cutting inside threads

The cutter is in a cylindrical hole and is wedged front and back with a 1/4" dowel sawn in half.
The cutter was made from a piece of an old saw blade.

The metal guide that the kerf of the tap runs on is an old hack saw blade
with a curved notch filed into it.  Its thickness fit the kerf very nicely.

I made a few test nuts before cutting inside threads on the piece that will be the main block of the thread-box.  They came out pretty good and fit on the plough plane screws nicely.  On some I used mineral oil or BLO to lubricate / soften the wood to be threaded.

A nut in poplar - threads a little fuzzy

Nuts in poplar (near) and soft maple shown threaded onto the original plough plane screws

Here's the rub with the nuts.  Since inside threads are cut into the rear block of a thread box, the threads should be fairly clean so that when making a screw, the newly cut outside threads can mesh well with the inside threads.  On poplar, my threads were quite furry.  I had used some mineral oil and later BLO to soften the wood before threading it, and this left threads that were not so clean.

A little fuzzy and this is along the grain

Closer to cross-grain, the threads are very fuzzy

I did a little experiment, cutting inside threads in a mystery hardwood.  On one piece, I used BLO to soften the wood before cutting, the second piece was dry.

With BLO: fuzzy threads

Without BLO: fuzzy threads, especially at the cross-grain areas.
I skipped the oil for subsequent nuts.

I used a piece of the mystery hardwood for the main block of a screw-box.  I took the cutter I had made a few years ago, reshaped it, and sharpened it much better.

The screw-box I made a few years ago, that I never got to work properly

Here it is next to the one I made last week that worked right.
Note the difference in the shapes of the cutters.

After I fit the cutter to a new screw-box, I tried running a 13/16" screw blank through it and actually got some threads!

Freshly cut threads in poplar coming out the back of the screw box

More threads (at the right pitch), but ...

... then they started to get all munged up

I think chips were getting caught inside the box.  Also, the inside threads in the screw-box got damaged.  Poplar probably wasn't a good choice for threading a 13/16" diameter rod and the mystery hardwood probably wasn't ideal for the screw-box.

This is getting long, so I'll stop here and resume in the next post.

Thursday, October 7, 2021

Making Wooden Screws - SUCCESS!! (Finally)

Long post - heavy on pics.

I've written before about making wooden nuts and screws with hand tools.  There are many YouTube videos that show electric powered machines making them, but I'm much more interested in how it was done a couple centuries ago.

It seems counter-intuitive to me, but the nuts are far easier to make.  The screws aren't too bad either, if you use a chisel and have a lot of time and patience.  The hard part for me was making a screw-box.  I'd been close before, but I finally got it this time.  The secret is two-fold: sharpen the cutter properly and get it in the right position.

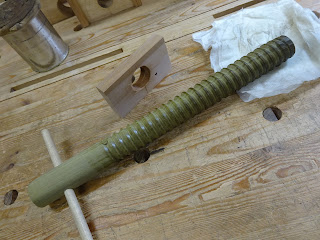
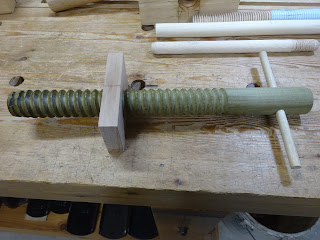
First successful screw using a screw-box (top), with one made using a chisel and files

I'll go through the process here, including the making of the nut even though I've shown that before.  I apologize if I've left out some details (posts from May and June 2021 have more details).  This time I'm making a screw with major diameter 1 1/4" and minor (root) diameter 1".  The pitch is 3/8" and the angle between threads is 90°.  This results in a screw with a flat on the top of each thread.

Square up a 1" blank and lay out lines for threads at 3/8" pitch.
Make a mortise for the 1/4" x 1/8" cutter and its wedge.

Make the blank round (I used planes, spokeshaves, scrapers), leaving the knifed layout lines

Connect the layout lines with a pencil line.
I wrapped a piece of clear flexible plastic around to help connect the lines.

Cut the 1/8" deep kerf on the laid out spiral.  I chucked this up
in the benchtop bungee lathe to make this easier.

One way to obtain the angle that needs to be cut in the block

Square up a block and knife lines around vertically and horizontally to 
mark for boring a 1" hole.  Then from the vertical centerline, mark two lines equidistant
from center so they are separated by the circumference of the 1" hole (about 3 1/8")

The horizontal pencil lines in the above pic include a centerline for the block and two lines each 3/16 from that center, making those two lines 3/8" from each other.  The kerf through the block is cut along the lower left and upper right corners of the rectangle described by those two pencil lines and the two vertical knife lines 3 1/8" apart.

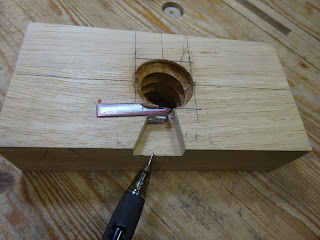
Insert a shaped piece of metal so it shows inside the hole.
Double-side tape a couple of stand-off blocks to the entry side of the block.

Starting to thread a test piece.  Those stand-off blocks give a little space
between the nut blank and the tap block to allow chip ejection.

Partially cut threads.  It'll be done when there are no more flats.

It's good to have a screw already prepared to test that you've cut away enough material in the nut for it to work with a screw.  I know, this is a bit of a chicken and egg kind of thing.  But I had made a screw using a chisel (shown in first pic, above) and it turned out to be a really good thing for testing purposes.

When satisfied, cut inside threads in a squared-up 6" x 3" x 1 1/2" blank.
This blank and a 6" x 3" x 1" cover/alignment plate have centerlines knifed (or gauged)
in two directions to help center the holes when boring and to help align them in use.

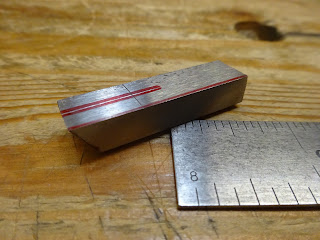
Make the cutter.  Start with 3/8" x 1/4" x 1 1/2" piece of O-1 steel.  File a 30°
angle on the front end and lay out center lines top and bottom.

Saw and file to about 5/8" back.  You can barely see the markings on the side
for material to be removed.  See next pic for how that came out.

Clamped a square up through the threaded block to help locate the cutter mortise.

And here's the problem.  I found you can't locate the tip of the cutter right in line with the tips of those inside threads.  You've got to get the tip a little further towards the center.  This took some trial and error.  See the progression below.

Marked the outline of the cutter

Chopped the mortise.  Pic shows the tools used, including impromptu 1/8" router plane.

This pic shows I chopped too deep.  The tip of the cutter needs to be as close
to in-line with the tip of the inside wooden thread as possible.

Added some card stock shims to the bottom of the mortise ...

... until it was just right

To fit a 1 1/4" screw blank in this block, need to cut away this first thread

I added a shavings escapement

Due to the shims, the cutter was a bit proud of the surface of the block.  So I
relieved a little material from the alignment plate.

At this point I tried cutting some threads, but ran into problems again.  As I twisted the screw blank into the screw box, the threads being cut would not engage the inside threads of the block.  I could cut part of a thread and then it would get bogged down.

Frustrated again, I put it down for the weekend.  I consulted what videos I could find and got back to it on Monday.  In particular, two videos by Paul Hamler really helped me: "Cutting Wooden Threads" and "Sharpening a V-Gouge".  I used his suggestions for how to sharpen my cutter.  I cheated a bit here, using a Dremel tool to help out with grinding and stropping.

I also used the weekend to think about the cutter position.  I realized I needed to move the cutter further towards center of the hole, so I chiseled a bit away and added some paper shims to tighten the cutter in place.

Paper shims inserted at pointer after removing a bit more material on
mortise wall opposite the pointer

With the square aligned with the tips of inside threads, tip of cutter 
is now about 1/16" towards center.

This actually took a few iterations.  But the excitement was building.  When I thought it was ready, I cut off the mangled threads (from earlier attempts) at the end of the screw blank and gave it a whirl.  It started cutting threads.

Turning the blank into the screw-box.  Threads coming out the other
end.  Shavings coming out the escapement.

Well, this was exciting.  I prepared a new screw blank from poplar and let it sit in mineral oil overnight.  The next day I ran it through the screw-box.

SWEEEEEET!!!  Oh man, what a feeling!
The first 6" of the blank had been soaked in mineral oil, but
I didn't notice any difference in the next 4" of threads cut without the oil

Finally, some measure of success.  It took less than 1 minute to cut
these threads, whereas it took several hours to do it with a chisel.

Testing with a nut

Still two things bother me.  First, the thread angle is more than 90°
(thought this doesn't seem to affect the function)

Second, while the tap was made with 3/8" pitch
(8 threads over 3 inches, or 2 2/3 threads per inch) ...

... the screw has a slightly lesser pitch
(almost 8 1/2 threads per inch).
I'm guessing this has to do with a little slop in the tap nut.

That also doesn't seem to affect the function.

So I'm calling this good.  I'll still play around with this and with other sizes, but I'm happy it finally worked out.  Now I have the confidence that I'll be able to make the appropriate screws when the time comes that I need them.  Good stuff!