Friday, September 30, 2022

12-Sided Bucket, Part 2

The previous post ended with a 12-sided bucket glued up and the top and bottom edges trued up.

The glued-up bucket

It still needed a lid.  The idea was to have the lid match the bucket with 12 facets.  So it was laid out on a 7/8" (or 13/16"?) thick blank.  The thought was to have the center at full thickness, tapering to a thin 3/16" at the edges.

Traced the bucket top rim onto the blank and connected opposing vertices to find a center

Sawed and planed the 12 edges.
Gauged a 1/8" deep rabbet on the bottom so the lid could be inset into the bucket.
The second gauge line on the edges is the 3/16" thickness the lid will taper to.

Cut the rabbet with chisels and router plane

Got a good fit after a little fettling

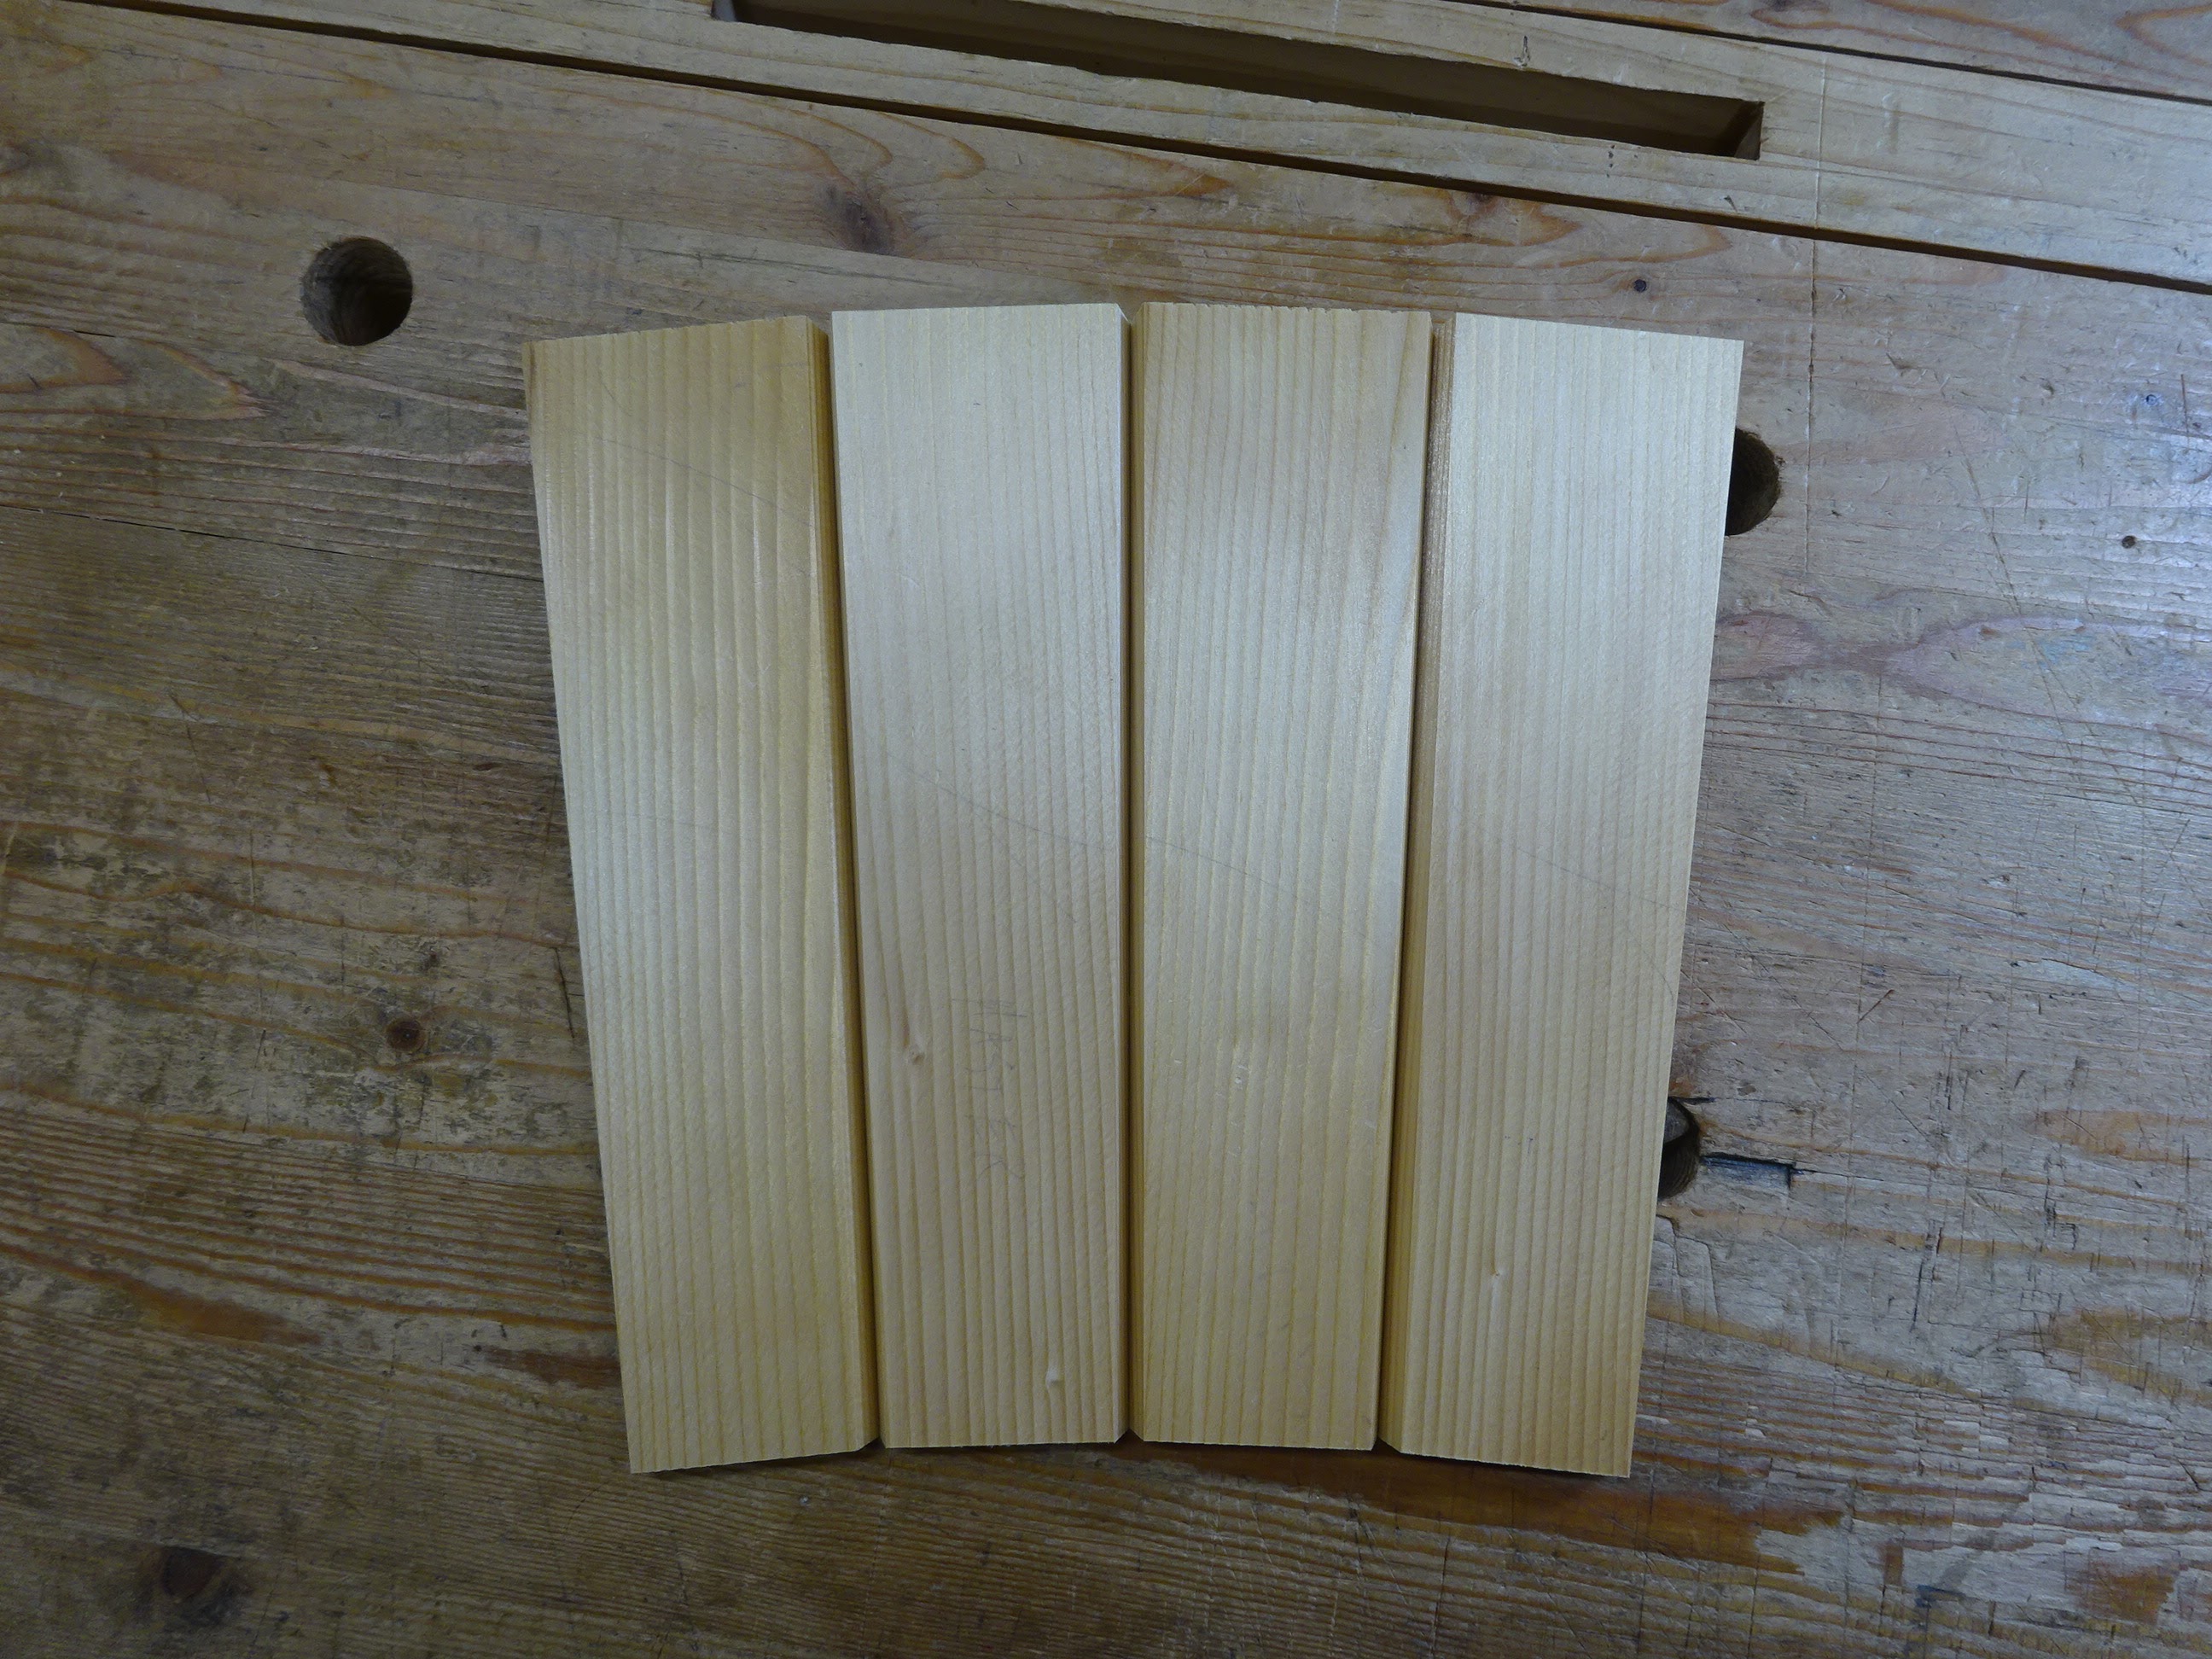
Really had to think about how to shape the lid.
In the end, a saw was used on four facets, then planes finished it off.

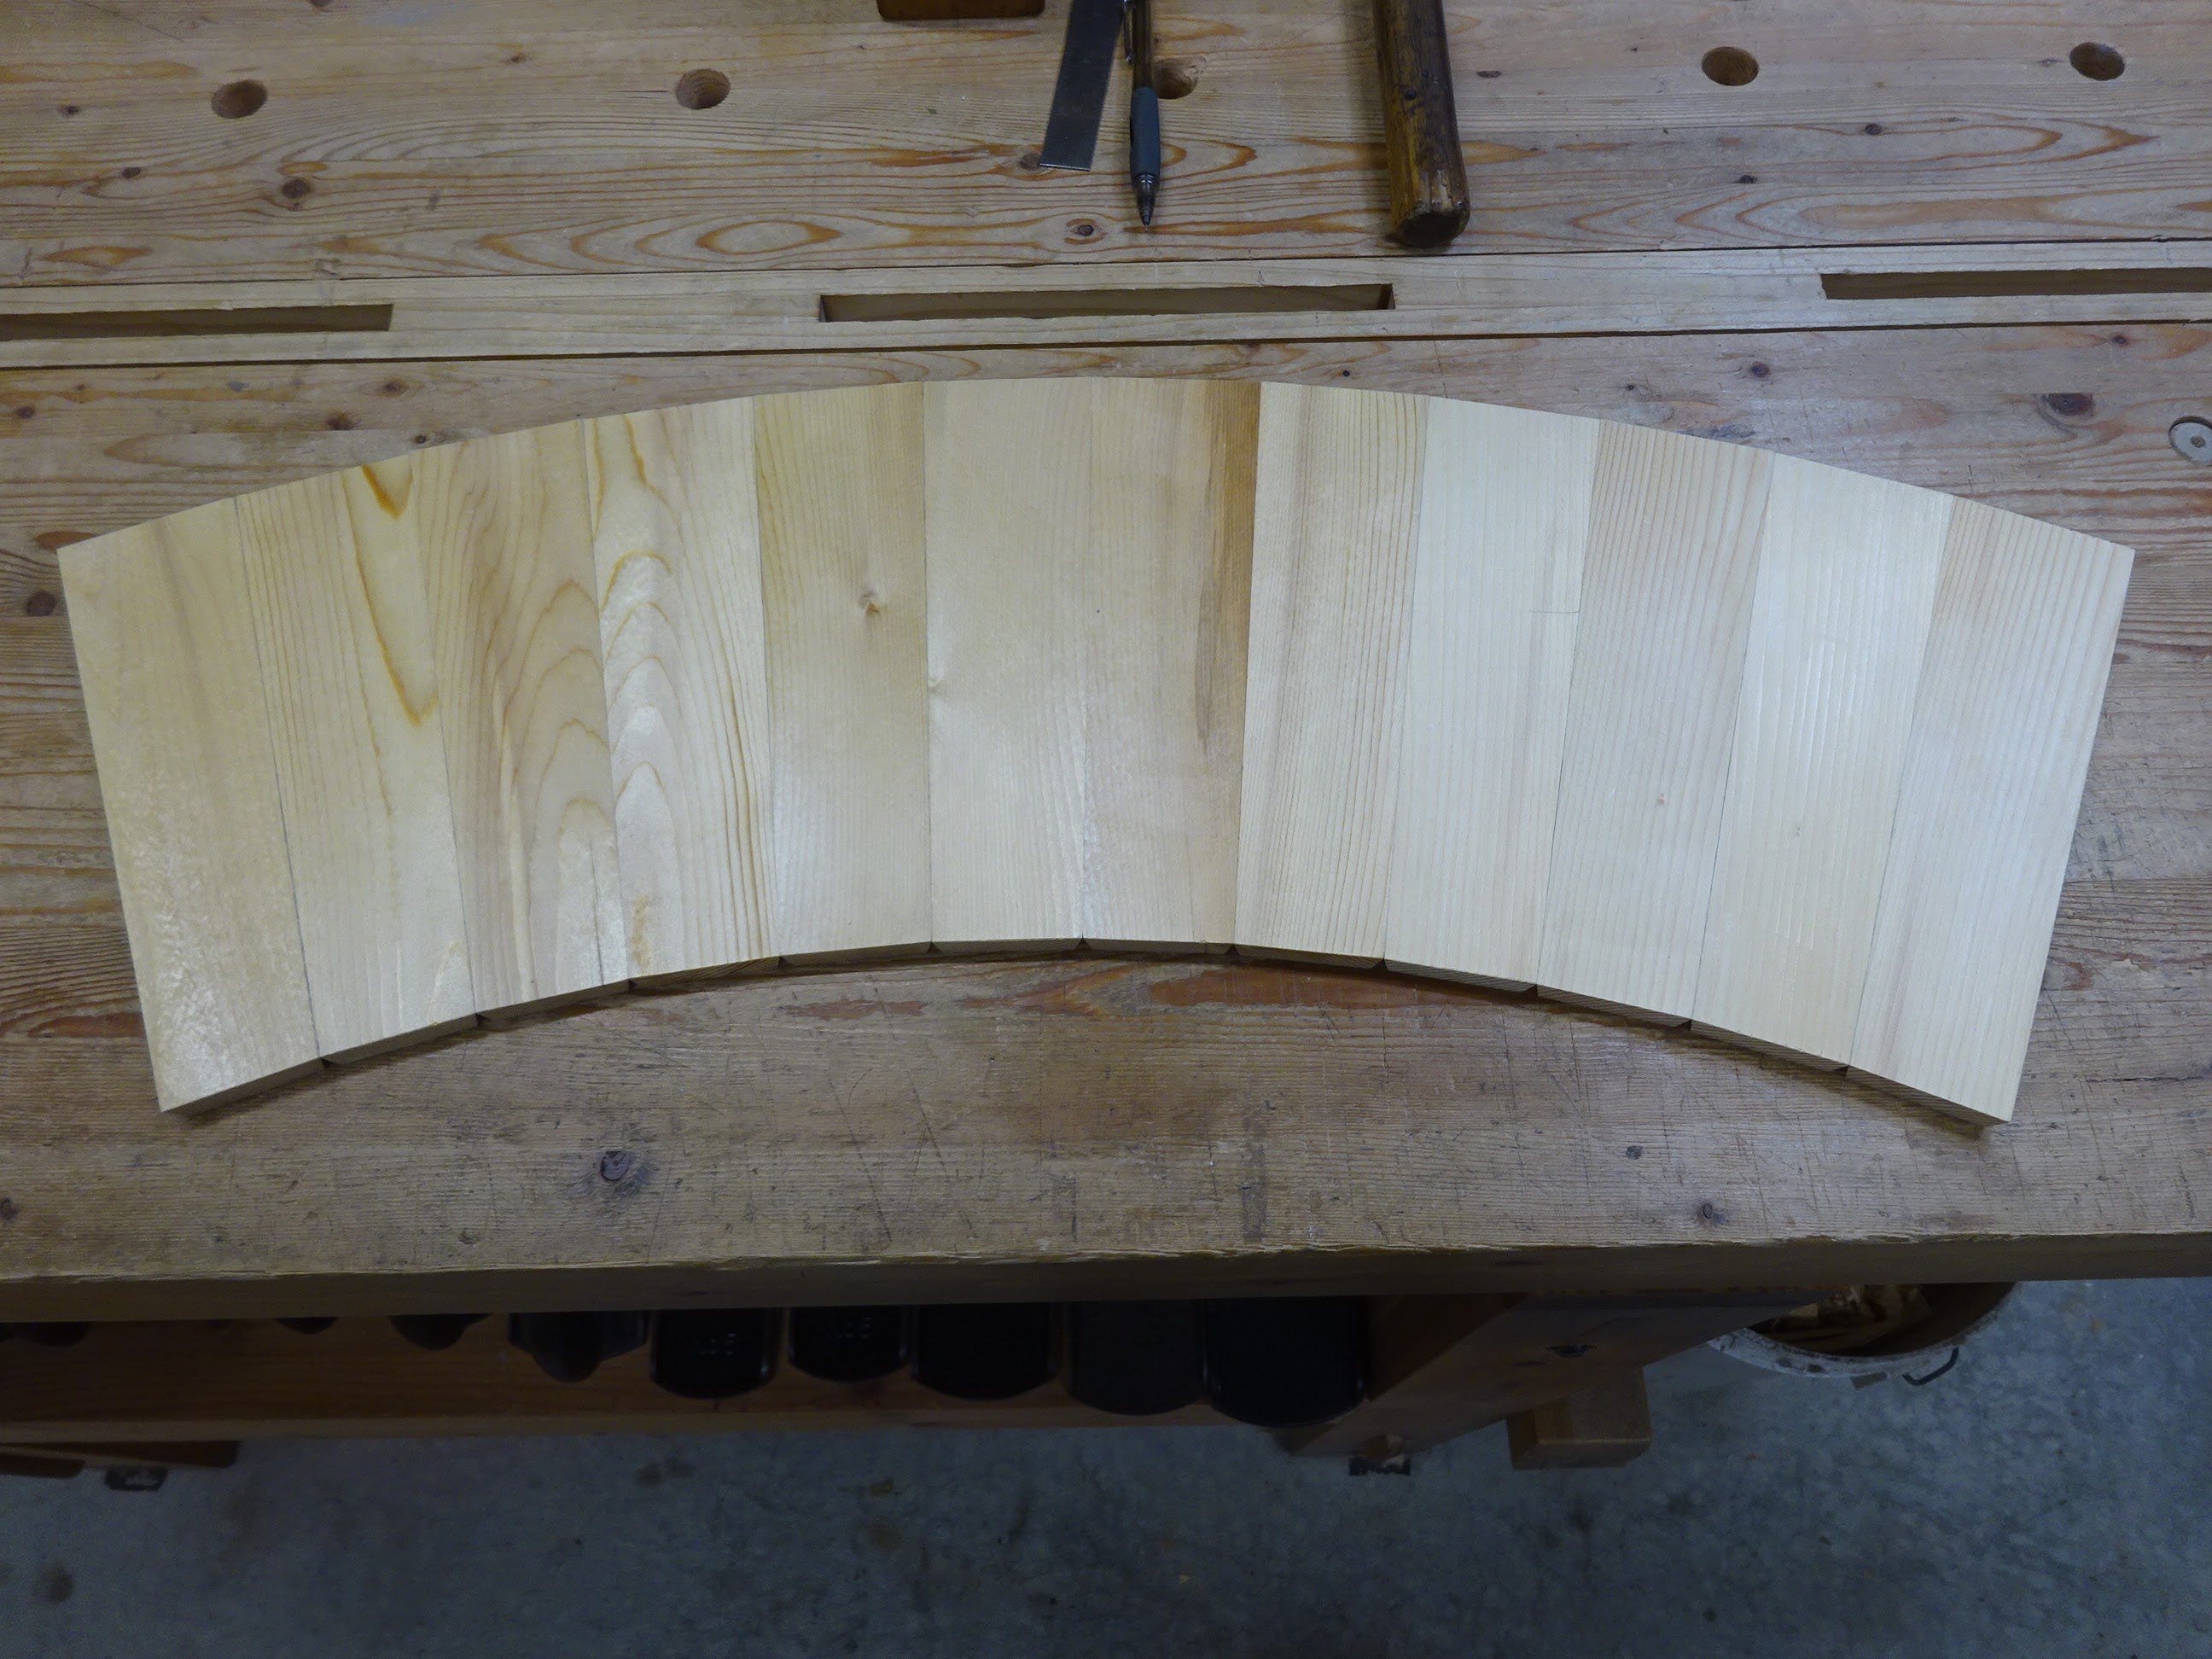
Four facets sawn and planed.  Note the untouched area in the center - 
that's for a handle later.

Side view of above.  You can see the extra material that needs to be
removed from the two facets adjacent to the center one.

After that, it was some careful planing of the high spots, aiming to keep all the facet boundaries crisp. It helped to replace the penciled facet boundary lines to ensure planing within the facet. In the end, they weren't as crisp as hoped, but it came out fine.

The lid got a handle, which was a simple piece 7/8" long, starting at 1 1/8" x 1 1/8", then shaped into a 12-sided column, tapering to about 7/8" diameter at bottom.  It was attached with a dowel.

Lid with handle

And lid fitted to the bucket

And that was it.  It's finished with several coats of shellac, then a coat of wax and now it will reside in our kitchen to collect food scraps.  

Final placement

This started out as a prototype, but it came out good enough to be used as the final project.  With all those 15° angles on the sides of the individual pieces, it was totally surprising that the bucket came together without having to tweak the angles.  This was a good project.  It's fun to try something new and challenging.  I don't think I'll be getting into coopering full time, though.

Thursday, September 29, 2022

12-Sided Bucket

Does this qualify as cooperage?  I don't know, maybe.

Our neighborhood recently began collecting compostable waste (finally!), so we need a small bucket to collect waste food scraps and other compostable items.  The compostable bags that are sold for this will limit the height and diameter of the bucket.

This started by considering 8-sided vs. 12-sided containers, eventually deciding on 12 because it would seem less angular.  The bucket was to have an inner diameter about 6" at the bottom, 8" at the top, and be about 8" tall.

A few notes and calculations

Being a prototype, this will be made of pine that used to be a table top.  If it comes out OK, It'll be the final bucket.  To keep the bucket light, the pieces will have 3/8" thickness.  Sketchup was used to get approximate dimensions of the 12 pieces.  Here's the build in pics.

Four of the twelve pieces - about 2 1/4" wide at top end, 1 3/4" at bottom 

Each piece gets a 15° angle on both long edges

So they look like this ...

... and when mated together will create a roundish bucket

The 15° angles were made using little 15° ramps on my shooting board

Here's one piece getting the angle

The ramps are reversible so I can plane the other edge without grain direction issues

Twelve pieces with outside faces up.
Then tape was added, the whole thing turned over, and it was rolled up.

Shocked that it all came together pretty well

Then a dado was laid out to hold the 1/8" plywood bottom
(referenced the gauge off the bottom end)

Sawed close to the lines and removed waste with a 1/8" chisel

Then put that same chisel in my impromptu mini router plane to level the dado bottoms

The twelve pieces with dadoes

After taping it together and assembling, got the measurement for the bottom

Laid out the plywood bottom and cut to the lines

After adjusting/fitting the bottom a couple times, glued up the bucket

When dry, leveled both top and bottom edges with a small plane

Another post will cover the lid and finishing.  Catch you then.

Thursday, September 22, 2022

Chopping Block From a 4x4

A neighbor recently gave me an 8-foot 4x4.  Rather than let it lie around in my small shop, I thought I'd make a chopping block from it.

Chopping block from a 4x4, with 2x4 legs

Using a divider, I stepped off 9 sections and cut the 4x4 into 9 (roughly) equal lengths, each about 10 5/8".  Then I planed some reference faces and edges and glued them up in three sections.  After planing the glued sections flat, the three glue-ups were glued together to make a 10x10 chunk of wood that will be my "block".

The glue-up

I wanted it to be up off the floor, so the next step was to drill three holes in the bottom.  The holes were drilled at about 12° off vertical, using a sightline pointing to a center point.  This is end grain, and was a real challenge.  A 1" auger bit had little success - the lead screw could not pull the bit into the wood and it stopped cutting, but at least it got the hole started.  A Forstner bit in a drill was next - it just didn't cut at all!  After thinking about it a while, I spied a rarely-used 1" spade bit in a corner.  This did the trick, but it was still not easy and took quite a while.  The holes were drilled 3" deep.

Some layout on the bottom

The bits that I tried and the finished holes

I decided on a final height of about 28-29", and after a few measurements and calculations, took a 2x4 (also acquired from said neighbor) and cut three sections about 22" long.  I formed a 3" long, 1" (strong) round tenon on the end and did a little shaping to make the legs look a little better than a chunk of 2x4.

Three legs

Before tapping the legs home in their holes, I knocked off the four corners of the block to make it octagonal; not equilateral octagonal, just enough to make the corners look better.  I also chamfered the top and bottom edges to reduce inadvertent chipping.  After the legs were installed, the feet were scribed to make them sit on the floor evenly.

With the top level, scribing the feet

Sits nice and level

I suppose if I looked around enough, I could find a piece of a tree trunk to use for a stump.  But I generally don't see them around, so this was a good use of a 4x4.

It's a good height when sitting at this stool

I don't do a lot of work with a chopping block, so I wondered if this could do double duty.  When I need it, I'd bring it into the shop.  When I don't, it could be a plant stand on the back patio.  Fingers crossed that the wife is OK with that.

Hmmm ...

OK, now that I've seen it outside, I don't even need to ask the wife - this looks horrible out there as a plant stand.  Back to the workshop it goes.

UPDATE: I've used it now to rough out some stock for my next project, and it has been working out fine.  It's faster than sawing or planing the waste, and fun too!

Friday, September 16, 2022

Wooden Smoother(s) Tune-up

Over the years I've acquired a couple of wooden smoothing planes.  The first is a coffin smoother by J. Pierce with a Chapin-Stephens iron (more info on this plane here).  The second, a German-style plane sold by vom Cleff & Co., has a Peugeot Freres iron (more info here).

The two smoothers

Both planes had wide-open mouths, a little over 1/8".  After having success closing the mouth of the jack plane (last week's blog entry), I thought I'd fix these up.  First up is the J. Pierce plane.

That open mouth doesn't help with smooth planing

Cut and shaped the patch, traced its shape with a knife, ...

... then chopped out the recess and glued in the patch

One complication here was that the recess wasn't wide enough for the router plane to remove wood in the center of the recess.  So I leveled the recess floor at right and left sides with the router and used a chisel freehand for the middle, checking the depth as I went.  It all went smoothly and I got a mouth opening about 1/32".

Small slit of light is the opening

... and right away I was getting nice shavings

But there was a problem and more work to do.  Even though the plane seemed to be working OK, I could easily fit a feeler gauge (forgot what size) through the mouth, up between the iron and the bed.  It took ump-teen iterations (way too many) of scraping the bed and checking the fit to get rid of the gap.  But finally between the feeler gauge method and the candle soot method, I finally got a good fit.

One thing that I hadn't checked initially was the wedge.  It turned out that the underside of the wedge was not close to flat.  So I planed a few shavings off it and that probably saved me several iterations of the scrape-and-check method.

Big hump in the middle of the wedge's underside

Finally, I flattened the plane's sole.  I had done this before, but I was surprised how out-of-flat it was when the iron was installed.  It really does flex the body when the wedge is tightened on the iron.

Marked the sole in pencil, then (with iron retracted a bit)
used sandpaper on glass to flatten the sole

It's really easy to create a side-to-side belly on the sole when lapping on sandpaper.  I ended up planing a (very) slight hollow, then just a few strokes on the sandpaper got it flat.

The German smoother had a similarly large mouth.

The German smoother

Mouth a little over 1/8" wide

One difference with this one: after shaping the patch, with the iron in normal position,
I butted the patch's longest edge against the iron's cutting edge (to give front-back positioning)
before knifing the outline.  This gave a good fit with very little trimming needed.

After glue-up and clean-up, got a very tight mouth: between 1/64" and 1/32"

This plane also had other issues that needed fixing.  First, the wedge's fingers were too long, which could lead to shavings getting stuck and clogging the throat.

Arrow shows where the finger overhangs the cap-iron.
The pencil lines on the finger show where the cap iron starts to curve
and that's were they need to be trimmed.

Trimming the wedge fingers

Reshaping done on the finger at right

When I had initially rehabbed this plane, I put a fairly large back-bevel on the flat side.  I wish I hadn't done that and had flattened it properly at the time.

Huge back-bevel on the flat side of the iron.
I used to use the block at the right to lift the back end of the iron
when honing the back (a different kind of "ruler" trick).

I ended up grinding back the iron's cutting edge and then regrinding the bevel.
Now I can use a 0.010" thick plastic shim as the "ruler".

And here are the two soles

Holy mackerel - these two planes really cut nicely now!  Especially the vom Cleff plane.  I can get shavings in the 0.0005" thickness range and a beautiful surface finish.

And as long as I was at it, I looked at a couple of smoothers I made a few years ago.  One of them just has a single iron and I've always gotten chatter when using it.  After getting the iron to mate much better with the bed, there's no longer any chatter.  Wow - the devil is in the details.  It really pays to tune up those wooden planes!