Saturday, August 31, 2019

Making A Three-Tiered Auger Bit Box - Part 1

I'd needed to provide better storage for a set of bits I got at a garage sale last year and finally I got around to it.  The box was challenging on a number of fronts and in the end it's not perfect, but I'm satisfied with it.
My "tool roll" for the past year was this towel.
Missing bits: 1", 3/4".  Extra bits: there are three 5/16" bits, two 15/16" bits and an expansive bit.
I thought about different ways to hold the bits in a box, keeping them from knocking around.  In the end, I wanted to try cutting semicircular grooves to house them, similar to how they are in the Russell Jennings 3-tiered box that I posted about last week.

In some poplar, I laid out the semicircles on both ends and connected them on the face with straight lines.  There was 1/8" between the adjacent semicircles.
This will become the tray for #4 through #11 bits
I started with the larger bit tray, which was much easier because I could use some round moulding planes to get the shape.
Started with the wooden plough plane, cutting grooves close to final depth
Round planes (on bench) were used to plane to the layout lines
This worked well and I got very close to the semicircular layout lines
Large bit tray done - #12 through #16
I only have #6, #8 and #10 round planes, so I needed another way to cut the semicircular grooves for the other bit tray.
I removed as much as I could using the plough, then used a chisel to round the curves
(Note the steps in the 7/16" groove (4th from left) - the steps have not yet been chiseled)
Chiseling out the steps turned out not to be such a great idea, as some wood tore out a bit too deep in many locations.  But I was going to smooth them with task-made scrapers and that helped a lot.  I made a scraping tool a couple years ago when I rehabbed an old wooden beading plane.  This came in really handy, but I had to make the right sized scrapers.
3/4" wide piece of saw blade, about 3" long
Shaped with hack saw and files, tried to get the edges 90° to the faces using diamond stones
The tool has an adjustable fence
It took a while, but this worked well in smoothing out the semicircles.
I followed up with sandpaper around appropriate sized sticks.
Made a cutter for each size groove
Made these trays from 1" thick poplar.  I would later thin them so that there
was just 1/4" of wood below the largest groove of each tray.
Next time: making the box.

Friday, August 23, 2019

Analysis of a Three-Tiered Auger Bit Box

I bought a set of auger bits about 5 years ago and was lucky that they came in the original box.  Not all the bits were original to the set, but that's OK.  Last year I came across an almost-complete set of bits and they've been rolled up in a towel since then, so I wanted to give them a better home.  That's why I'm studying the box from my first set.  I've always loved the 3-tiered box and wanted to know a bit more about what makes it tick.
The Russell Jennings Mfg. Co auger bit box for their "Fig 100" bits (double thread lead screw)
The box is 10 1/2" x 4" x 3 7/8" high and the walls and lid are 7/16" thick
Underside of lid has the label.  Top tier has bits #4 to 9 (1/4" to 9/16").
Second tier has #10-13, bottom has #14-16.
The box is put together with with box joints, each finger is about 5/32" wide
But note that there are three nails reinforcing each corner - one nail for each tier
Note in the previous two pics that the lid has a spline running front to back at each end.  My guess is that this was to keep the single-piece lid flat.  But that creates a cross-grain situation if it's glued in, which could cause the lid to crack.  And guess what?
The lid has a crack
(At one time I sanded the lid, removing the patina.  The horror!)
The bottom of the box is inset and is flush with the bottom of the box sides and ends.
Box bottom inset within carcase
Note the two nails holding the box bottom in place
You may also notice in the above pic that there are two nails in the top two tiers as well.  I'll get to that more later but they are nailed through grooves in the sides that house a lip of the bit trays.

The hardware on this box is interesting.  Each tier is secured to it neighbor with small clasps.
Clasps on front of box - all work perfectly.  They are attached with round-headed nails.
It looks like the upper nails on the middle clasp are not original.
The hinges on back are awesome!  They are continuous from bottom tier to top tier and then to the top of the lid.  Clearly these were custom made for this box.  I'm sure many thousands of these boxes were made, so it made sense to have a specific hinge mass-produced for them.
The back of the box showing the hinges
Back portion of the three-knuckled hinges.
Hinges affixed with round-headed screws (not "clocked" - an obvious faux pas).
Where the hinge comes up on top of the lid, it is affixed by a single countersunk flat-head screw
Let's get to the bit trays.  The top tray is low enough in its tier that the bits don't stick up higher than the sides, allowing the lid (which is not relieved on its underside) to close.  But for the second and third tiers, the bits are higher than the rims of their respective tiers.  The tier above them has a relief in its underside to account for that.
First tier bits below the rim of that tier
Second tier bits higher than the rim of the tier
5/16" recess in underside of first tier
Third tier is similar, except the recess in the underside of tier 2 is only 1/4"
Now, how are the trays held in place?  The following pic shows the bottom tray and you can see in the left-most bit compartment that some of a groove is showing.
See the groove?
And this shows the underside of the middle tier and it's clear that it fits into a groove
One of the grooves can be seen from the outside of the box
What I don't know is if the bit tray and the piece that fits into the groove are one and the same.  That is, does each bit tray have a single-cheeked stub tenon that fits into the groove, or is there a thin shelf extending from the left side groove to the right side groove and the tray is just glued to the shelf?

No matter which it is, there is a cross-grain situation in this connection.  It certainly wouldn't need to be glued, but it seems solidly in place.  There is plenty of room for the tray to expand and contract, as there is about 1/32" of space between the tray and the front/back of the box.
An 0.029" shim fits between the tray and the back of the box
As far as construction is concerned, it's pretty clear that the box was made full size and then the tiers were cut apart.
The saw kerf split the finger I'm pointing to
One final detail and I'll wrap this up.  The top tray has 6 "half-pipe" compartments for the bits to rest in.  But the smallest three don't extend all the way to the right.
This was because the square tapered parts of the #4, #5 and #6 bits' shanks are too
large to fit in their half-pipe compartments.
It was a feat of engineering to fit 16 bits in a box this size and have them all be easily accessible.  Great stuff!

Thursday, August 15, 2019

Dedicated Mortise Gauges

I've thought for a while about making a couple dedicated mortise gauges.  The Marples and Veritas mortise gauges I have work well, but I have some scrap material to use up and this is a nice project for scrap.  It seems like most of my mortises are either 1/4" or 3/8", so having dedicated gauges for these sizes might be helpful.  And I can space the pins just right for the chisels I use.

The 3/8" gauge is made from cherry.  After squaring up a piece of wood, I laid out some lines, then bored out and pared the mortise.  Adding a smaller, angled mortise for the wedge was a piece of cake.  I made the smaller mortise about 1/16" larger on one side of the 1" thick fence than the other side.  This gave the wedge a nice angle to do its job of tightening the beam to the fence.
The fence blank with two mortises
One detail to consider is how large you want the beam to be.  I made a single-pin marking gauge a few years ago and the beam is 7/8" square.  It is a great marking gauge, but it seems a bit bulky.  So on the 3/8" gauge, I decided on 13/16" square and it looks and feels great.
The parts of the gauge
I like the pins of the gauge to run catty-cornered, so I chiseled a little flat in that area to accommodate the pins.
The beam, showing the flat area for the pins
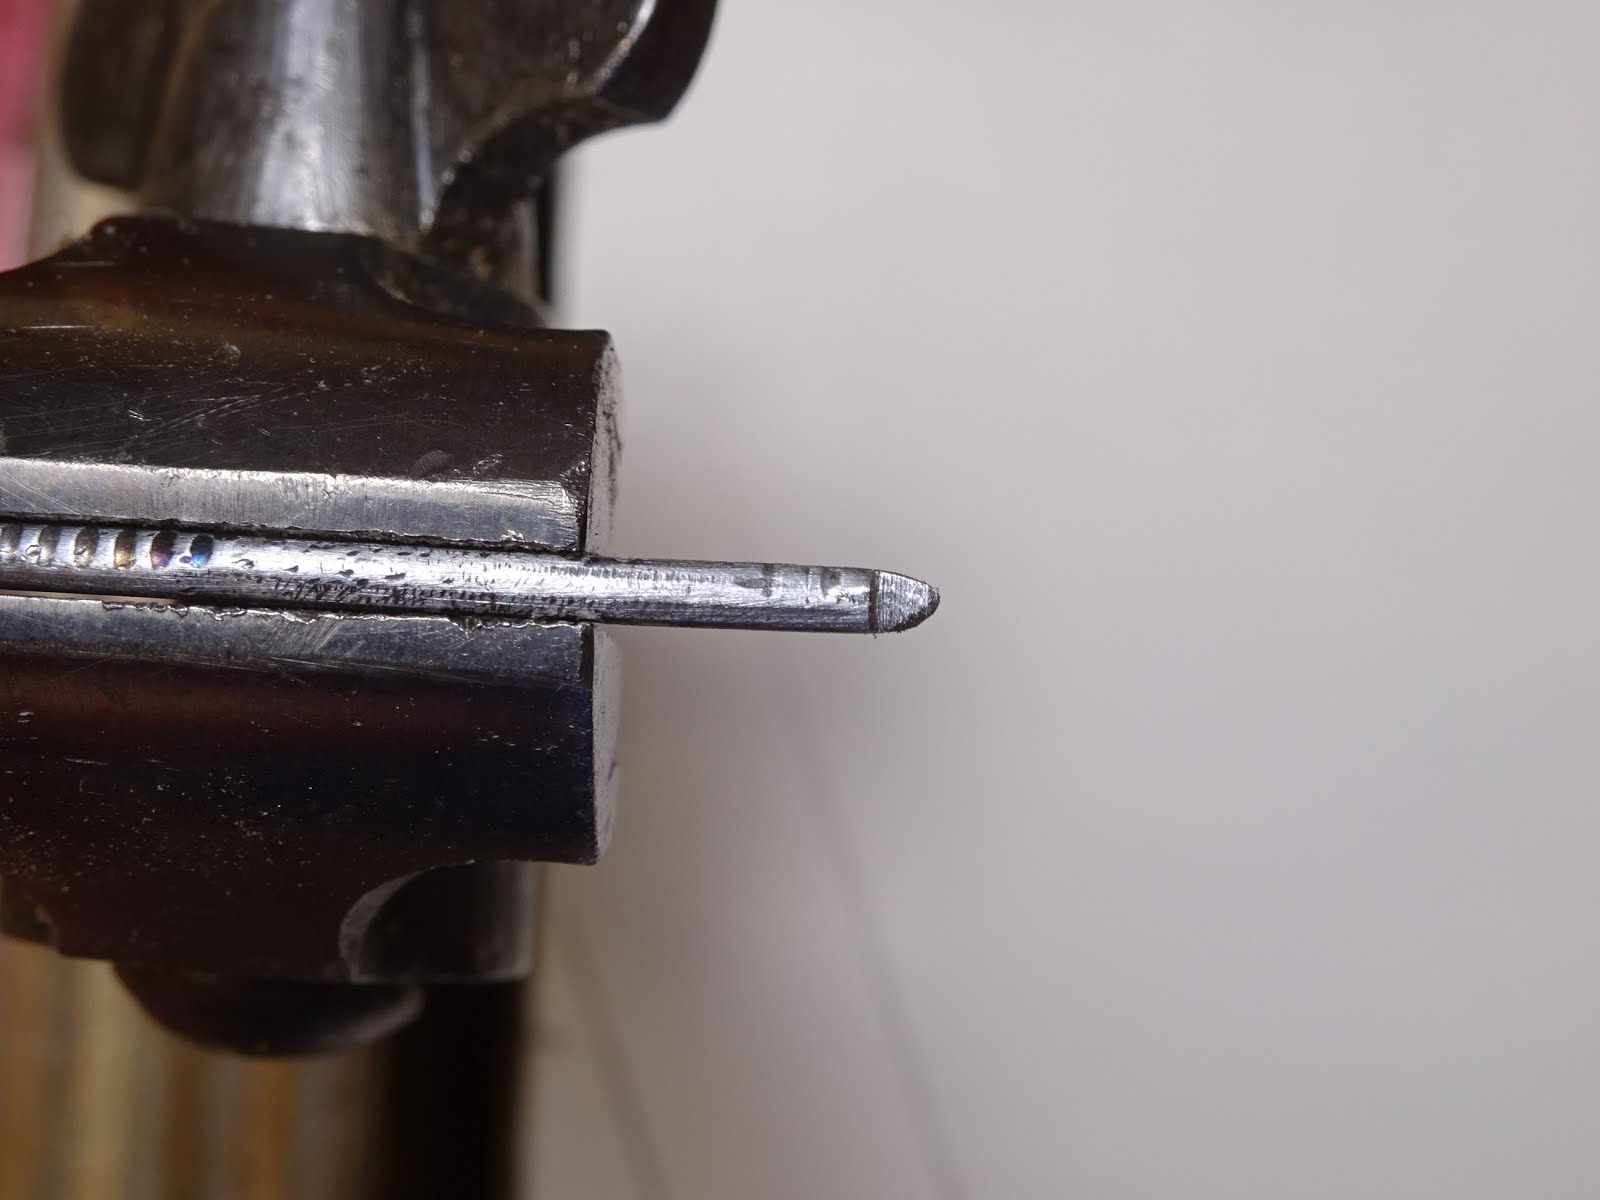
For the pins, I used ordinary nails (with heads cut off) and I filed the ends to make a sharp rounded end.
Pin shape in profile
Pin shape straight on
To hold the nail for filing, I'm using a little finger vise that I found at a garage sale last year.  I love this thing - it really comes in handy for small duty filing.
Stubs finger vise (that's a 3/4" dog hole behind it for size reference)
I took a torch to the nails to harden them, quenched in oil, and then pounded them into the beam and got them set at the same height.  I have no idea whether the heat treatment will have had any beneficial effect on the type of steel used for the nails, but it seemed like a good idea.  Actually, they still seemed fairly soft after that.
The bevels are set to leave any bruising between the pins
Finished using Watco
This Watco had been in this jar in my cabinet for years.  I thinned it a little with turpentine and applied it with a rag, wiping the excess 15-20 minutes later and repeated this the next day.  After several days, the wood still had a tacky feel to it, so I won't be using this stuff again.  I did wax the front face of the fence after a few days, but it still didn't feel right.  It performed fine on some test marking, so I'll see how it goes when I need to use it in the future.

The 1/4" mortise gauge is from a design I saw in one of Bob Rozaieski's videos.  For this one I made a prototype in poplar, thinking I would make the real thing from some harder wood.  But the poplar one came out so nice that I'm keeping it.  If it doesn't hold up, I'll make another.

This one has the wedge oriented differently from the gauge above.
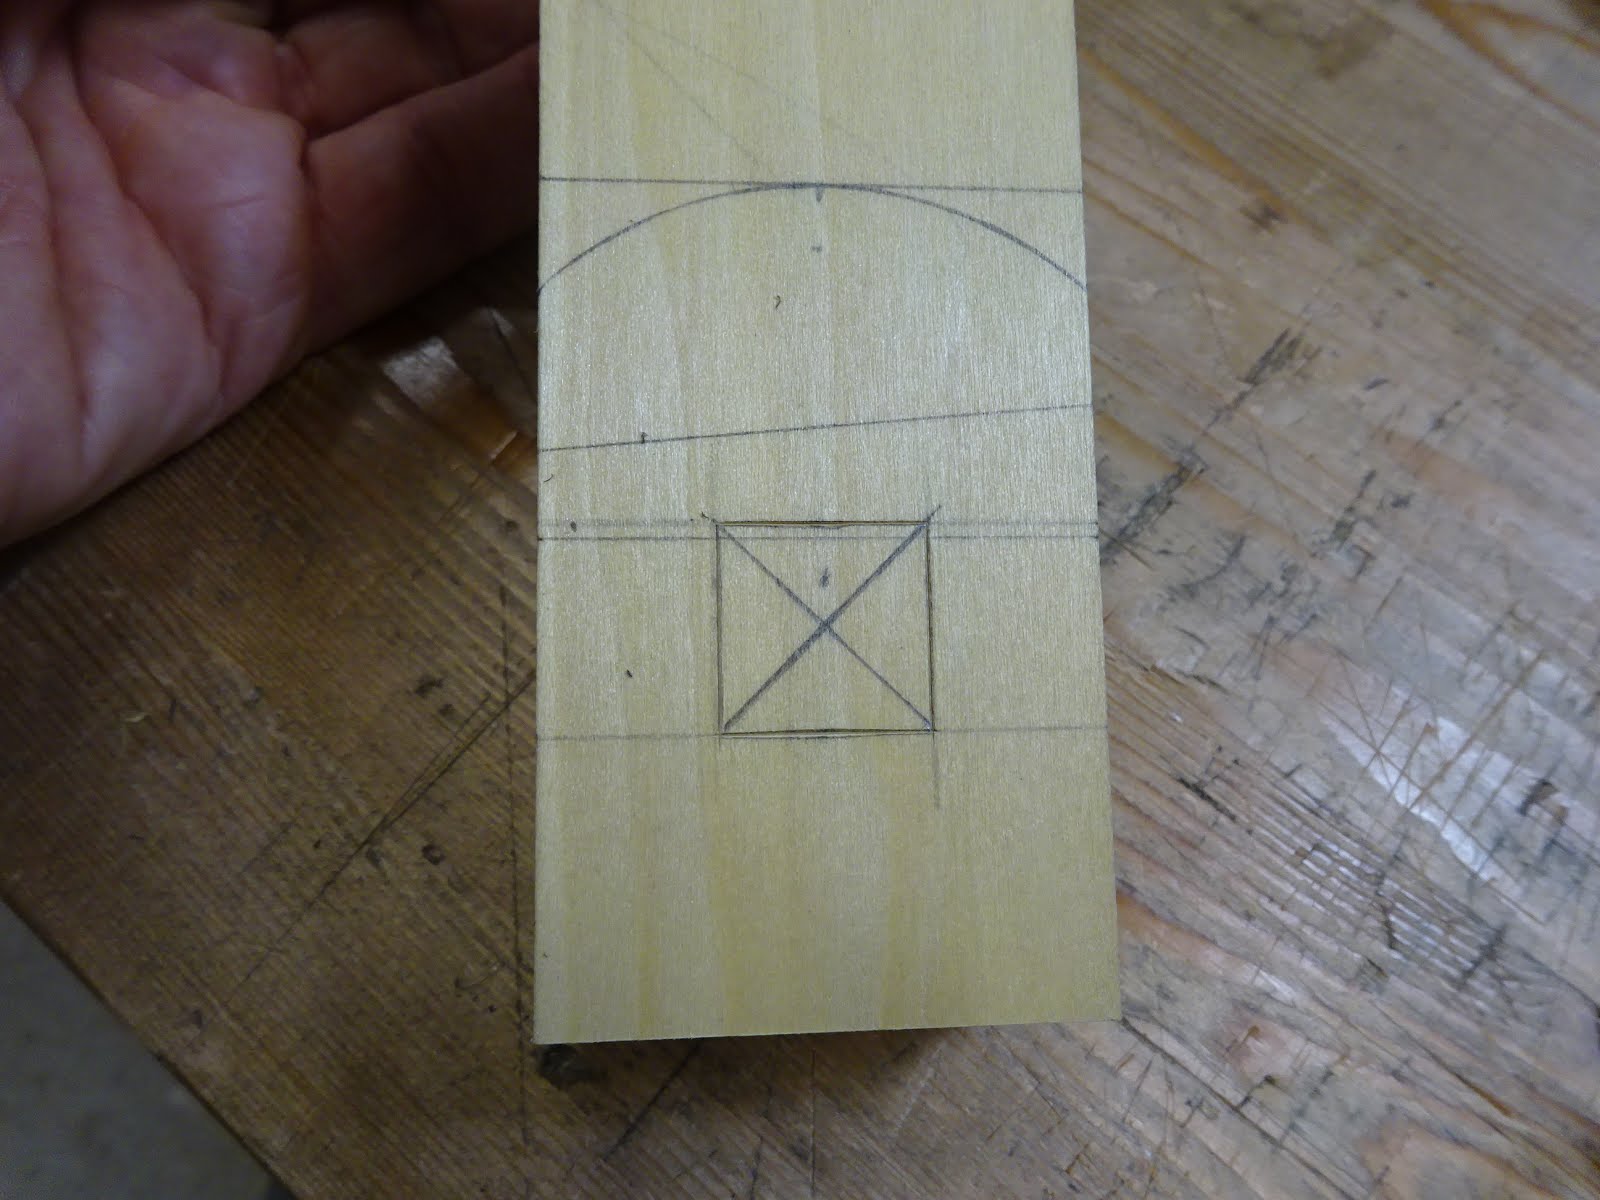
Layout on a squared-up blank - note the "x" for the smaller wedge mortise on the near edge
Note the angled layout line for the wedge.  The wedge mortise overlaps the beam mortise by 1/16".
Bored from both sides to remove the bulk of the waste
Then squared up the mortise with chisels
Then bored and chiseled the smaller mortise
I made a sacrificial beam, which I put in place while cutting the smaller mortise.  This prevented any blowout in the areas where the mortises overlap.
The sacrificial beam showing the mortise overlap chopped away
The smaller mortise was a challenge to get cleaned up - it's long and narrow (5/16" wide, I think) and it took a lot of careful paring to flatten the walls.

For this gauge I made the beam 3/4" square.  It seems fine, but I think I like the 13/16" beam better.
Test fitting the beam.  Temporary wedge in place.
I made the pins for this gauge the same way as the other gauge and spaced them just a tad wider than my 1/4" chisel.
This pic makes the pins look too wide - the chisel actually fits a little better than it looks
All fitted
I love this style gauge.  The orientation of the wedge makes it so easy to loosen or tighten with a tap on the benchtop.  I only wish it had more fence surface area to ride along the piece being marked.
Getting finished
Unfortunately I finished this one with the same Watco "Danish Oil", so it's not as slick as I'd like on the front face of the fence.  I've got some projects coming up where I'll be able to use one or both.  Can't wait to see how they perform.
Glamour shot 1
Glamour shot 2