Thursday, December 21, 2023

A Sign for a House

I'm a horrible gifter, rarely knowing what to get for people.  Heck, I never want anything for myself!  How would I know what other people might want?  But I got a little inspiration this year.  My wife's daughter had a baby in May and we became grandparents for the first time.  Now that they have a little family, I thought maybe their house needed a sign.

So off to the internet I went, first looking at images of signs people have on their houses, then looking at videos of letter carving.  I had a nice chunk of redwood lying around that would be easy to carve.  And there was enough to cut off a bit to practice on first.

Some practice letters and a border

The quarter-circle at the corner of the border was a challenge

But practice makes better

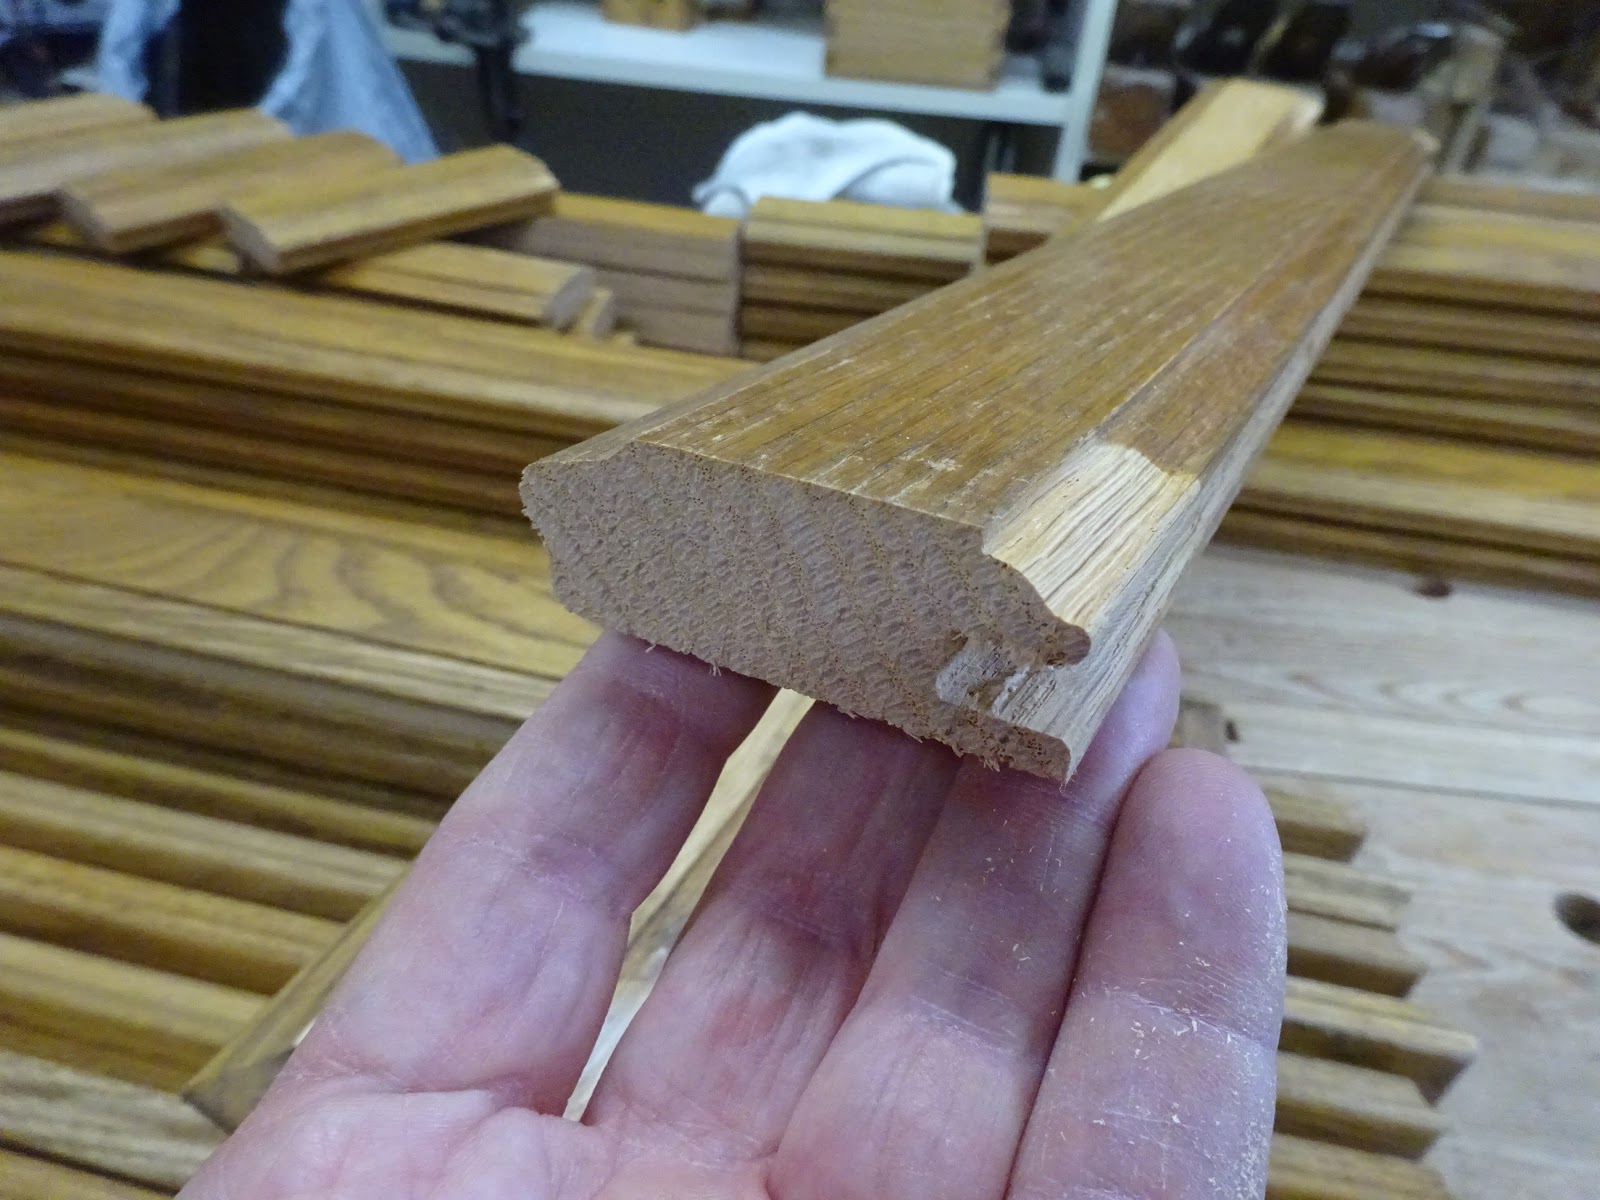
I was pleased with how the letters came out, but thought they were a bit too tall at 4" on a 6" tall board.  So I did some drawing in Sketchup to get a feel for proportions and decided on about 3 1/8" tall for the larger letters and 1 5/8" tall for the smaller letters.  The practice border was too narrow to make with a 1/8" chisel, especially those curved areas in the corners.  So I chose them to be just shy of 3/16" wide and 1/8" deep.  The corners were drawn with the help of  1" and 1 1/4" diameter circle templates.  The circles were centered at a point 1/2" from the end and 1/2" from the edge.

The practice letters had been printed from a Word document and then cut out of the paper with a sharp knife.  For the final version, I got my wife to help me by printing on her Cricut, which she uses when scrapbooking.  The Cricut is basically a CNC paper cutter.  It's really cool and does a great job making letters (or shapes of any kind).  She can use any font that is loaded on her computer.

The templates taped to the workpiece were used to draw the letters

Most of the carving done

I'm not an experienced carver.  I'm sure it takes me at least 4-5 times as long to do the lettering as it does for someone who does it a lot.  But I've got the time and patience - and it takes a lot of patience.

Some "stop cuts" aid in the removal of material

A couple really useful tips I got from Bill Schenher's (Billy's Little Bench YouTube channel) video on letter carving was first to draw (and chisel) center lines in the letters and second, make stop cuts where transitions occur.

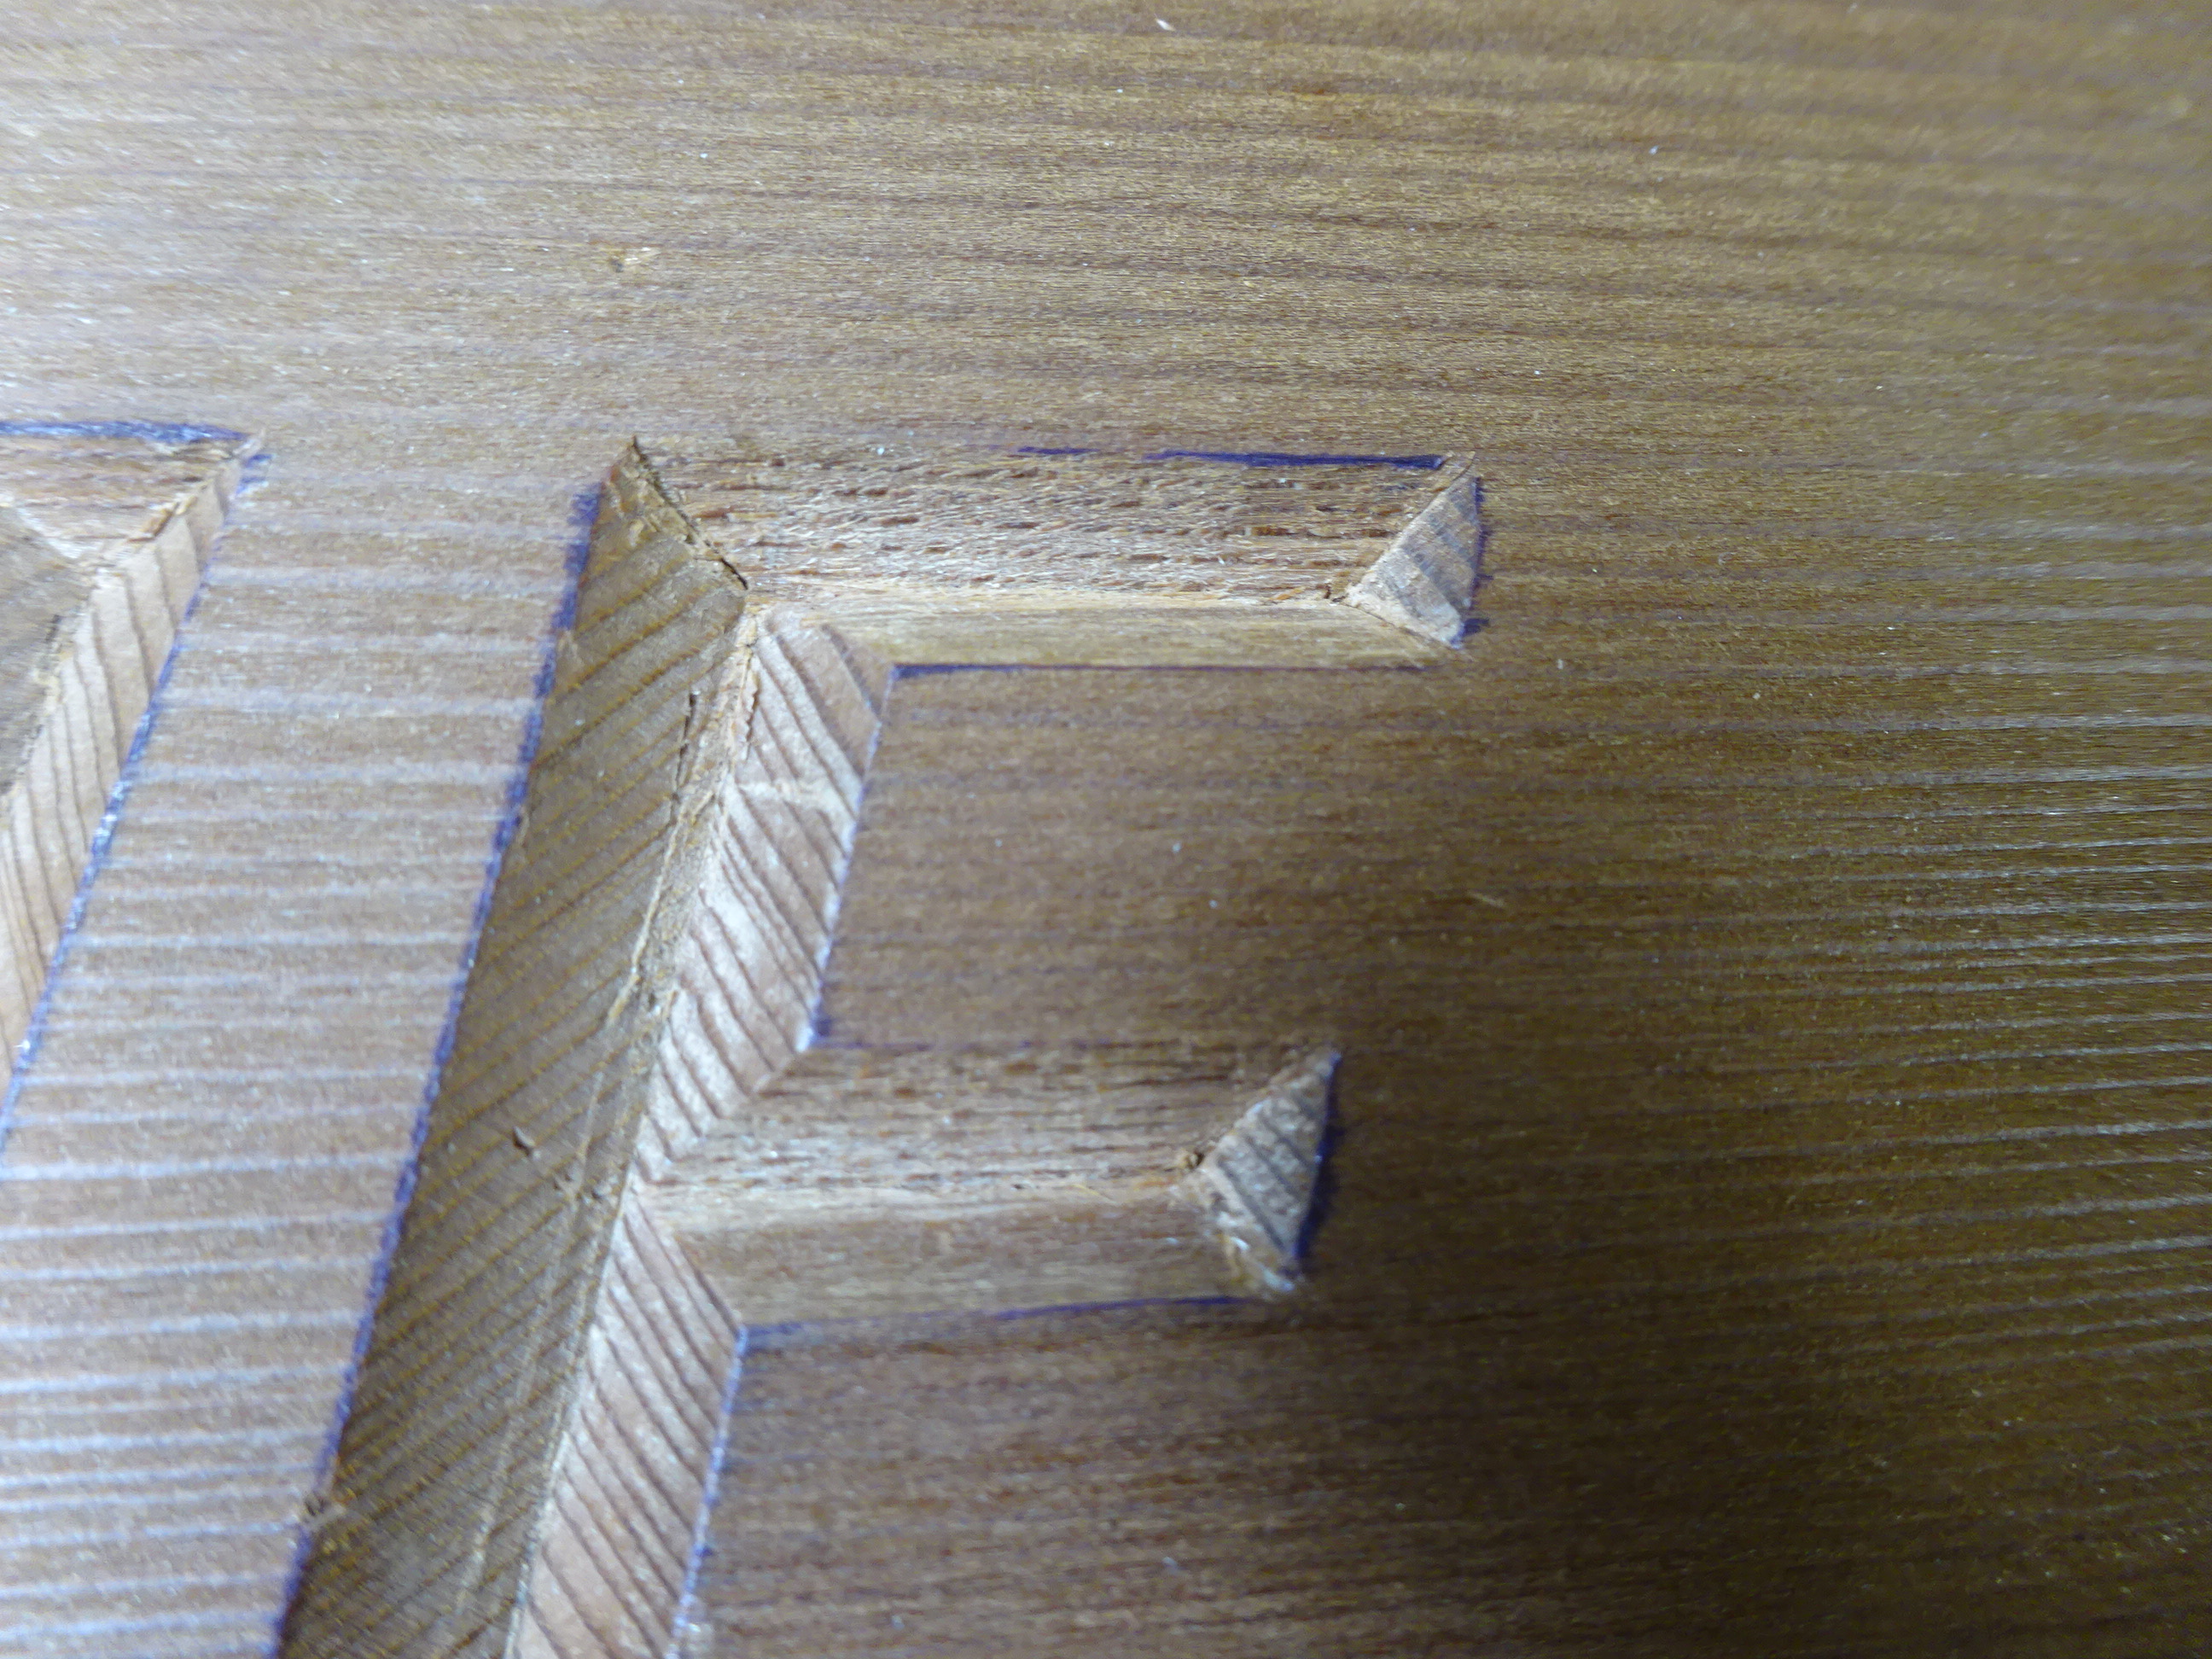
The stop cuts end up making the little triangles at the ends of the straight sections

The letter carving came out great.  I did it with the workpiece in a vice, so it was about 36" high.  My back ached at the end of the days I carved.  I can handle that with the amount of carving I do.

I thought I'd paint the letters for extra visibility.  The practice piece was used to evaluate colors.  My wife had the brilliant idea of using purple and teal, the giftees' favorite colors.  I first painted the border purple and the letters teal, but that looked horrible.  Then I tried some white in the border and that still didn't look good.  In the end, both letters and border were painted teal.

The practice piece with some test painting.

The nice thing about painting is that if there is some spill-over onto the wood plank, I could just plane it off, and that's what I did.  A few plane strokes really made the letters crisp.

I also tested some finish techniques on the practice piece.  In the picture above, the "R" and surrounding wood have a couple coats of shellac.  The "A" and "HEA" are raw wood.  There was no seepage or creep of the paint on either section, so I didn't think it would be necessary to use shellac as a sealer.  In the end, I coated everything (paint and wood) with BLO for a little protection.

And here's the finished sign.  I hope they like it!
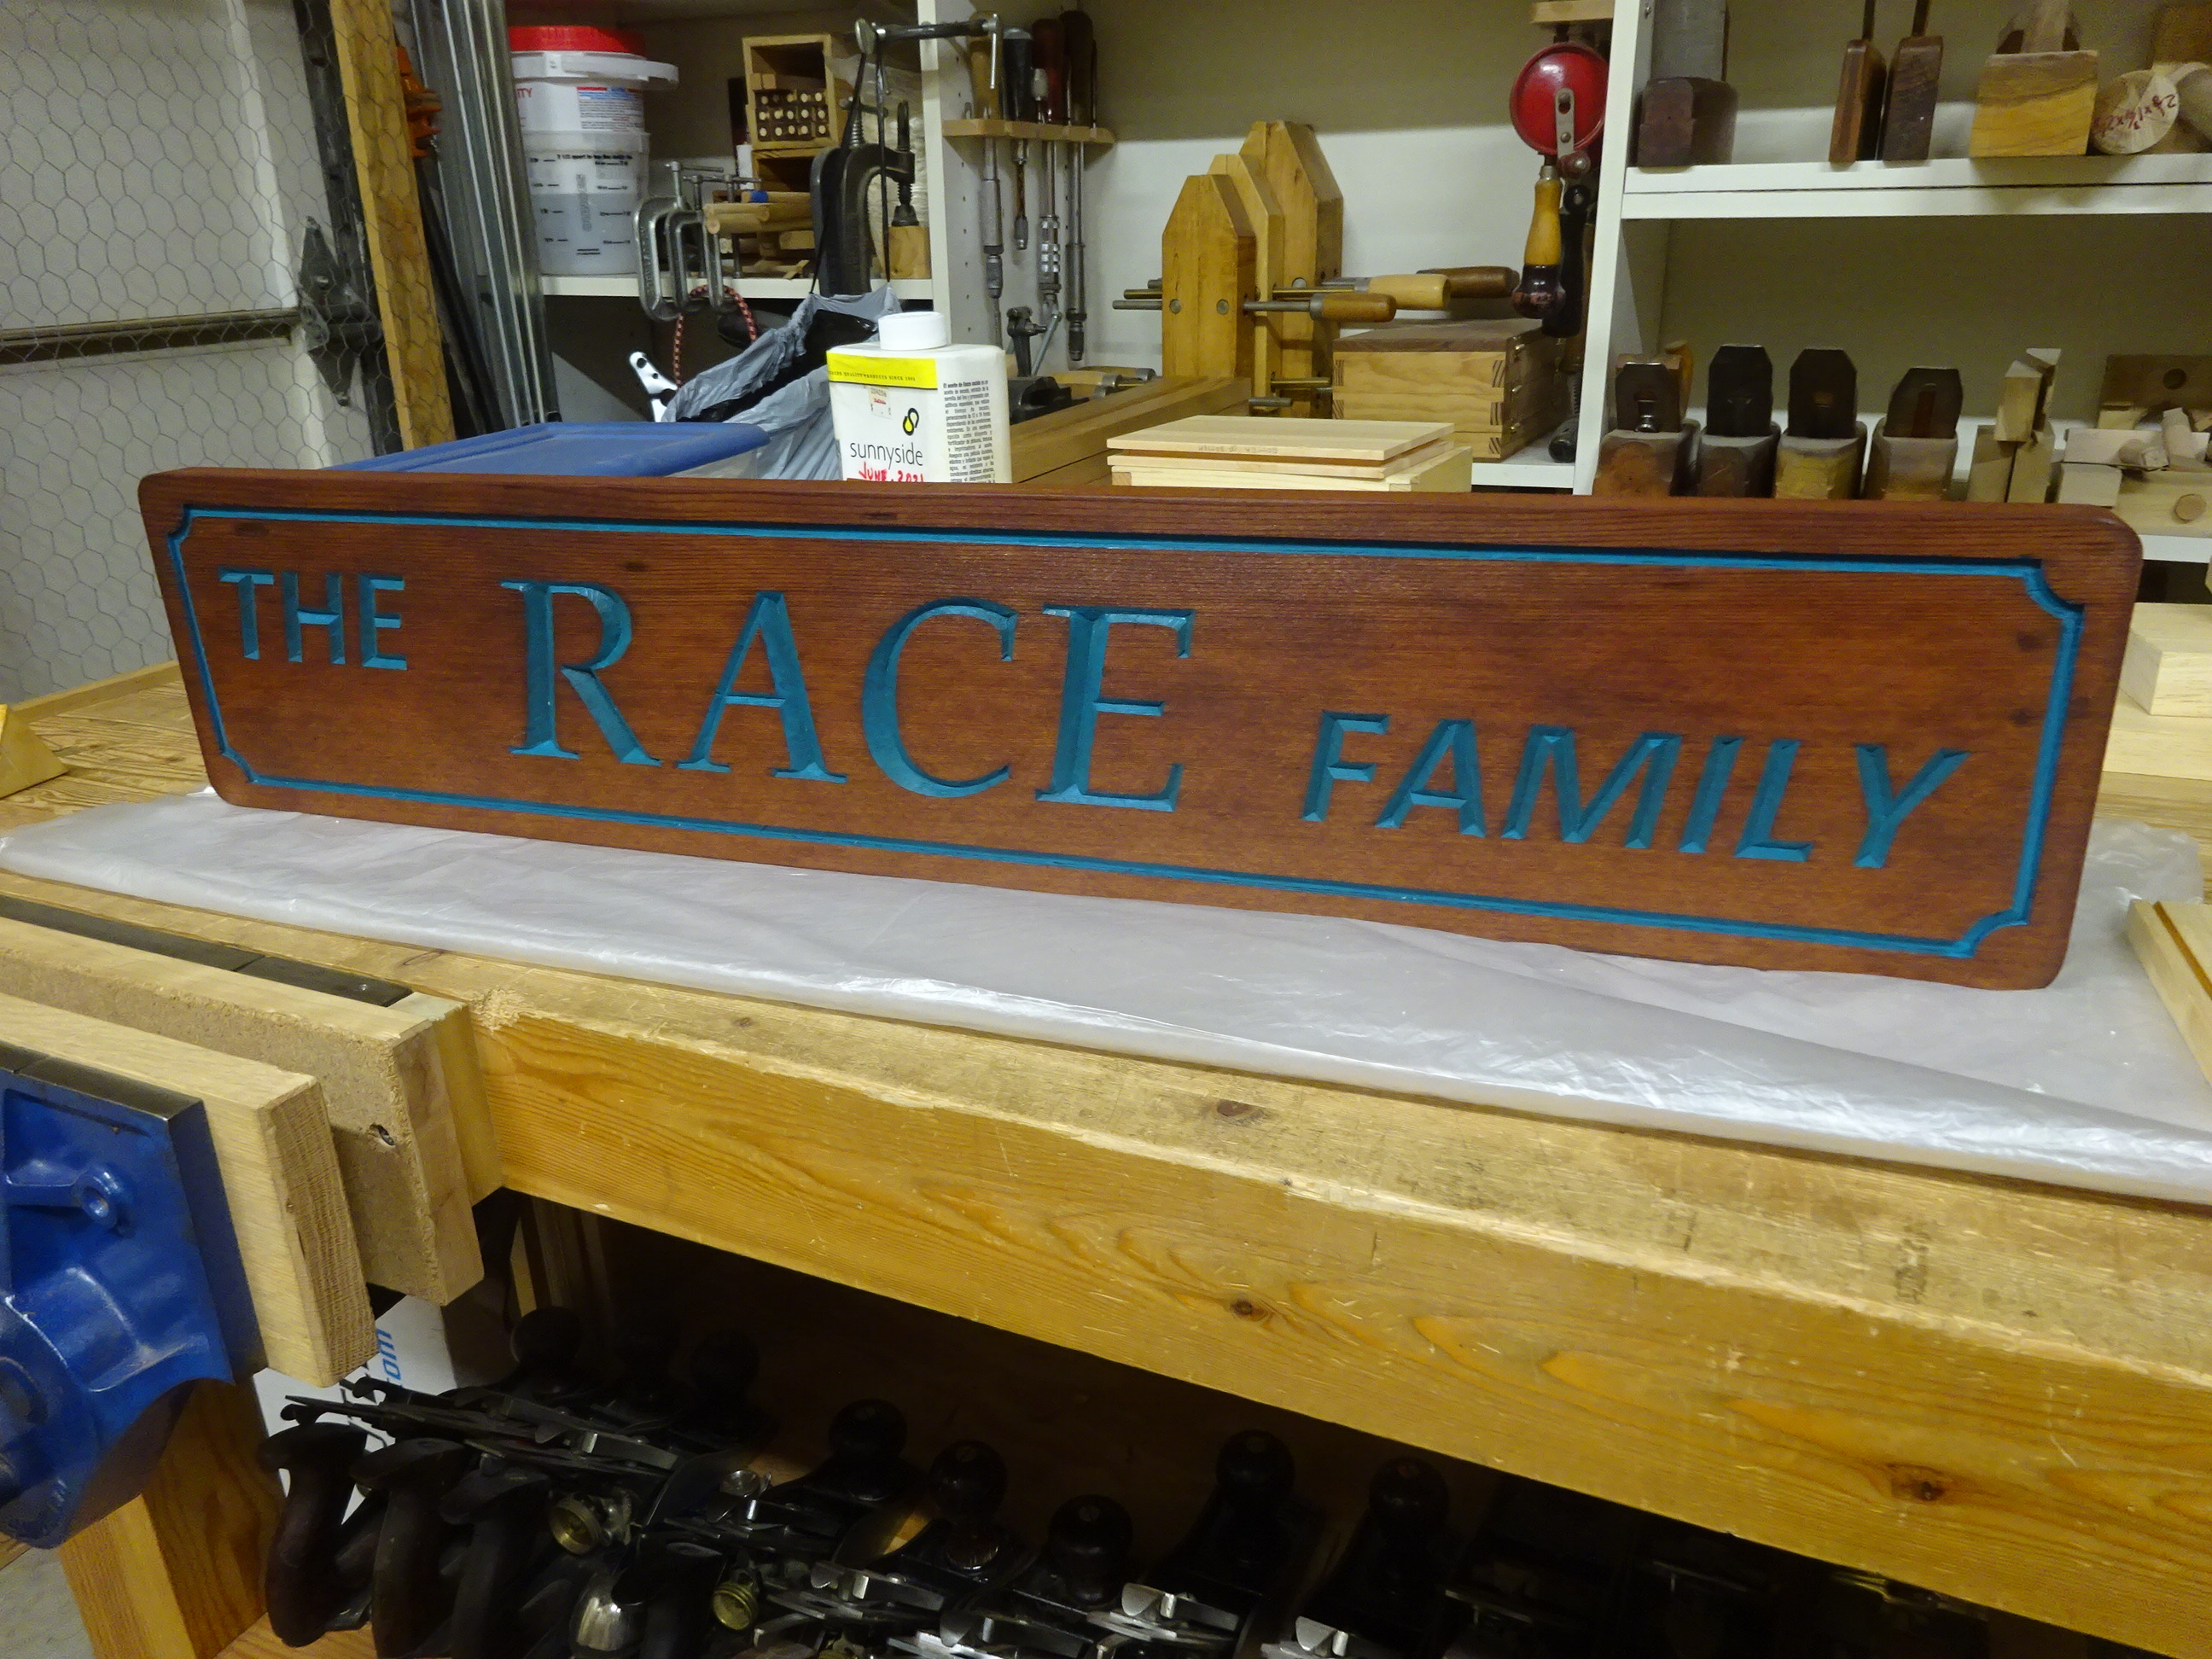
Glamour shot #1

And with raking light


Thursday, November 30, 2023

On Using Used Wood

When a neighbor offered me the old wood from the kitchen they're remodeling, the masochist I am, I jumped at it.  These townhouses were built in the 80's and oak was generally what was used then.  I have a hard time turning down free wood, but maybe those days are numbered.

Rails and stiles from 15 doors

Face frame rails and stiles from three cabinets

There were also a couple of drawer fronts.  This is a lot of wood to clean up.  All the door rails and stiles have molded outer edges, as well as molded & grooved inner edges.  Many of the face frame rails have pocket holes at the ends where they mate with stiles.  And all these things need to be removed.

Molded end and groove shown

I woke up this morning thinking how best to cut the ends efficiently.  In December of 2020 I wrote about my Stanley #2358A miter box and saw.  Since being refurbished, it has sat on a high shelf in the shop.

So lonely up there all by itself

And the saw has been hanging on the wall since then.

I'd give it a permanent location in the shop if I had more space, but I don't.  Finally I have a good use for the thing where it's worth the trouble to take it down from the shelf!

Stanley #2358A ready to make a cut

Half way through

What a joy this thing is to use.  Each cut took about 15-18 strokes of the 30" saw.  It was still perfectly sharp from when I fixed it up.

Molded end cut off

Now I just have to clean up the grooved and molded edges of all these pieces.  A bandsaw sure would be handy for this.  Anybody out there have any suggestions on how to efficiently clean up those long edges?  I've tried the hatchet, followed by scrub plane and smoother, and that works, but takes a bit of time.  Anything I'm not thinking of while using hand tools only?

UPDATE: Someone from the facebook unplugged woodworkers group suggested using a drawknife and that really did the trick.  I followed the drawknife with a scrub plane and smoother.  It still takes some time, but it's more fun and does a nice job.

Drawknife with workpiece in the vise.  Later I brought down my vise-mounted
shave pony and that worked great.


Friday, November 17, 2023

The Cutest Little Saw

At a tool collectors' show a couple weeks ago my raffle ticket was called and I won my choice of 5 or 6 tools.  I couldn't even tell you what the other tools were, because my eyes were immediately drawn to this small 8" dovetail saw.

Isn't she cute?

Right side view

To get an idea of the size, here it is with a 26" Disston D-115

It's very difficult to see and much more difficult to photograph, but I saw on the left side of the plate that it's a Disston.  Below is an enlargement of the saw plate in the first photo above.

HENRY DISSTON
PHILADELPHIA

Eventually after some clean-up, I was able to get a better pic of the etch

The saw was in pretty rough shape.  I'm sure it hadn't been used in decades.  The teeth were irregular and rounded over, the plate had some waviness and the back was bent.

Looking down the tooth line from behind the handle - see the bend?

17 tpi / 18 ppi
You can see here how uneven the teeth were.

Maybe the nicest part of it was the handle, which I initially thought was beech, but now I think it's apple.  The handle is quite small, even for my narrow hand, so maybe this was originally made for children.  I don't think it's too old based on the etch above.  There's no medallion.  I'm guessing it's from the 1950's, but there'll be more on that below.

I should have done this research before I cleaned it up, but after some snooping around the Disstonian Institute website, I'm pretty sure this is a Disston #70 dovetail saw.  According to one of the Disston catalog pages from that site, these saws came in an 8" length (among others), had an open handle made of apple wood, a plate from 26 gauge (0.018" thick) spring steel, a brass plated steel back, 17 ppi (16 tpi), and about 1 1/2" of plate width below the back.

Close enough.  I measured the plate at about 0.017" thick.  I counted 17 tpi in a few places, but it probably started life as 16 tpi.  There are remnants of brass plating on the back - most of it gone now.  There is still 1 3/8" of plate showing at the rear, closer to 1 3/16 at the front.  Based on pictures, I don't believe the plate was supposed to be less deep at the front - I think the plate is recessed into the spine more at the front for some reason.

The teeth were a mess, and I ended up filing them off completely.  Before realizing from the Disstonian site that the teeth were probably originally 16 tpi, I intended to file to 17 tpi.  But the tooth-spacing templates from Blackburn Tool's website only go up to 16, so that's what I used.

Starting to cut in the new teeth, using a template glued to the plate

Getting closer

I added a little set to the teeth - very little - being careful not to go too far.  A saw like this that is designed to make shallow cuts doesn't need much set.

The screw holes in the handle held a mystery green gunk.  I don't think is was a result of corrosion of the brass screws.  Maybe some compound a former owner put in there to try to tighten up the screws.  Not sure why - the screws seems to hold fine.

Mystery green gunk

The handle was missing a piece where the spine fits in.  I glued on a scrap of beech and shaped it to match the other side.

Chiseled the broken area to get a flat surface

Glued on a piece of beech with some creative clamping

After shaping it like the left side, the right side matches in all but color
(the color got much closer after a few coats of oil)

I also scraped and sanded the rest of the handle to remove any old finish, then put on three coats of BLO over three days.  I love the feel of an oil finish on saw handles.

Ain't she pretty?

For the slightly bent back, I was able to bend it back the other way - very carefully.  The bent saw plate seems to have been mostly fixed by adjusting the spine a bit.  To adjust the spine, I clamped the saw plate in the vise with the spine above the vise jaws and tapped a stick with a kerf cut in it with a hammer to move the spine.  Now, the plate is almost perfectly straight without the handle, but I have a little bend near the back of the plate when the handle in installed.  Makes me wonder if there is something funny about the slot in the handle.  I ran a piece of sandpaper through the slot a few times, but I still have a slight bend in the last inch of teeth.

I did a little more research with the help of the Internet Archive, where I found many old Disston catalogs and manuals.  In a 1918 catalog, the #70's handle looked a little fancier with an extra fillet (not sure if that's the right term) forward of the top horn.  From 1929 through 1949, the saw shows up in the catalogs and/or manuals with a less fancy handle like mine, but the #70 is not found at all in the 1949 and later catalogs.  Maybe that means the saw is from the '29 to '45 time period, but who knows - they might have still sold them after 1945 and not put them in a catalog.

I've made a few test cuts now and it cuts well.  It leaves a very fine kerf.  I'll do some practice dovetails later today.

Thursday, November 9, 2023

Another Step Stool

I guess step stools are getting to be my thing.  I saw a similar piece on the unplugged woodworkers FB group and I needed to make one.  This project has an aspect that I've never tried before but have wanted to for a long time.  The stretcher between legs is attached with cross wedged through tenons.

Sketchup model (without shaping) to give general idea

The legs are splayed out at 15°, so the mortises in the top and legs, as well as the shoulders of the stretcher tenons are at that angle.  I had some softwood from an old coffee table that I planed to about 1" thick.  The top and legs started out at 10" wide.  The top is 15" long and the legs are about 11" long.  Being careful to use only the reference face and edge, I marked out for the leg tenons and top mortises.  Because the rear mortises and tenons were too far from the reference edge to use a regular marking gauge, I used a panel gauge.

The tenons cut: note the angled shoulders

Mortises marked out and the first one chopped and pared to the lines

These mortises are angled

Four mortises complete

Mortises in the legs chopped and the stretcher tenons formed

A mortise in the tenon will fit a wedge

Note the mortise is not rectangular, but angled.
This made making and fitting the wedge more complicated.

Here's a test wedge in softwood showing its angled nature

A wedge fitted, but not trimmed to length

A final hardwood wedge in place

All shaping done: oval cutout forming feet, leg sides shaped,
hand-hole in top, stretcher tenons rounded over ...

... stretcher edges curved, and underside of top beveled

The top was shaped so that the last 4" of each long edge was slightly curved heading towards the ends.  The shape turned out to be very pleasing.  The tops of the leg tenons were leveled with the top.  I'm not planning to glue this project.  The angled legs and wedged stretcher tenons make it quite sturdy.  But I am adding a few coats of shellac.

The finished product

This was a nice project.  Not hard to do, and I tried a new technique with the wedged tenons.  Now to fine a home for it.


Thursday, October 26, 2023

Some Details on Roubo Phone Stands

I've posted about making these things before, but I just made two more and thought I'd share some details.  This will be mostly pictorial, with text in the captions.  The wood is air-dried walnut, from my brother's property in North Carolina.

Starting with walnut, 9 1/2" x 3 1/4" x 3/4" thick.
Here, some layout lines have been penciled and knifed in.
The layout starts about 2 1/2" from the bottom.
Center "finger" is 1" wide, others are about 9/16" wide.

Drilling holes at the 8 corner points of the layout.
This layout shows three "fingers" on upper portion and two on lower.
It's the opposite on the bottom side - three on lower, two on upper.

Sawing the wood between drilled holes using tool made from hacksaw blade

The result of that sawing

Starting to chisel out the waste to create the hinge knuckles

This knife line is centered between the extents of the fingers

After chiseling out most of the waste, I set the chisel in that knife line
and use a 45 degree angle block to guide the final chiseling.

Here is the result - nice clean line


Since the extents of the fingers are the same distance apart as
the workpiece is thick, the 45 degree chops get you to the center
of the workpiece.

Another view.  Note the centered lengthwise guide lines on the side of the workpiece.
They'll guide the saw when separating the phone stand.

Then it's on to sawing down the thickness, down to the chiseled knuckles

You've got to saw all the way down to here

Red arrows show the saw in the cut.
Green arrow shows the little bits that fall out through the
chiseled knuckles telling you that you've sawn far enough.

If you've chiseled and sawn enough, the phone stand will open up easily

When opened, it's nice that the parts mate appropriately.
This works out this way if the distance between the extents of the "fingers"
(or knuckles) is the same as the thickness of the workpiece.

Then it's on to cleaning up the sawn surfaces.
Here, cleaning up a sawn face with a card scraper

You can also plane some of the sawn surface

The front shelf that holds the phone is 7/8" long.
I typically put a 7/16" slot centered in the shelf (seen below) for a charging cord.

Did some shaping to the top and the feet using templates

And here they are

But wait, there's more!!
I added a decorative carving before giving them four
coats of shellac, then paste wax.

These are going to my sister and to a family friend both visiting from the East Coast this week.  I have Ron Aylor to thank for the inspiration of these phone stands.