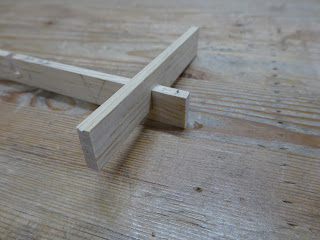
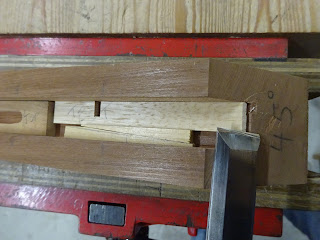
So far, I've shown the jigs necessary to do the precise work of kumiko. Now, finally we get to making some actual kumiko patterns.
I started with a pattern based on squares. Ninety degree cuts and joints make things SO much easier. To start, I decided on a spacing between vertical pieces, which is the same spacing as the horizontal pieces.
 |
| The two kerfs define the size of the frame |
As a reminder from the post about the cutting jig, see the next photos for how a lap joint is formed in a workpiece.
 |
| Workpiece and 0.155" spacer butted against the stop block |
 |
| Make a kerf half way down the workpiece |
 |
| First kerf done |
 |
| Remove the spacer, butt the workpiece against the stop block and make another saw cut. (Note: the 0.155" spacer was arrived at by trial and error to get a nicely fitting joint) |
 |
| Testing the fit of another piece into the first half lap |
My cross-cutting jig shown above was very small and I only cut two kerfs in it about 3" apart. I know now how I might have handled this better, but at the time, I wasn't sure how to get a third kerf with EXACTLY the same spacing. So to make a frame like that shown below using a jig that had only two kerfs, I did the following. Make the right side cuts for the first two lap joints into a kumiko frame piece, then remove the stop block, move the workpiece 3" to the right, and put a plastic spacer (the thickness of a kerf - an old drug store card was the perfect thickness) into the rightmost jig kerf, extending into the left workpiece kerf. Then use the leftmost jig kerf to make another cut into the workpiece (hope that wasn't too hard to follow). I then added the second kerf to each half-lap.
After making 6 frame pieces, I ended up with a square grid that looked like this.
 |
| Kumiko frame put together |
The next step is to fit diagonal pieces that radiate out from the center. It will look like the next picture.
 |
| Frame with diagonals added |
Here's a close-up of the center area.
 |
| Note the diagonal pieces are pointed to fit into the corners |
The same point needs to be shaped on the other end of the diagonal pieces to fit into the outside frame corners. To do these, I used the 45° trimming jig. Trim the end to 45°, flip the piece over and trim the other side for a perfectly centered point.
 |
| Trimming a 45° angle on the end of a test piece |
OK, some people might tell me I'm cutting a 135° angle here, and they'd be right. But my mind tells me I need to bisect the 90° corners, so I'm gong to call it a 45° cut using a 45° trimming jig.
Making these pieces the exact length to fit into their spaces was a matter of trial and error. I found that my frame was slightly out of square, so the diagonal piece in the lower left quadrant didn't fit properly in the upper left quadrant (for example). If all had been made precisely, all four diagonal pieces would be interchangeable. On the bright side, making them all the same length (the average of the individual lengths) helps to square up the frame.
 |
| Diagonals fitted |
The pattern I made subdivides each of the 8 resulting triangles with three pieces. Two of these pieces bisect the 45° angles formed by the diagonals and frame members. They meet near the center of a small triangle and a third piece is fit with them and into a frame corner that doesn't have a diagonal (see next pics).
 |
| Two triangles in lower right quadrant fitted with more kumiko pieces |
 |
| A close-up of the bottom right corner |
Parts labelled "A" are identical and hopefully you can see how they fit into the 45° corner formed by the frame and diagonal. If all has been done precisely, all 16 "A" pieces will be identical and all 8 "B" pieces will be identical. But I did have to do a little fitting of these parts to their individual locations.
The "A" parts have one end with 22.5° angles on both sides to fit into the 45° corner. Where the two "A" parts meet each other, there is a 67.5° angle trimmed on both sides. This makes them fit each other and form a 90° opening where part "B" is to fit. Part "B" is trimmed with 45° angles on each side of both ends.
And here's what it looked like after fitting the other three quadrants with their "A" and "B" pieces.
 |
| My first kumiko!! |
This thing is not even glued together and it is super strong! All those lap joints and snug fitting infill pieces make for a rigid construct.
Here's a little issue I found. It's at the three-way junction of the two "A" pieces and piece "B".
 |
| It's the joint indicated with the circle |
 |
| Here's a close-up |
Pieces A have the 67.5° angles where they meet. Piece B has 45° angles cut on both sides of both ends. You see that piece B does not seat fully into the the joint of pieces A. To enable it to do so, the 67.5° angle on one side of each A piece would have to be larger than the other side. And one thing that makes kumiko (somewhat) easy is that the angle-cutting jigs make it so easy to cut the exact same angle at the exact same depth on both sides of a stick.
Note: I researched this a bit more and found that people do, in fact, cut more away on one side of the 67.5° pieces to allow part B to seat fully into the joint. I'll have to experiment with using shims to make one facet of the ends of A a little deeper. This will require a slightly longer piece B.
That's all for now - this got way longer than I intended. I'll write more later about another square kumiko design that I made.
This comment has been removed by a blog administrator.
ReplyDelete