Showing posts with label Shop Projects. Show all posts

Wednesday, July 1, 2026

Box for Plow Plane Irons

Until now, I've stored the irons for my wooden plow plane in a roll that gets put in a drawer.  The roll wasn't some multiple-compartment, fancy leather gizmo; it was nothing more than an old kitchen towel.  The irons deserved better, so I made a box for them.

For whatever reason, I often get stuck on design.  I looked online and found a few images of plow plane iron boxes.  They typically were vertical boxes with a lid that hinged to the side and each iron stands on end in its own slot.  While I liked that, I was having a tough time in my head with grain direction of the parts as well as methods of construction.  In the end I decided on a flat-ish box with a horizontal compartment for each iron.  The box has a sliding lid.  It's got 9 compartments; 8 for the set of irons I bought for the plane and an extra for the iron that came with the plane.

Two 10" long sides and a 6" long front and back

Dovetailed and dry fit

1/8" grooves were made top and bottom, starting 1/8" from the edges

Then (8) 1/8" dadoes were cut into the front and back

Cutting dadoes this small can be a real challenge, but it went much quicker after gaining some experience.  I used my homemade mini router plane to get the bottoms to depth.

The bottom of the box fits into the grooves in the sides, front and back.  It's just shy of 1/4" thick, so I rabbeted the edges to fit the grooves.

Getting ready to rabbet using the moving fillister

Here's the box's bottom rabbeted

Here's dry-fitting the bottom

1/8" hardboard dividers in the dry-fitted box

In this picture, you can see that I've cut down the box's front piece to allow the sliding lid to get in its grooves.  It started out the same width as the back for easier marking and cutting during the dovetailing and grooving stages.

Sliding lid

Two more details: the dividers were shaped to allow easier grabbing of the irons, and a thumb catch was carved into the lid to make the box easier to open.

The shaped dividers, with irons in place

Thumb catch on the lid

The glue-up was OK, though I initially messed up - even after a few dry-fits.  The order of putting the components together was key to get it glued up properly.  I gave the box a few coats of shellac on all outside surfaces, with none on the inside.

Here's one last detail.  The front edge of the box's top has a piece of wood glued to its end grain.  This hides the entry grooves and makes the front of the box look nicer.  I realize it a cross grained glue-up, but I've done this before on a similar box which has held up for about five years now.

Glamour shot

And with the lid partially open

Good little project.  The plow plane irons deserved a home of their own.  Now I just have to figure out where the box will live in my cramped shop.

Tuesday, July 16, 2024

Wooden Toolbox, Part 4: Upper Tray, Drawer, and Finishing Up

Last post I had completed the main box.  This time it's on to the upper tray and drawer.  For the tray, I made the depth (front to back) a little more than 1/16" less than the inside dimension of the box.  It's length is about 3" shorter than the inside length of the box.  This was to allow a drill to stand up on the floor of the upper compartment and still be able to put the tray in place.

The 3/8" thick tray components dovetailed

... and test fitted into the box

Made a handle / divider that fits into stopped dadoes in the ends.
The handle is 1/2" thick to add a little comfort when picking it up.

Close-up of one end of the handle / divider

One corner of the tray with cleaned up dovetails

Glued up the dovetails first, then later glued on a 1/8" plywood bottom
with some creative "clamping"

It fits!

I made the height so it would stick up 1/8" from the box upper edges

I just love fitting drawers to openings.  After the drawer front and back were fitted to the opening and the drawer sides to the depth, the drawer was dovetailed together.

Fitting the front into its opening

Fitting the left side and getting its length directly from the box

The parts in relative position

Marking the sides with a triangle

... and the front/back with a triangle.
I sometimes use a double triangle so I don't confuse it with a reference edge mark

Dovetails complete

I had another decision to make.  Do I plow grooves for the 1/8" plywood drawer bottom, or do I glue the bottom to the underside of the drawer?  I did a little test groove in some scrap to help with this.

1/8" groove with some scrap plywood fit in place

First, my 1/8" plow iron is a bit wider than 1/8", and the plywood is a little less than 1/8", so the fit was sloppy.  Second, if I inset the groove 3/16" or 1/4" from the bottom edges, I would lose 5/16" or 3/8" of useable space in the drawer.  So I decided to glue the plywood to the bottom of the drawer.  But since I sized the drawer components precisely, I had to remove the thickness of the plywood from the drawer parts.  On the drawer front I used a rabbet so that the plywood would not be seen with the drawer closed.

Here, I've glued the dovetails together and also glued the bottom 
to the drawer, using the metal toolbox as a clamp again

Then I cut out a bit of the front to form a finger pull

And lastly I could do the final fitting all the way inserted
(before the finger pull I had no way of pulling the drawer back out!)

Added a couple coats of shellac

And here it is partially loaded, ready for work

This was a really fun build.  It's solid as a rock, but a bit heavier than I might have liked.  But that's OK.  It's built for a purpose and I think it'll serve that purpose well.


Wednesday, July 10, 2024

Wooden Toolbox, Part 3: Panels, Shaping and Glue-up

Last time, I ended up with the main carcass like this.

Two ends dovetailed to the bottom, horizontal divider joined to
the ends with multiple 1/2" x 1/2" through mortises and tenons

I decided to fit the front and back panels into grooves.  The front panel is shorter due to the drawer opening below the divider, so grooves went near the front edge of the divider as well as near the front edges of the ends above the divider.  For the back panel, the bottom and ends were grooved near the back edges.

Putting a 5/16 groove near the front edge of the divider

Rabbeting three edges of the front panel -
homemade rabbet plane at left, restored skew rabbet plane right

I didn't get a picture, but to fit the back panel, the toolbox bottom got a groove near the back edge. Later, after the bottom and ends were assembled, the groove showed as a hole (on the outside of the carcass) that I had to fill in.  That is one of the few things about this build that I didn't like - the filler pieces don't match the grain very well and it's fairly obvious (at least to me).

In addition to the groove in the bottom, the ends received grooves near their back edge from bottom to a height equal to that of the grooves for the front panel.  I had laid out the dovetail joints at the bottom corners of the carcass so that the grooves would not interfere with the joints.

The left end.  Note the stopped groove (shallow mortise) on the near edge.
The groove at the far edge goes all the way to the bottom of the end piece.

One further note: I had originally made the horizontal divider as wide as the ends and bottom.  But for the back panel to fit, I cut off 5/8" to allow the inset panel.  When figuring out how much to cut off the divider, I dry-assembled the toolbox after the rear grooves were cut in the ends (and before the back panel was put in place.  I marked with a knife where to cut the divider directly from these grooves.

Once the panels were fitted, I was able to do some shaping on the ends, as well as the handle.  Then a dry assembly showed it was really starting to look like something.  The glue-up followed shortly after a couple rehearsals.

Shaping an end

A first dry assembly

And then with glue and clamps

I ended up adding a couple more clamps after this.  I saw that the bottom dovetails had not quite closed up.  Another clamp and a few hammer blows got them seated.

I also glued strips to the interior of the front and back panels that would support the tray.  These 3/8" x 5/8" strips were positioned so that their top edge was 3 1/4" above the floor of the upper compartment.  That allows 3 1/4" of vertical space below the tray - just enough for me to fit my battery drill in there.

Gluing in the tray support strip.
The wooden block in there was used to set the height of the strip.

Next time I'll write about making the upper tray and the drawer.

Wednesday, July 3, 2024

Wooden Toolbox, Part 2: The main box

As a reminder, this is what I'm working on.

The plan

It's a relief having the design part behind me.  I'm not much of a designer and I'd rather be building stuff.  Like all of my projects, it started with getting stock to size.  I estimate that about 70% of my project time is spent in stock prep.  This is all by hand - but I'm starting to see the day coming when I'll have to rely on a bandsaw to help me.

Resawing a board that will become the front panel

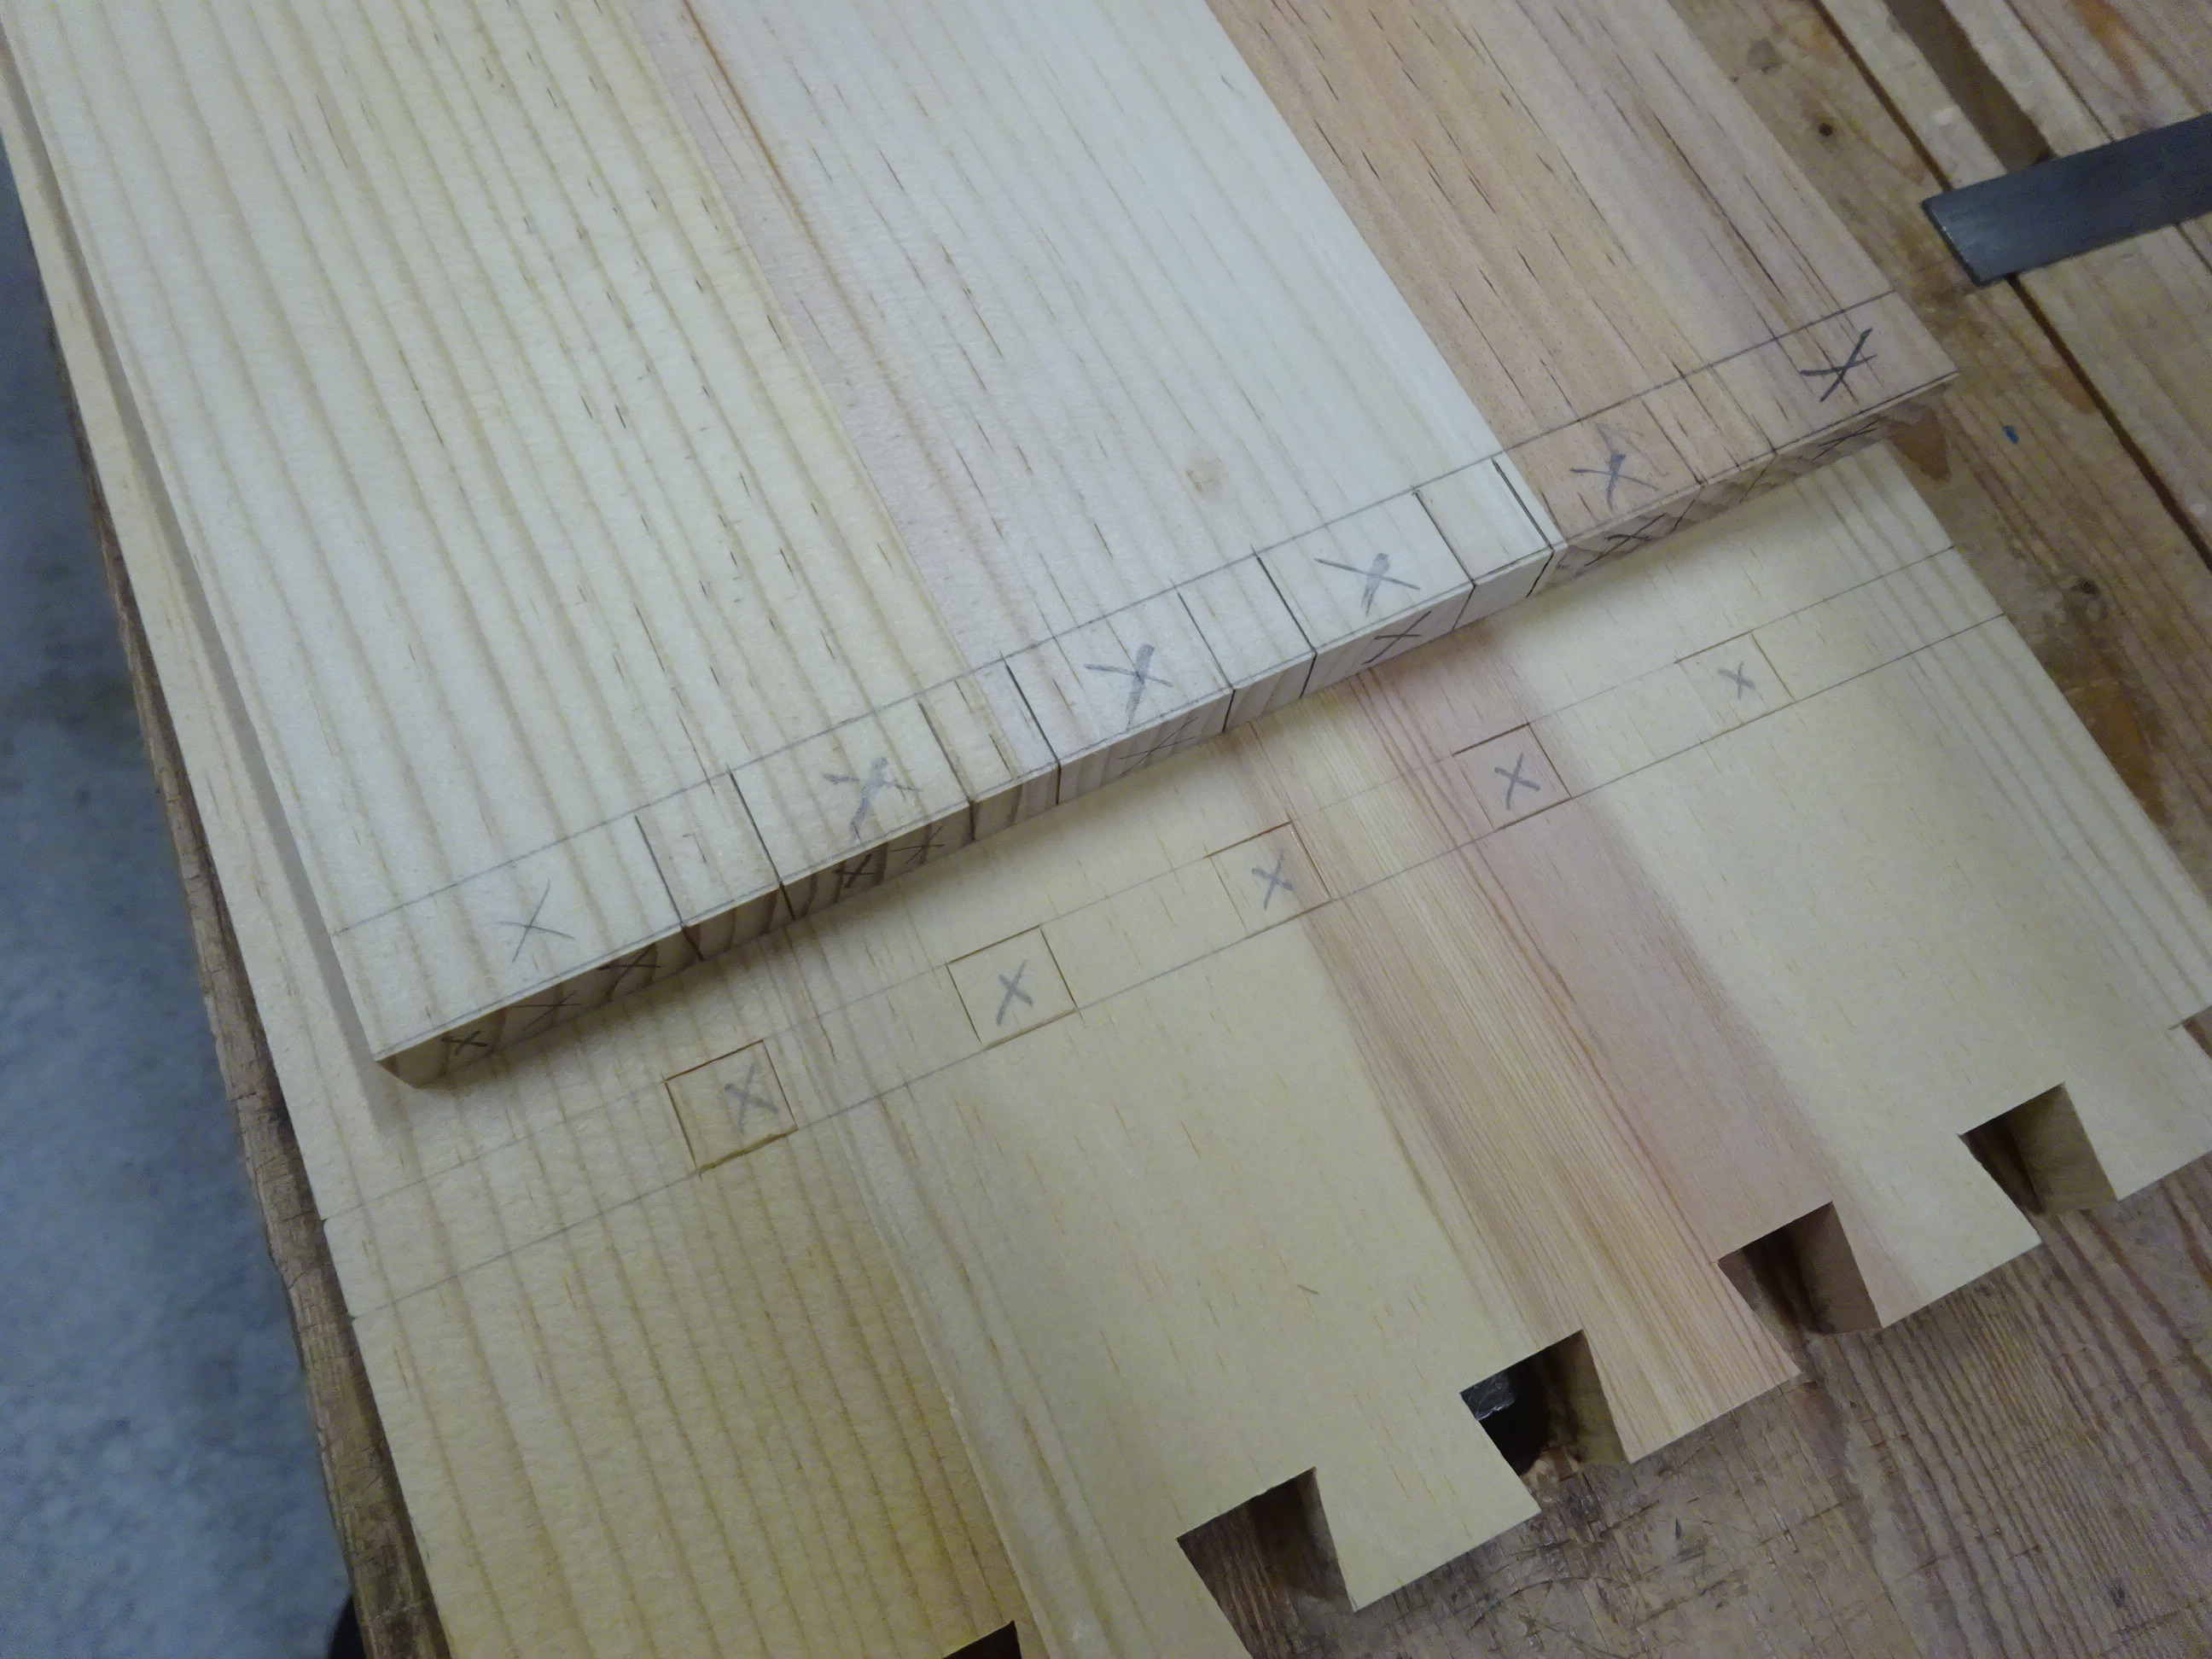
Once the bottom and ends were dimensioned, I started dovetailing.  Tails are on the ends and pins on the bottom to resist coming apart if there is too much weight in the drawer.

Laying out the tails on the end boards

Sawing out the waste

After cleaning up with a freshly sharpened chisel

Marking the pins with pencil before fitting the pieces together

After a test fit, I can tell this pin is too tight by the smeared pencil marks

First corner fitted, after some judicial paring of pins


Joint cleaned up (not yet glued)

Here's the setup I used to clean up the tails and pins.
I rarely use the slot in my benchtop, but it came in handy here.

Next on the list was to fit the horizontal divider.  I took the shoulder lines from the bottom piece, as their shoulders need to be perfectly aligned.

The joint marked out

It might not be evident from the picture, but the sides have five 1/2" x 1/2" mortises marked.  The divider has the matching tenons marked.  Since my marking gauges won't reach as far as I need for this application, I had to get out my panel gauge for the markings further from the reference edge.

After boring and paring the mortises and sawing and chiseling the tenons
a first test fit shows a nice result.

I had left the tenons 1/16" long to be flushed with the surface later, but I thought I'd leave them proud on the finished toolbox.  Not sure it'll go well with the flushed-up dovetails just below, but if I don't like it, I can always flush them up later.

And here's the box (so far) dry assembled.

Bottom and divider assembled with ends

Next time I'll write about fitting the front and back panels, doing some shaping and gluing up the box.