Showing posts with label Boring Tools. Show all posts

Wednesday, August 12, 2026

A Few More New-To-Me Tools

Last post I wrote about buying several tools from the widow of a woodworker who, after several months of grieving, was ready to let go of her husband's tools.  On a separate occasion, I got a few more things from her and this post shows them.

A few more new-to-me items

I already have a pair of mag goggles (though I can't seem to find them right now), but these had an extra lens that pivots in front of the right eye for extra magnification.  This pair does not have a light like my other pair, but it'll be nice to have the extra lens for looking at finer things.  It's already helped me get a better view of cutting edges.

I also already have a set of brad point bits, though my set only has 7 bits - 1/8" to 1/2" by 16ths.  This new set goes from 1/8" to 1/2" in 64ths, and already it has come in handy when I had to drill a 15/32" hole.  The set looks to be in great shape.  They had been used, but probably not too much.

A nice complete set of brad point bits

I had been looking for a circular (or "compass"? - not sure of the correct term) plane for the last year or two.  When I saw this one in the man's collection, I really hoped I could get it.

Stanley #20

View from above the front portion

It's a bit grungy and has some issues, but I'll clean it up and get it working.  Can't wait to try it out.

Finally, I picked up a book that looked interesting.  It's "Shoji and Kumiko Design, Book 1: The Basics", by Desmond King.  I had experimented with Kumiko a few years ago and enjoyed it.  And I recall seeing King's name when I was researching Kumiko at that time.  This book will give me some more information to continue with the techniques.

Desmond King's Book 1 on Shoji and Kumiko

That's all for now.  I've got some tools to clean up, materials to read, and some woodworking to get to.

Wednesday, April 8, 2026

A Fray Brace with Different Style Chuck

When I found this brace a few weeks ago, I grabbed it because I didn't have a 6" brace.  And because it's a Fray.

John S. Fray 6" brace

John S. Fray was in business from the late1850's to 1909 or 1920 (accounts differ), when they were bought by Stanley.  But Stanley continued to use Fray-marked components after the purchase, so it's not clear when this brace was made.  There's some evidence below that it's post-1932.  I'm sure there are some people out there that could nail it down, but I'm not one of them.

THE JOHN S. FRAY CO.

BRIDGEPORT, CONN U.S.A.

The only other marking is this "7" on the ratcheting area, but it's a 6" swing!

I'm not certain, but the handles might be rosewood - I saw examples on the web that had rosewood and some with walnut.  Either way, they're in great shape and I did nothing to clean them up.

The part of this brace that I want to point out is the chuck, or bit-holder.

Jaws opened

Jaws closed

I found a website by George Langford that had a list of patents related to Fray braces.  One of them, applied for in 1928 and granted in 1930 or 1932, shows a bit holder very similar, if not exactly like this one.  That's several years after Stanley had bought Fray.  Apparently it took a long time to use up the Fray parts that they had purchased.

The chuck jaws were like none other I'd seen before.  It is a two-jaw chuck and after wrestling with them for a while, I got them removed from the housing.

Pointing to what I think is an oil port.
Loosening the screw to the right allows the jaws to come free.

The jaws removed and cleaned up

Looking down into the chuck where the jaws go.
The bright spot is part of a threaded section on the inside wall of the knurled outer shaft.

In the picture of the jaws above, you can see a threaded section on the jaws, just next to the leaf springs on the right end.  These engage with inside threads deep inside the chuck.  When the knurled section of the chuck is turned, the chuck pulls the jaws inside and they clamp on the shank of an auger bit and grab it tight.  That little screw on the knurled part of the chuck's housing somehow keeps the jaws in place.  I can't quite see what's going on in there, but the screw does it's job.

Here's another picture looking down inside the chuck while the jaws are in place.  Down in the bottom, there is a recess shaped to accommodate the square tapered shank of an auger bit.

Tough to get a good picture of the recess where an auger bit sits

After a bit is set in that recess, the knurled shaft is turned and the jaws grip tightly on the auger bit.  And I mean it REALLY grabs tight!

Here's a bit tightened in the jaws

If it helps to understand the mechanism, here is a picture from the original patent (thanks to DATAMP and Google Patents).

I hope this pic comes out OK.  It downloaded as a
PNG file rather than JPG

Here's a link to the Patent picture, if the above doesn't show up well in the blog.

The tough thing about this brace is that I can't remove the chuck to clean the innards.  I cleaned what I could with dental tools and small brushes (and I pulled out a lot of crap), then oiled it generously.  It worked as found, but it works more smoothly now.

To clean up the brace, I wire-brushed most of the metal parts fairly lightly just to clean off the grunge.  And I left the wood parts alone - they were already in pretty good shape.

And there she is

It's always nice to see different mechanisms like this.  I don't necessarily get all there is to understand about it.  For example, what are the leaf springs on the ends of the jaws for?  And why is that little screw in the knurled section needed?  Well, it's good to learn about these things anyway.

Thursday, February 12, 2026

Some New (To Me) Tools from the PAST Show

At the end of January, I went to the PAST tool collectors show in Fremont, CA.  Usually I don't come home with anything, but this time I did grab a few things.  I'll show them below, but first let me show this router plane display that one of the guys brought!

A collection of mostly craftsman-made router planes

None of these planes was made by Stanley or Preston or Millers Falls, or any other maker that we typically think of when we think of router planes.  These were mostly user-made tools and they were pretty dang cool.  The longest one was 14" long.

On the same table was also a display of an unusual Disston saw - a #196 "docking" saw.

Disston #196 Docking Saw

There's nothing about it on the Disstonian Institute site, but some other search results indicated it was used for heavy construction, like timber framing or railroad work.  It has crosscut teeth and a heavily breasted tooth line.  Someone at the tool show suggested the name came from its use on the docks, perhaps crosscutting dock boards to length.  The metal handle was interesting - possibly due to its getting rough use.

Anyway, moving on to what I picked up ...

A couple years ago I bought two larger auger bits - 1 1/8" and 1 1/4".  I found a 1 1/2" bit at the show and grabbed it for $10.  It's a Snell's-Jennings bit, no idea when it was made, but it was in near perfect condition.  It was already sharp - both spurs and both cutting lips.  And when I got home and made a test hole I was very impressed at how clean the entry rim was.  This was a great find because I have had some trouble using expansive bits for larger holes.

A beautiful, clean 1 1/2" hole

SNELL'S
JENNINGS'
6

That's a really clean hole!

I'm a sucker for incannel gouges.  One of the sellers had a table where everything was $8.  There was a box filled with chisels of all types and I grabbed four - two small incannel gouges (that will add nicely to the larger ones I've got), a bent gouge, and a 1" bevel edge chisel.

The lineup

The two incannel gouges were from Spear & Jackson and New Haven Edge Tool Co.  I just need to clean and sharpen them and I think they'll be a great addition to my shop.

SPEAR & JACKSON
SHEFFIELD

The S&J was about 9/16" wide

S&J curvature approx 9/16" radius

NEW HAVEN
EDGE TOOL CO.

About 7/16" wide

Curvature of 9/32" radius

The bent gouge is from Ulmia.  It's 13 mm wide with an approximate 1/4" radius curvature.  I don't do much carving, but this one will be a nice addition to the carving set.

ULMIA 

It's about 1/2" wide

This shows the amount of bend

Finally, there was this 1" socket chisel.  I don't need another 1" chisel, but this one is a T. H. Witherby.  If their chisels are as good as I've heard their drawknives are, this will be a real winner!  It's got a little pitting on the flat side, but I think I'll be able to get that out.  I found a good article about Witherby by Brian Welch here.
T. H. WITHERBY
WARRANTED

You can see the pitting here

Not sure why, but I do prefer socket chisels

That's it.  Some nice additions to the shop.  Now I have a little work to do to get them up to working condition.


Wednesday, December 18, 2024

Mohawk Shelburne 10" Ratcheting Brace

This post is about fixing up a hand brace.  For most people reading this, there won't be anything new or ground breaking, so maybe this post is for those who don't already know much about braces.

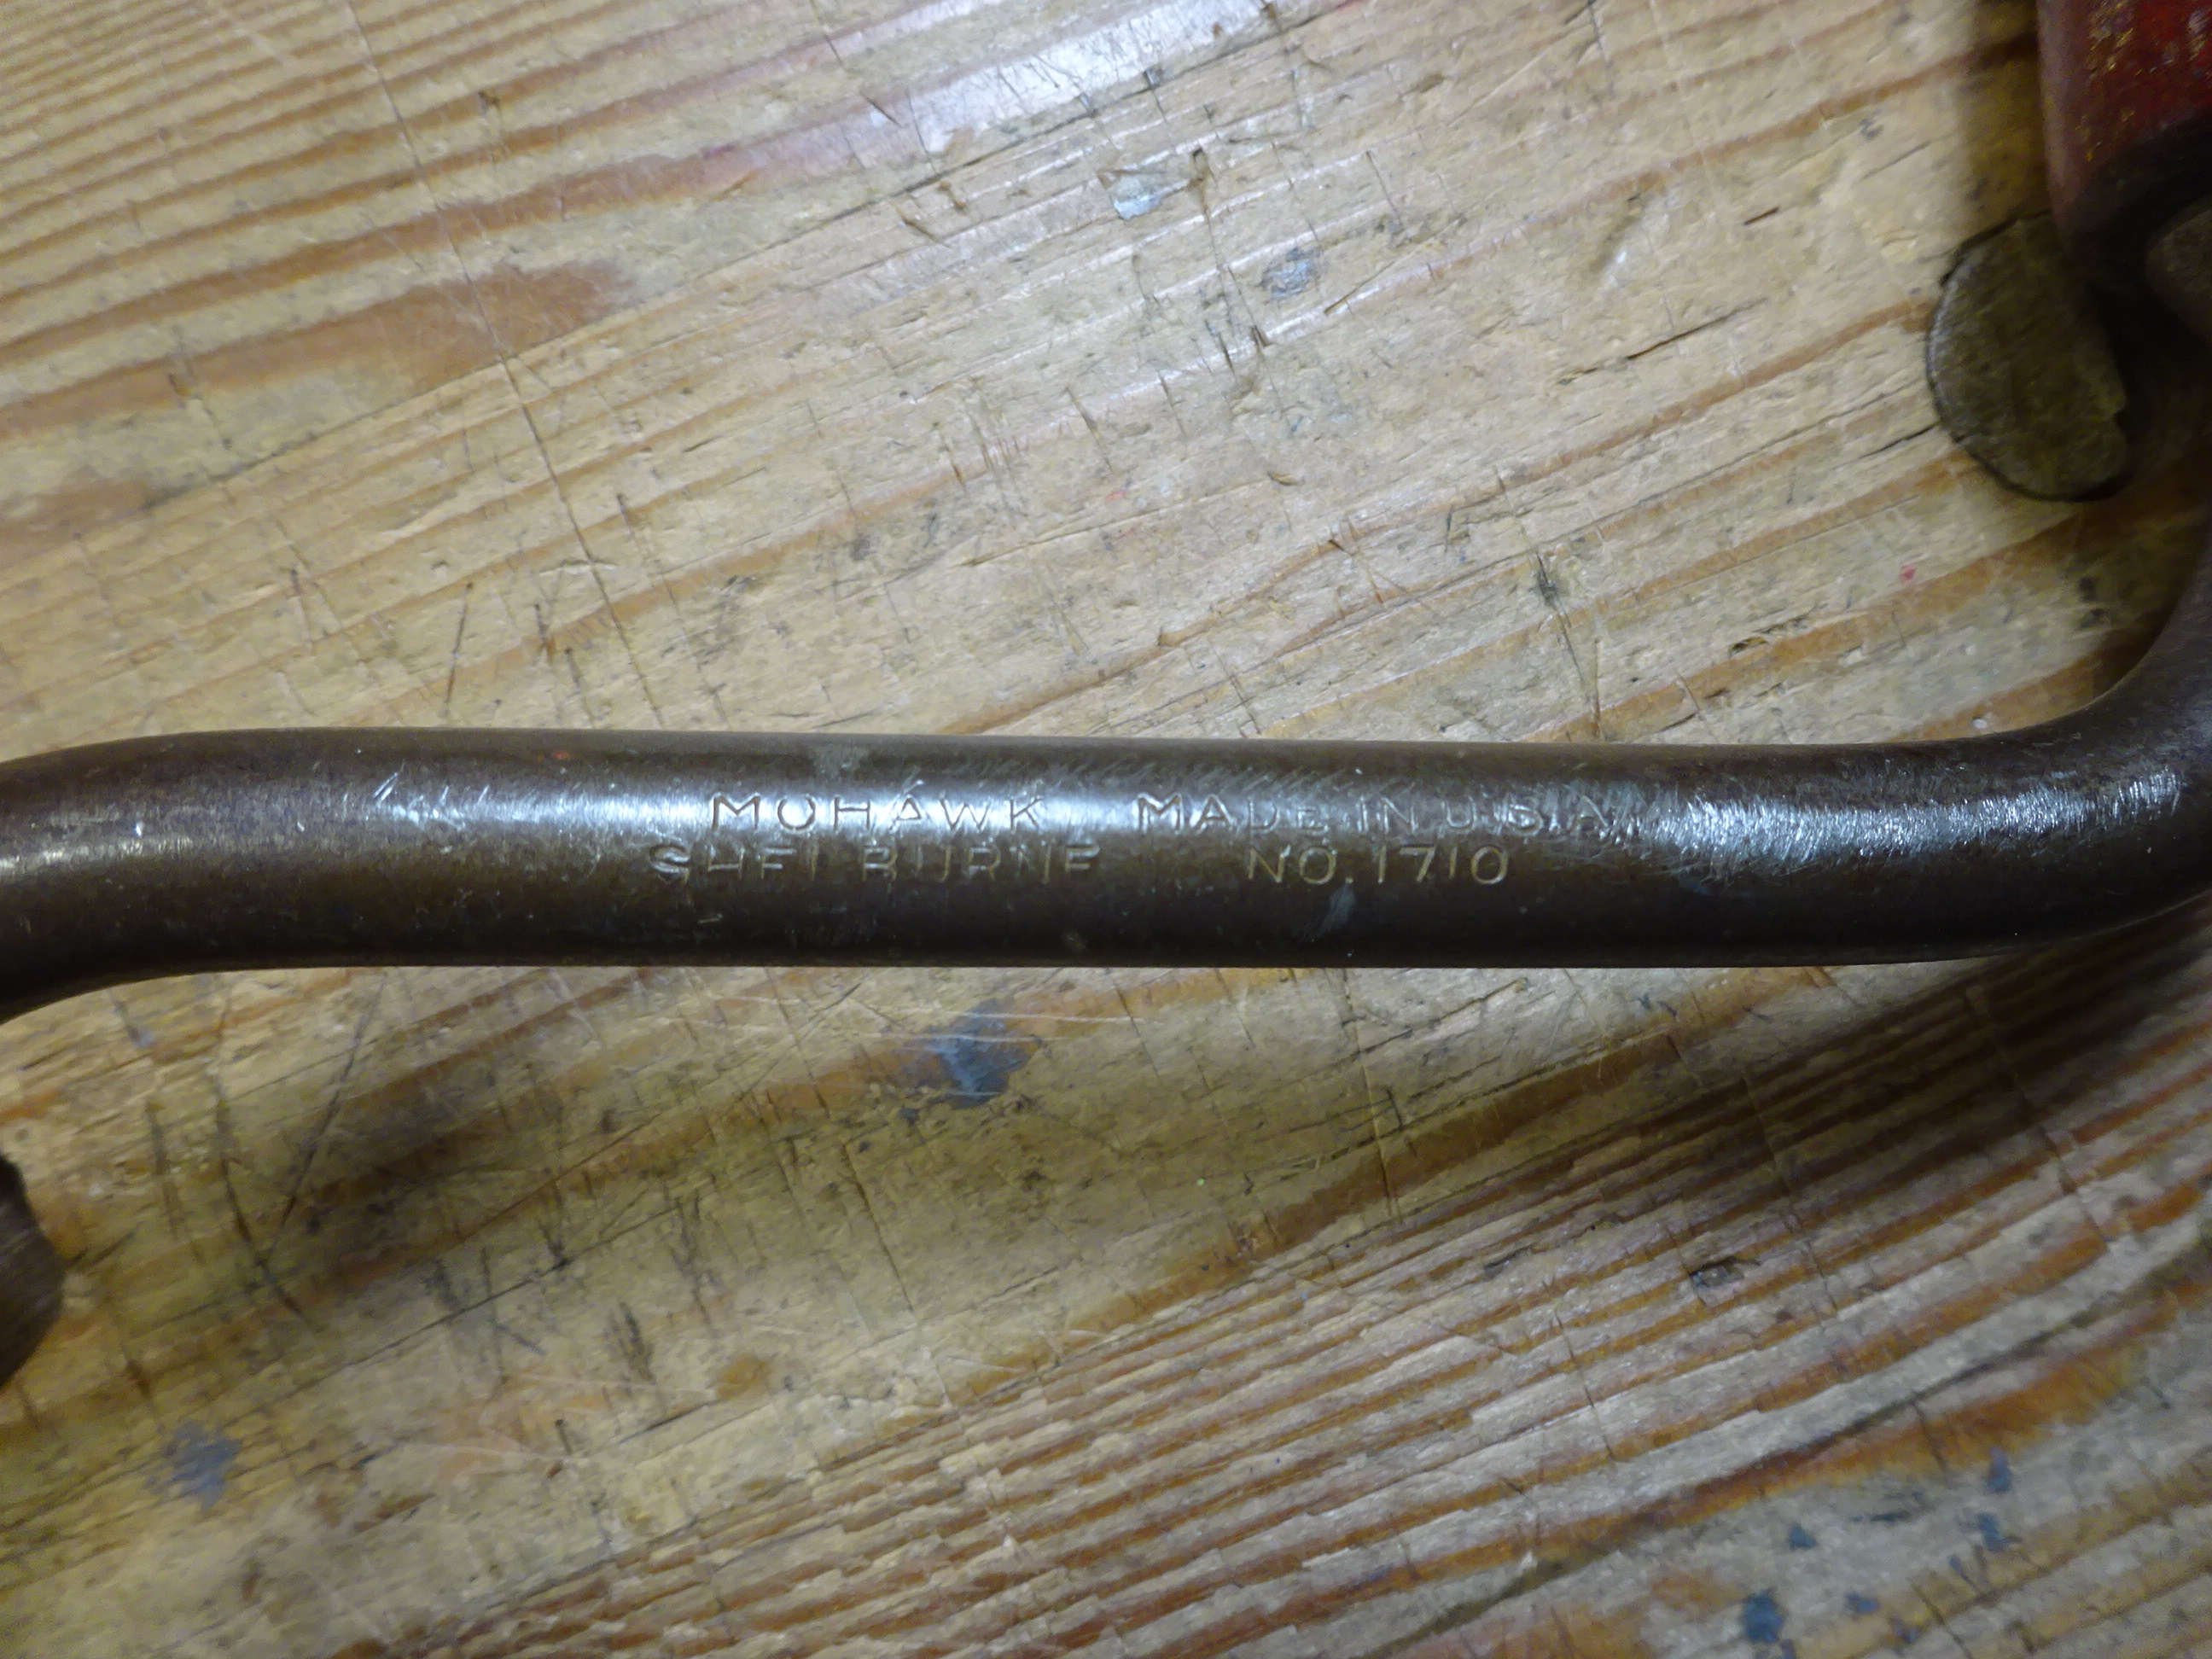
One of the tools I found at the estate sales that I wrote about recently was a 10" ratcheting brace with the inscription "MOHAWK SHELBURNE / MADE IN U.S.A. / NO. 1710".  I didn't know anything about this brand, so I looked into it.

The Mohawk Shelburne No. 1710

The inscription

Info from the Old Tool Heaven website indicates (look about 3/4 down the linked page for the 1700 series) that this was made by Millers Falls as an "economy" line of tools.  This one is likely from the 1935-1948 time period, though I would have thought it was newer than that based on its condition.  It was a little rusty, but it cleaned up easily and is in great shape.  For an "economy" brace, this thing is built very solidly.

The first thing I did for this brace was to sand lightly (about 400 grit paper) all the surfaces to remove rust.  Fortunately it didn't need much.  I also used some 00 and 0000 steel wool and a wire wheel in a drill to clean things up.

Well, that looks a lot nicer!

The jaws that hold an auger bit need to be able to slide easily inside the shell.  I have skinny fingers and can fit one inside the shell with some fine sandpaper or steel wool to clean up the forward (conical) part of the inside of the shell.  If you've got fat fingers, use a padded screwdriver or something similar.

The shell and jaws

Looking from back end of the shell, note the shiny, smooth front conical portion
on the inside.  That's where the jaws need to slide.

Pointer shows where to get a nice smooth surface for the jaws to slide well in the shell

After cleaning up these parts, I gave them both a little oil to guard against rust and ensure they slide easily against each other.

Next is to clean up the threads on the inside of the shell and on the brace's main body where the shell screws on.  A brass brush or toothbrush works well here.  But when the dirt and gunk are a little heavier, then a pointed tool (like in the previous picture) can help clean them up.  A string can also be used to help clean between the external threads.

Clean threads allow the shell to screws on easily

The ratcheting mechanism is next.  For this brace, I shot some WD40 in all the joints to loosen up any crud.  Work the forward and reverse mechanism to loosen any dirt underneath it, and then spin the external threaded area in both directions to ensure the lubricant gets spread to all locations.

Here's the forward / reverse mechanism ...

... and the ratchet mechanism

So far I have not had the courage to do it, but if the ratcheting was not working (or working very poorly), you can knock out some pins to take it apart.

I think these two pins hold the ratcheting "pawls" in place

There's another pin here for disassembly of the ratcheting gear

I shook loose and wiped away as much WD40 as I could and added several drops of oil to keep things in nice working order.

Now for the handle - not sure what to call the rear handle, but that one.  I noticed early on the ball bearings that are used.  You can see them in the next picture.  If this wasn't already in good condition, I could have taken it all apart to clean the bearing race.  As it was, I just gave everything a good oiling and put it back together.

In this pic taken pre-rust removal, you can se the ball bearings

Under the handle, there are three screws, ...


... but these aren't the only thing holding the wood handle to the base.
Note the threads that the wood handle screws onto.

If I wanted to access the ball bearings, I could remove this C-clip

I opted not to scrape and refinish the two handles.  They were in pretty good shape already.  Not that they couldn't use some new finish - it just wasn't that urgent.

And that's it.  There's not too much involved in cleaning up a brace, especially one that is already in pretty good working order.

All cleaned up and ready to go

Catch you all next time.