This drawknife was thrown in for free when I bought the Millers Falls #67 router plane a few weeks ago. It had a lot of pitting, but I took it to see if it could be brought back to life.
 |
| New-to-me drawknife |
There wasn't much in the way of markings. I wish I could have made out the maker's name.
 |
| "9 IN" |
 |
| Unfortunately the metal was too corroded to read the maker mark. Looks like the last few letters are "...WICO", or "...W CO", or maybe "... NICO" |
There was a LOT of pitting on this knife.
 |
| Bevel side |
 |
| Flat side |
The blade was bent as well as twisted. But it was surprisingly easy to fix those things. I held the blade in a vise and bent and twisted it back into much better condition.
Here's something interesting. When I started cleaning up the metal, I filed some grunge away on the side of the blade and was surprised at what I saw.
 |
| It looks similar to very old plane irons that have a thin piece of harder steel forge welded to softer iron |
I've never heard of this technique used for drawknife blades. It's probably just a single piece of steel. But there might be more evidence later when I've sharpened the bevel.
On to sharpening. I used the hand-crank grinder to grind a new bevel. A fair amount of metal had to be removed as there were a lot of nicks in the edge.
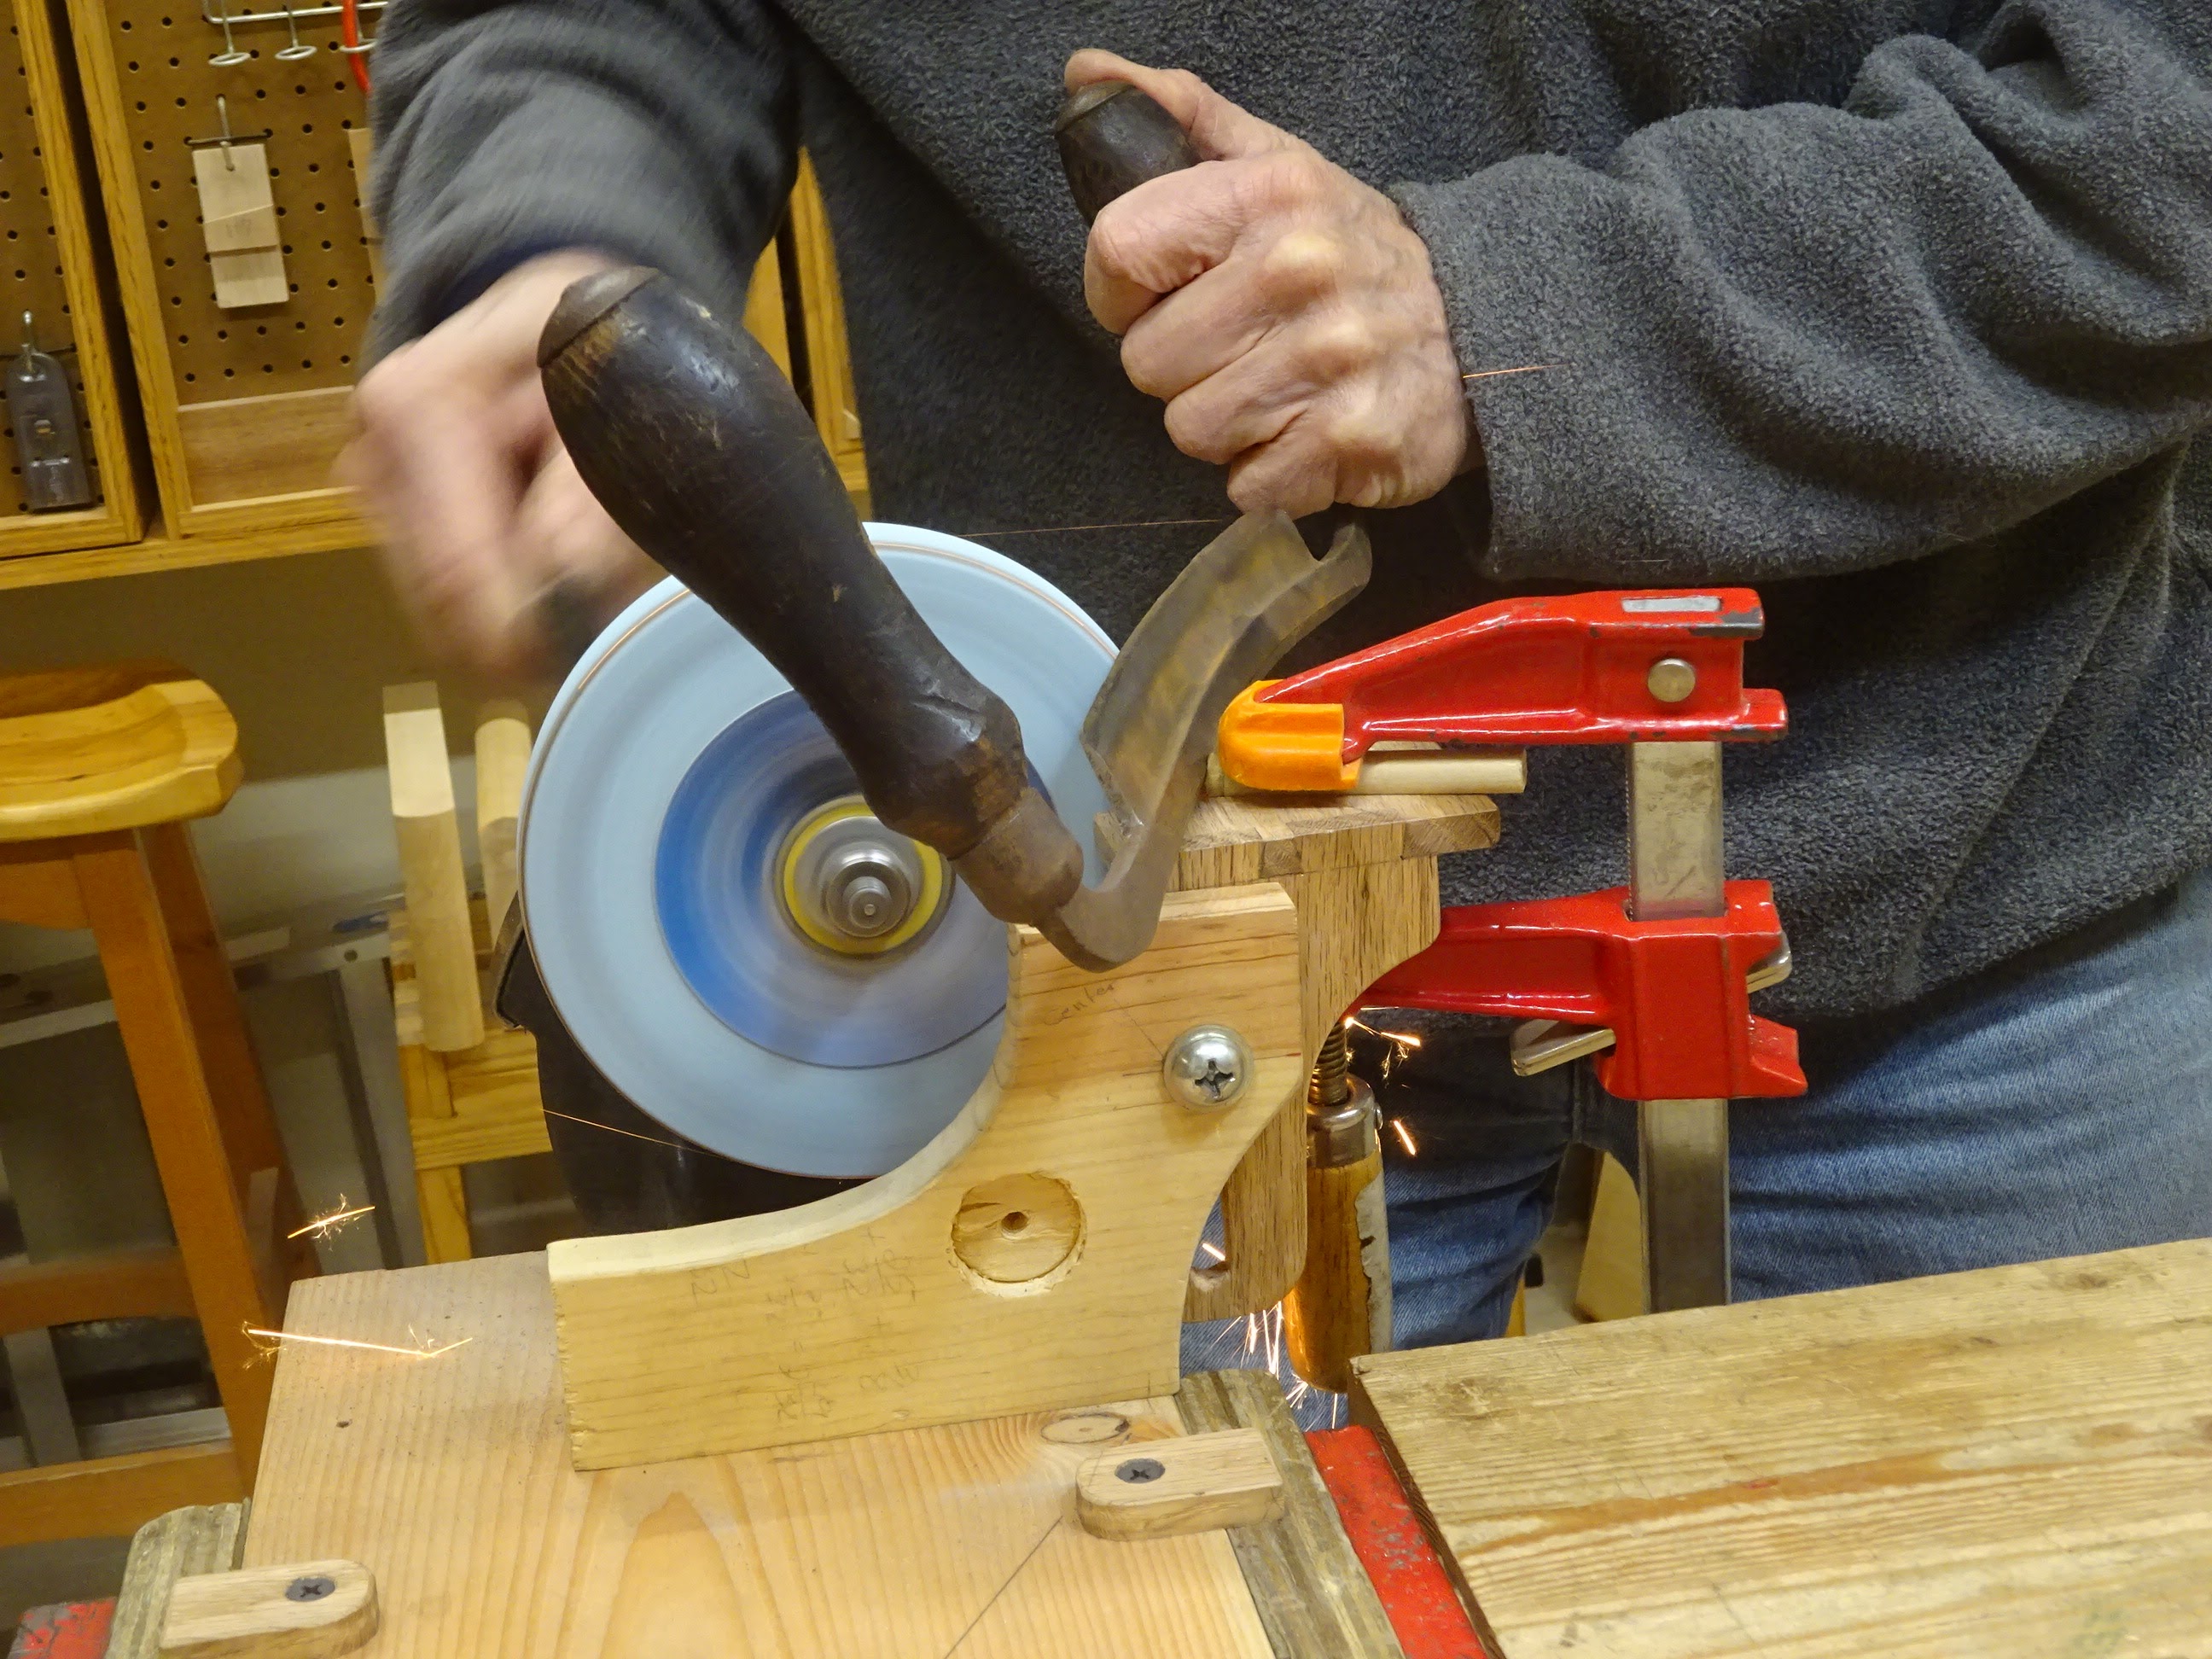 |
| Action shot of grinding. Look at those sparks. Ooooh, sparks ... |
In the picture, a clamp is holding a 3/8" dowel to the tool rest. The dowel is flattened on the bottom (so it doesn't roll) and has a notch on top near the front where the back of the knife rests. That allowed me to adjust how the bevel was presented to the grinding wheel. It was important due to the curvature of the knife's 9-inch edge.
 |
| Also ground the back to create a slight hollow |
 |
| The slight hollow made it easier and quicker to flatten the back with sandpaper wrapped around a block |
To sharpen the bevel, I clamped the knife to the workbench, raised up on a couple of sticks. Then used the sandpaper and block again to work the bevel. I went through several grits, ending with 600 (I think).
 |
| Sanding the bevel at about 25°. Later gave it a secondary bevel of about 30° |
 |
| Stropped the bevel and back to get a nice edge |
OK, the following pictures show evidence of a forge-welded blade. If anybody knows whether or not this was ever done with drawknives please let me know in the comments.
 |
| See that "seam" in the bevel? |
 |
| Closer picture: could that be the seam between hard steel and soft iron? |
Anyway, now I've got another working drawknife. And it was thrown in for free with the router plane. Can't complain.
Update: This week, I got a chance to use this drawknife and it cuts beautifully and feels great in the hands!!
Drawknives are one of my favorite tools! enjoy it!
ReplyDeleteThanks, Antony. This drawknife turned out far better than I thought it might. So far I'm enjoying it very much.
DeleteMaybe a vintage Two cherries drawknife? The logo looks like it.
ReplyDeleteThanks for the input. I learned something today - I thought Two Cherries was a relatively new tool maker, but I guess they've been around a long time. Still, I can't see how their name or logo fits the "WICO" that I saw on the drawknife.
DeleteI have one with harden insert, also no name. Maybe blacksmith made.
ReplyDeleteI also have one with hard insert forged in, with no maker marks.I think it might be blacksmith made. Works excellent for hogging material.
ReplyDeleteThanks for that, Jim. Knowing that, I feel a little more confident that this one is forge welded.
Delete