Tuesday, September 20, 2016

A Bathroom Cabinet, Part 2: Joinery and Shaping

After getting all the stock prepared and cut to final dimensions (and letting my body recover from that), it was on to joinery.  The cabinet will be put together with dadoes and rabbets.  About two thirds into this stage I realized I had made a big mistake in the order of layout.  I was very fortunate that things went together just right.  I'll get to that later.

The top was to get two stopped dadoes to receive the sides, and a rabbet at the back for the piece that will be used to mount it to the wall.  The dadoes were straight forward and went smoothly, though slowly.  I was being very careful not to blow out the way-to-thin wall near the edge.
Dadoes in underside of top complete
Just a quarter inch left at end of board - yikes!
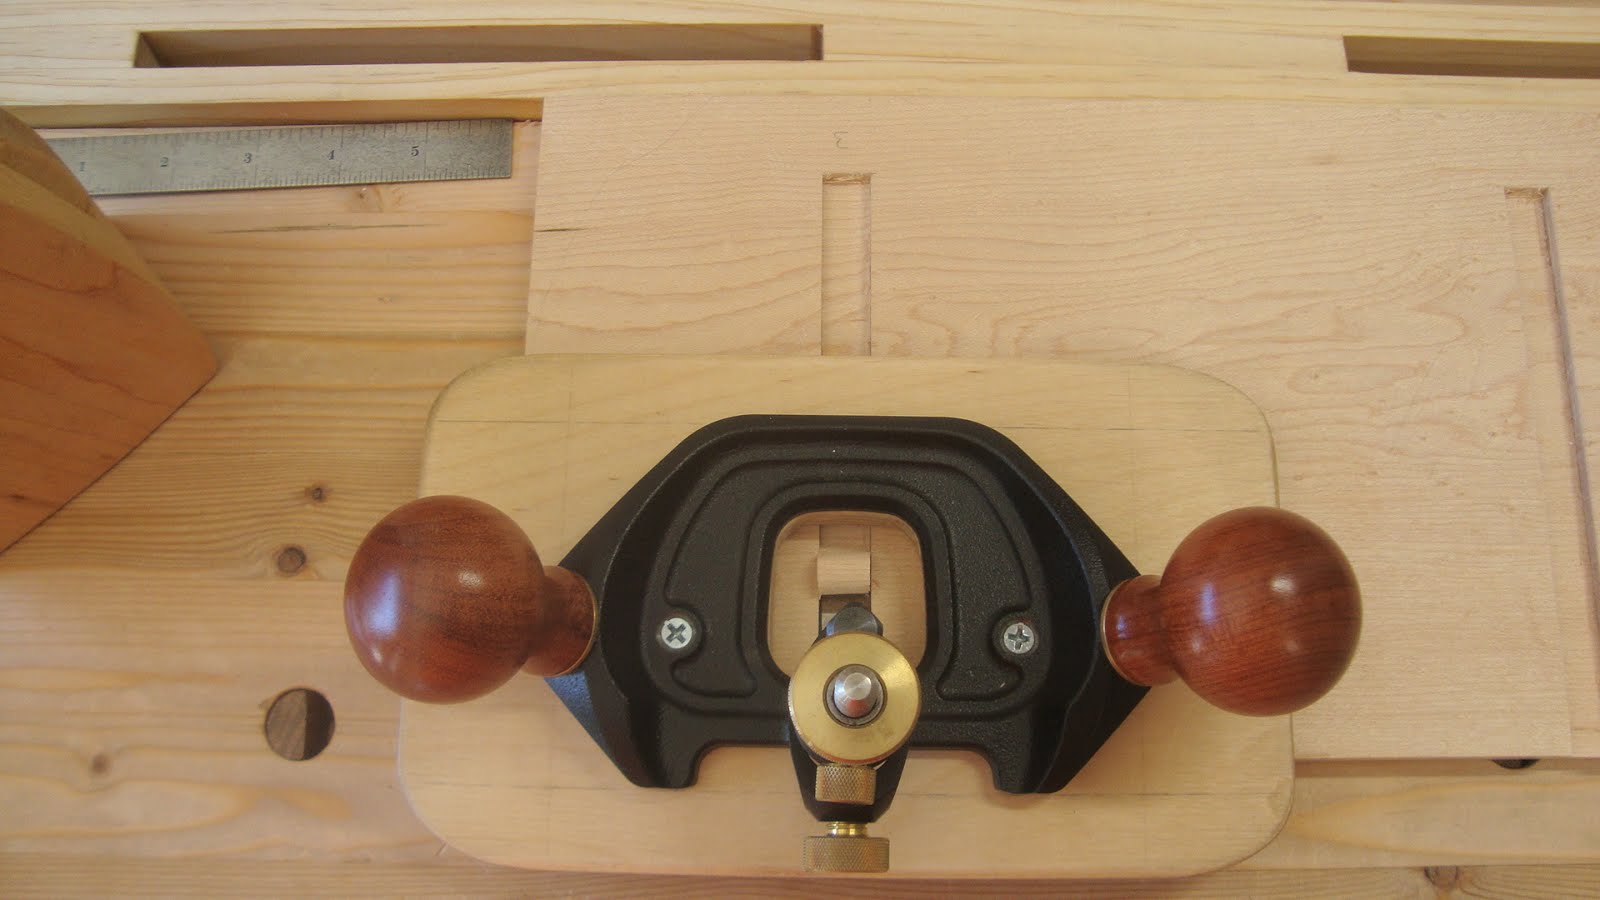
These dadoes are stopped about an inch from the front of the top so the joints won't show.  BTW, the reason my sides and shelves are about 17/32" thick is so I can use my 1/2" router plane iron in these dadoes.

The rabbet across the back end of the top was interesting.  I couldn't use a rabbet plane because the design has that thin edge (see above picture) extending all the way to the back.
Started the rabbet by chiseling a chamfer (bevel up!)
Then started chopping with chisel ...
Chopping and paring, chopping and paring ...
More paring
Finally I went right into my gauge lines and pared the rabbet square.  Touched it up a tiny bit with a router plane set to the same depth as the dadoes.
Rabbet finalized
The sides received dadoes for each of the two shelves.
Chopping close to the knife line - about 1 mm away
Removing waste with router plane
When the 1/4" deep dadoes were about two-thirds down, I used the knife in the corners rather than the chisel to sever fibers to be able to continue routing to depth.

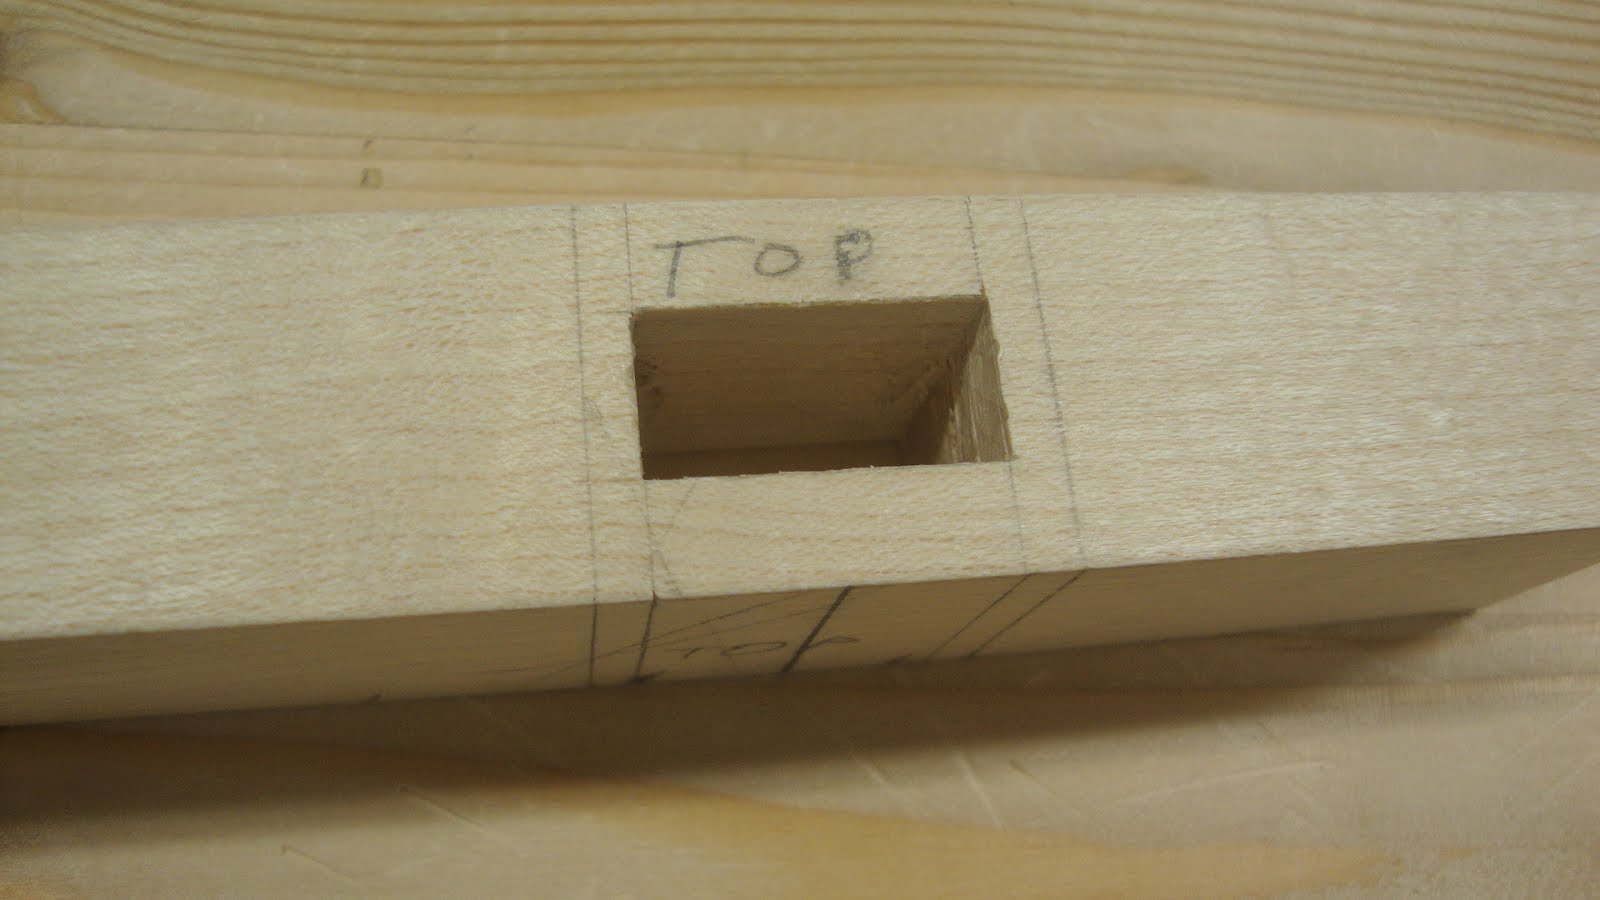
The sides also needed a notch cut out to fit with the stopped dadoes in the top, as well as two rabbets for the back members to fit in.  These rabbets were made with chisel and mallet.  I did make a couple saw cuts near the layout lines to avoid removing any "keeper" wood.
Notch in side to mate with stopped dado
Side joinery complete
With this done, a dry fit was needed.  Just a few strokes of a plane were necessary to get a good fit of the sides and shelves into their dadoes.
Cabinet joinery fitted
HERE IS WHERE I REALIZED I LUCKED OUT!!!    With the shelves fitted into the sides, I added the top (which already had it's dadoes and rabbet cut) to the assembly.  In retrospect I should not have done the joinery in the top until the lower assembly was completed.  That way I could take the sides/shelves assembly and directly mark the extents of the sides on the top, and there could be no error in placement of the dadoes in the top.  I had marked my dadoes in the top by measurements from the drawing, which can be a fatal mistake.

This is one of the most important lessons in woodworking.  Measurements are fine for rough work, but when laying out joinery you should use actual work pieces for marking.

The next thing was shaping the sides.  I needed to mark a 5" radius arc on the sides and to do this I used a large compass that I made several years ago.
Large compass
Didn't get any progress pics, but with the line drawn, I sawed, planed, spokeshaved, scraped and sanded the curves.
Curves added at bottom of sides
Now was the time to do the part I've been thinking about all along - shaping the edges of the top.  Here's the profile I drew up in Sketchup.
Top edge profile that I'm aiming for
I started by laying out several lines that I would plane to.  On the top, a line 1/16" from the edge.
On the top, 1/16" from the edge
On the bottom, 1/8" from the edge
On edges, a centerline (3/8").  Later added a 3/16" line on edges from top surface.
Note also in the above picture that I used a cutoff from a side or shelf to fill the dado to protect it when planing the profile.  I REALLY didn't want to blow out the thin dado wall at this stage!

And here's the profile that I'm aiming for marked on the board.
Profile marked
I started by planing the end grain edges, so I clamped a piece on the far end to avoid any spelching.
Spelch protection clamped on left side
I started by planing the convex portion of the profile with a #4 smoother.
Convex curve at upper left done, concave at upper right started
On the upper right, I started by planing a straight chamfer to remove most of the waste.  When I was close to the lines, I got out the moulding planes I made last year.
A #6 (6/16" radius) and #8 (8/16" radius) round moulding plane
I haven't really used these since I made them, but they worked very nicely.
Working the hollow with a "round" plane
I'd really like to get Bickford's book "Mouldings in Practice" and sometime soon I will.  I think I could learn a lot about creating mouldings.
Almost there ...
Finished with a little sanding to refine and even out the surface
And here it is.  I'm totally stoked about this!!  I've done close to zero edge profiling and this is a real confidence booster.
The profile done
Another view
So here it is complete minus a little scraping and finishing.
Looking good!
Next up: some scraping and applying a finish.  I'll probably be using a poly or poly/oil mix.  But that will wait until next week - we're heading out for a camping trip in the Eastern Sierra and I've got a lot of preparation to do.

Friday, September 16, 2016

A Bathroom Cabinet, Part 1: Design and Stock Prep

We recently had the upstairs second bathroom renovated and I volunteered to make a wall cabinet.  It's tough to get a decent picture due to the size of the room, but here goes.
Maple sink cabinet, empty wall above toilet
From the other side ...
Some bare real estate above toilet
The space available dictated the size of the cabinet.  My wife wanted the height, including items that may be placed on top of the cabinet, to be about the same as the mirror height.  The width was to be close to that of the toilet's water tank.  Overall the cabinet was to be close to 18" x 18".

My wife looked on the internet for some ideas of what she wanted.  She would find something and I would draw my rendition on Sketchup.  We went a few rounds on this until finally settling on a design she liked.  The first two designs were clearly different from the last two.
Version 1: three shelves
Version 2: two shelves
She had some specific height requirements for the lower shelf, so only two shelves would fit in this configuration.  Then she found some other things on the internet and the next design mimics that.
Version 3: can use the top as a third shelf
Finally, she decided she didn't like the side slats, so the sides became solid.  And I changed the profile of the edges around the top.
Version 4: This looks better
Another view showing the hooks she wants below the lower shelf.
View from below
The sides will be housed in dadoes in the top and the shelves will be housed in dadoes in the sides.  The upper back piece that will be used for hanging the cabinet.  Combined with the lower back piece, these will also add some racking resistance.  The two back pieces will fit into rabbets.

There is something I'm concerned about - the dadoes in the underside of the top will be only 1/4" from the edges.
Rear view of top of cabinet with dadoes and rabbet
I'll have to be very careful cutting these as the 1/4" left on the edge can easily split off.  (OK, they're already successfully cut, but if I had to do this over I'd make the top wider or move the sides in another 1/4").

I had a couple 10-foot maple boards in storage and will be using one for this.  Unfortunately they are a full 1" thick, so I had a lot of planing to do.  I started by breaking them down to more manageable sizes using my Bill Schenher split-top saw bench.
Cross-cutting
Ripping with the aid of the split in the top of the saw bench
A couple of rough pieces up on the bench
Parts cut to rough shape, stacked and stickered for the weekend
After letting the wood acclimate to my shop for a few days, I started planing.  The top will be 3/4" thick, but all other pieces will be just over 1/2".  Sure wish I had resaw capability of some kind - either a bandsaw or a big frame saw.  Someday I'll make a frame saw from a Blackburn Tools kit.  In the mean time, I made plenty of shavings for Misty to play in.
Misty inspecting the shavings - "Hey, what was that outside?"
The white bag on the left is stuffed tight with shavings, too.

Anyway, my right palm was bruised a little and some blisters were starting on the fingers with all the planing.  I tend to grip the plane tote with a death grip when working hard.  After that my hand feels (and looks) like something from a horror movie.  I ended up altering my grip for some operations to ease the pressure.  When planing across grain using a scrub plane I eased up on the grip like in this picture.
The pushing grip - watch out for the pinky finger, though
And, yes, that's masking tape on one finger to keep blisters from forming.  I got the top to about 13/16" thick and all other parts to 5/8" and let them sit overnight.  Turned out to be a good idea as the narrower boards cupped a little by the next day.
Stacked and stickered again
I did that again the next day, bringing the thinner parts to 17/32".  And I again needed to fix a little cup after letting them sit overnight!

Next time: joinery and shaping

Wednesday, September 7, 2016

A Small Wooden Hammer

A few years ago I made myself a large mallet from maple and that thing has been great.  The head is laminated from three layers of 1" thick material.  But sometimes I find a need for a smaller wooden hammer, for example, when tapping the wedge of moulding planes (not that I use them much).

So I squared up two pieces of maple and marked out some joinery.
Already looks a little like a hammer
Tenon on end of handle
Mortise on head
I've been trying a mortise-chopping technique that I read about on Dennis Laney's excellent blog "A Woodworker's Musings".  He suggests to line up the board with your eye so you can better tell whether you are chopping vertically.  The following photo shows the alignment.
Length of mortise aligned with the chopper's eye
I do find that this helps me with chopping vertically, but I have a tougher time holding the chisel comfortably and seeing my end lines.  Anyway, after chopping from top and bottom, meeting in the middle, the mortise was made.
Nice and square with clean walls
This mortise is square now, but later I angled the mortise end walls for wedging the tenon.  Pencil lines in the picture above show the extent of the tenon shoulders and those lines are 1/8" from the ends of the mortise.  Later I made the mortise wider by 1/8" (1/16" on each side) on the top.

Then to the handle.  After sawing the tenon cheeks ...
Cheeks sawn, ready to saw the ends
... I did a dry fit and all looked good.
You can see the extra space for the wedges
Before gluing anything together  I wanted to do the shaping of the handle and the bottom of the head.
I used a small ball peen hammer as a model for the handle shape, made cardboard templates and transferred the shape to the wood.
Shape for the thinner aspect of the handle marked out
And for the thicker aspect
I cut some relief cuts with a crosscut saw, then used chisel and spokeshave to get roughly to the lines.
Handle shape roughed out
Then spoke shaved the corners and scraped and sanded for a smooth feel.
Smooth
I also did a little shaping on the underside of the head.  With that done it was time to glue up and wedge the joint.  I had some oak wedges from a prior project that worked fine.  I fine tuned the width of the wedges by swiping the wedge's edge across the sole of a #4 plane held upside down.
Cooking ...
The next day I cleaned up the joint.  I didn't need to make it look so nice (because of the subsequent shaping), but I just love to look at the joint cleaned up.
All cleaned up
Then it was on to shaping the top of the head.  It was a challenge clamping it in the vise and having enough room to plane the edges from square to round.  But round it got.  Then I chamfered around the business ends.
Head rounded and ends chamfered
The finished and shaped joint
Finally I gave it a couple coats of oil and let it dry.
The completed hammer, with hanging hole
And here it is in it's new home under the bench, hanging out next to it's big brother, Bruno.
Hanging out in the dark
Fun little project.  And I hope it proves useful next time I need to hammer something made of wood without damaging it.