The seat on the original chair had a circular area that was excavated to fit a small bum. For my chair, I used a compass to draw a circle centered laterally and roughly centered between the front edge of the seat and the front of the spindles. It was probably a 4 1/2" radius, but I didn't record it. Then I drilled a 1/4" deep hole in the center as a depth to shoot for.
 |
| Laid out a circle, drilled a 1/4" deep hole in center |
Several years ago, I made a little compass plane - probably the first plane I ever made - and I used it to plane down to depth.
 |
| Used a compass plane to hollow out the seat |
 |
| Down to depth |
I didn't get any picture in progress, but shaping the perimeter of the seat was fairly quick work using a saw, chisels, spokeshave and rasps/files.
 |
| The seat fully shaped |
There were a couple features that I copied from the original chair to add to the comfort of the sitter. First, forward of the bum depression, the top of the seat gently curves down to about 1/8" depth at the front. Then, the front edge was rounded over a bit more to ease the pressure point on the hamstrings.
OK, now ready for glue-up. First was a couple of dry runs. I marked on the legs where they intersect with top and bottom surfaces of the seat. This allowed me to know when the leg was fully inserted during glue-up. The lower mark also served as a depth line for a saw kerf for a wedge.
 |
| Lines showing where the leg meets the bottom of the seat |
I worked with the undercarriage first, using hide glue in case I (or someone else in the future) needed to take the joint apart. With the legs seated to the marked lines, wedges were glued and tapped in just until they seemed solid - no further.
 |
| Undercarriage glued up |
Next was the seat back. The two outer spindles were housed in through mortises in the seat and these were wedged also. The three center spindles were simply glued into their 1/2" deep mortises. To keep the spindles and posts properly aligned while the glue was setting, I installed the crest rail without glue.
 |
| An outside spindle (post) glued and wedged in its mortise |
Later when the glue had set, I flushed the through joints and they really looked nice.
 |
| A leg joint flushed at top of seat |
 |
| Joints flushed |
 |
| Also flushed the outside spindle (posts) joints on the underside of the seat |
Gluing the crest rail onto the tops of the spindles and posts was fairly uneventful. Having waited until the joints at seat level had dried, I worried less about driving the posts deeper in their seat mortises while tapping the crest rail onto the spindles / posts.
At some point - I don't recall if I did this before or after glue-up - I leveled the feet, and cut about 3/8" off the back feet to give the chair a more comfortable backward lean.
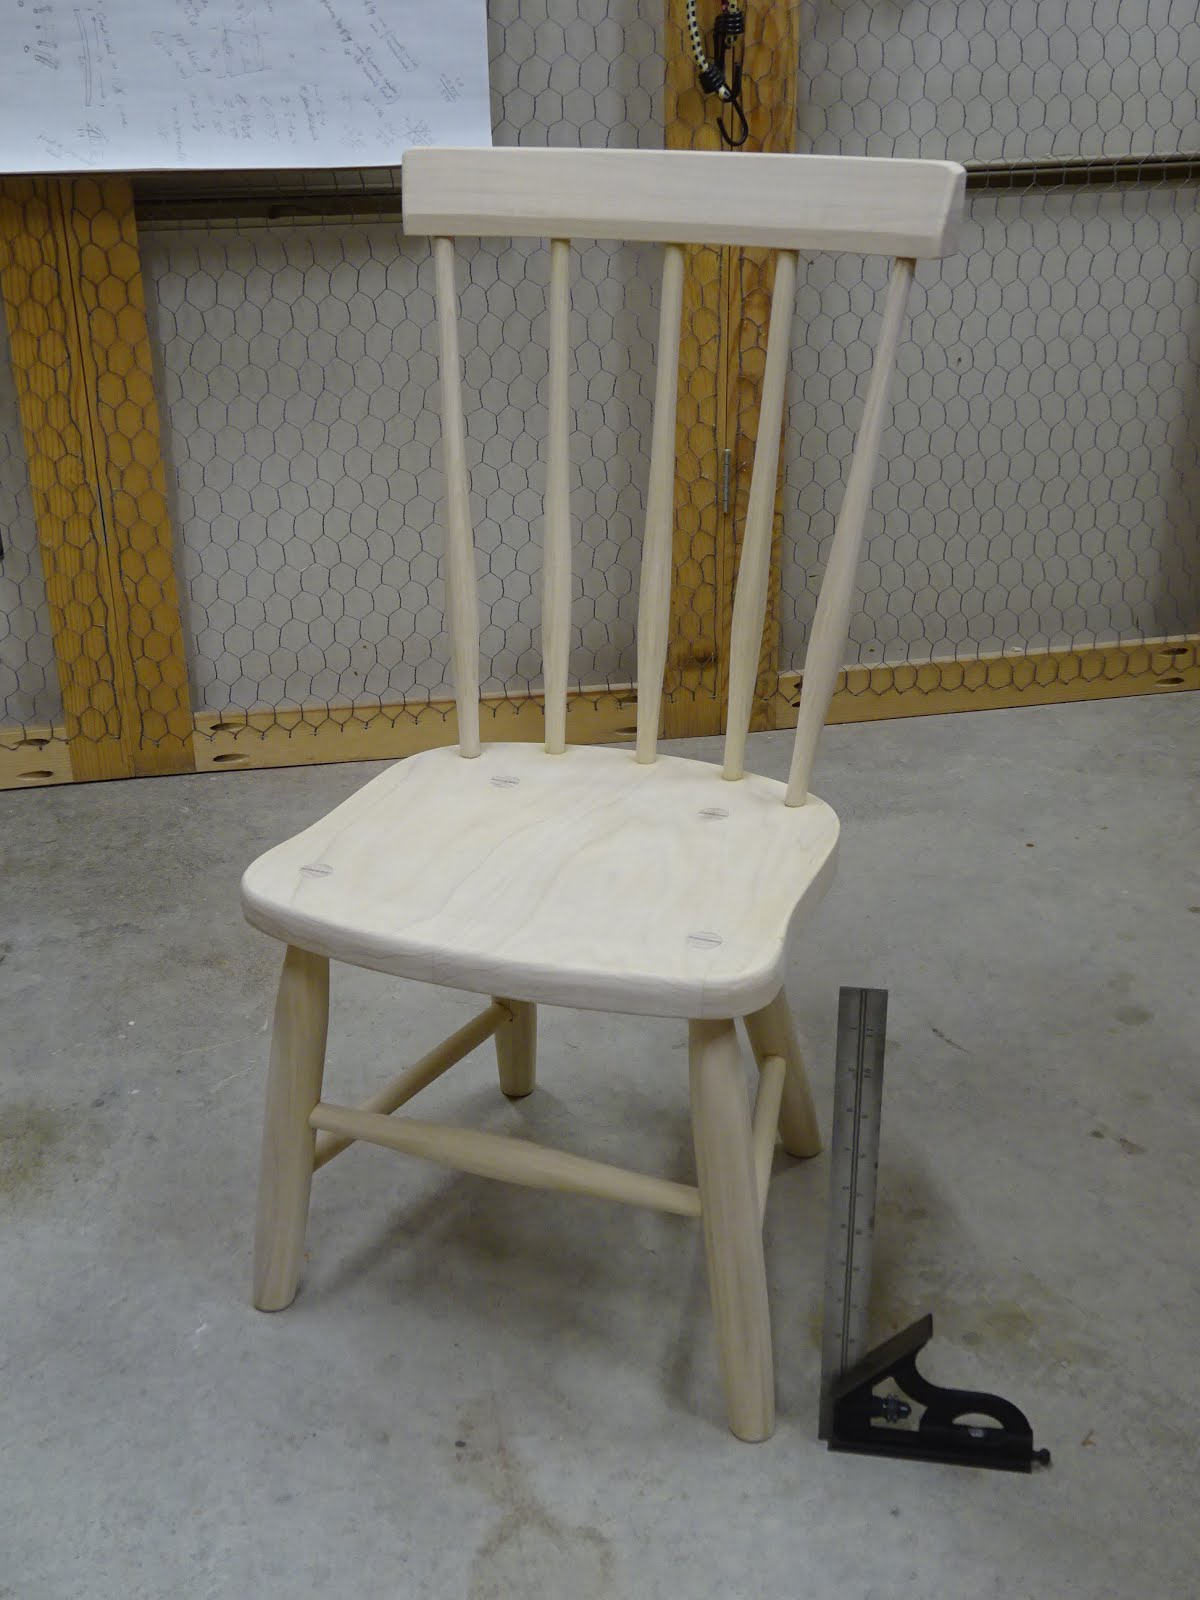
And there she is, all ready for a finish.
 |
| Woodworking concluded |
I've never used milk paint before, but wanted to try it out. Mike Dunbar has an
excellent video on using this paint and I watched it a couple times before beginning. I ordered some milk paint from The Real Milk Paint Co. (no affiliation, blah, blah). It comes in powder form and you mix it with water to prepare the paint. What they don't really make clear enough is that a thick foam forms on top that seems to get in the way of progress. I probably didn't wait long enough for the foam to settle down after mixing it up.
Anyway, before starting, I raised the grain with a damp rag and sanded when it was dry. I started painting on the bottom of the seat so if it was horrible I could start over with something else and that area would rarely, if ever, be seen. But it came out OK. I applied two coats of the green milk paint, buffing lightly with a scotch-brite pad after each coat was dry.
 |
| Always a good idea to start with an inconspicuous area |
 |
| Here's the chair after a couple coats of paint |
Mike uses a wiping poly as a topcoat, brushing it on, then wiping off any excess, so I wanted to do the same. But apparently I didn't get the same type of poly as Mike uses, because mine was too dry to wipe off by the time I had applied it to the whole chair. So I let it dry, lightly sanded and then applied a second coat.
And here's the finished chair. I'm very happy with how it came out.
 |
| Chair complete |
I'd been wanting to make this type of chair for a long time and I've gotta tell you - it's a very satisfying build. For now, the wife wants to put the chair somewhere with a teddy bear sitting on it. But maybe in a few more years there will be a grandchild in need of a small chair ...


You made the whole process look way too easy. I have a DVD on using milk paint as I had the same foaming problem on the one time I had used it. I top coated with shellac. The chair looks great.
ReplyDeleteReally Ralph, it's not too tough and is definitely a lot of fun! You just have to have good layout practices and cut and bore accurately. But there is a lot of wiggle room - if you don't get things perfect, it'll still come together.
DeleteMatt,
ReplyDeleteLooks great, the milk paint really looks good and proper. Really nice job, hope to see more.
Don't do like we have done, the grandchild I made a child's chair for has out grown it. Luckily grandchild #2 will be just the right size by the time it gets to Houston.
ken
Thanks, Ken. I might be away from more chair building for a short while before I get back to it. My wife's daughter got married last October, so maybe in a few years there'll be a grandkid or two. Plenty of time for me to make some chairs. And maybe a little table. And maybe some toys .......
DeleteIt looks very good.
ReplyDeleteThank you for documenting the all work.
Thanks Sylvain. I find it really helps me to remember some things if I write them down. And if it provides a little inspiration or entertainment for others, when then that's good too.
Delete