I have this old 16" woody that came along with a few other things in an auction lot. I wrote about it back in April of 2020. It has no maker's mark and I don't know if it was user-made or if it was a production plane. But it was made from a beautifully quartersawn piece of beech, bark-side down. The double iron is from Auburn Tool and there is hardly any useable iron left.
 |
| Unknown maker wooden jack |
 |
There are some cracks in the body that someone filled at some point.
But the body seems stable. |
 |
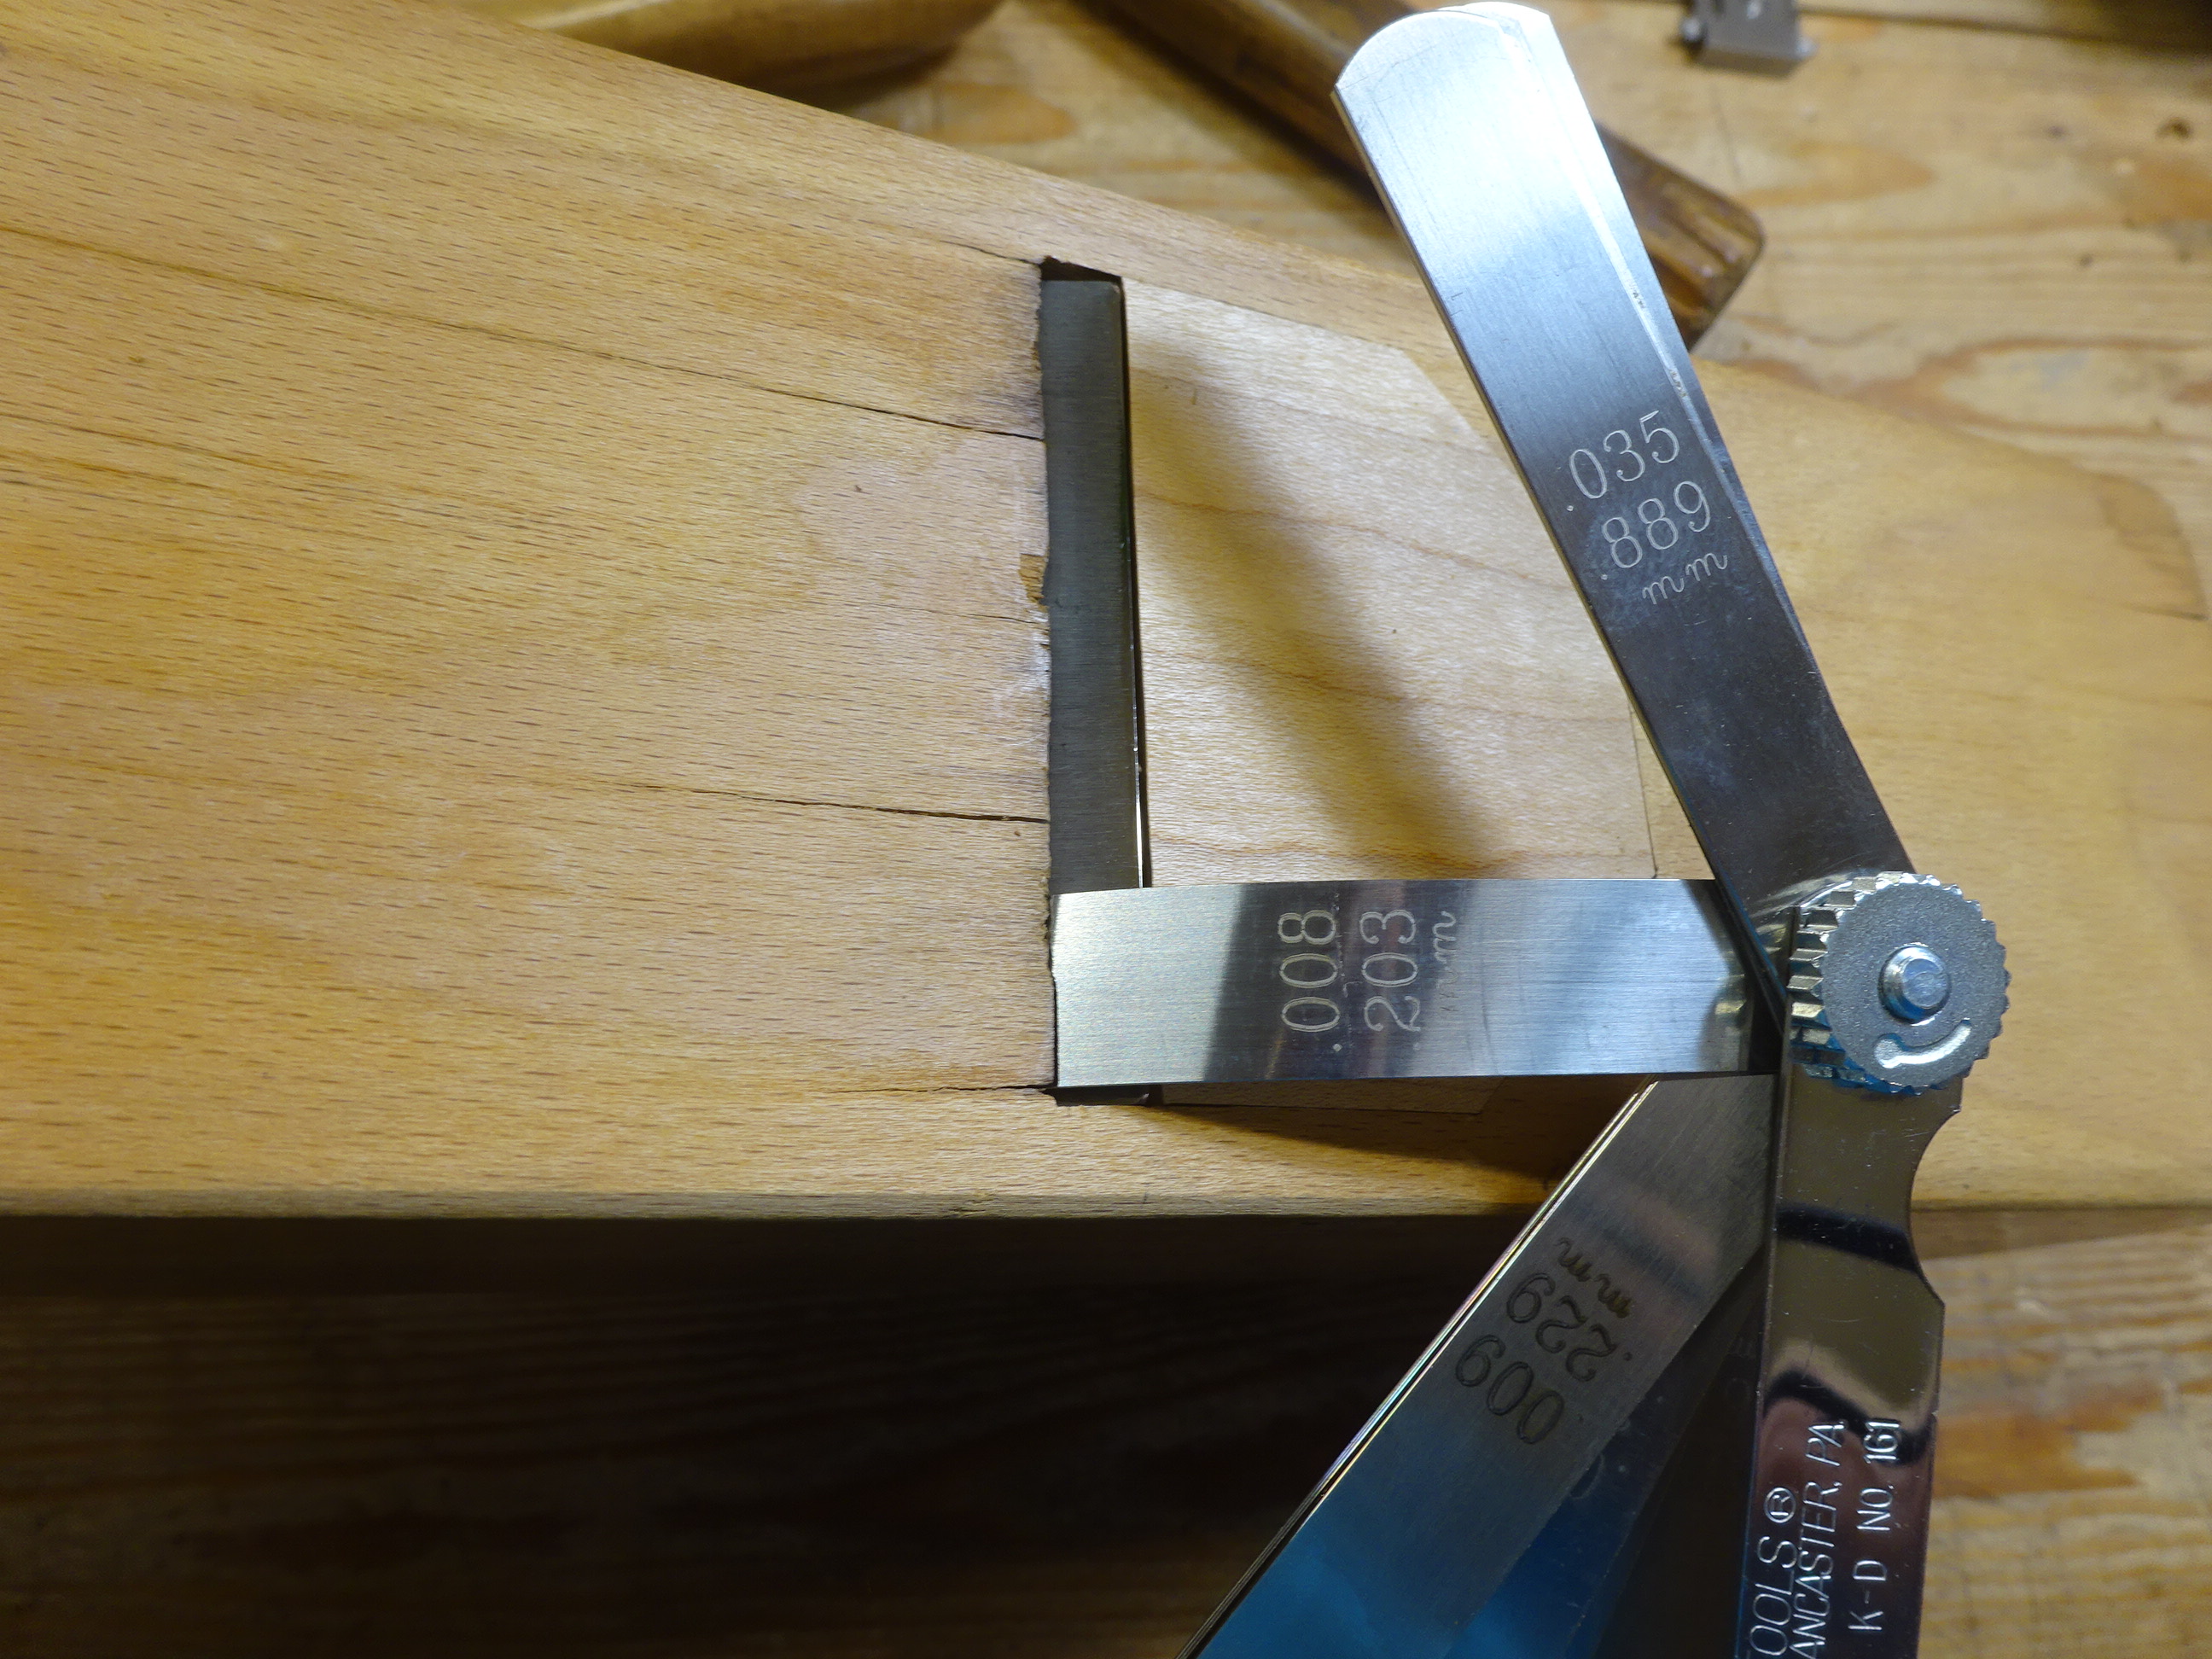
| Here's the main thing I'm addressing today - a huge mouth |
The mega-mouth wouldn't be a problem if I wanted to use this as a scrub plane. But I thought I'd close up the mouth and use it as a try plane or a shooting plane. I couldn't find any scraps of beech, so I used a piece of hard maple that's been in the shop for several years.
 |
I cut out a piece the width of the mouth and shaped it into a pentagon.
Just guessing at the shape here - nothing guiding me other than old pics I've seen. |
 |
| Lightly knifed a line around the patch |
 |
| Then chopped and later routed the recess to about 5/16" depth |
 |
| Got a good tight fit |
It's not easy seeing what's going on in the next pic, but the camera is looking into the throat from the top of the plane, pencil pointing to the maple patch.
 |
| Bed is at left, front of throat at right. |
After marking where the patch meets the front of the throat, I relieved material to make that transition less abrupt.
 |
| Then glued in the patch |
 |
| And later planed it down |
 |
| This shows the new tight mouth |
I was very happy with this, but there was more to do. First, the iron did not bed well when the wedge was tapped tight.
 |
| Large gap between iron and bed on left side |
 |
| So I scraped the right side with a blunt chisel to remove some material ... |
 |
... and used the candle soot trick that I learned from Bob Rozaieski
to get a good mating surface after several iterations. |
The next thing is that the fingers of the wedge were too long and that would enable shavings to get caught in the throat.
 |
View from above: throat front at top of photo, right cheek under red arrow.
Yellow arrow points to the high point of the chip breaker.
Red arrow points to the overhanging end of a wedge finger. |
 |
So I trimmed the fingers shorter, and also relieved more of the ramp
to make room for the shorter fingers |
Then I flattened the sole and planed the right side perfectly square to the sole.
 |
| Sole and right side square |
 |
| The plane rests on its right side when used as a shooting plane |
I got great results when using it as a shooting plane. Really happy about it. Next up: similar work on an old wooden smoother.


No comments:
Post a Comment