Did you know you can use hollows and rounds on end grain? I've got Matt Bickford's excellent video, "Moldings in Practice", but he focuses on making moldings on long grain pieces that are applied to a project. But what about a molded edge all around a table top? For my shoe shelves, I was aiming to have a top with similar molding profile as the existing table we'd been using. It's an ogee profile with no fillets.
 |
| Here's the shape I'm going for on a piece of scrap - only a long grain edge done so far |
When laying out the shape, it helps to draw exactly what you're trying to achieve. The upper concave part has a 5/8" radius and the curve does not quite come to vertical at the top. The lower convex portion has a 3/8" radius and the curve does come to vertical at the bottom.
 |
| The shape, with layout lines highlighting the transition point from concave to convex |
 |
| Drawing in the rabbets that will be cut |
The rabbets help to guide a round plane in cutting the upper hollow. I first cut the rabbets all around the four edges. Note in some pictures below that I've clamped a straight board to the underside of the top. The top had a fairly large cup and forcing it flat really helps get the rabbets and subsequent shaping more consistent.
 |
Rabbets cut on all four edges - used a 3/4" homemade straight rabbet
and 1 1/4" D.R. Barton skew rabbet |
 |
| One long edge shaped - used homemade 1/2" round, 5/8" round and 3/8" hollow |
When planing the end grain edges, I first sharpened up the irons and set the planes for a very light cut. I also came from both directions so that I wouldn't blow out any long grain at the ends. One last thing I did was to score the top with a marking gauge at the extent of the upper hollow. This helped ensure no top surface fibers were torn: a lesson learned from practicing on scrap.
 |
| Working on the end grain |
 |
| Another view of the end grain work |
 |
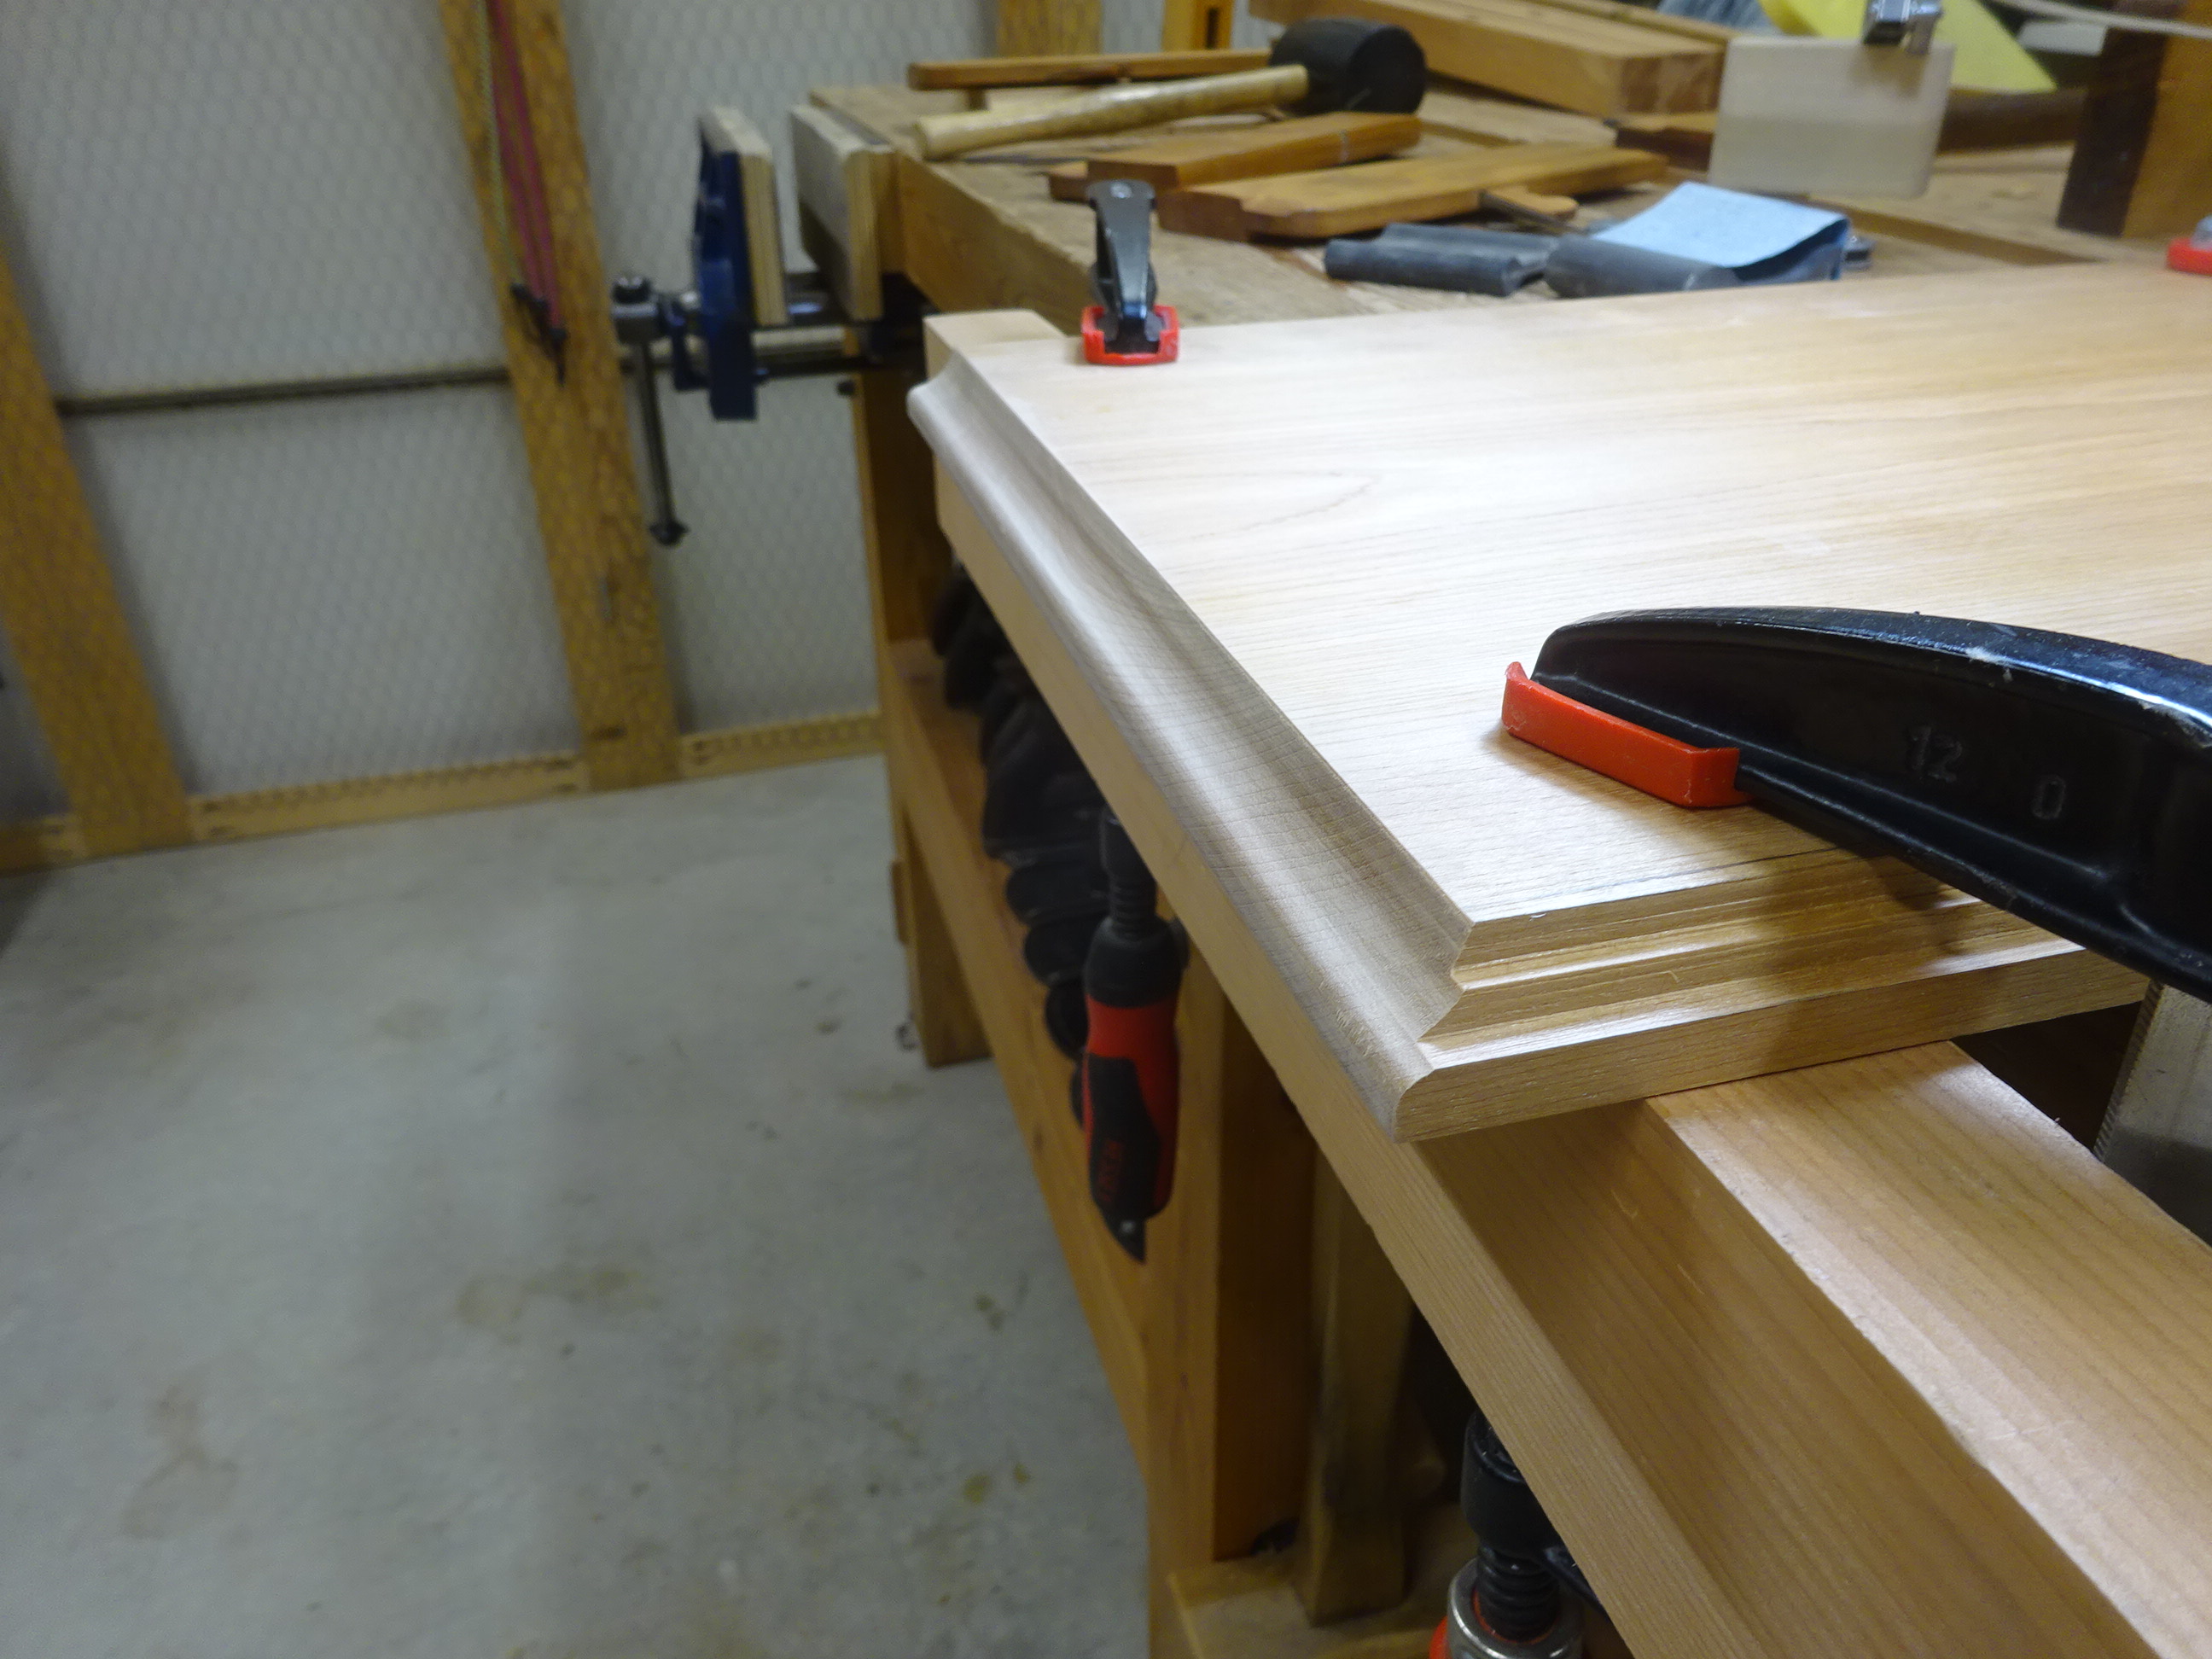
| The meeting at the corners came out pretty good |
 |
| A closer view of a corner |
A number of years ago I found at a garage sale some rubber sanding blocks that are hollow on one end and round on the other end. Sized from 1/4" to 7/8", these are perfect for smoothing out the curves. The end grain needed a bit more sanding than the long grain, but they both came out great.
The undercarriage has three coats of shellac and so far, the top also has three - I might add some more. The top is attached to the base with 6 buttons.
 |
| Glamour shot |
I've already gotten a good start on the second shoe shelf. It's identical to this one, but two inches less wide. About half the mortises are done, so it's time to get back to it.


HI Matt
ReplyDeleteare H/Rs straight or skewed?
Just straight, Ralph. I imagine skewed could help with the cross grain - I've never tried one and would love to know if it's true.
DeleteIt looks very nice.
ReplyDeleteThanks, Sylvain. I'm pretty happy with it.
DeleteIt turned out beautifully Matt. Well done.
ReplyDeleteThanks, Salko. The second one is coming along nicely - I'll glue it up today and make the top, then all that's left is the finishing.
Delete