This post is picture heavy and text light.
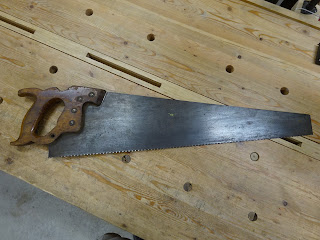
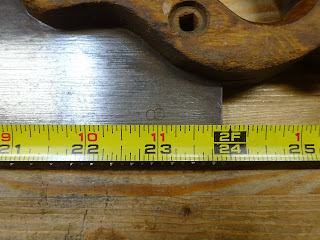
At the same garage sale that I found the Disston D-23 saw that I posted about recently, I got an unknown maker 26 inch "Warranted Superior" skew-back crosscut handsaw with 8 PPI/7 TPI. Like the Disston, this saw had a remarkably straight plate - no kinks or bends. As I understand it, these Warranted Superior saws could have been factory rejects from Disston or other well-known makers, sold under the WS medallion by smaller companies or hardware chains for slightly less money. Still good saws, just not perfect.
 |
The saw as found
|
 |
Filed 8 PPI crosscut
|
 |
Handle with Warranted Superior medallion
|
 |
Lower horn was long ago broken off
|
The handle is smaller than most that I come across and it fits me very well. Just need to fix that horn.
 |
The handle has an "open kerf" ...
|
 |
... as opposed to the D23 that had a closed kerf handle
|
I'm certain the open kerf was cheaper to manufacture, not only for cutting that kerf, but also for shaping the rear of the saw plate. The D23 has a curvaceous rear end, whereas this saw has sharp angles (pics below).
The saw nuts and bolts came out without problems and I later cleaned them up with a wire wheel in the drill.
 |
I don't know what these are made of, but they are not
attracted to the magnet sitting right in front of them |
 |
Could this misplaced hole be the reason it was a reject from a major maker?
|
 |
The rear of the plate, very harsh angles ...
|
 |
... as opposed to the Disston D-23 with nice curves
|
Here's what I did for the handle. I didn't know what wood it was made from, but guessed (probably incorrectly) beech. I may have made the new horn a little too long, but I can always fix that later if it feels wrong.
 |
Scraped and sanded off old finish and grunge
|
 |
Clamped a squared-up block next to the broken horn to shave it flat
|
 |
Glued on a piece of beech
|
 |
Drew a shape
|
 |
And shaped it to blend in with the rest
|
 |
Fits my hand well - note how the lower heel of my hand
(behind the pinky) fits right into the curve of the horn |
I gave the handle three liberal coats (soakings) in BLO/turps and had hoped the beech might get a bit darker, but only the original wood darkened. Hopefully with some years of use the new wood will blend in better - see pics at end.
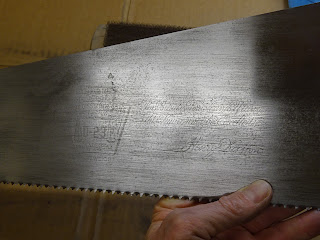
The plate was fairly grungy. Aside from the "8" denoting PPI at the rear of the left side, there was no etch or other marking. This meant I didn't have to worry about obliterating anything and could sand with abandon. After sanding, it got a citric acid bath for 3-4 hours, followed by more sanding.
 |
As found - a lot of sanding from 120 to 400 grits got the plate much nicer
|
 |
Cut off the last four inches
|
 |
The plate cleaned up - can you see the detail I added?
|
 |
| Filed a nib into the front |
 |
Just because it makes me giggle
|
 |
Right side cleaned up
|
This plate is about 0.033" thick and is not taper ground. The right side had some pitting, but nothing that will affect the cutting. I've never had a saw with a nib. I don't know if skew back saws or panel saws had nibs, so don't know if this is historically correct. But it makes me smile, so ...
Finally, to the teeth. My main rip handsaw has about 4 1/2 TPI. I have another that has about 10 TPI, but it is practically useless, other than for thin plywood. I wanted a saw that was a little less aggressive than my main rip saw and settled on 6 TPI. I had hoped that the existing teeth would be close enough in spacing that I wouldn't have to file them completely off, but in the end that is what I had to do.
 |
Tooth line filed off
|
 |
Using a 6 TPI template to score the new gullet locations
|
Here's where I decided to try something different. Saw files are not nearly as good as they used to be, and I've noticed that the small edge facets of a file often crumble when filing. And filing in new teeth can be very tough on them. So I thought I'd give those small triangle corners a break and use a hacksaw to saw down to proper gullet depth. Unfortunately, I used a wrong measurement and sawed much farther than I should have. But the experiment was a success - the files held up much better for not having to cut steel with the corners.
 |
Hacksawing the gullets
|
 |
Beginning to file the faces
|
 |
Filing almost complete and you can see how much deeper the hacksaw cuts are
|
 |
Undaunted, I set the teeth with a Stanley #42 (recently refurbished)
|
 |
And gave it a final light sharpening pass
|
 |
And here she is
|
 |
Right side glamour shot
|
This saw cuts fantastically well. The deep gullets don't seem to affect the cutting, but I'm going to have to be aware that the teeth are a little vulnerable to breaking or bending right now. Finally there is a rip panel saw in the arsenal!


