For a long time I've thought about purchasing a band saw. Mind you, I don't have the space for one, but that doesn't stop me from thinking about it. Band saws can do a lot of things, from cutting curves to resawing thick boards into thinner boards. My interest was in the latter. After some research and reading, I decided to make something that would fit in my shop and allow me some resawing capability. I ordered a Roubo frame saw
kit from Blackburn Tools. When the kit arrived last week I was giddy with excitement, but a little worried about the condition of the package.
 |
| Bent package |
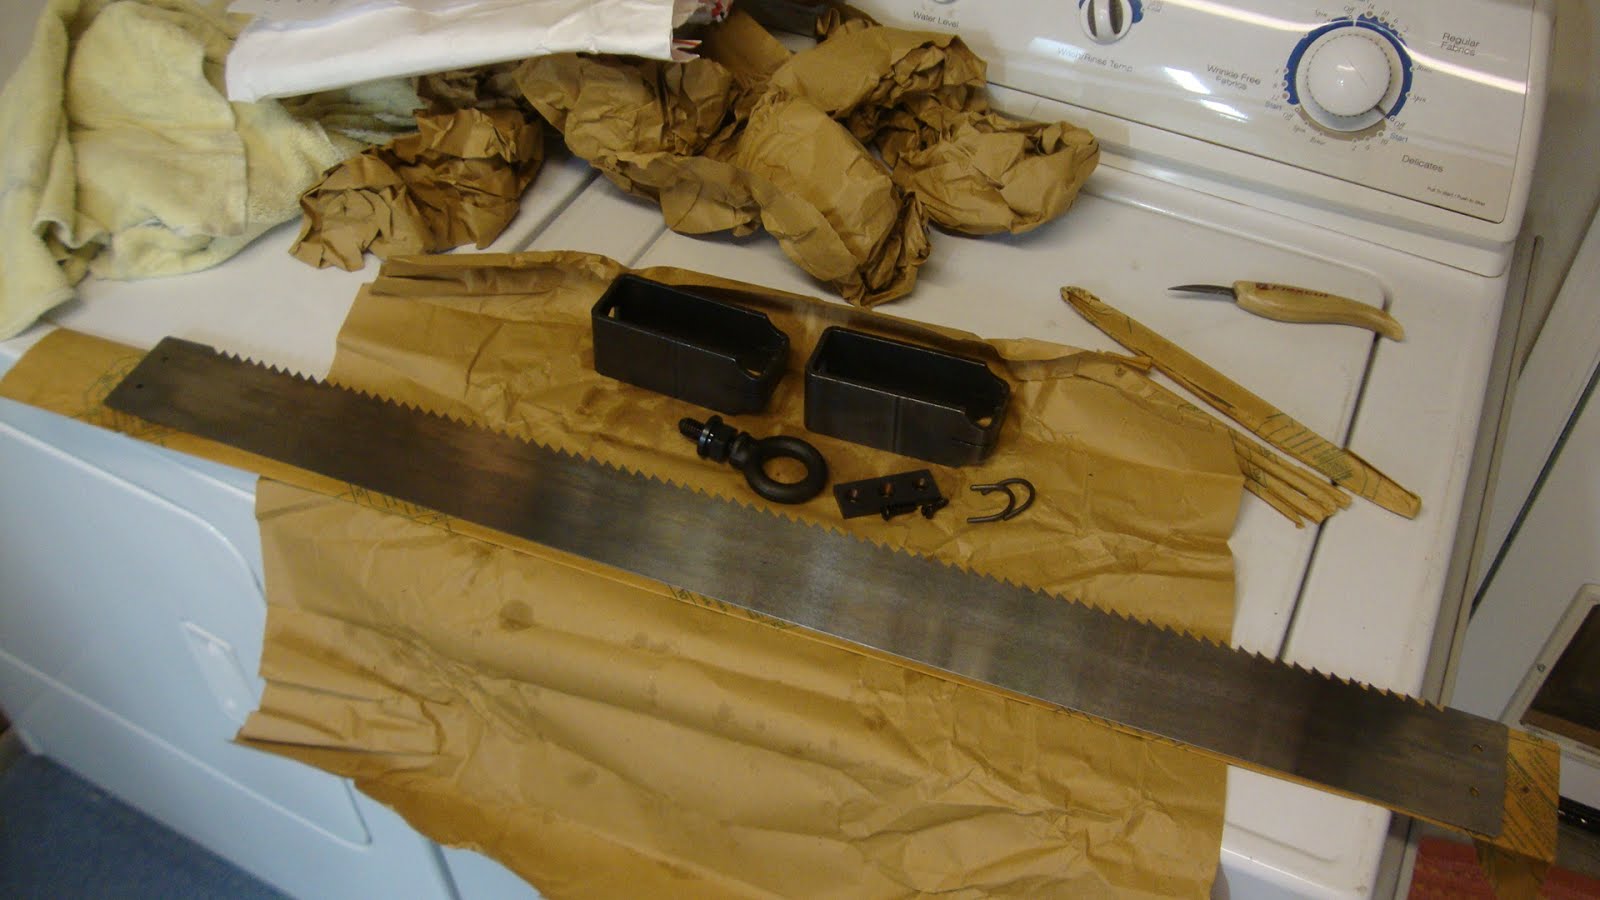
Turned out not to be a problem at all. The parts were well wrapped and the package was stuffed with wadded-up brown paper.
 |
| Kit components |
I got the 36" saw kit. Isaac Smith, the proprietor of Blackburn Tools, will sell these with the blade unsharpened and the teeth unset or with the blade sharpened and the teeth set. I chose sharp and set. The saw plate is 0.042" thick and the total set is somewhere around 0.052-0.055 (difficult to measure).
The brackets are heavy 1/8" thick steel with a slot cut on one end to accept the blade.
 |
| One of two brackets |
 |
| Slot for the blade |
 |
Slot on other side. Guessing this was the "exit" side of the tool that cut it.
Note: that roughness was only at the surface - it was perfect on the inside surface. |
The brackets apparently are welded at a seam that can be seen on the inside.
 |
| See the weld? |
 |
| Closer view |
This took only a minute or two to file away with a coarse file.
 |
| Hump filed away |
A heavy eye bolt provides the mechanism to tighten the blade. The small end of the eye bolt is tapered to fit into a conical hole in a bearing plate that is housed in a mortise in the handle.
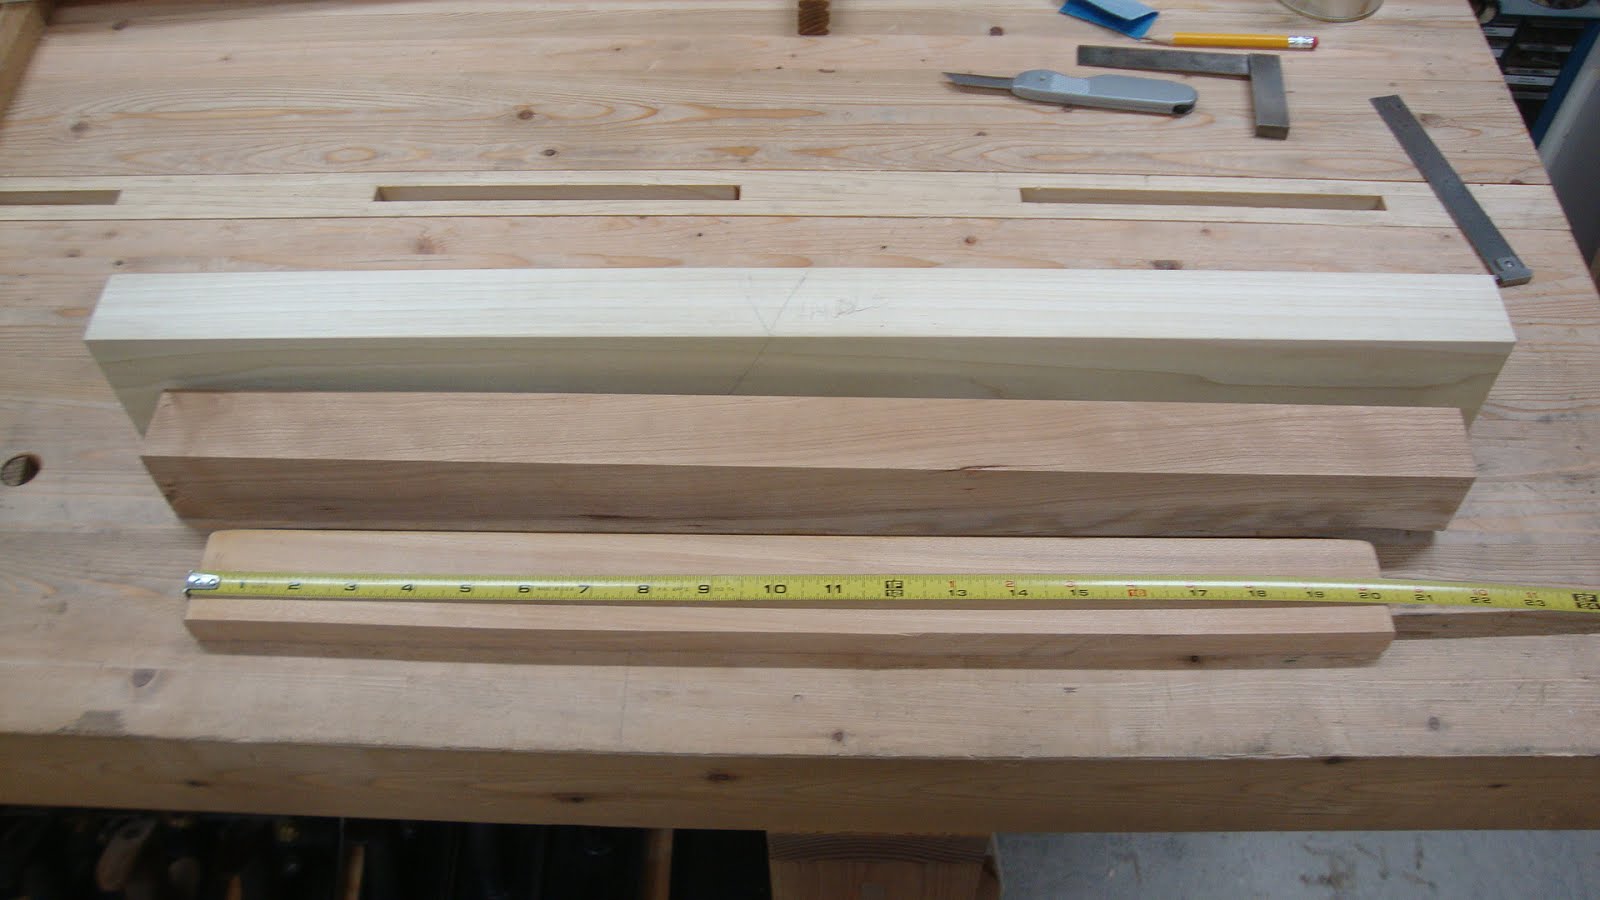
Speaking of the handles, let's get into the making of the frame. I had a big chunk of 2" thick poplar and got all four parts from it. The final thickness of the frame members is 1 5/8" and I took a couple days to get it to final size, allowing some movement overnight (twice) before planing to final dimensions.
 |
| Wood parts ready to go |
Initially, the shorter handle pieces were cut over long, 25" to be exact. The plan provided by Blackburn had a 24" handle. I'm a fairly slim guy and fretted for a long time about how wide I was going to make my handles. I wanted the saw to be comfortable.
 |
| 25" long handle stock in back, ~23" piece in middle and 20 1/2" piece in front |
So I found some scrap pieces of different lengths and held them as if I was holding the frame saw handle to see how it felt. In the end I went with 22" length.
 |
| Made an 11" template to mark half a handle |
While things were still square and easy to work with, I chopped a mortise for the bearing plate, which was
exactly 1" x 2" x 1/4". The mortise was long enough to even out the bottom with a router plane, but unfortunately the grain was diving to the right (in the picture below) and that side was not nearly as smooth on the bottom.
 |
| Mortise for bearing plate |
At first I kept the mortise depth not quite the thickness of the bearing plate so that it would sit a little proud of the surface. I was thinking that some wood compression might sink the plate more fully.
 |
| About 1/16" proud |
Turned out this didn't work, as the dimensions of the blade and stretchers were such that the blade couldn't reach the keepers. So I had to fully sink the plate.
 |
| Bearing plate flush with surface |
I didn't get pictures of the mortising and tenoning of the frame members, but here she is dry-fitted.
 |
| Dry-fit |
Well, I was zinging with anticipation, so I made a small test cut even before shaping the handles.
 |
| First test cut - oh, man this felt good |
Back to the shaping.
 |
| After marking the shapes (including the round-over areas) ... |
 |
| ... made a bunch of stop cuts |
Then chiseled out the waste, chiseled close to the lines, rasped and filed smooth and got handles I was happy with. No in progress pics, but here are the parts after applying a couple coats of BLO.
 |
| Soaking up some BLO |
And here she is assembled.
 |
| The handles are comfortable and I like the way it looks |
I shaped the handles a little differently from the way the plan laid them out. In the plan, the rounded ends extend all the way to the bottom edge of the board (yellow arrow).
 |
Red arrow shows bottom location of my handle
Yellow arrow shows the plan location |
But I was a little worried that with poplar I might get more flex than I wanted. In the plan, almost 7/8" of material is removed from the top edge, making the final width of the handle about 2 1/8" just inside the stretcher mortises. By moving the handle ends up away from that lower edge (to the red arrow), I got more like 2 1/2" thickness just inside the mortises. So far I haven't noticed any flex at all.
I've made a few practice runs at cutting up some stock. And HOLY CRAP! This thing can go through some wood in a hurry! I'll post on that experience next time. But suffice it to say, there is a learning curve involved in getting a straight cut.


CONGRATS!
ReplyDeleteNOW, the fun begins... Make the handle comfortable. Make the side pieces comfortable too. I often find myself holding the saw by the side pieces.
The secrets to even cots are (1) turn the work piece frequently, and (2) let the saw do the work. Don't force it.
You're going to really like this new saw!
...even cuts...
DeleteThanks, Bob. I'll post on this next week, but your suggestions have already been part of my learning.
DeleteImpressive looking saw. I'll be interested to see how it works out for you. Like Bob said...make it comfortable and let eh saw do the work.
ReplyDeleteThanks, Greg. Really looking forward to getting more experience with this saw. It weighs 10 pounds, so it's easy for the saw to do the work.
DeleteHi Matt,
ReplyDeleteI got the same kit from Blackburn. Had some problems with it initially but I think I got it straight now. I talked to Isaac abut my problems and the very first one was tension. I thought I had too much but Isaac said it wasn't enough. He had a 36" saw that had way more tension than I had on mine.
Saw from both sides no more than 10 strokes before switching.
I remember your trials and tribulations with that saw and once in a while see it in the background of one of your pics. Haven't seen you using it much. I probably won't use mine much, either, but it'll be nice to have it when I do need it. I've learned a bit about using it and it was clear from the first cut or two that I'd need to switch sides often.
DeleteOooohhhh, nice saw. I have been on the fence for a while about this kit. First Ralph, now you... I may just do it :-)
ReplyDeleteJokes aside, I have an antique that I found a while back. It works, but could use some attention on the blade. Was thinking to ask Blackburn to sell me a blade that would fit my frame.
Bob, with probably "one" example of every WW tools ever invented :-)
Bob, if you've got an old one, can the blade be sharpened and put to use? If not, the Blackburn blade is pretty nice.
DeleteAwesome frame saw Matt! Are the teeth about double the size of your hand rip saw teeth? Guy
ReplyDeleteHi Guy. Yeah, the teeth are about 3 1/3 teeth per inch and my rip saw is 5 1/2 tpi.
Delete