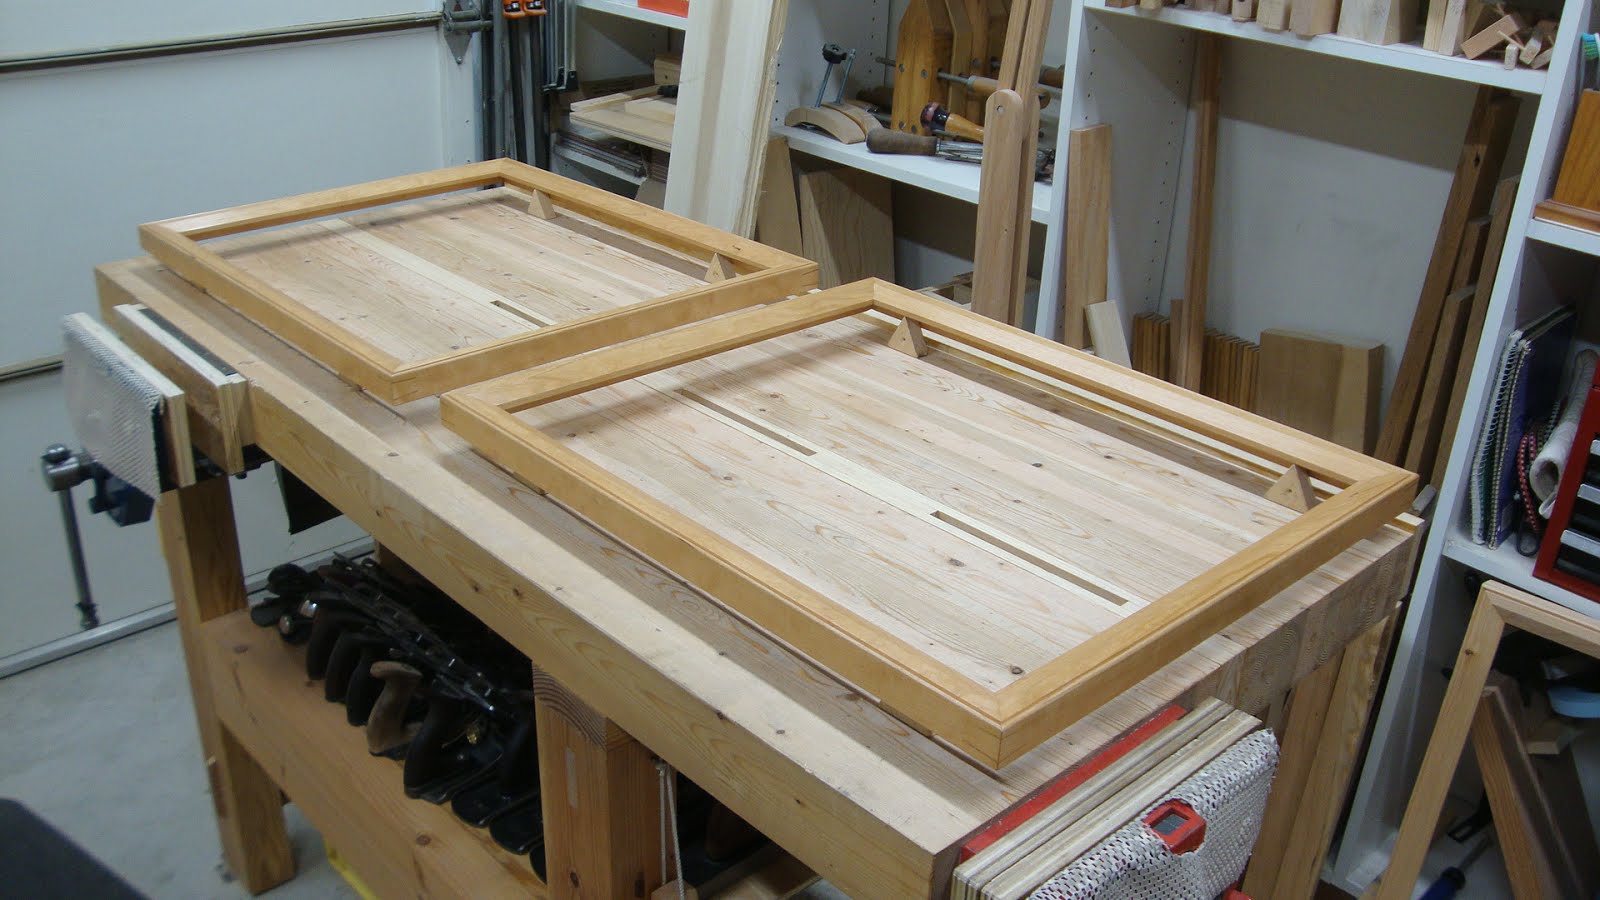
With the rabbets complete, the next step was to miter the corners. The parts were laid out to get a pleasing look to the grain and miters were marked.
 |
| Rough marking of the miters |
After sawing the 45's, the shooting board made quick work of cleaning them up. I had sharpened up the #6 that I use solely as a shooting plane and the cherry cut easily.
 |
| Shooting the miter |
But I found out that my miter shooting fence is not perfectly 45°. Adding two thicknesses of paper to the end of the fence furthest from the plane gave me a perfect miter.
 |
| Paper shims wrap over the top edge of the fence |
I mitered corners #1 and #3 (numbered clockwise) so that both shorter parts and both longer parts had one end mitered. Then the other end was rough mitered close to proper length and finished on the shooting board. The long members were made to be exactly the same length as each other, as were the short members.
For shaping, a large chamfer was formed on the inside edges. The chamfer was 3/4" wide and 3/8" deep. A marking gauge line would still be seen after the chamfer is cut, so to mark the guide lines I used the Incra 6" marking template and a 1/2 mm mechanical pencil. I don't use this template a lot, but it is fantastic and comes in really handy at times.
 |
| Marking the 3/4" width of the chamfer |
 |
| Chamfer area marked |
 |
| Added extra pencil lines to know better when to stop planing |
Removed most of the waste with a scrub plane, then finished up with a #4 1/2 smoother.
 |
| Getting close to the lines |
 |
| Showing how the part was held in the vise |
I made an effort to plane each piece just to the line. If I planed a little more on one part than another, they would not mate well when forming the mitered corner. Later on before gluing up, I took a couple shavings off some parts to get this right.
For the outside edge of each piece, a 3/16" bead was cut using the Lee Valley grooving plane and beading iron.
 |
| Beading the outer edge |
 |
| This gave a nice looking profile |
When it came time to glue up, I rehearsed on a practice frame I had made from a Doug Fir 2x4.
 |
| Rehearsing on the prototype |
I made eight 45° clamping blocks that each get clamped to the frame member, enabling me to clamp at right angles to the miter.
 |
| Clamping blocks: 3/16" plywood with 45° block glued on and sandpaper adhered to bottom |
 |
| You can see how these blocks are used |
 |
| The ruler shows the direction of clamping force - directly perpendicular to the mitered faces |
The glue-up went OK, though not perfect. Still, I'm pretty happy about it. Both frames glued up squarely, evidenced by a check of the diagonals.
When the glue had dried sufficiently, splines were glued into the corners to shore them up. I used my widest kerf backsaw to cut the slots so it would be easier to make the splines.
 |
| This is a bad saw, but came in handy for a ~0.050" kerf |
The practice on the prototype frame want well. And I learned how best to fine tune the spline material. After cutting thin pieces, I tried thinning them with a plane upside down in a vise.
 |
| Dangerous and didn't work that well |
What worked perfectly was to plane them on the bench using a bench dog (raised only a mm or so) as a stop. And I was also able to plane one side thinner than the other to get it in the kerf more easily.
 |
| Planing the splines |
I used the splines to mark the frame corner, to make sure I didn't cut too deeply for the splines.
 |
| Marked the bottom, then squared the line to the two sides |
 |
| Sawed the kerfs at a slight angle |
 |
| Glued in the splines |
 |
| Cut away the bulk of the waste with a knife, and planed flush later |
After some sanding, it was finally time for finishing. My previous mix of shellac was fairly old, so I started a new (half size) batch a day earlier in preparation for finishing.
 |
| Shellac dissolving in alcohol |
I applied three coats of shellac, sanding after each had dried. After letting them sit overnight, I then waxed the frames.
 |
| On the drying "racks" |
 |
| All done |
 |
| Here's a typical corner. Happy about how they came out. |
My neighbor, who is the artist that I commissioned to do the paintings, also got the matting and glass fitted to the frames. He also attached the little tooth-like hangers to the upper frame members. Today he helped me mount these on the wall while my wife was out. The timing was perfect.
 |
| The final product |
The wife was totally surprised and loves them. She grew up around Big Sur, so these paintings have a lot of meaning for her.
Now it's time for a little R&R. We're leaving tomorrow morning for Valley of Fire (just east of Las Vegas) and Death Valley, where it's going to be in the mid 90's. Yowzah!


Nice work and beautifully explained. I've tried planing wedges and splines on an upside-down plane too. It works sort of ok, then you shave a bit of your finger tip skin off, try to be more careful and it goes sort of ok again until that second shaving of the fingertips ....messy.
ReplyDeleteHi Paul. Haven't seen your name around the blogosphere lately. Thanks for the comment. I get too many cuts on my fingers from other aspects of woodworking to risk more with the plane upside down. Maybe if I had a much longer strip of spline stock it would be safer. I was really surprised (and pleased) how well the dog worked as a mini planing stop. Being able to apply downward pressure on the spline made it a cinch.
DeleteVery nice! They look great.
ReplyDeleteThanks Greg, I appreciate the comment.
DeleteVery nice work! I see a Paul Sellers influence in your working style, which I appreciate.
ReplyDeleteBoth frames turned out great, their a lot of work for glue up, but I'm going to make some of those clamping blocks, great idea!
I enjoy making things for my wife, she never critiques ...a good woman looks past any flaws as long as she know you have her in your heart.
Enjoy the heat, it's 10 degrees and snowing here in Montana. The snow boarding was awesome at Showdown today!
Regards, Stephen
Thanks for the comment Stephen. Definitely a lot of Sellers influence. I reviewed one section of his picture frame videos before finishing these. Glad you're making the most of the cold weather - I won't be doing any snow sports this week, that's for sure (ha).
DeleteTHIS is how heirlooms are made! Very nice work.
ReplyDeleteThanks, Bob. I really loved that it was a collaboration of artist and woodworker. Both parts came out very nice.
DeleteNice work Matt. Surprising the wife with a thoughtful gift is always fun but not always easy to pull off :-)
ReplyDeleteEnjoy the su.... meanwhile we are freezing our a.. off here brrr
Bob, with Rudy wearing his parka awaiting to go out
Hi Bob. It was a total surprise for her, too!
DeleteIt turned out to be almost 100°F in Death Valley, about 18°F higher than normal for mid-March. Felt good today to get away from the heat and back home. Sorry your weather is so tough. Don't throw away your parkas any time soon due to global warming!