I've been wanting to try making a picture frame by hand methods for quite a while. I thought I'd start with a simple rectangular profile (no molding or shaping) so I can work on the miters. As planned, this would be the size for an 8x10" photo.
I started by finding a piece of red oak that had once been a frame member for a bathroom cabinet. After squaring it up (it was bowed pretty seriously along its length), it was about 11/16" thick, 3 1/2" wide and 26" long. For the frame I needed two pieces about 10" long and two more about 12" long. Each would be about 7/8" wide. I would get one 10" and one 12" member from each side of the board.
The first thing to do was to cut rabbets that would eventually accept the glass, the photo and the backing after the frame is assembled. The rabbets were to be 3/8" wide and 3/8" deep.
 |
| Rabbets laid out and cutting started |
File this under "things they don't tell you about". For a board that has a clear grain orientation, if the grain is going in the right direction for planing the rabbet on one side, you should be able to flip the board end for end and cut the second rabbet on the same side of the board. But for some reason (I don't recall what it was - a knot, a screw hole, reverse grain?) I felt like I needed to cut the second rabbet on the other side of the board.
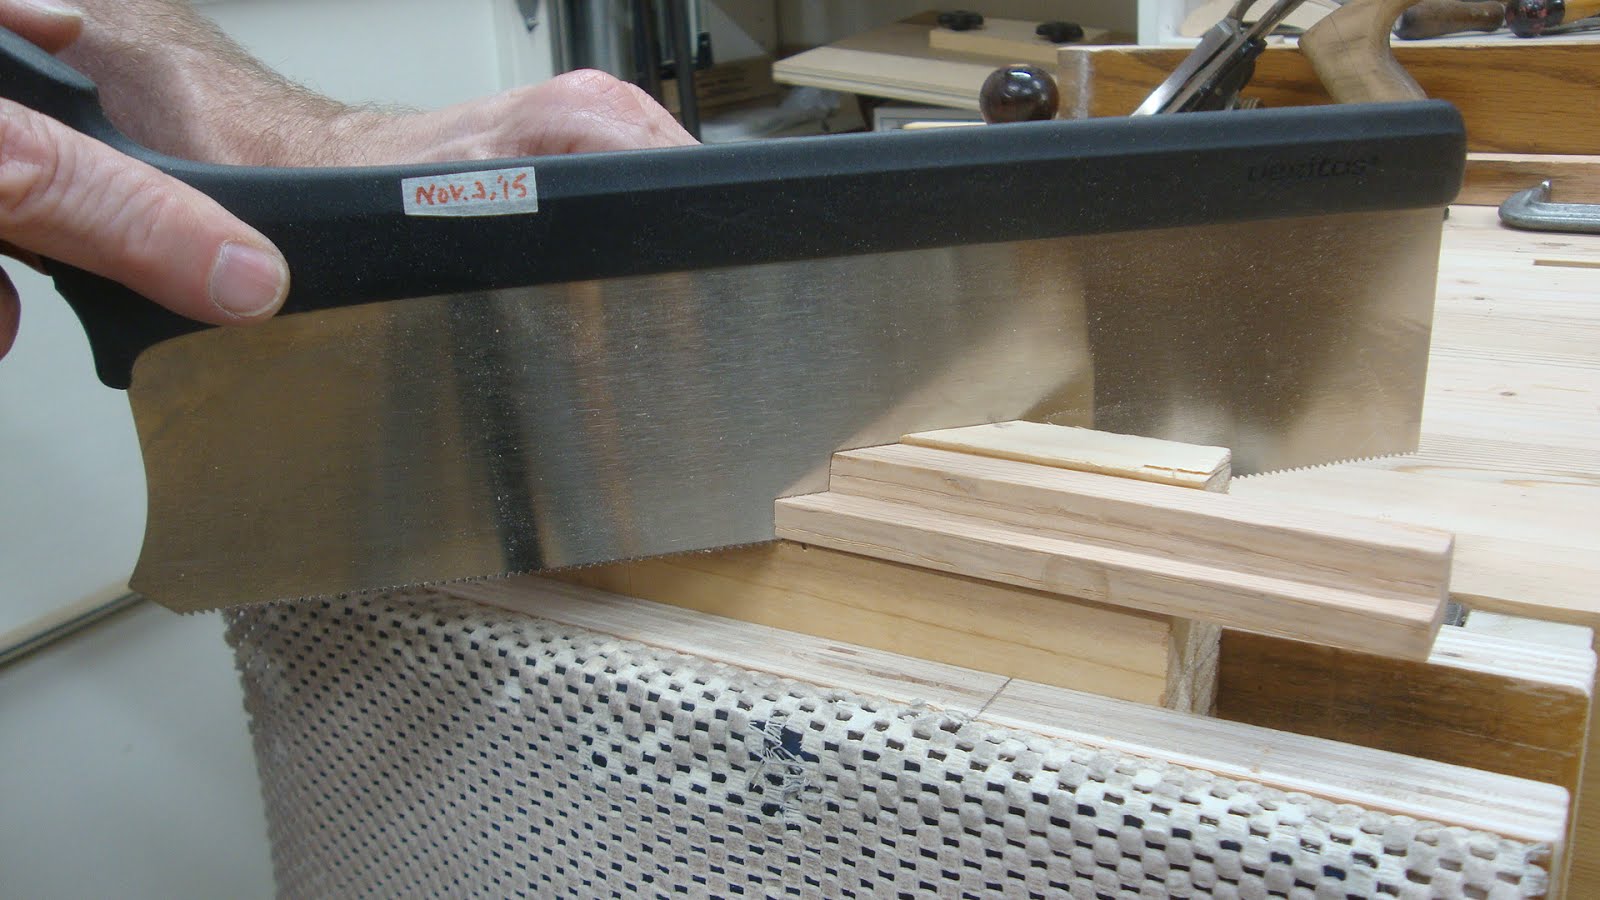
In any event, the first rabbet went OK using the Record #778 with one annoyance. I was getting a lot of clogging in the throat of the plane.
 |
| Clogging in the throat |
I took WAY longer to cut the rabbet than I see on some videos, but perseverance paid off and the rabbet got done.
 |
| Completed rabbet (ignore screw holes - most will be in scrap areas) |
Notice that for the first rabbet the width of the board is oriented vertically in the vise. Because of grain orientation, I couldn't orient the board in the vise the same way for the second rabbet. Since I don't have a sticking board long enough to handle this, I borrowed a page from Seller's book and used his "clamp-in-the-vise" method.
 |
| Board clamped in a sash clamp which is clamped in a vise |
The rabbet had been marked carefully.
 |
| Layout of the second rabbet |
The cutting went OK, but with lots of clogging again. Not sure if this is a normal thing for the #778 or if I could be doing something to avoid the clogging.
 |
| Second rabbet complete |
With the rabbets complete, I started cutting approximate 45° angles using a small miter cutting board. I've put on my to-do list to make a new miter cutting board out of a harder wood. The pine was far too soft for this as you can see by the ever widening kerf on the right side
 |
| My miter cutting board is looking a bit ragged |
It worked though, and I got my approximate cuts done including some test cuts.
 |
| Cutting one 45° end |
I used the shooting board to get a nice pristine surface.
 |
| Shooting the sawn miter |
Alright, here's another of those "things they don't tell you". Shooting a miter is very different from shooting a square end. When shooting a miter, as the plane blade contacts the internal corner of the frame member, it wants to pull the member with it. This has the result of moving the plane away from the edge of the shooting board that it is supposed to be tight up against. The lesson is this - when shooting miters, you really need to push the plane hard against the shooting board as well as applying forward force. This was a tough lesson as I'll explain later (I had to trim too many times - know where this is going?)
Well, even though the shooting board's miter fence seems to be spot on 45°, when I mated two trimmed pieces together they made an angle greater than 90°. Should have taken a picture here. To adjust this I needed to cut a bit more off the internal corner of each miter and to do that I placed a paper shim between the frame member and the 45° fence.
 |
| Paper shim in place to cut more off internal corner |
Well, eventually this worked with some trial and error, but I shaved so much off the miters that the frame ended up being a little too small to fit the 8x10 glass into. Oh well - it's just a practice run anyway.
For glue-up, I did a practice run with some scraps. I'm using twin splines to strengthen the joints. The depth of the spline cut was marked and the kerfs cut.
 |
| Note the lines - you don't want to cut too deep and get into the rabbet! |
I used two saws on the test piece - one with a set of 0.026" and another with 0.045". I've had trouble cutting thin splines so I wanted to try two sizes. I think the thicker kerf will also lead to much stronger joints and that is what I went with.
 |
| One thin spline and one thick spline |
 |
| Another view of two different thickness splines |
Once I was happy with the process I glued up one corner and let it sit and then the opposite corner and let it sit. These two subassemblies were then fitted, trimmed and glued.
 |
| Last two corners glued up |
After the glue set up, I trimmed away the excess spline material, then planed the joints flush. Here are the four corners.
 |
| Upper left |
 |
| Upper right |
 |
| Lower left |
 |
| Lower right |
And here's the frame completed.
 |
| Done |
Overall I'm pretty happy with the miters. Unfortunately due to too much trimming on the shooting board trying to get things to make 90° corners, the frame is a bit too small to accept a standard 8x10 glass. It's also out of square considerably due to the trimming.
Next time I'll be better at the shooting board trimming and I think it'll come out much better. Looking forward to that. Good thing this was just practice.


Hi Matt,
ReplyDeleteMiters are an evil despotic joint conjured up by the devil to inflict misery on woodworkers. I've had my fair share of rants and miters going airborne but I think I'm getting better at them
Trying lighting up on the depth of cut with the rabbet and especially so with the miters. I've found for that if the iron is catching the leading edge and pulling it I've got the iron set too deep. A light cut takes longer but you end up with a better, cleaner miter.
Ha! Let's hear how you really feel about miters!
DeleteThanks for the tip on setting the iron shallower. I'll try that next time, which should be fairly soon.
Hi Matt,
ReplyDeletethe miters are looking good so far as one can see on the pictures. But I too have learned that lighter shavings might be the key.
Regarding the Record rabbet plane. I had that clogging sometimes too. Honestly I haven't spent much time in investigation. But I still have it and can have a look.
My guess is a) that's a handling error, or b) it has to to with the iron cap.
Oh and you can still use the frame if you will use some acrylic glass which you can cut to every desired size. A lot of commercial frames nowadays are fitted with acrylic glass
Cheers,
Stefan
Great idea about the acrylic, Stefan. I hadn't thought of that. Thanks. And if you figure out anything with the Record plane, I would love to hear it.
DeleteStefan is correct about his 2 guesses, the lever cap has a small upturned lip which only function is to "help" throw out the shavings out on the other side, but it so happen that thats the fence side, your hands position, how you put your hand on the fence is interfering with those poor shavings "exit" .... Resulting in bunching.
ReplyDeleteBTW Ralph description of the evil miter is pretty accurate :-)
Bob and Rudy
Bob - I just went and looked at the cap iron of the Record #778. You are right about the lip - I never noticed that. As it was set up, the cap iron was angling to the left as it descended towards the blade's edge, so the lip was no in line with the right edge of the blade. I've corrected that and next time I use it I'll pay more attention to it. Thanks.
Delete