As a reminder, this is what I'm working on.
 |
| The plan |
It's a relief having the design part behind me. I'm not much of a designer and I'd rather be building stuff. Like all of my projects, it started with getting stock to size. I estimate that about 70% of my project time is spent in stock prep. This is all by hand - but I'm starting to see the day coming when I'll have to rely on a bandsaw to help me.
 |
| Resawing a board that will become the front panel |
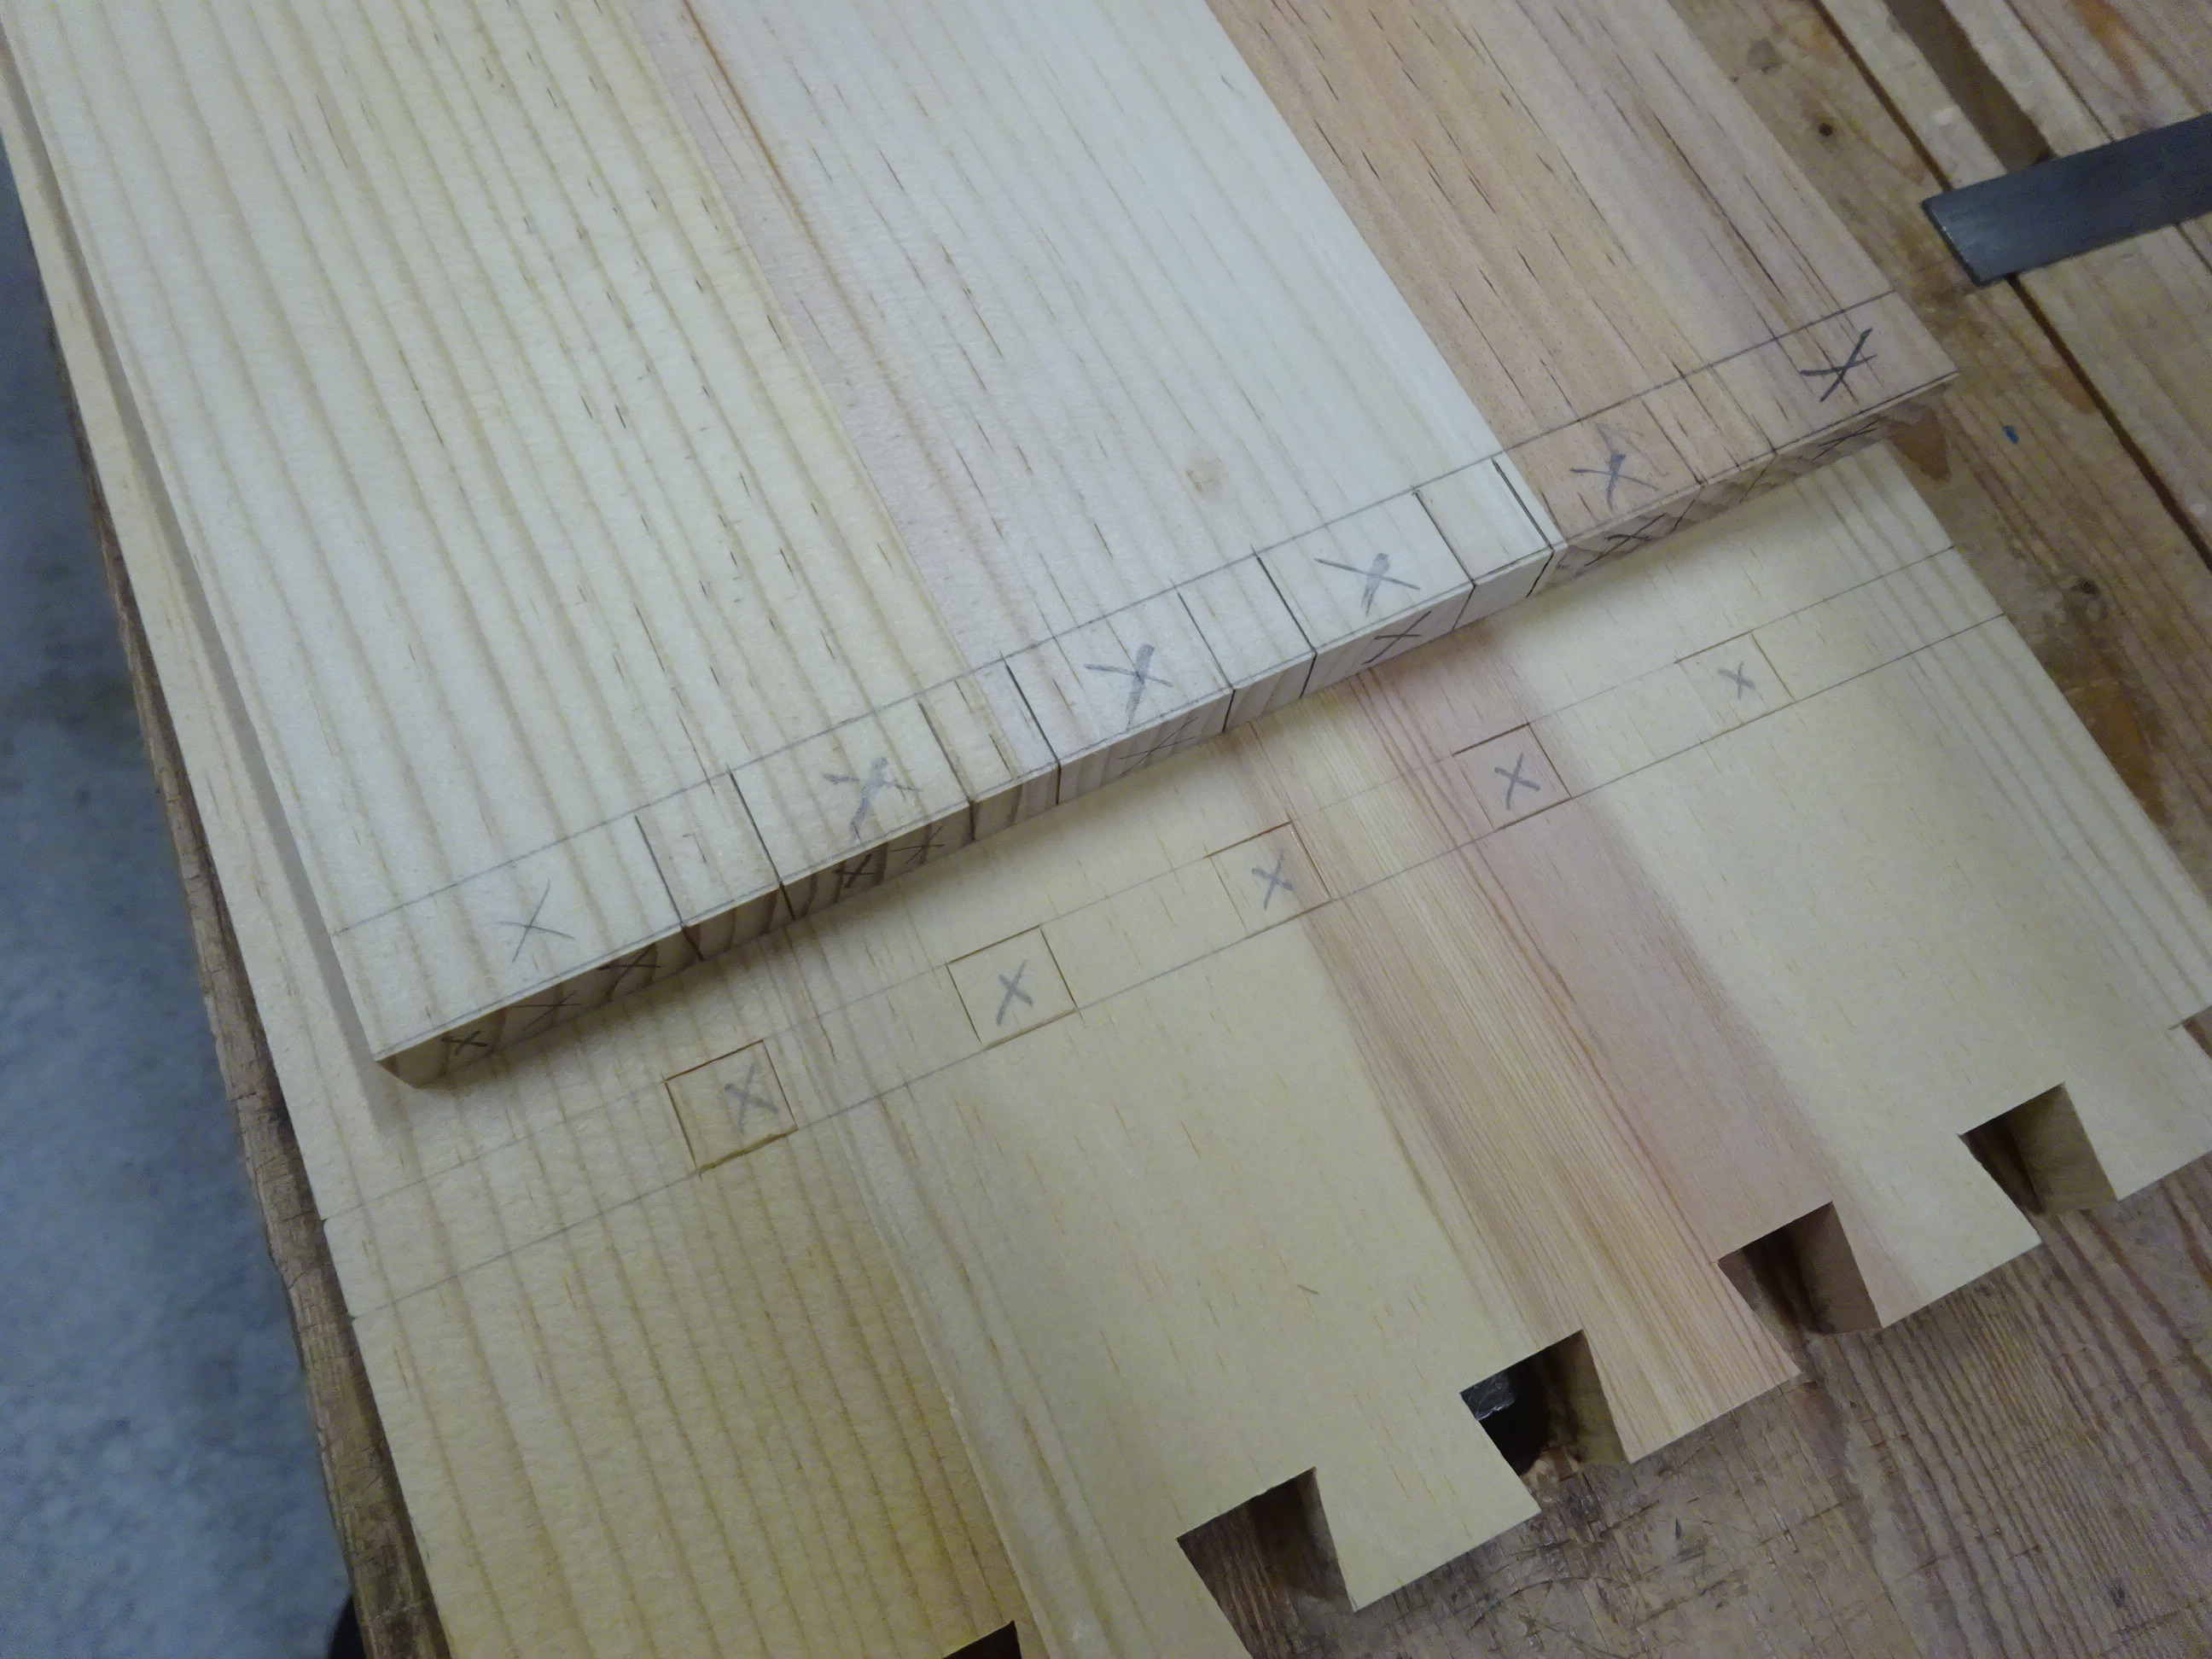
Once the bottom and ends were dimensioned, I started dovetailing. Tails are on the ends and pins on the bottom to resist coming apart if there is too much weight in the drawer.
 |
| Laying out the tails on the end boards |
 |
| Sawing out the waste |
 |
| After cleaning up with a freshly sharpened chisel |
 |
| Marking the pins with pencil before fitting the pieces together |
 |
| After a test fit, I can tell this pin is too tight by the smeared pencil marks |
 |
| First corner fitted, after some judicial paring of pins |
 |
| Joint cleaned up (not yet glued) |
 |
Here's the setup I used to clean up the tails and pins.
I rarely use the slot in my benchtop, but it came in handy here. |
Next on the list was to fit the horizontal divider. I took the shoulder lines from the bottom piece, as their shoulders need to be perfectly aligned.
 |
| The joint marked out |
It might not be evident from the picture, but the sides have five 1/2" x 1/2" mortises marked. The divider has the matching tenons marked. Since my marking gauges won't reach as far as I need for this application, I had to get out my panel gauge for the markings further from the reference edge.
 |
After boring and paring the mortises and sawing and chiseling the tenons
a first test fit shows a nice result. |
I had left the tenons 1/16" long to be flushed with the surface later, but I thought I'd leave them proud on the finished toolbox. Not sure it'll go well with the flushed-up dovetails just below, but if I don't like it, I can always flush them up later.
And here's the box (so far) dry assembled.
 |
| Bottom and divider assembled with ends |
Next time I'll write about fitting the front and back panels, doing some shaping and gluing up the box.


That joinery is going to make for a very sturdy box, and it looks great, too.
ReplyDeleteThanks Jeff. Yeah, it's probably overbuilt a bit, but it's solid as a rock. The project is coming along nicely - just have the drawer to do now.
Delete