A few weeks ago I made a post and rung stool from fresh-cut wood. The following picture was taken about that time when I was just experimenting with some cord weaving.
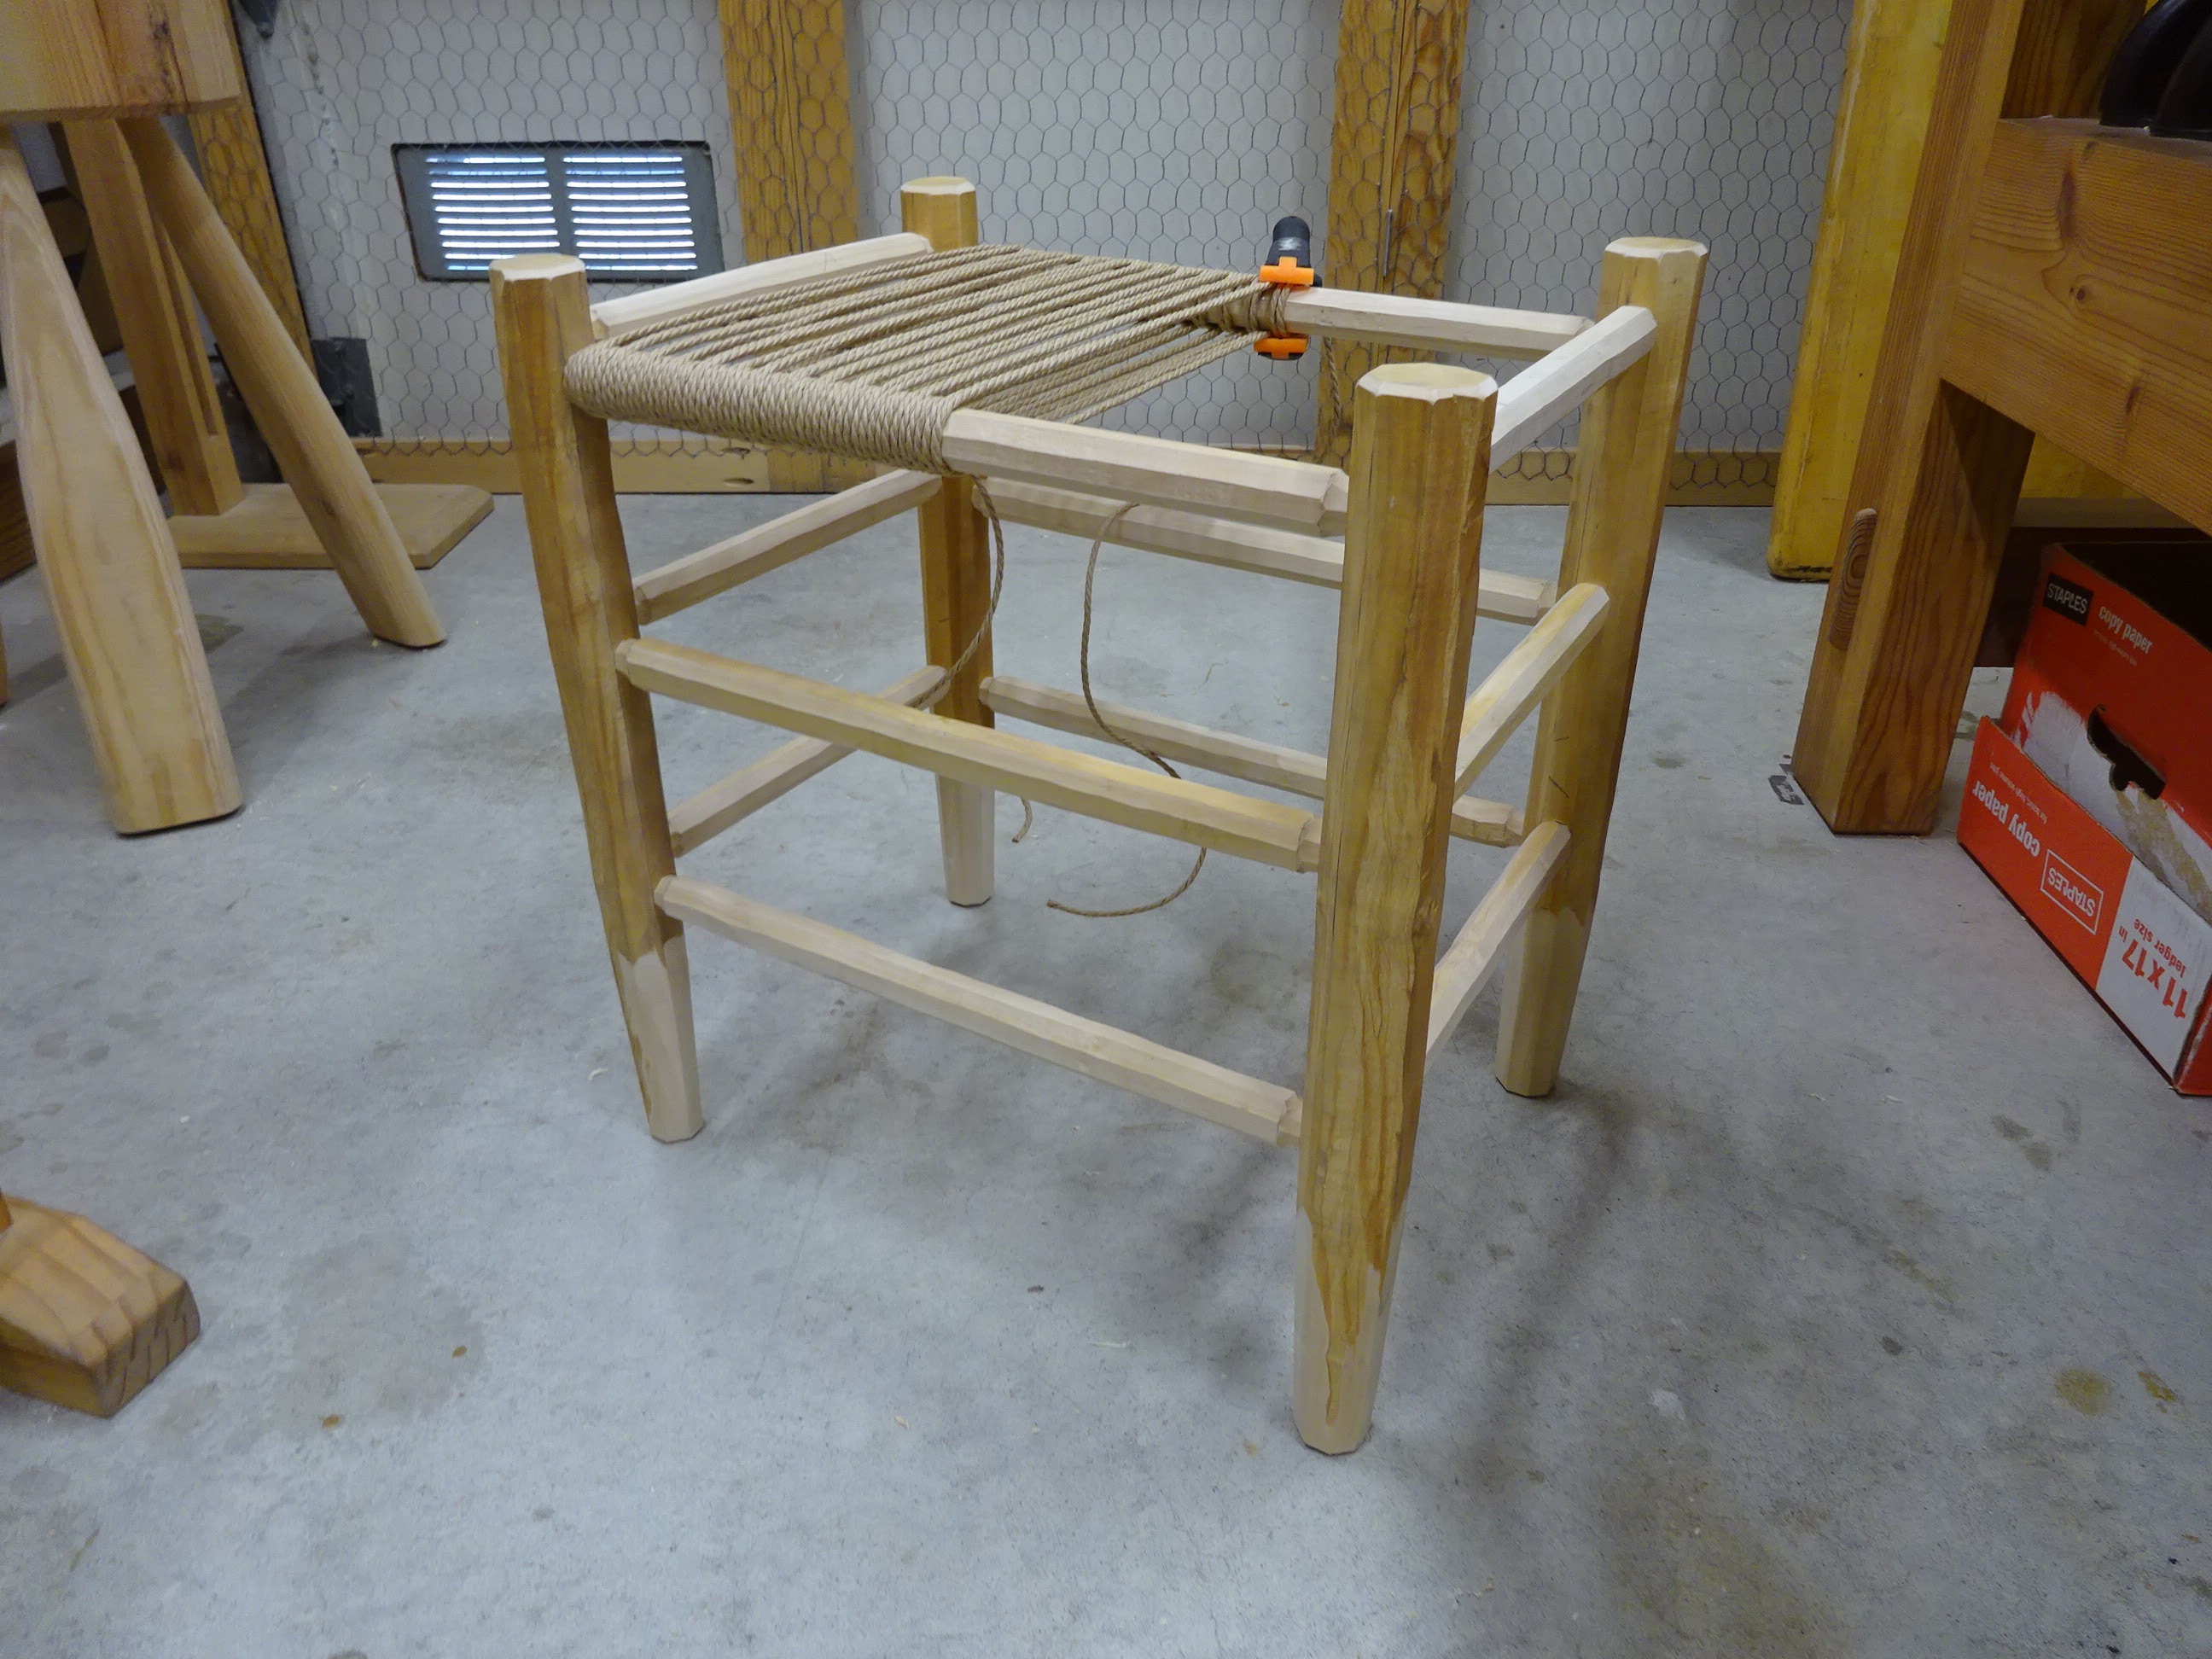 |
| The post and rung stool with an initial experiment in weaving |
That was about a month ago. I started on the seat again, but I'd been hung up on what to do. The two types of weaving I considered are like in these two photos from the internet.
 |
| Internet picture |
 |
| Pic form Caleb James' site |
Danish cord is expensive stuff and I didn't want to be wasteful. The pattern on the left uses less cord, but typically uses nails. The pattern on the right uses more cord and a few tacks.
Most of the cord seats I've seen with the first pattern use L-shaped nails on the insides of the rails to turn the direction of the cord. This avoids the waste associated with cord going fully front-to-back or side-to-side under the seat.
 |
| Showing use of the L-shaped nails used on the stool I made in early 2022 |
The second pattern is more common using other materials like rush or other material thicker than Danish cord, and it uses only a few tacks.
There are two reasons I didn't want to use nails on this post and rung stool. First, I just like to avoid using nails if I can. And second, my rungs are only 7/8" octagonal and there really isn't enough room to use them.
After thinking about it for far too long, I went with the first pattern, but modified for not using nails.
The initial experimenting did allow me to work out some spacing issues. For the front-to-back cord, I found that it would look good with 5 or 6 loops around the rung between each full front-to-back cord.
 |
| Front left leg of stool is at shown in this photo. Two extra wraps (four total) at furthest left front-to-back wrap, then 6 wraps around the rung, then two full wraps and another 5 or 6 wraps around the rung. |
 |
| Continued this pattern across the seat (ignore the left-to-right pattern for now) |
There are two issues with this. Notice where the rung joins the post that it necks down from 7/8" to 5/8". Two pics above here you can see a naked rung as well as a wrapped rung that show this. It causes The first couple of wraps to follow that necked-down shape and I don't want the succeeding wraps to slip over the first two.
The second issue with this is that under the chair, after I've completed two front-to-back wraps and 6 wraps around the front rung, I have to angle the cord to begin the 6 wraps around the rear rung before continuing with the next two full front-to-back wraps. It's not an issue for looks because it's on the underside, but when I go to weave the left-to-right cord it's unclear how this will affect things as I get further to the back.
 |
| Underside shown: pencil pointing to the angled cord |
In the end, I just went for it and figured out these issues on the fly. First, to avoid the necking down problem, I added a couple extra loops of cord around the rungs and tacked them in place. This helped level the ends.
 |
| View from above showing how it fills in the tenon area |
 |
| View from inside showing how it was wrapped and tacked |
I don't know if the terms "warp" and "weft" apply to all kinds of weaving, but I get a kick out of using them, so here goes. To make the wrapping easier for the warp (front to back wraps), I made something to help control the cord. I saw something like this on Caleb James' and others' websites.
 |
| Made from 1/8" thick plywood: note the two holes under the left coils with cord going through to help keep it from unraveling |
 |
| I hadn't planned this, but the size was right to sit it on lower rails - very convenient! |
So I started wrapping. I saw a video where they put four full warp wraps at far left and at far right, but two everywhere else. So that's what I did. But when I got to the right side I found I didn't have an odd number of front-to-back groups of cord.
 |
| Here I'm counting - 12 groups Note that I considered putting the weft through just two of the four in the right-most group of warp cord (essentially making it 13 groups), but later decided against that. |
 |
| Here I've started the first few rows of weft after fixing the warp. For the fix, I unwrapped several warp rows and adjusted the number of rung wraps to get 13 warp groups. |
The warp ended up not perfectly symmetric, as there is a lone group of four at the far left and all other groups are of two. In hind sight, it would have been fine with just two everywhere.
 |
| Getting close to complete. The last few rows of weft are tougher to weave. |
Weaving the rest of the weft went fine. Note that I'm weaving on the underside of the seat also. Because of the angled cord that I mentioned earlier, I tried to do something to ease the transition. At the beginning and the end of weaving the weft, I went over and under every pair of warp cords. Near the middle, I went over and under two pairs, then three pairs, then back to two pairs so that the angled cords had somewhere to go.
 |
| The underside - see the angled warp cords? |
You can also see in the above picture where I tied off the beginning and end of the weft. These are simply tied to a pair of warp cords.
Here's two pictures of the completed seat from above, the second taken after adjusting the spacing of the warp cords. It didn't make a huge difference, but I'm happier that I took the few minutes.
 |
| Before adjusting |
 |
| After adjusting the spacing |
And the final product.
 |
| Ta da ... |
This was a fun project. Just a few months ago, the wood was a living tree. When it fell in a storm, I took a couple logs and made the posts and rungs. Weaving the seat was the icing on the cake.
I probably mentioned this when I posted about a Danish cord stool in early 2022, but weaving this cord is tough on the hands. Near the end, I used an old pair of bicycle gloves and that helped.
Last note: After completing the warp, the seat doesn't feel like it's tight enough. But when the weft goes in, it really tightens it up and becomes quite firm.
Just a thought... You can take a learning point from the marlinspike decorative knot tiers and use a clove hitch around a not too thin rod to pull the cord nice and tight. This should also save your hands a bit.
ReplyDeleteI would use something in the neigbourhood of 3/4" to 1" in diameter and 6" to 8" long.
I should mention that a clove hitch may not even be necessary depending on the tightness required. A few wraps around the rod may be sufficient.
DeleteWell, I have to admit that I didn't understand most of your comment. I've heard of a clove hitch, but I've never been good at knots, even after trying to learn from YouTube a few times several months ago. Even with the makeshift knots I used, this seat is very firm. I did use square knots to tie lengths of cord together and found out (from seat weaving videos) that I'd been tying square knots wrong my whole life (haha).
DeleteThis comment has been removed by the author.
ReplyDelete