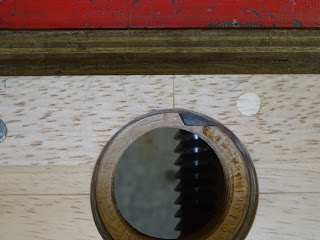
Following some suggestions on the previous blog entry from Sylvain and Paul, I worked on the shape of the cutter. But first, I changed the angle on the front end and played with some other things.
 |
| I had the angle at just under 10° (Roy's book suggested about 10°) |
 |
| Filed it to somewhere closer to 25° |
 |
| Screw blank was still contacting the cutter midway on the lower bevel |
After moving the cutter back 1/8" (by cutting that amount off the back end), I actually got it to cut a little bit.
 |
| Started cutting, but still wasn't right |
 |
| Moving the cutter back made the vertex not align with the internal thread peaks |
 |
| Another view: the bottom of the V should align with the peaks of the internal threads |
So I angled the mortise in which the cutter resides and got some hope.
 |
The screw box cut the blank, but this external thread
failed to engage in the internal threads of the screw box
so the cut was not helical |
I made a few more similar adjustments, and I was cutting a bit more, but really it was not close to what it should be.
 |
| Gnarly, horrible, useless threads |
At this point, I set it aside for a few days. When I went back, I used the suggestions from Sylvain and Paul to shape the underside of the cutter differently. And I started looking at some angle questions.
 |
| First, I ground more of the underside of the cutter to give more clearance for the screw blank |
I got to thinking about how a cutting angle changes depending on where on a circle a cutter is positioned. In the following two photos I'm holding the cutter on the screw that I had cut with a chisel a few weeks ago. The leading edge of the cutter is at the "top" (defined by the picture below) of the circle and it is perpendicular to the radius of the circle where the leading edge contacts it.
 |
| Side view of same |
But if I move the leading edge of the cutter away from the "top" and angle it down a bit, like I did for the screw box, the angle of presentation of the cutter changes and I'm no longer cutting threads where the facets of each thread are at 90° to each other.
 |
| If I move the cutter to the right and angle it down, ... |
 |
| ... the cutter no longer will cut a 90 degree trench |
For this reason, I moved the cutter back to its original position: cutter up closer to the "top" of the circle and perpendicular to the radius at that contact point. After that, I checked the position of the cutter with respect to the screw that I cut with a chisel (and I know fits in the screw box).
 |
| Checking how the cutter tracks with a known screw |
 |
| A closer view shows the cutter tracking in the trench of the existing thread |
With the relief that I had ground on the underside bevels of the cutter, as well as the adjustments noted above, I cut a bit of thread.
 |
| Not cutting deep enough |
I made a couple more adjustments to the depth of cut by shimming the cutter to angle it down slightly and tried again. This time I'm using a poplar blank that had been soaking in mineral oil for a week. BTW, the cherry blank used in previous work had also been soaked in oil.
 |
| Got some threads ... |
 |
| ... and they look good but are still not right |
When I cut the thread in the picture, I could no longer turn the blank into the screw box. I think it's because I'm still not cutting deeply enough, so the "valley" of the thread is getting caught on the peaks of the internal threads in the box.
At this point I decided I had to put this aside for a while so I could get to some other projects. But I'm getting closer. When I get back to it, I'll work on some smaller screws. Perhaps 2 1/8" OD was too big for a first attempt.


You are making progresses.
ReplyDeleteI am interested to your findings.
IMO A larger diameter allows you to better view what is happening
I agree that a larger diameter lets you see better what's happening. But I've seen from Roy and another source that two different cutters, diametrically across from each other in the screw box, should be used for a screw this size. And getting them both set up properly is challenging. The amount of wood that needs to be removed with a single cutter makes it too hard.
DeleteBut at least I've seen how things need to be set up using a larger screw and that should help a lot when I try it with a smaller diameter.
I don't know whether it can be said to be a rule of thumb but these high quality threading tool sets use two cutters from 1 1/2" and larger.
ReplyDeletehttps://www.fine-tools.com/gewind.html
Thanks for the link. I saw on their site the two replacement cutters for 1 1/2" and larger screws. The deeper the thread, the more material to remove - makes sense to have dual cutters. But I'm betting it's tough to get them both aligned properly for a homemade version.
DeleteYou must to do inside bevel to cutter
ReplyDelete