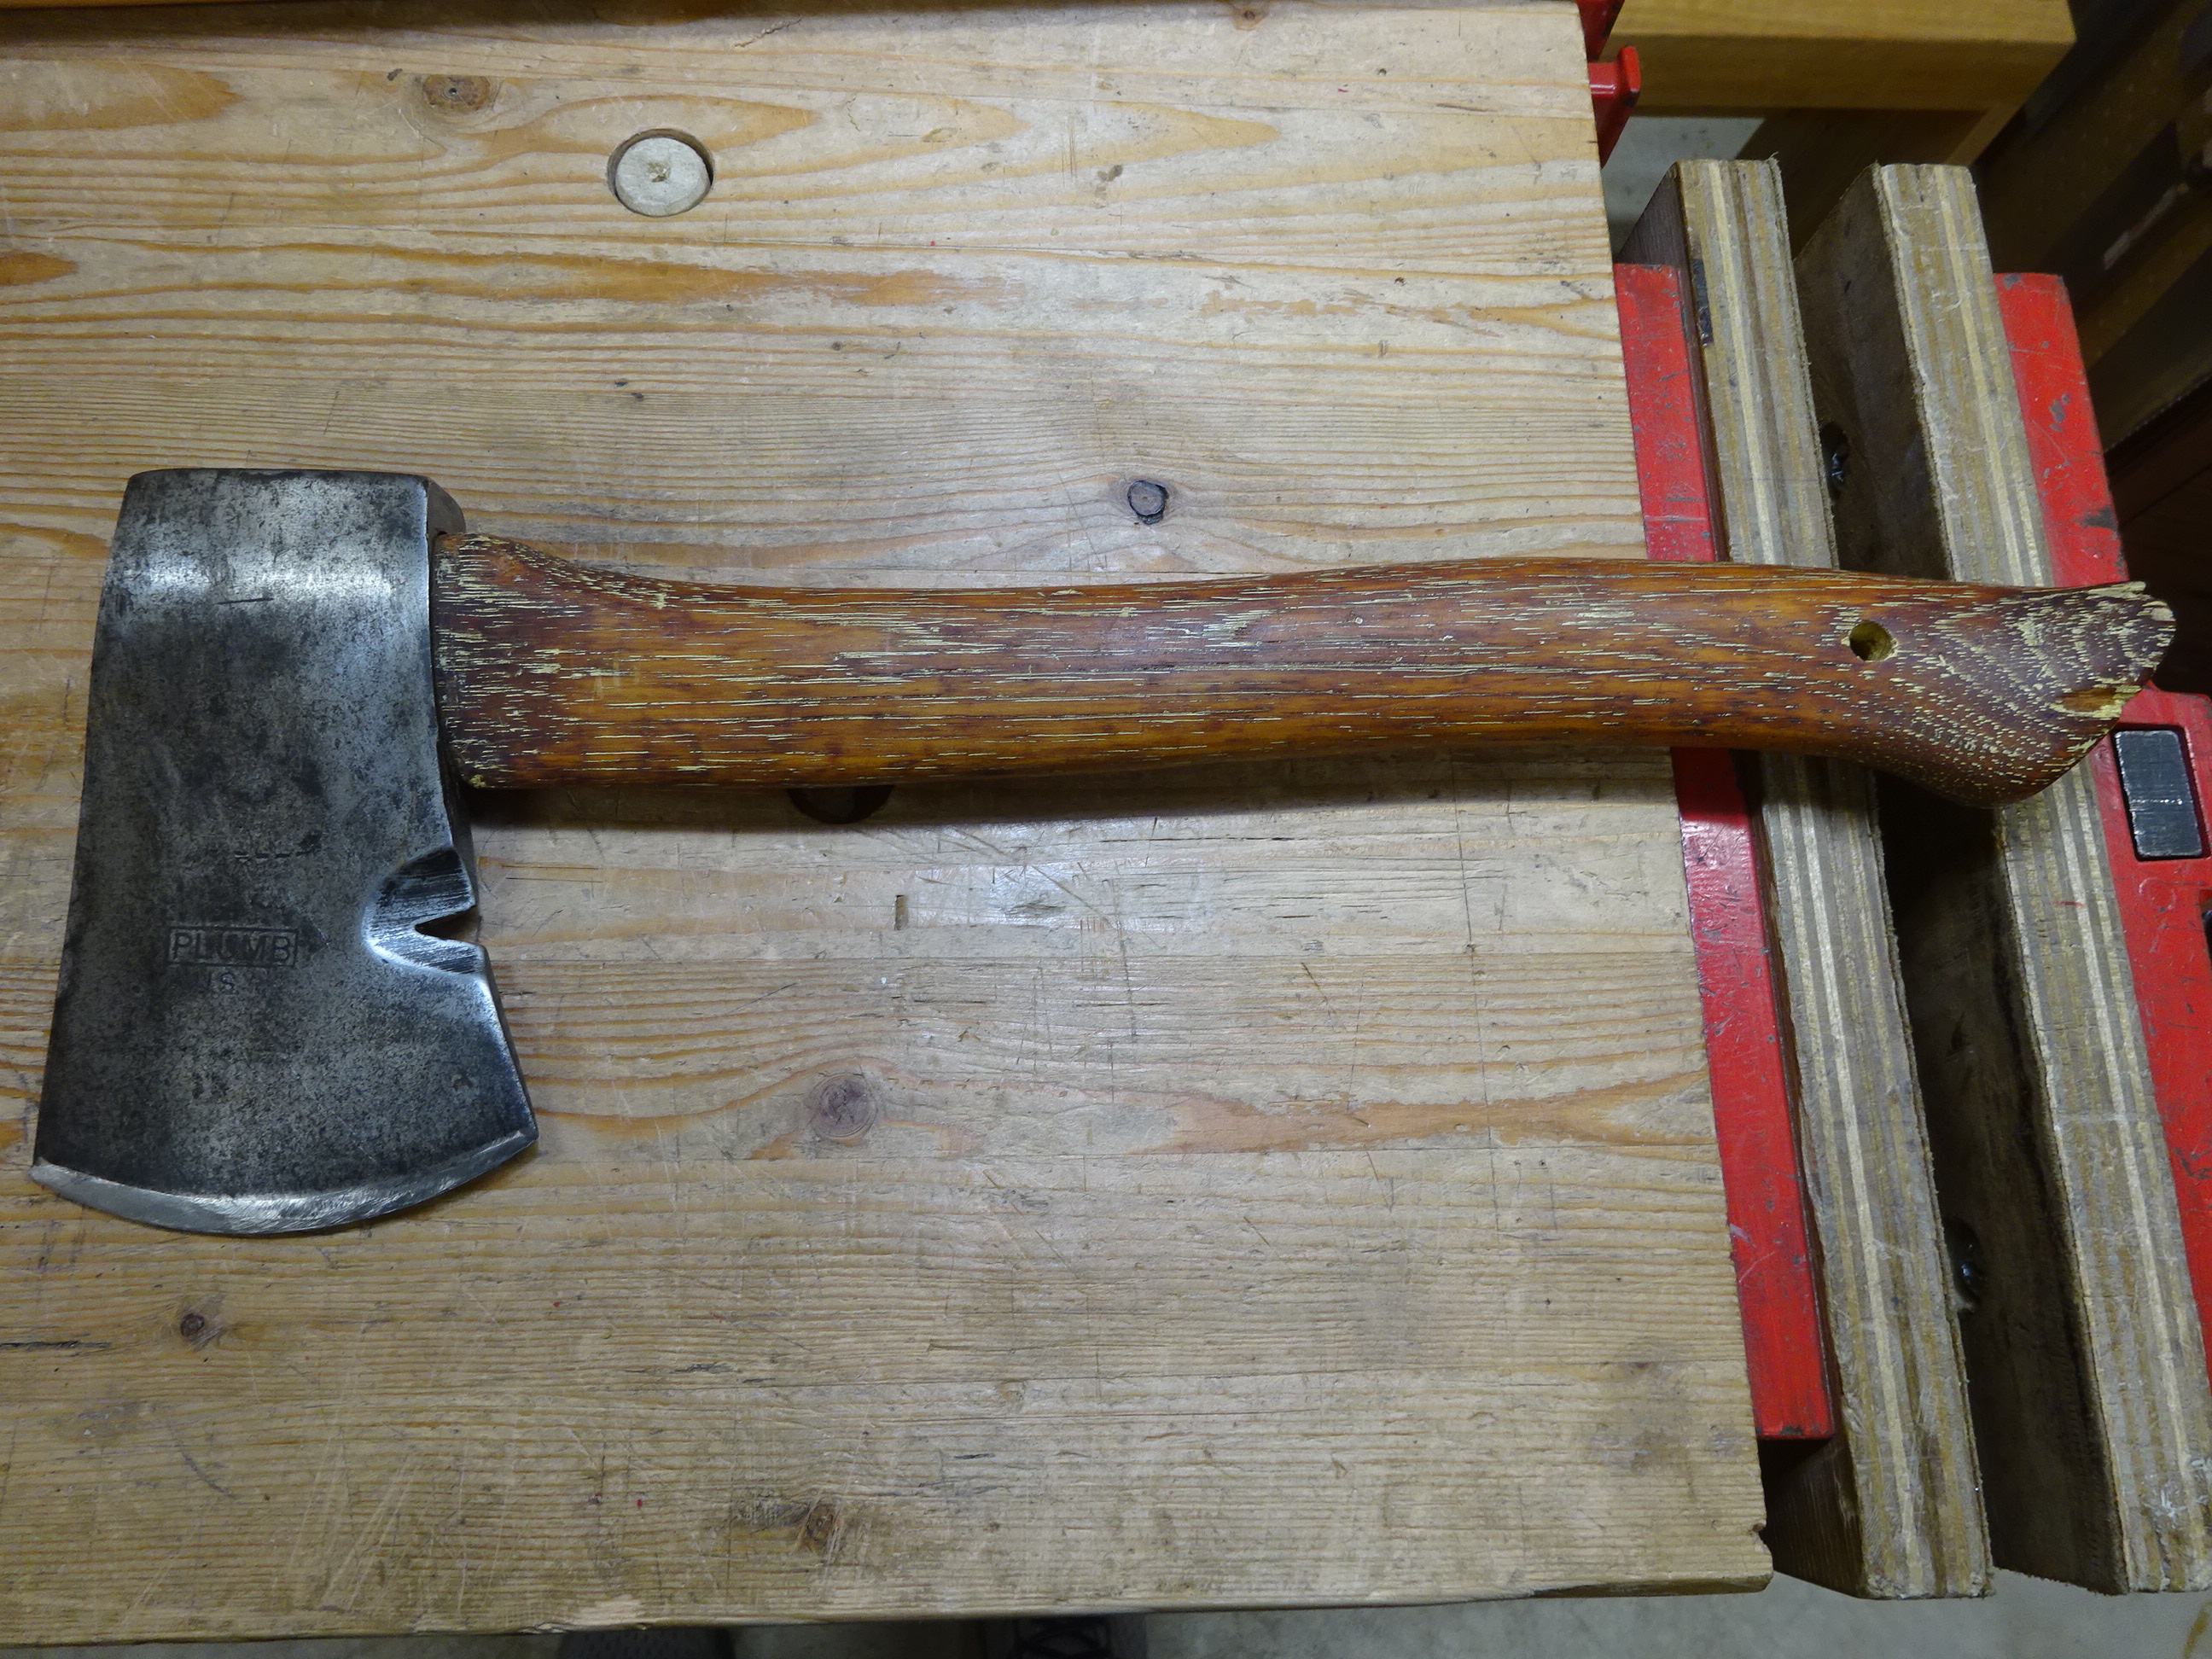
I found this old Plumb hatchet at a garage sale a few years ago. Read the end of this post for more information on Plumb. The handle on the hatchet was painted yellow when I bought it. I had scraped the paint off and oiled it, and it was so smooth and comfortable. I mean baby's butt smooth!
 |
Plumb hatchet
|
 |
Logo
|
 |
| Boy Scout logo on other side |
I don't use a hatchet much, but recently I noticed that the head was not quite secure on the handle. Looking more closely, there were three nails and a screw-in wedge shoring up the original wooden wedge.
 |
| Not the greatest job of wedging |
 |
| That screw head seen in the previous pic is actually a screw-in wedge |
Time to make a new handle. I don't remember how I got it, but I've had an old ax handle for years. It says Genuine American Hickory and it feels strong and dense, so I thought I'd try making a new hatchet handle from it.
 |
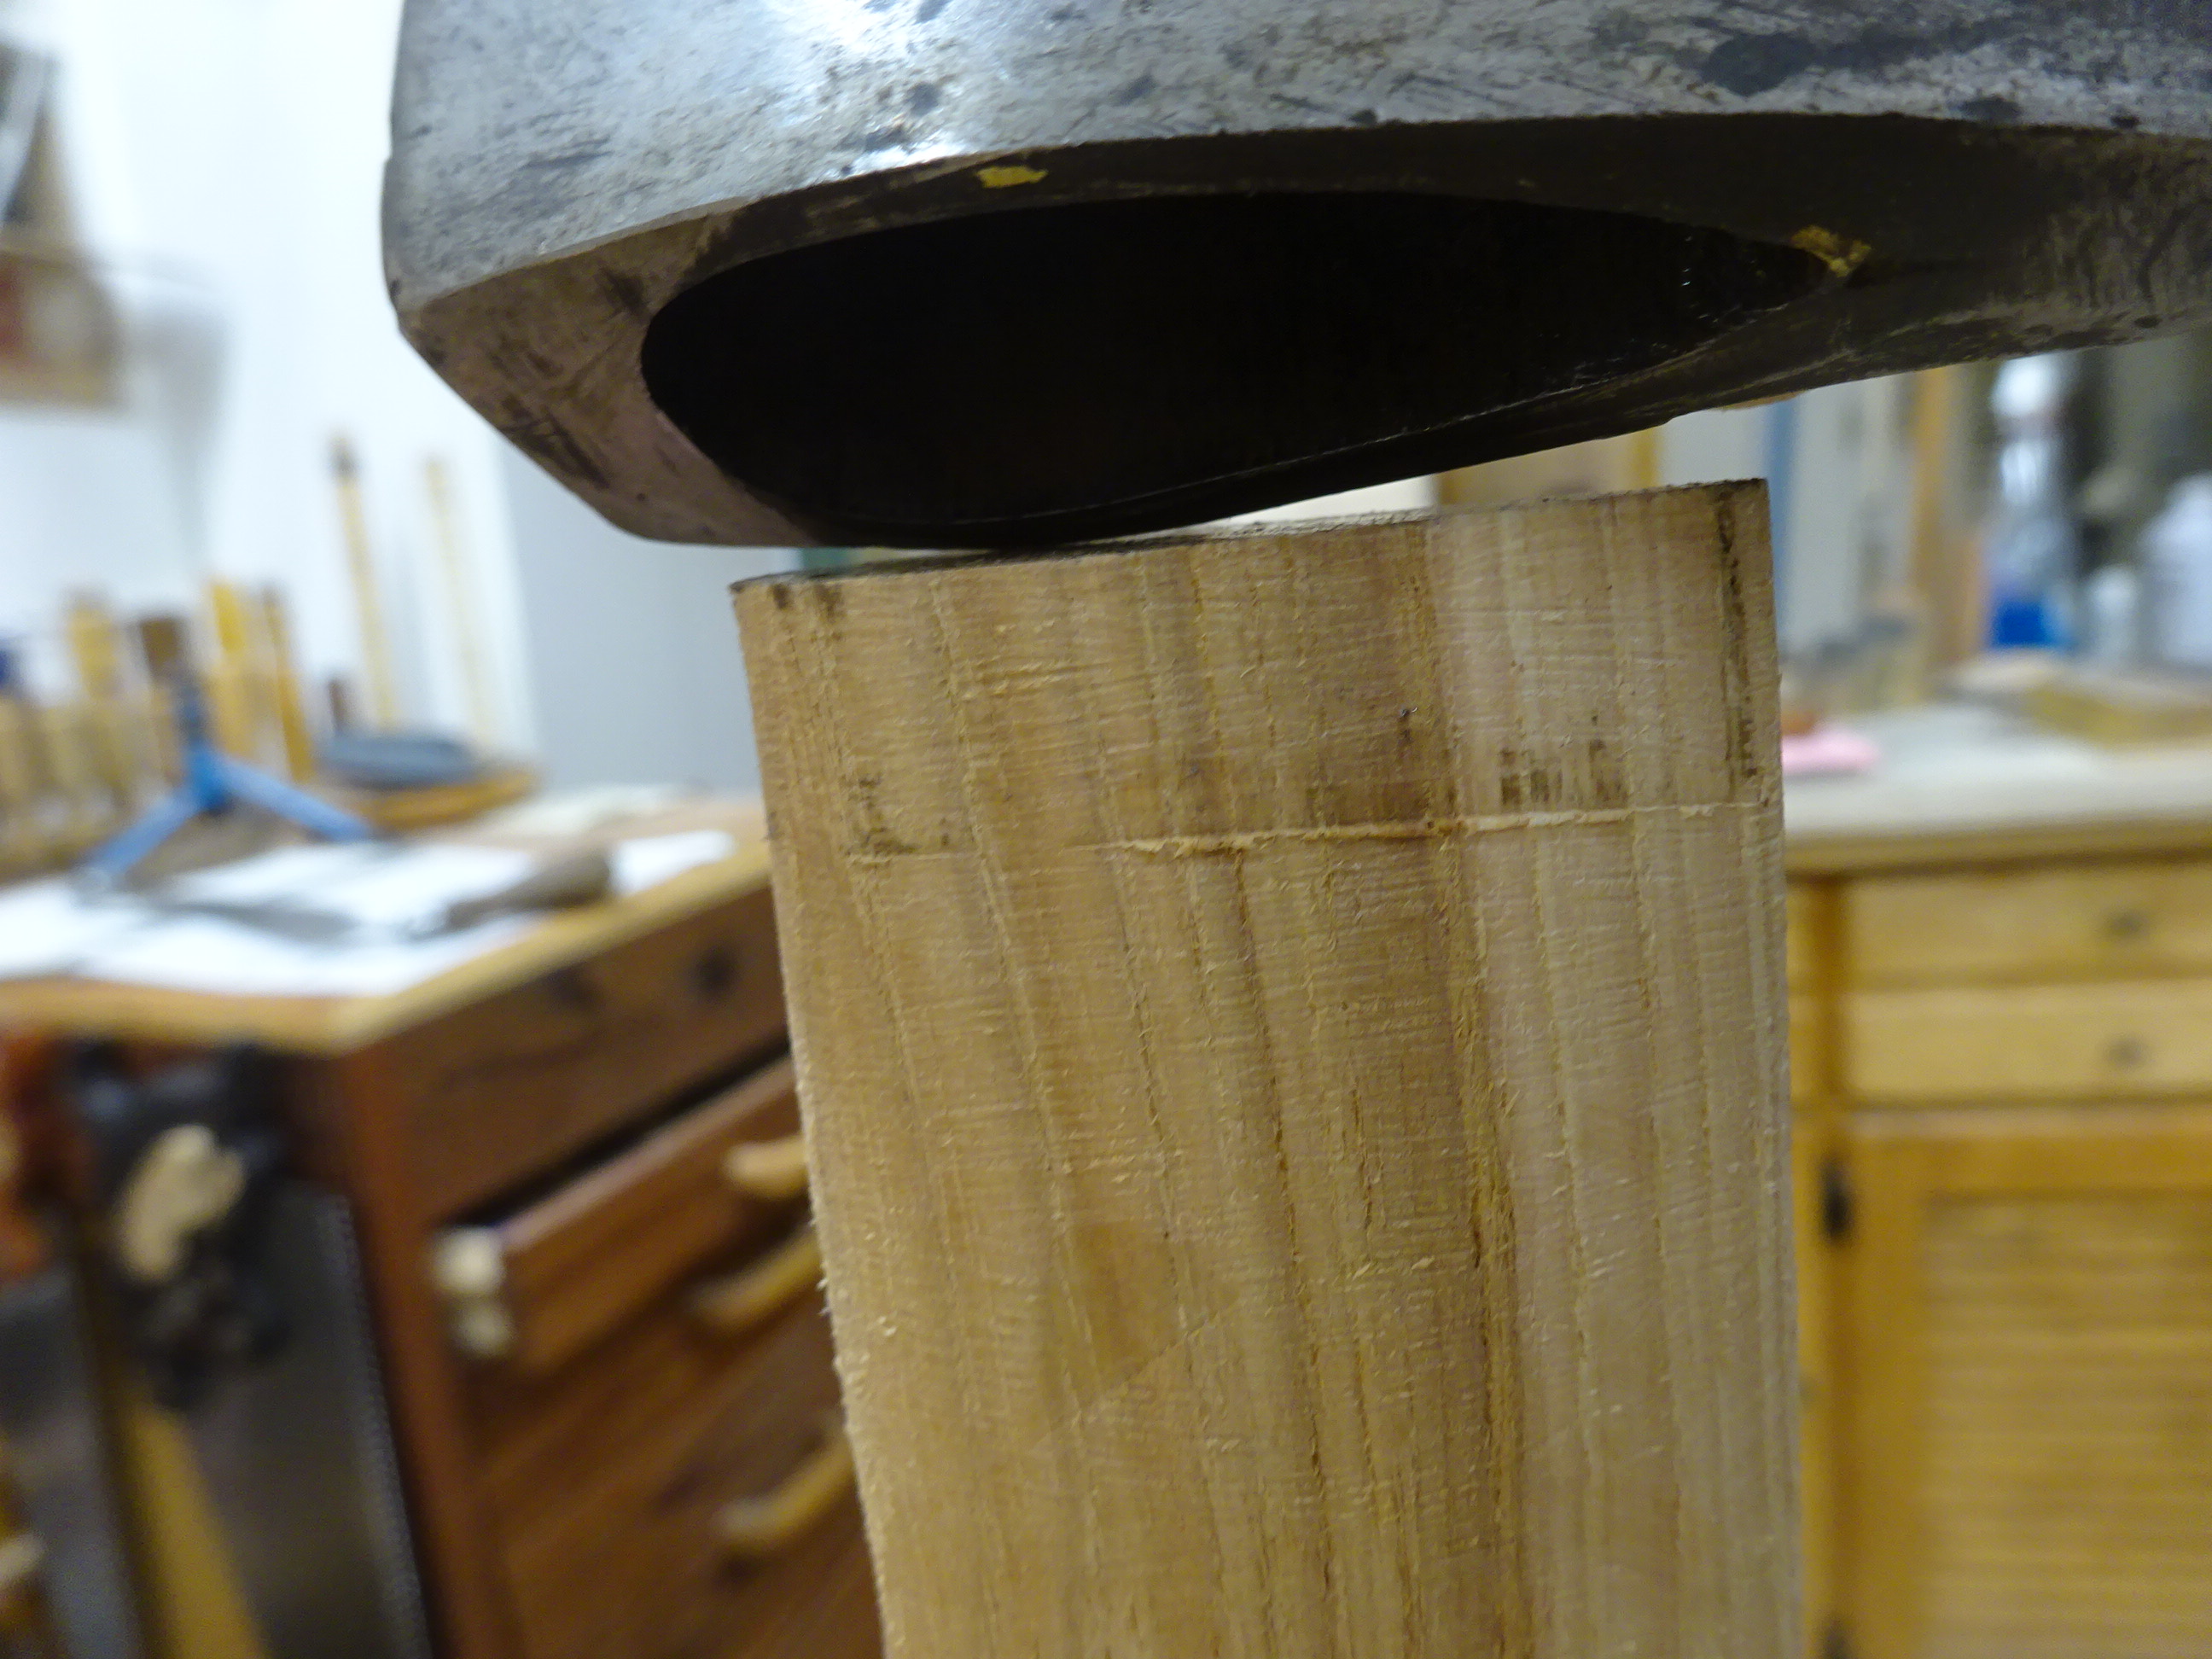
Tap the head on, then pull it off
|
 |
The ridge and marks from the inside of the eye indicate where to remove material
|
 |
Successive marks showing the progress with each iteration
|
Eventually I got it seated, but had to do some chisel work on the shoulder to match the curvature of the base of the head. Next was to cut a kerf in the top of the handle.
 |
| Sawed down about 2/3 to 3/4 the height of the eye |
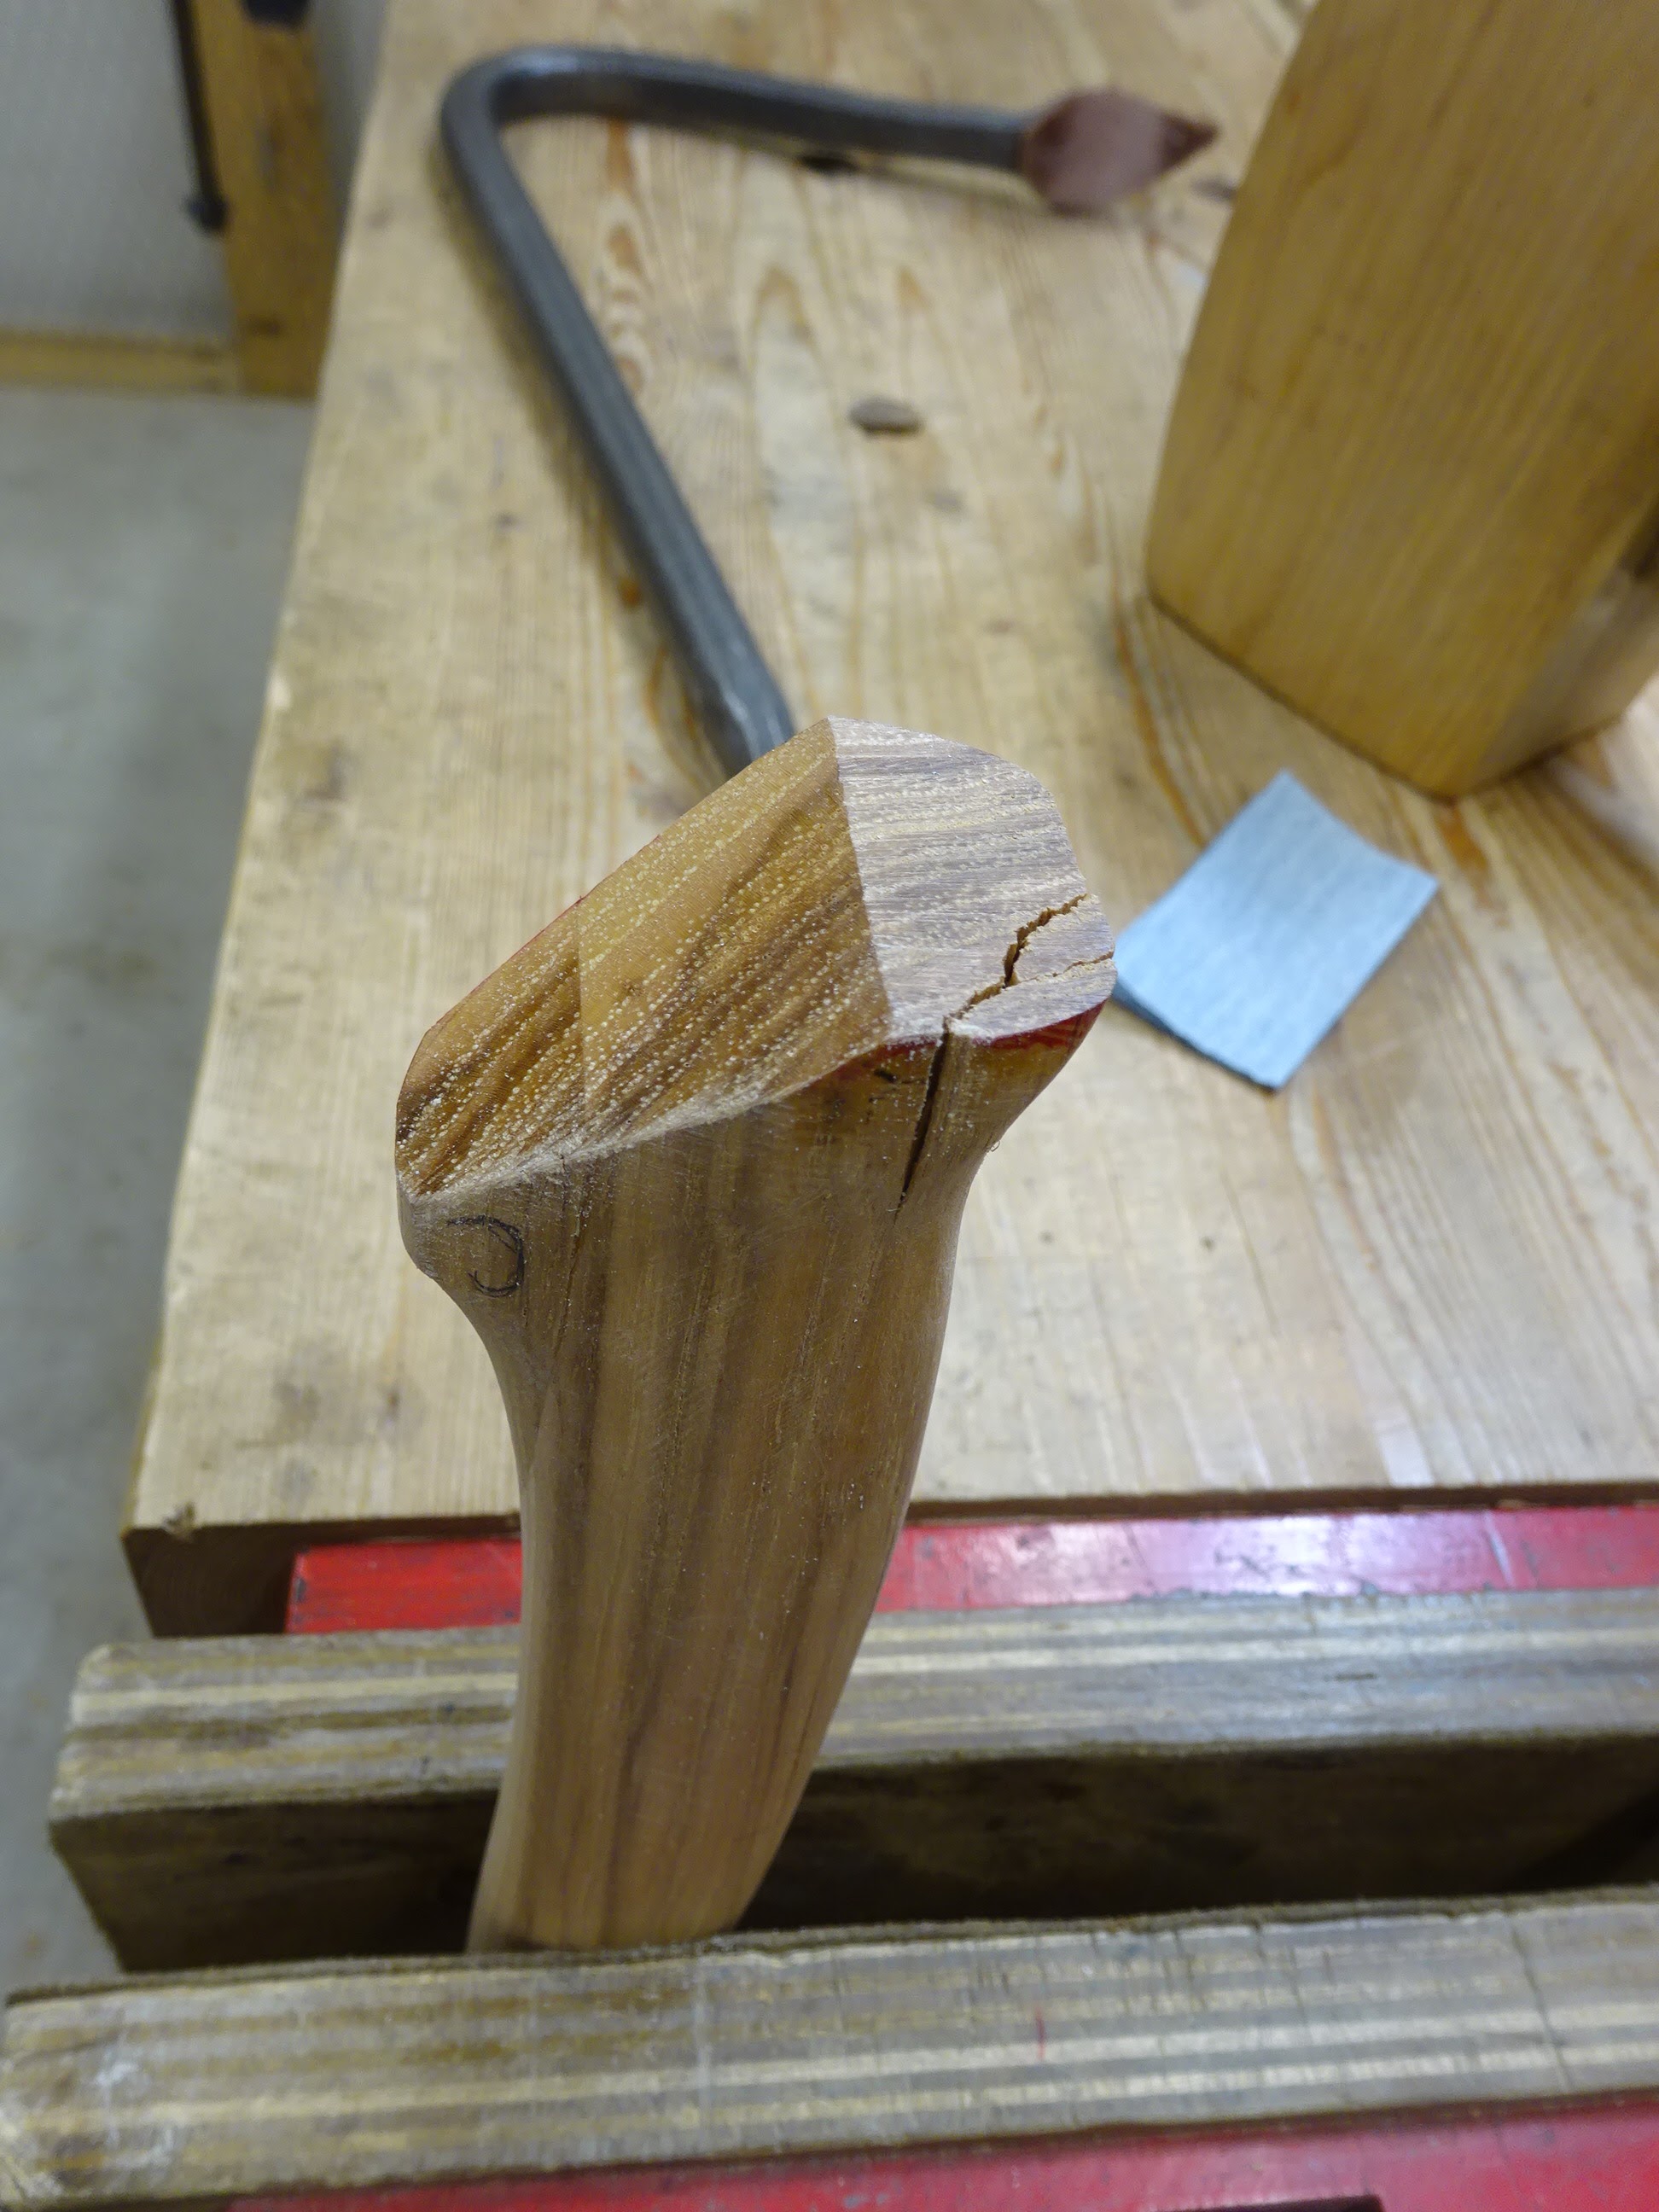
Shaping was done by holding the old handle to the new and sketching a shape. Front and back of the handle were shaped first using drawknife, spokeshave and rasps. The sides (thickness dimension) were done later. There is a little "horn" at the bottom of the handle that I didn't have enough width of material for. So I glued on a piece and shaped it when the glue had dried.
 |
Arrow shows the "horn"
|
 |
Glued on some extra material
|
 |
Then shaped it like the original (still some extra length on new handle)
|
When I was happy enough with the shape, scrapers and sandpaper gave it a nice smooth feel. Then it was the moment I had been worrying about: wedging the handle.
 |
First cut the excess above the ax head to about 1/4"
|
I had researched what wood people use for the wedge and remarkably poplar is commonly sold for this purpose. I would think it would get destroyed by a metal hammer while being banged home. No way was I using poplar! I also read some advise not to use oak or other open-pore wood, as the pores might crush over time and may loosen the wedge. I ended up using maple, a hard, close-grained wood. I had not seen anybody do this or recommend this, but I made the wedge a little thinner at the front than the back to more closely match the shape of the eye.
 |
Starting to hammer in the wedge
|
 |
Worried about breaking the wedge, I clamped blocks to either side while tapping it in
|
The wedge didn't go in as far as I had hoped. When it wouldn't go any further, it started breaking and I cut it off there. I then trimmed the excess sticking out of the ax head to about 1/8" protruding and pounded in a metal wedge that I found somewhere.
 |
| Metal wedge tapped in and cut off flush |
All the research I did on these metal wedges indicated that they would be tapped below the surface of the wood. But my wedge was quite fat and couldn't go that far in, so I had to cut off the excess and file and sand it smooth. While I was pounding the metal wedge in, I had the butt end of the handle on the concrete floor. Even though I had extra material to be cut off later, I damaged some keeper material.
 |
Arrgh! And this is after cutting away the extra length.
|
I glued the cracks and managed to clamp it in the vise (which was no small feat due to the shape of the handle and location of the crack. After some shaping it looks fine.
 |
Completed shape
|
The original handle had some initials on the butt end - former owner perhaps - so I added mine to the new handle.
 |
Original handle
|
 |
New one
|
Finally, I gave the new handle some BLO and sharpened the tool and I think it'll be ready for many years of use.
 |
Glamour shot #1
|
 |
Glamour shot #2
|
The Plumb Co. (originally Yerkes and Plumb) was founded by Fayette R. Plumb around the 1870's in Philadelphia, initially with Jonathan Yerkes. By the late 1880's, Yerkes retired and the company was fully Plumb's. For (a lot!) more information about the Plumb Co., check out
this site.


Good job on the new handle. Should make a fine hatchet
ReplyDeleteBob
Thanks, Bob. Can you tell I'm between projects in the shop? Last few and next few posts are more shop-related stuff than real ww projects.
DeleteNicely done!
ReplyDeleteNext... Make an edge cover (to protect the edge, not you), polish that edge to razor sharpness, and set it aside. You'll mis-remember where you last left it and will look for it for months.
Still searching for mine! :)
Thanks, Bob. I thought about making a cover. I have a little leather - maybe not enough though. Should research this a little to see different designs.
DeleteAbout 5 years ago I found a Swedish Banko hatchet head at a flea market for a buck. When I rehandled it, I just put in a wooden wedge, and as I was about to saw the end of the handle flush with the hatchet, I decided to leave about 3/8 inch stick out. The handle has been absolutely solid since - and I use it frequently.
ReplyDeleteGood luck with your hatchet. Some postings by P Follansbee have been helpful for me in finding good safe hatchet ' technique'.
Alfred
Thanks, Alfred. I wasn't sure if too much extra handle protruding from the top would get in the way at times - I've not got a lot of experience with hatchets, so I don't know. As it is, I wanted a little to protrude (for the reason you did), but not too much. Hopefully it will remain tight for many years.
DeleteYour should be plenty strong. I only used one, wooden wedge and left as much of the handle's end as you show in your pic before flush-cutting it.
DeleteTwo things I wouldn't want to do without: 1. the sheath - I made a basic one out of a remnat on thick leather with one rivet so that the cutting edge doesn't cut the seam,
2. the ax store - a round whet stone with a different grit on each side.
I don't do a lot of rough carpentry but have found a lot of uses for the small hatchet.
Alfred
Great point! A carpenter's hatchet is such a versatile tool—perfect for precision cuts and shaping wood. Whether you're a professional or a DIY enthusiast, having a high-quality hatchet can make all the difference. Do you have a favorite brand or style that you use for woodworking projects?
ReplyDeleteThanks for the comment. I'm afraid I don't know much about hatchets, so can't name a favorite brand. This one was a learning experience for me. I've used it occasionally over the last five years and it's great to have around.
Delete