In
the previous post, I finished the primary excavation. That left me with a flat bed, though it was narrower than it needed to be. I needed to extend the bed to the full width of the iron, plus 1/16", and this would create the abutments and form the recesses for the iron and wedge. Here's how it was done.
 |
| Used a flush-cut saw down to the 1/4" line, referencing off the bed ... |
 |
| ... but used a 0.019" thick cereal box shim to ensure not going below the bed line |
 |
| For the final plane, I used a 0.010" thick brass shim |
 |
| Can't see them here, but I also marked 1/4" depth lines on the saw blade so that I wouldn't saw too deep |
For the cut that defines the front aspect of the abutment recess, I made a temporary sawing guide at the combined angle of the iron and wedge and screwed it to the bed. I was able to use the layout lines on the plane body to figure out the angle.
 |
| The temporary sawing guide screwed to the bed |
 |
| In this close-up, you can see I positioned the guide so that the thickness of the saw will get me to the cut line |
 |
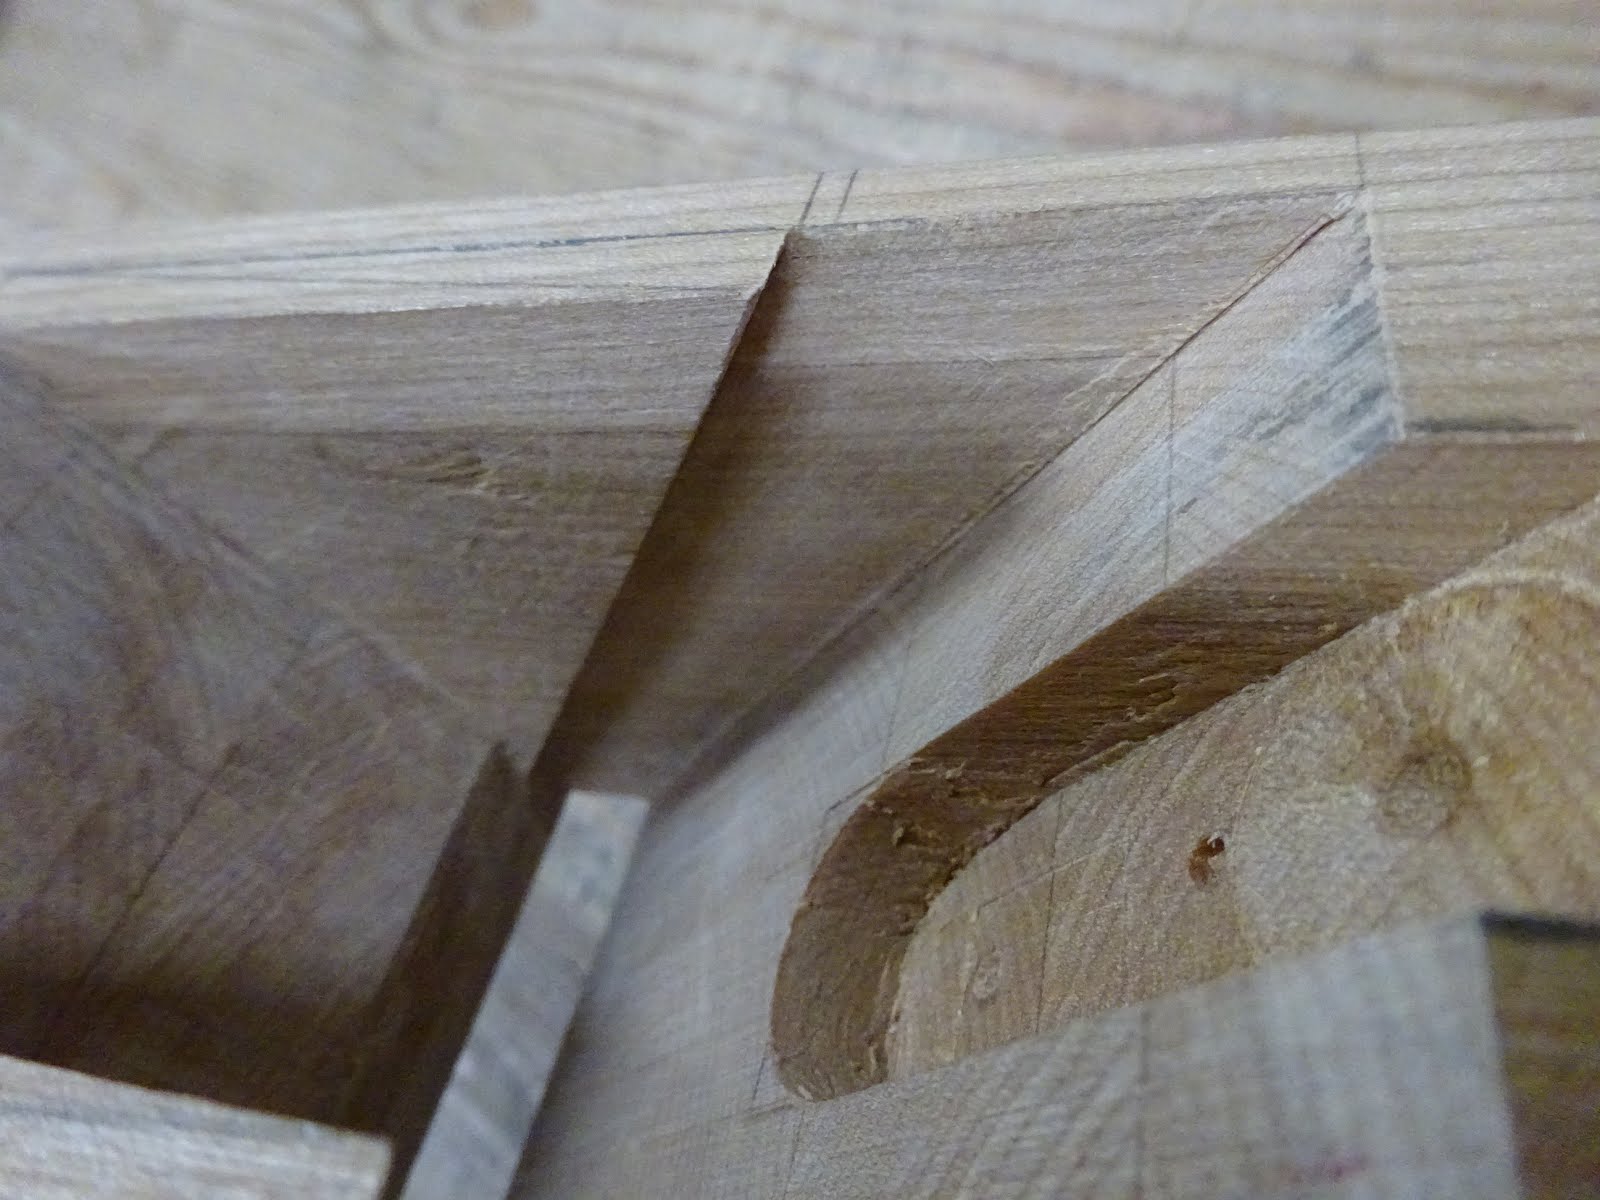
| Then I sawed to 1/4" depth ... |
 |
| ... and I'm left with the abutment recess delineated |
 |
| Then some careful paring gets the side walls down to the sawn lines |
You can see that my shims left me some material to pare away. But the nice, flat bed gave a good surface to reference a chisel against to pare that down even with the bed. That was the reason, BTW, that I used the thinner shim on the final plane - paring the leftover bit on the prototype from using the 0.019" thick shim was harder than it needed to be.
 |
Here's the completed abutment recess on the final plane.
The slot for the cap-iron screw has also been drilled and chiseled out. |
The next step in shaping the throat was to widen the front aspect. I showed the following sketch a couple weeks ago when posting about throat geometry. The throat is widened by cutting down from "1" to "3", with the saw angled to cut 1/4" deep at "1" and not at all at "3".
 |
| Throat widened at front |
 |
| Cutting at an angle - you can see the teeth down deep are not engaged in wood |
Then it's a matter of paring away the waste to get a smooth side wall, angled at top. Finally, I marked and cut to lines for the "eyes", the softened edges that spare tender fingers when clearing the throat of shavings.
 |
| "Eyes" laid out |
 |
On the prototype, I pared about the same amount on top as on sidewall (basically 45° paring).
That was a mistake that I corrected on the final plane, cutting more on the sidewall than on the top. |
I'll continue next time with the wedge, first cuts and final shaping.


Remarkably precise work, congratulations! The cut to widen the throat would give me some chills!
ReplyDeleteThanks, Lionel. Like with most things woodworking, it just takes patience. It's a matter of layout and carefully cutting to your lines. When you lose patience and try taking deeper cuts, that's when you go past your lines and ruin things!
DeleteAwesome job on the plane. I have a bunch of blanks I split out from a beech log and someday I want to have a go at it. Alder is only marginally harder than poplar. Considering the effort you are expending a tougher wood might be more appropriate. Beech and birch have been widely used for plane making over the centuries.
ReplyDeleteBlog comments can be affected by browser security settings. With the frequent updating of some browsers, a new privacy setting could have found its way into your setup. I can comment on these blogs from my work machine but not my home one. It should be the other way around but such is life.
Steve, if I could get my hands on thick quartersawn beech, that's what I would use. But I do love making due with what I have on hand. I love the way these planes look in red alder, but if they don't hold up over time I'll have to seek out a more appropriate wood.
DeleteThanks for the info on the 'comments' glitch. If that comes up again, I'll (try to remember to) look into those settings.
You would be best off (except for the dry time) looking for logs. Arborists cut down trees every day. Someone who burns wood will have splits of hardwood in their pile. I've grabbed logs off the side of the road. You can split them to rough size but for this project you wouldn't want to wait years to dry.
ReplyDeleteA lumberyard that has turning blanks may have some pieces suitable but probably not beech. Mail order might be an option and a lot of businesses are more friendly to small sales now that the economy has slowed so drastically.
Blackburn tools was selling beech plane blanks a while ago but I think they are done with that.
Good options, Steve. Thanks for the input.
DeleteRegarding the comment, I used to have Chrome set up for commenting on these blogs and it stopped working. I tried to send a comment and the Captcha didn't load so I went into settings and allowed "third party cookies" to be set and it worked. I keep an extra browser less secure so I can do stuff like this without excess tracking in my normal browsings.
ReplyDeleteGreat works and you are learning a lot about these wooden planes by making some. Such knowledge comes handy to refurbish old cranky planes :-)
ReplyDeleteReading your earlier comments about commenting. If you use your Google profile should work better. Google just like Apple does not always play nice with others. When i comment my profile says (google) at the end of it. Which of course does not work with Wordpress bloggers grrr ...used to accept Google and open id, no more.
The joy of software updates $#@&
Bob
Those wooden planes sure are interesting. It's great learning more about them.
Delete