Well, the
first prototype in pine worked, but the mouth was huge. And while a jack plane doesn't need a tight mouth, I wanted to do better. Also, I wanted to do some work with a tote and practice the shaping details on the body.
To tighten up the mouth, I searched the internet and once again
Bob Rozaieski came through for me. Bob often seems to have the information I need and that's why I
support him on Patreon. His post from May of 2017 on
Wooden Plane Throat Geometry showed exactly what I was looking for. And though his post was about smoothing planes, he told me the same ideas hold for larger wooden planes.
This time I made my plane blank from poplar. After sawing off and planing the sides, I cut the main body apart. I used a 45° bed angle, a 60° breast angle and a wear angle of 100°. But this time, the wear is taller.
 |
| Left side of plane is removed, bed is to right and breast and wear are to the left |
 |
| Notice how short the wear was on the first prototype |
In the first picture above, you can see the abutment recess drawn in. Note how the fore part of the abutment does not go all the way through to the mouth, but rather it ends in the middle of the wear. And you can see how small the mouth will be.
 |
Here I've moved the breast/wear section of the main body to the left, revealing
the overall shape of the abutment recess |
This complicates the making of the plane slightly, as one cannot saw the front abutment shoulder like you can with the rear shoulder. But chopping, paring and leveling with a router plane is fairly quick.
After that I made a wedge and planed it to fit. I shortened it a little bit at the small end so that it would not run into the "wear" portion of the abutment recess.
 |
| Fore section of main body removed to show fitted wedge |
 |
| Here's a close-up shot of the wedge (right) extending just to the wear section of the abutment recess |
I cut the wedge a little shorter and then did the rest of the shaping on the wedge. Then I prepared the blank for glue-up.
 |
| The body and sides are taped together from below to prevent moving while gluing together |
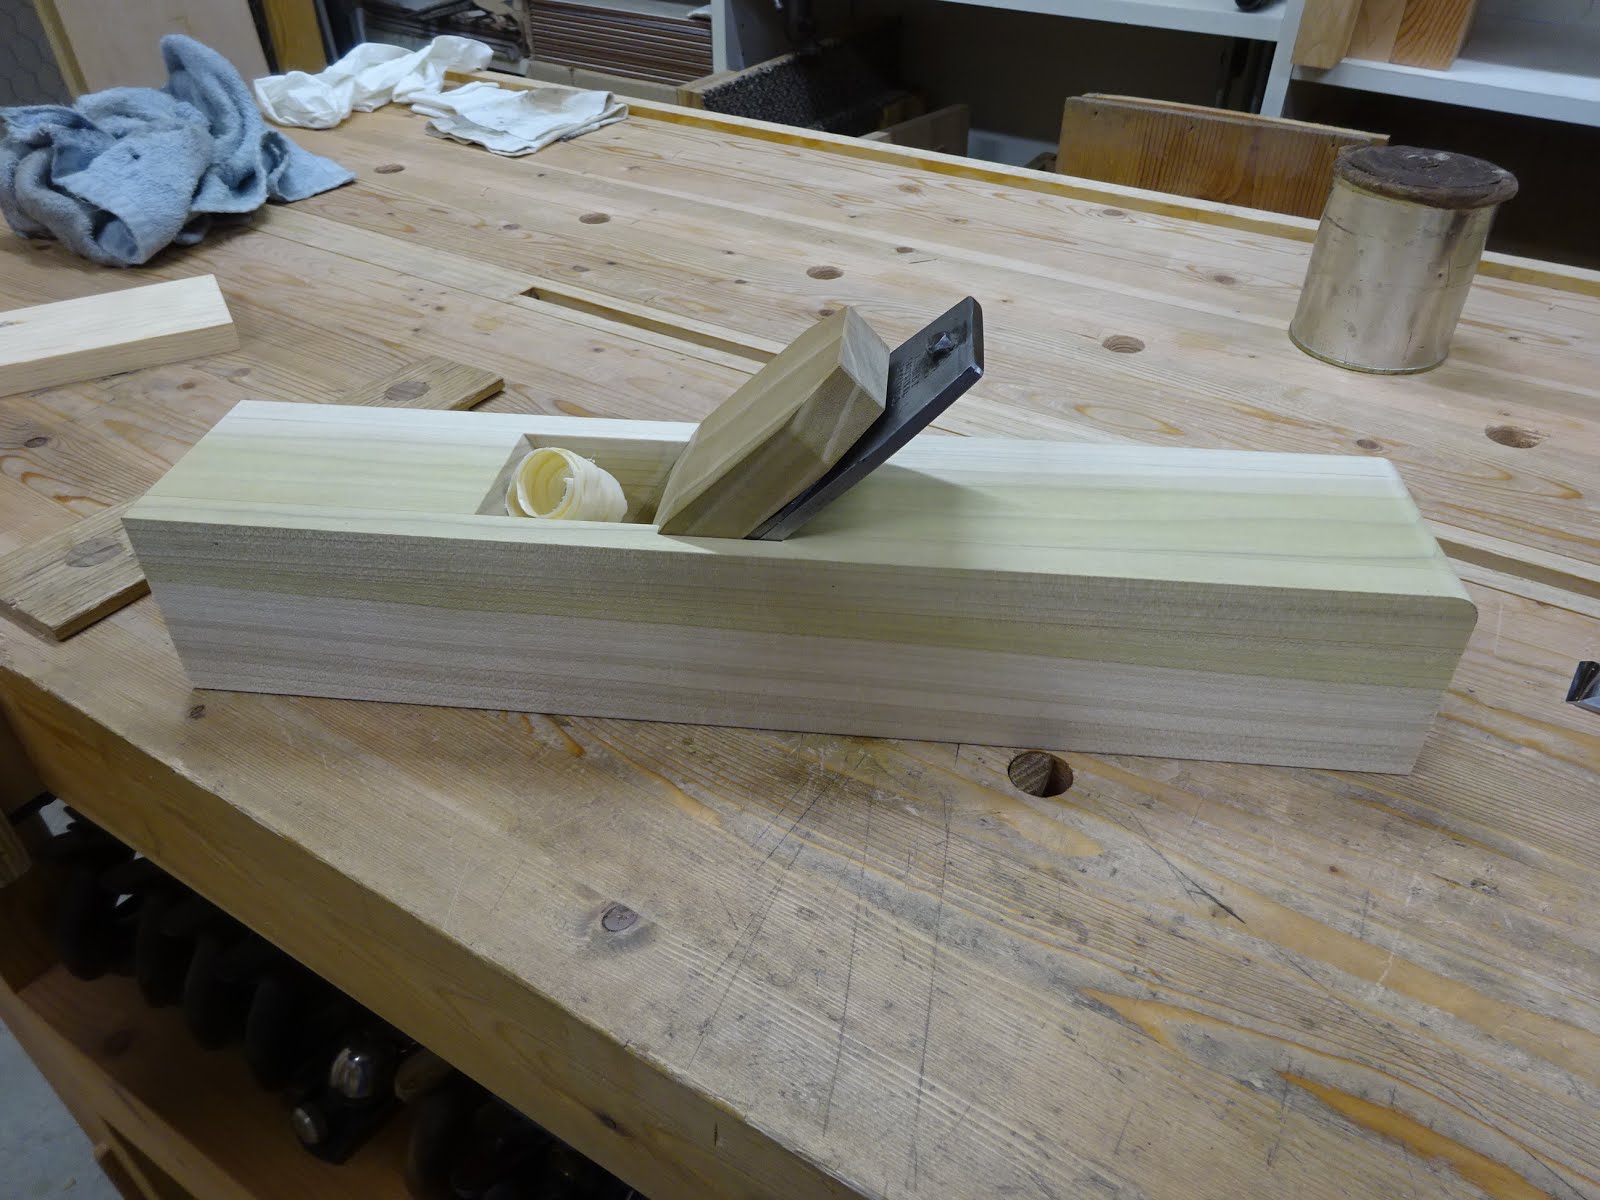
Once the glue dried, I cleaned up the outside surfaces and cleaned up any glue that squeezed into the throat. Then put in the iron/cap iron and wedge to see what the mouth looked like.
 |
You can see the mouth opening at bottom of the throat.
It came out just about how I wanted it. |
 |
| Here's the mouth from the sole - fairly tight, but allows thick shavings to pass through |
When I gave it a try, I got nice thick shavings with no clogging.
 |
| First shavings |
The next thing was the handle/tote. I love the comfort and shape of the tote on my early 1900's type 5 Stanley #4 1/2 and I used that as a model.
 |
| Copying the tote shape from the #4 1/2 |
 |
| The paper template |
 |
| Used the template to transfer the shape to a 1" thick piece of poplar |
 |
| Then cut and shaped as best as I could. This was time-consuming, but was a lot of fun. |
Note the cutout at the bottom rear of the tote. That's a tip I got from Richard McGuire's plane build - it allows you to fit the tote into a rectangular mortise, rather than try to shape the rear of the mortise like the rounded back of the tote.
I chopped the mortise and pared the walls very carefully and got a great fit. Then glued the tote in with hide glue and let it dry.
 |
| Gluing in the tote |
I'll close with some details on the shaping of the body for comfort.
 |
| Added the "eyes" at top of throat, which make it a lot more comfortable when retrieving shavings |
 |
| The top, rear edge was rounded over, approx 3/8" radius |
 |
All other top edges were chamfered, 3/8" on sides and 5/32" on top.
And a stopped chamfer was extended down all four vertical edges about 1 1/4" |
 |
| Prototype #2 all done |
Next time I'm going to write a bit about the positioning of the tote and how I changed that for the real (non-prototype) plane.


Awesome work, keep it up
ReplyDeleteBob
Thanks, Bob. This stuff really gets me thinking about the design of the old tools. There's always more to the designs than you first realize.
DeleteOh very much so. These oldies looks simple but every little design is there for a reason, Building one is probably the best way to understand how they works. Even a simple looking chisel has a few little tricks up its sleeve.
ReplyDeleteBob, where we did not escape the last snow storm, dang!