One of the tools that was in the box of tools I won in
an auction recently was a Buck Brothers gouge. The business end just needed some cleaning up, but the handle was in sad shape.
 |
| Buck Brothers 5/16" radius gouge |
 |
| Buck Bros logo |
The handle was cracked and had black cloth tape wrapped around the "ferrule". When I took the tape off, I found this.
 |
| Homemade "ferrule" made from wire |
Apparently the original ferrule broke and the handle cracked (who knows - maybe simultaneously?) and a previous owner fixed it this way.
 |
| Took off the wire and ... |
 |
| ... the tang came out easily |
 |
| The tang was pretty gnarly so I cleaned it up with a file |
 |
| This shows the tang hole, the crack and the original lathe chuck marks |
The back of this gouge was interesting. There is a leather washer on the back end.
 |
| The leather is about 1/4" thick |
 |
| It's actually two pieces of leather |
 |
They came off fairly easily - perhaps originally glued with hide glue.
The end tenon of the chisel handle was 1/2" diameter. |
Well, having just built my
bungee lathe, making a new handle was my first turning project. It's a rather unremarkable handle, but so are my turning skills. I wanted it to be shaped like my other gouge handles - just a gentle bulge in the middle of the handle's length.
 |
Turning the new handle from mystery wood
(possibly some kind of mahogany - it was a piece of an old coat rack) |
I turned a 7/8" cylinder at the left end that would receive a ferrule. That's the same size as the original handle. Unfortunately it looks too clunky to me. The bolster is much smaller - about 1/2" across and the transition doesn't seem to flow just right (see pics further down this post).
When it came to fitting the tang, I used a technique that I learned from a
Bob Rozaieski video. I drilled with three sizes of drill bits, successively deeper as the drill sizes got smaller. Then used the tang to ream the hole until the bolster was about 1/8" from the handle.
 |
| Handle perfectly level in vise |
 |
| Small bubble level on the top of my drill makes it easy to judge level drilling |
 |
| Using the tang to ream the hole |
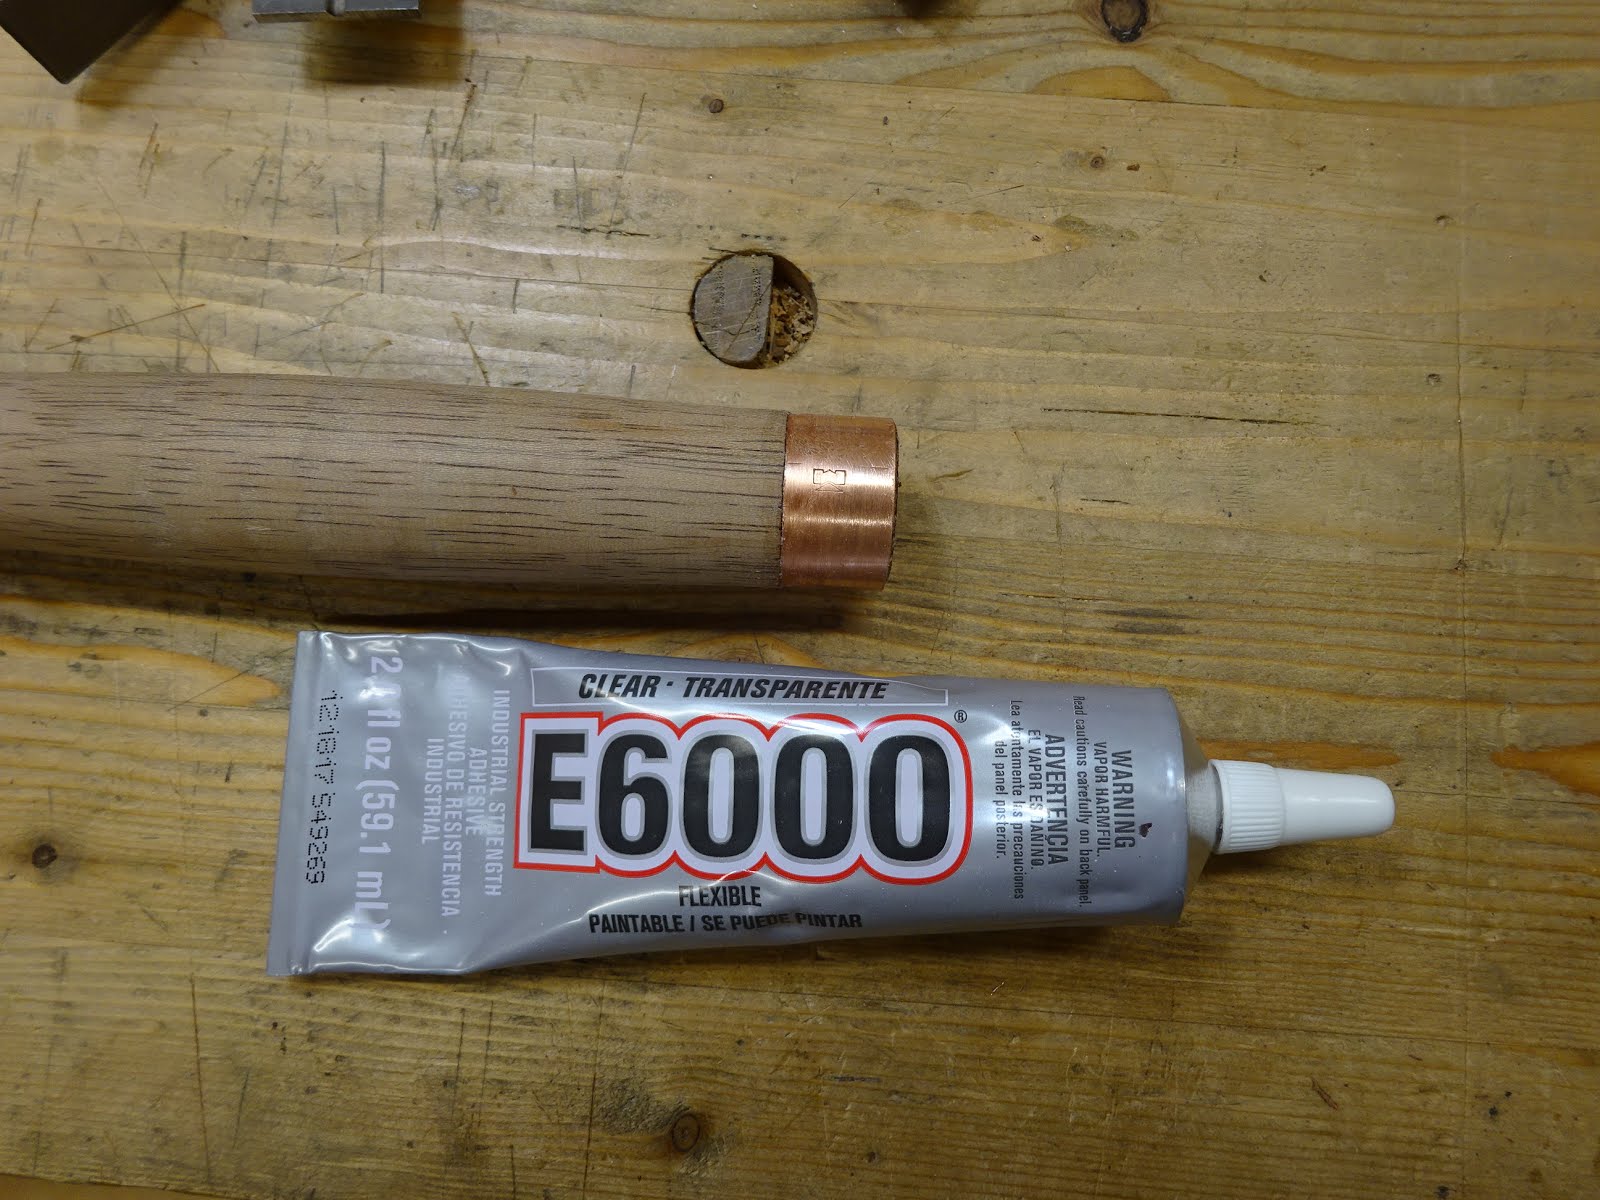
My ferrule was a piece of a copper plumbing connector cut to 5/8" long. I made the ferrule area on the lathe just a tiny bit too small, so had to use some glue to affix the ferrule.
 |
| Ferrule attached |
With the ferrule attached, I whacked the handle home and I now have a new gouge handle.
 |
| Thar' she blows! |
This was literally the first or second piece of wood that I had ever turned, so it's not perfect. And putting a few coats of BLO on it seemed to highlight some not-so-pretty area. But I'm pretty happy about it anyway.
I love putting old, neglected tools back to work - can't wait to use it.


Good job. I would had keep the leather washer detail on the top, it is there to protect the handle from mallet blows, its just the right cushiony material, often built up of thin washers.
ReplyDeleteIf you only use this gouge by hands, then that detail became irrelevant
Bob, who like to see old tools resurrected
There are things I don't understand about the use of leather washers. Primarily, wouldn't they decrease the mallet force that is transmitted to the tool's edge? Also, when using a socket chisel/gouge, I wouldn't think you would need or want a leather washer because each mallet strike just seats the handle better and if the handle is nicely rounded at the back it won't split (wishful thinking?).
DeletePerhaps it has more to do with not breaking the handle. I have some chisels that have a ferrule near the back end, and then a rounded dome of the wood that is struck. I understand how that would be helpful in keeping the handles from splitting. I'm getting hung up on the leather reducing the force of the mallet blow, versus (hopefully) protecting the wood from splitting.
Are force transfer and handle splitting the only two factors to consider? There's a lot I don't know about chisels.
Stupid Ipad ate my reply grr...
ReplyDeleteYes force transfer and handle splitting are two reasons for the leather cap detail. Not all chisels are designed for mallet work, but rather, by hands only. Those that are designed for hitting need some details on top of the handle to minimize or prevent spitting.
A pig sticker for example takes on a beating, the top of the handle, flattish, need a small bevel around its perimeter or it wont survived long. Problems happens when you strike the top offset, not on the center. Being end grain if you hit the edge it will soon split off. The idea of using some cushioning were the mallet hit the chisel is to mostly absorb some of that damaging blow and transfer more force when hitting slightly off, cause the head stays in contact a smidgen longer and wont glance off. Too much cushion and you loose lots of transfer. Leather washer seems to provide the right amount, and newer polyurethane wrapped wooden mallet has a bit more. There are other means to try to ensure better contact when hitting off, such as the round head mallet used primarily in carving, and the waffle head on framing steel hammers (fingers smasher). And yes, there is a lot more about chisels :-)
Bob, hitting things since...whenever :-)
Thanks for all that info, Bob. I was thinking about mortising chisels too - they really take a beating, but don't have a leather washer or a rear ferrule. But they do have the slightly rounded back end that is chamfered to mitigate the splitting issues. And typically made of a tough wood to handle the pounding. I have some other interesting chisels that I'll be posting about soon.
Delete