The last thing to do with the wooden plough plane was to make and fit new wedges. The top of the mortise was a little over 5/8" wide. I couldn't get a measurement at the bottom of the mortise, but I knew it was a little smaller than the top.
 |
| Top of mortise 3/64" over 5/8" |
I used the original wedge to lay out a shape on a stick of beech. I got two wedge blanks from this stick.
 |
| Using original wedge to lay out two wedges |
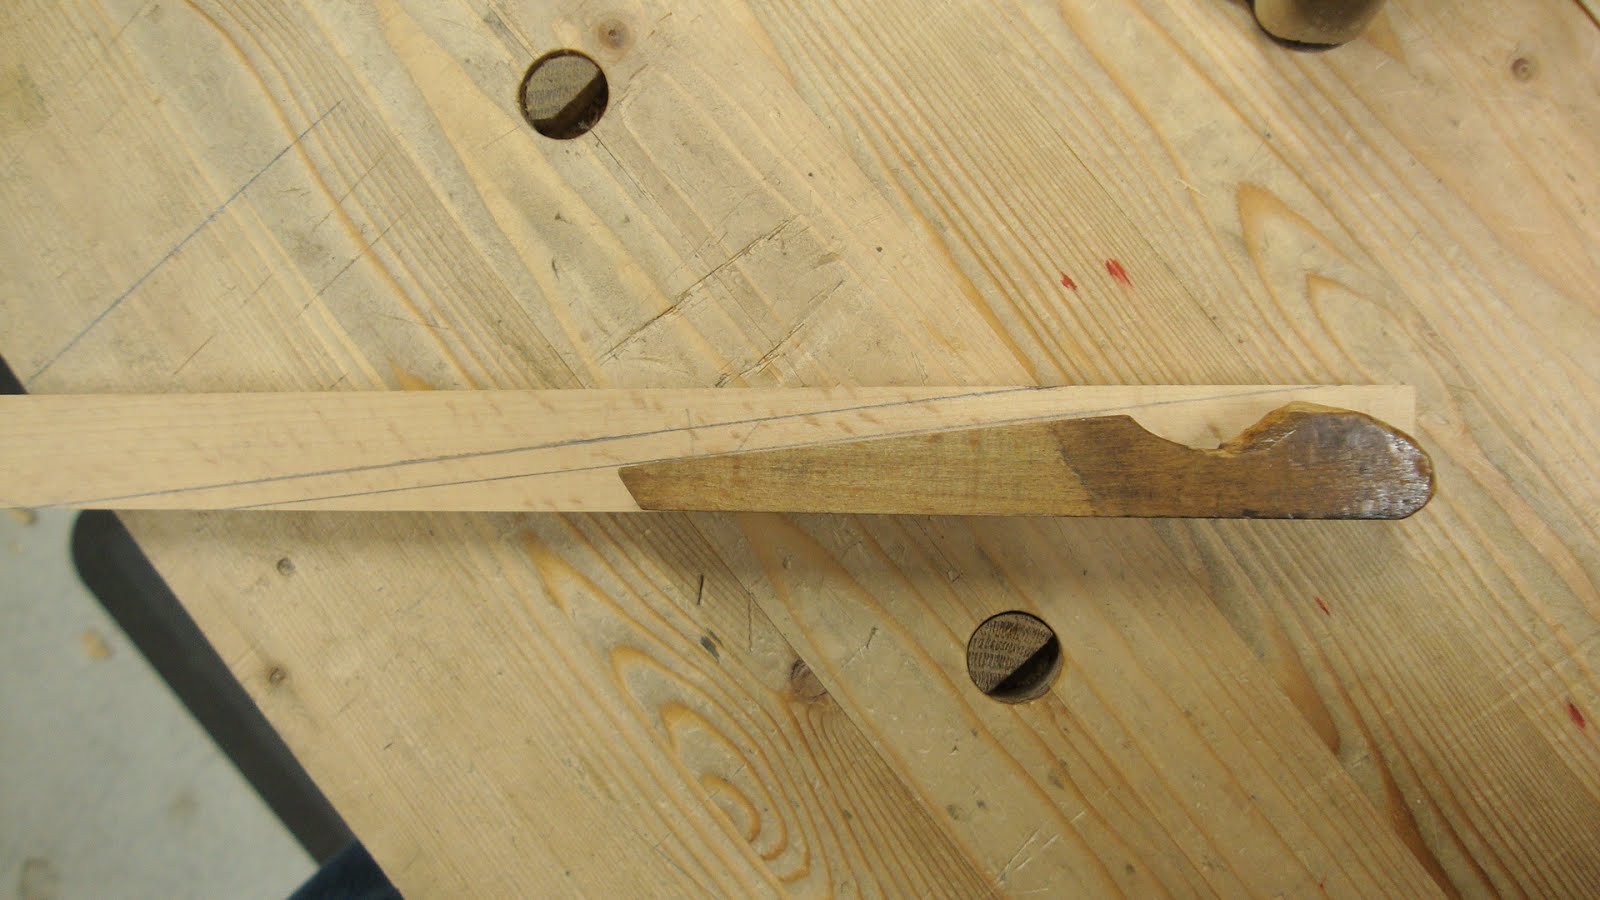
After sawing out a wedge blank, I planed a few shavings off the sides until there was a snug fit in the mortise.
 |
| Sneaking up on the right width |
 |
| View of the top of mortise (no iron in place) |
 |
| And the bottom - both good fits for wedge width |
With the #1 iron in place, I started to plane carefully for a proper fit at the front and back walls of the mortise. Especially for the first of the two wedges I made, this was a lot of planing, fitting, planing, fitting ...
 |
| Bottom of mortise, front - tight to mortise wall |
 |
| Bottom of mortise, back - pretty good, maybe could be a little better |
 |
| Top of mortise, front - a little gap |
 |
| Top of mortise, back - big gap!! |
As Ricky Ricardo might have said, "You've got some 'planing to do!" So I very carefully planed a little more off the lower aspect of the wedge and fitted a few more times. Eventually it came out very tight all around.
 |
| Tight in front |
 |
| And tight in back (it's actually tighter inside the mortise) |
Having gotten a good fit, I needed to do some shaping. The original wedge has a little cove at the bottom that matches a cove in the plane body and skate. These help to guide shavings out of the plane.
 |
Arrow points to the original wedge.
Just below arrow is the cove in plane body, skate and wedge. |
I used a chisel, round rasps and round files to get the shape for the new wedge.
 |
| New wedge shaped at its bottom end |
Then I had to shape the top of the wedge. The original wedge was pretty gnarly and wasn't necessarily a good model.
 |
| At first I used the original wedge to draw an outline |
 |
| Settled on my own shape after playing around a while |
 |
| Then made some relief cuts and chiseled, rasped, filed and sanded smooth |
 |
| And here's the final shape in situ |
The funny thing about this is that even if the wedge could be used for every iron, another iron might have been sharpened many more times (and hence thinner at its thick end) and the coved bottom part of the wedge won't sit in the right location when tightened.
 |
| Here it is with the #2 iron wedged in place - notice the wedge sits a little higher |
Well, now I was excited. Wedge fitted, irons sharp, plane completely fettled - I had to try it out.
 |
| #1 and #3 grooves plowed in a scrap 2x6 T&G board |
Very happy about how it worked. It will still take some practice to get good at using it - can't wait to use it on a project.
I ended up having to make two wedges. The first wedge fit nicely to the 1/8", 1/4", 3/8" and 7/16" irons and the other wedge fit nicely to the other four irons. To ensure that I use the right wedge with the irons, I initially wrote the sizes on the wedges.
 |
| Sizes written on backs of wedges |
Then I had a better idea - a few days ago found a set of letter and number punches on Craigslist, so I punched the iron numbers on the respective wedges.
 |
| Iron numbers punched on the wedges |
 |
| Closer pic - I erased the penciled numbers later |
I gave the wedges a couple coats of boiled linseed oil and let them cure for a few days. And here she is - all fettled and fitted, ready for another generation or three of productive use.
 |
| Refurbishment completed |
One thing I wanted to mention - there is a trick that I learned along the way to getting the iron and wedge out after they've been tightly in place. Clearly a previous owner didn't know this trick because the wedge had been hammered many, many times trying to get it out. Since the iron and wedge are both wedge-shaped, they tighten each other. But they also loosen each other when moved in the opposite direction. All you need to do to loosen them is to tap the iron further into the plane body. This undoes the wedge action and both components readily come out. Just don't have your other hand in the way of the iron as it suddenly releases - I almost embedded an iron in my left palm as I was doing this.
Now I need a tool roll for the irons. Or maybe a box. Hmmm.


My vote is for a box. They are like Lays Potato Chips, you can't only have one.
ReplyDeleteMuch as I like that idea, I'm leaning towards a roll. It's maybe a little better use of tight space in the tiny shop.
DeleteMatt,
ReplyDeleteNow you have done it. I've a Sandusky double screw arm plow gathering dust out in the shop whispering "Matt did it why not you".
I've a number of irons, none really fit. Where did you buy your set?
Just to be contrary, I'll vote for a roll :-). Before I forget, nice restore and write up.
ken
Thanks for the comments, Ken. I got my set of irons from Pat Leach at Supertool. He had told me that American sets are tougher to find and that English sets are more common and will fit most American wooden plows. I was a bit nervous about it at first, but they fit nicely.
DeleteWhy am I not surprised that Ralph like a box better ?? :-)
ReplyDeleteTraditionally it would had been a tool roll for the set of irons, but dont let traditions stand in the way of progress :-)
Bob, at a African Violet show , where i will later present the First of Heather memorial prize. rudy is being doggy sat with 3 of his cousin doggy
Box ... roll ... box ... roll. Decisions, decisions! I'll probably go with tradition. This morning I bought a couple old leather purses at garage sales. I was thinking I would line my vise jaws with the leather, but maybe I could try to fashion a tool roll from one.
Delete