This post will cover the rehab of the toothing plane I bought off Craigslist. Part 1 of this series showed a few pictures of the plane as found. I'll expand on that here. The plane body was in pretty good condition with one exception.
 |
| Dirty, but otherwise solid |
 |
| The sole has a small crack near center of mouth |
 |
| A closer view |
If I had my thinking cap on, I would have sealed this crack with superglue before applying a finish. Didn't think of it in time. Any other issues could be cleaned up.
 |
| Looking straight down into the throat - a lot of crud, grime, dust, you name it |
The wedge is in pretty good condition.
 |
| Front of wedge |
 |
Back of wedge - see where the iron's ridges made a permanent impression?
I wonder what the number 79 on this means. |
 |
| Close-up shows some roughness on the leading edge |
Curiously, the wedge was a little bit tapered in width from back end to front end.
 |
| Wedge is 2 5/32" at upper portion |
 |
| Wedge width is 2 19/128" here |
 |
| All the way down to 2 1/8" here |
When I checked the plane throat it was similarly tapered. So I'm calling this good. Any discrepancy between wedge and throat was not enough for me to worry about.
 |
| Width is 2 19/128" at top of throat |
 |
| ... and 2 9/64" at bottom of throat |
And here's how well the wedge fits into the body. The following picture is viewed from the sole through the mouth and you can see one of the wedge "fingers" along the right side.
 |
| Wedge installed showing good fit at the sides. There's very little side to side play. |
I'm skipping ahead on this next photo, but after all clean-up was done and the iron and wedge tapped in place, I took a picture of the throat area. I'm happy with how the wedge seats against the abutment and the iron. Seems like it's holding it quite firmly.
 |
| Wedge looks nice and tight against iron and abutment |
The throat was very dirty, but looked to be in very good shape. Here's looking into the throat after wedge and iron have been removed.
 |
| Abutments in good shape. I wonder what the number 46 is for. |
 |
Looking down into throat at abutments, which look good.
If you look closely, you can see the crack in the sole extending a few mm into the body. |
To clean up the body I used coarse steel wool and alcohol to remove some grime. Also did a little light scraping.
 |
| Cleaning off crud with alcohol and steel wool. Top and front half of right side cleaned. |
The front of the plane has the maker name, several hammer marks and a number that I think is "36". Nice to see the quartersawn grain after cleaning.
 |
| Front of plane before cleaning |
 |
| Front after cleaning |
The rest of the body cleaned up nicely. Inside the throat I used a flat file to scrape away some junk. Fortunately for me, the bed was very flat.
 |
| Cleaning up the bed to remove crud, being very careful not to round it over. |
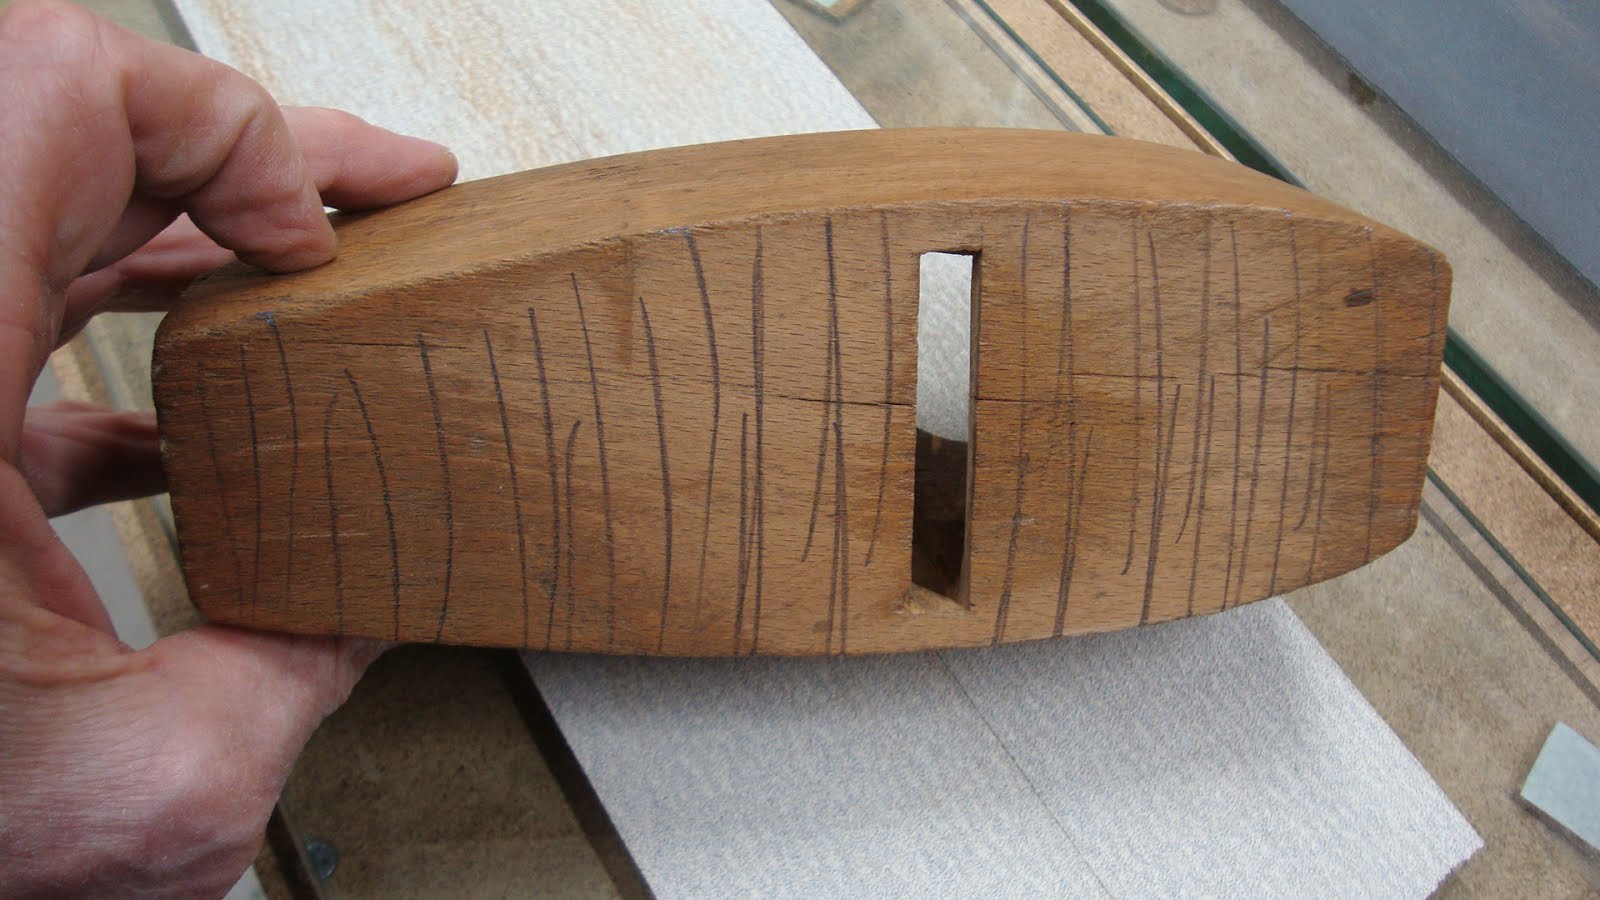
After cleaning up the throat I turned to the sole. It was not very flat and I did some initial flattening using sandpaper on plate glass.
 |
| Checking flatness with a straight edge - front of plane is to the left |
 |
| Made some pencil marks before rubbing on the sandpaper |
 |
| Almost there. Big low spot in front of mouth. |
I later re-flattened the sole with the iron and wedge in place. I was surprised how much they altered the shape of the sole when firmly in place.
After cleaning the body and wedge, they received a couple of coats of BLO and were left to dry for a few days.
As for the iron, it was pretty rusty, so after going over it with some sandpaper, I gave it 3-4 hours in a citric acid bath and them sandpapered again with 220 grit.
 |
| Back side of iron |
 |
| Close-up of the engraving |
 |
| Bevel side of iron |
 |
| Close-up of bevel |
 |
| The citric acid bath - about a quart of water and a tablespoon of citric acid powder |
After the bath and a little hand sanding the blade looked much better. However, the tiny channels made by the toothing are hard to get into.
 |
| After some clean-up. I later used a soft wire brush to clean in the grooves. |
 |
| The sides cleaned up nicely. Note the iron tapers from 3/16" to 1/8" in thickness. |
 |
| The engraving is mostly intact. |
The bevel was already at about a 25° angle, which is probably a little low for final sharpening of a toothing plane. Too low an angle and the teeth could break. So I left the bevel angle at 25° and honed the end at 30° or maybe a bit more. Kind of like a large micro-bevel. This took a while as the cutting edge was not straight.
 |
| After some initial work on the coarse diamond stone |
It's important not to grind these irons dry as the very tiny fins of metal can heat up quickly and this can destroy the temper. So I used excessive amounts of window cleaner on the stones while sharpening.
 |
| After a few more minutes ... |
 |
| ... and after about 20 minutes and some stropping I got a mirror finish |
I did NOT pull the burr off the back side because that can ruin the shape of the teeth. I just left the burr there and hopefully in use it will fall off.
Here's the tricky thing about this iron. It has a cup in it on the non-bevel side. Because of that, if I sharpened like I normally do I would get an edge that protrudes longer at the sides and shorter in the middle. Indeed this happened. If the iron was bedded at 30° this might not be a problem. But the iron is bedded at about 80°, so the iron would dig in at the sides and not cut anything at the middle. So as I was using the honing guide I tried to sharpen as if I was forming a very slight camber on the end of the iron (I've never done that before). I use a cheap Eclipse-style guide and because it has a thin wheel in the back I can easily apply more pressure alternately on the right side and left side of the edge being honed. I tested the edge with a straightedge until satisfied. It's not perfect, but it's close.
And here are the first "shavings". I'm not sure I've ever adjusted a wooden plane before, so it took several tries to get the blade to the right depth and even across it's width.
 |
| Looking down the throat. Need to adjust deeper on the right. |
 |
| Tiny little threads of oak |
 |
| Cross hatch pattern after planing diagonally in two directions |
I've never done veneer work and don't have any plans to start any time soon. But if I come across some really wild grained wood I'll reach for this plane to tackle it. Followed up by a standard smoother or a sharp scraper, I should get a very nice surface.


Maybe the 79 was the number to match it to the plane body?
ReplyDeleteFreddy wrote that he removes the burr by driving the business end of the iron into the end grain of a piece of maple.
Regarding removing the burr, I read Freddy's method, but someone else said that doesn't work, so not sure what to believe. I'm inclined to think that when using the plane the cutting action will remove the burr fairly quickly.
DeleteRalph beats me to it, but yah, thats why Roman drives it in wood. A gentle pass on a strop is probably gentler :-)
ReplyDeleteBob and Rudy still on my lap
I did try the strop normally on the bevel side (and got a mirror finish) and very gently on the grooved side. Didn't really remove the burr, but I was really being careful. Maybe too careful.
Delete