With the layout complete, it's time to get on with the sawing. I'm using my $5 garage sale 14 tpi gents saw that I recently sharpened. Disregard the date on the saw - I need to change it. I like to write the date of sharpening on the saw. I'll do this until I get a better feel for when a saw is dull.
 |
| 14 TPI gents saw |
Ganging two tail boards together gives me 1.5" of layout line to saw to on the top. I start on the back edge and gradually lower my hand until I've got a kerf all along the top. I keep the saw just to the waste side of the line.
 |
| Establishing the kerf |
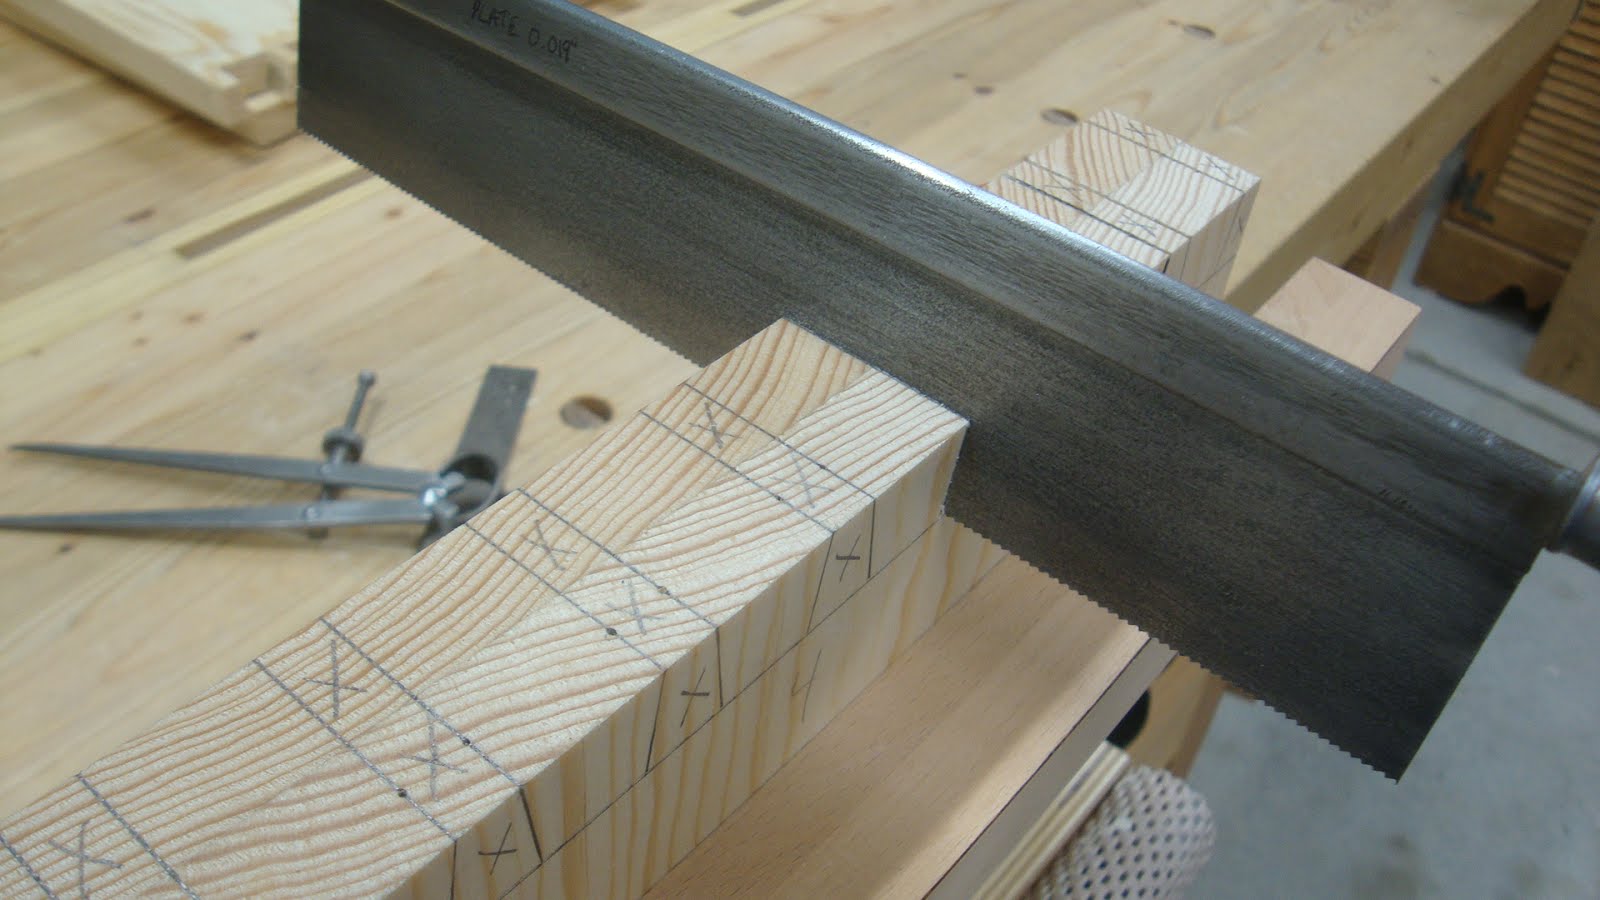
Some people choose to angle their tail board in the vise so that the layout lines for one side of the dovetails is vertical. Here, I keep the board vertical in the vise and make the angled cuts. As I saw, I follow the front face layout line down to the baseline, keeping the saw in the kerf at the far end of the end grain and eventually sawing at an angle as shown.
 |
| Angled cut |
Then I start lifting my hand again, using the kerf already sawn to guide the saw to make the cut all the way through. I continue to just above the baseline.
 |
| Finishing the cut |
I continue in this manner until all similar cuts are made.
 |
| All straight cuts complete |
Previously I would chop out the waste with a chisel, but with pine I tend to get huge chunks tearing out of the bottoms of the recesses. So with these practice DTs I'm cutting out the waste with the coping saw and cleaning up with chisels.
In the following picture I've already made the first cut of the two cuts that are used to remove the bulk of the waste. But I learned a little bit as I went along. I started on the right-most recess and worked left. You can see that I started my coping cut very low at first and started higher in later recesses.
 |
| First saw cut in removing waste |
I seem to have better control when starting the coping cut a little higher. The saw needs to turn too quickly when starting lower. In the next picture I've drawn lines where I might start the coping cut. It's much easier to make the curve when starting higher, as in the right-most of the three uncut recesses.
 |
| Marks showing where I might start a coping cut |
I have the Knew Concepts coping saw, which I like. After some practice, my cuts are easier and better controlled. For this operation, the ganged boards have been separated and are being cut one at a time. My hands are in the position as shown during the first cut.
 |
| Note the hand position - left hand to stabilize and help push/pull |
During the second cut to remove the remaining waste I found myself using a more standard hand placement.
 |
| Probably a better hand position |
I was a little nervous about cutting past the baseline (and I did clip a little baseline on one or two), but for the most part, the cutting went OK. I got pretty close to the baselines front and back. I thought I'd be tempted to cut at a slight angle, leading to more waste left on the back where I couldn't see it, but I kept the saw pretty level.
 |
| Next up: chiseling out the bottoms |
My chisels were just sharpened, but I still have a tough time with them. It may be due to the pine and its hard and soft rings. But also because I left anywhere from 1/16" to 1/8" of material to remove after sawing. I need to get some better close-up pictures of chiseling technique - I'll work on that for the post on removing waste from the pin board.
 |
| Chiseling out the bottoms |
Hand position is key here as I don't want to shoot through to the other side and blow out the surface wood. I've also been skewing the chisel a bit to try to make the cuts easier. You can see this a little below.
 |
| Skewing the chisel helped a little |
I also tried using smaller chisels, but I don't have confidence that I can keep them level. Placing them in the baseline helps, but I still tend to tilt them a bit. The broader edge of the larger chisels stays in the baseline much better.
After quite a bit of wrangling with chisels, I got the bottoms down. And the baseline looks pretty well intact - at least on this side of this board.
 |
| One end done |
It helps to look carefully at the recesses to make sure there aren't any humps in the bottom or any leftovers in the corners that would keep the tails and pins from fitting together.
Next time: Laying out and cutting the tails ...


I haven't tried out my Knew coping saw yet. Have you had any issues with it? Especially with the blade bowing while sawing?
ReplyDeleteThe Knew Concepts saw has been working great. I really like the quick release mechanism - it makes it easy to change the blade angle. No issues with the blade bending, kinking or bowing so far. The frame design really does add a lot of rigidity so you can tighten the blade practically as much as you like.
DeleteEven if you are using freshly sharpened chisels they may not be sharp enough for end grain pine. When I sharpen I always used a scarp piece of pine to test my edge on end grain. Should be leaving a smooth burnished look. Then and only then do i consider it sharp enough. Forget about cutting paper of various body hair samples...
ReplyDeleteBob, I've used the pine end grain test before, though I don't use it routinely after sharpening. I have a question about it, though. Pine boards are typically flat sawn, so imagining if the growth rings were straight, they would be "parallel" with the face of the board (like in three of the last four pictures above). When using pine end grain to test a sharpened chisel I've always gone in the direction from edge of board to edge of board (not front face to back face). Not sure if that is clear. But while paring a thin slice the edge of the chisel is touching both soft and hard rings all the time and at nearly 90° angles to the rings. When paring out the bottoms of the dovetail (or pin) recesses, the edge of the chisel touches all soft wood, then all hard wood, alternately as I get further into the wood. So my question is this - when testing your sharpened chisels, do you pare end grain with the growth rings (going from board edge to board edge) or across the growth rings (going in the direction of front face to back face). Man, this is tough to put into words - I need pictures.
DeleteLOL, yes it is though to put into words but I think I know what you are trying to say.
ReplyDeleteThe reason it is such a good test, testing on end grain pine for example, is because the edge encounter 2 different hardness, from the early to late wood. You need a very sharp blade to penetrate into soft wood without crushing ahead. Its even harder when the knife goes from hard Resistance (late wood) to suddenly softer wood (early wood)it will tend to speed up and crush easier. If the cut surface is glass smooth, that edge cannot be improved upon and will cut that pine any which way easily. That optimum level of sharpness start to dull as soon as you touch wood, so eventually, you will need to touch it up. The soonest you touch it, the sharper it stays faster and longer between major sharpening.
In practice, whatever piece of scrap wood I can get my hands on, mostly pine) and I cut first on the corners toward the ends. No point testing the end grain until it make decent cuts on along the fibers.
The I take slicing cuts on the end of the piece, I judge my sharpness by the surface left behind. A nice glassy surface is the goal
Bob
Matt,
ReplyDeleteI only can echo the guys here. Sharp edge is the key. Personally I'm often waiting too long before sharpening the edge again. Maybe a little hint. Try to cut the angles with a knife and the start to pare.
Cheers,
Stefan
Stefan, I'm not sure what you mean by cutting the angles with a knife. Is this about paring to the baseline?
Deletehmm, don't know how to explain it right. I mean the corners on the ground of the dovetail. That area which you are paring. The edges left and right of that. If you will do a stroke with a sharp knife then there will be less resistant while paring.
DeleteHm, still not a better explanation. I will do a pic in one of my next posts.