Thursday, March 31, 2016

Dining Chair - Part 6

Today was a day of shaping, mostly.  So I started by sharpening the toold 'd need - the #4 smoother, the spokeshave and the card scraper.  I've been getting better at sharpening and all three tools responded very well today.  The backrest rails were first, the upper receiving a convex curve on the top and the lower getting a concave on the bottom.
Upper and lower backrest rails with templates
My 1/8" plywood templates have been great.  The surfaces to which I needed to transfer the shapes were curved and the templates will flex just enough.  But it can still be challenging using the larger concave template to mark out the convex curve on the upper rail.  Needing a third hand, I got a brainstorm to hold the two backrest rails together in a vise, front (concave) faces upwards and the bottom of the lower rail touching the top of the upper rail.  (Wish I'd taken a picture.)  Essentially, this extends the front (concave) surface of the upper rail and I can press down on the template to mark the upper rail.

I sawed some relief cuts and chopped out the bulk of the waste with a 1" chisel.  I have a tough time chiseling "flat".  That is, I chisel deeper on one side than the other.  So I try to get close to the line on one side, then the other.
Chiseling to the lines
Spokeshave to the lines, scraper and then a little sanding got the shapes right and edges smoothed over.  Here is a picture of one of the slats partly done.
One side of a slat shaped, other side prepped to be done
The line-up of chair rails - all shaped and finish planed.
Four upper chair rails and four lower chair rails
Before I quit for the day, I wanted to get the backrest subassembly glued and in clamps.  When I did a dry fit, ...
Backrest assembly dry fit
... I found a small issue.  The upper and lower backrest rails' tenons were not perfectly in line with each other.  In this next picture, I'm holding a straightedge flush to the upper rail tenon cheek.  The ruler touches the lower rail tenon about 1/8th" lower than the cheek surface.  I'm not sure if this is enough to worry about.  I tried clamping in different ways to see if I could fix this, but no dice.
Two tenons not co-planer
So I decided to glue up the backrest subassembly and dry fit that with the entire back assembly to keep things in alignment.  Hopefully this doesn't put some twist in the back assembly.
Only the backrest subassembly is glued, it is not glued into the legs
Tomorrow I'll be shaping the front legs and back legs and hopefully getting the whole thing glued up.  Until then, ...

Wednesday, March 30, 2016

Dining Chair - Part 5

Between a skin doctor appointment to whack a huge thing off my face and getting my car smog certified to meet California's requirements, I got a late start in the shop yesterday.

It was time to get to the side rails.  These are different from the front and back rails in that they are angled.  I have a huge 25" x 30" easel pad to draw on and that is just the ticket when making full scale drawings.  The picture below shows a top view of the left side of the chair.  The front left leg is at the bottom left in the pic and the left rail angles towards the top of the pic from there.  I've drawn the mortise/tenon in the leg and you can see it is angled from the body of the rail.
Birds-eye view of left side of chair
When laying out the rail, I put the workpiece on the drawing and take the shoulder lines directly from it.  Setting a bevel gauge from the drawing ensures a reasonably repeatable angle setting to knife the side shoulders.  The pic below shows the shoulder lines already knifed and the tenon marked out in pencil.  The end grain can be marked with a mortise gauge, but I can't use a mortise gauge to mark the sides of the tenons due to the angles.  I have to set the bevel gauge to the proper angle and the drawing is used again for this.
Rail on drawing for marking shoulder lines and tenon extents on end grain
Note in the first picture I have the three angles that I need on the right side of the photo.  When you only have one bevel gauge and you have three angles to work with, you have to do something to help re-setting the bevel gauge.  I'm assuming that the edge of the easel pad is square and straight - probably not a great assumption.

Anyhoo, the cutting of the tenon shoulders and cheeks is straight-forward.  When I'm sawing the tenon cheeks, I've been using my $5 garage sale gents saw - 14 tpi rip.  It leaves a nice surface, but it's slow.
Gents saw - last sharpened November 3, 2015
I have a Veritas 12 tpi rip carcase saw, but I've never liked it.  Either I'm not using it appropriately or it's just not sharp.  But I didn't think it worked for me when it was new.  It also cuts very slow.  I'll have to try sharpening these saws again.
Veritas carcase saw
Because the tenon is angled, you can't use the router plane to fit them.  I'm not very good at chiseling to the lines, but I'm fortunate to have a Lie-Nielsen #042 medium shoulder plane.  This thing is really nice for trimming the tenon to thickness.  Funny - I don't use it to trim the shoulders.  I'll see if it needs that after assembly.
Sweetening the tenon thickness with the LN #042 shoulder plane
The tenons were trimmed until I get a self-supporting fit.
That's the fit we like!
I ran into a little problem with one of the front leg mortises.  When I was fitting the tenon into the mortise, I saw a crack opening up in the leg.  Fortunately the leg is in the vise so the crack couldn't propagate.
Pencil is pointing to a crack
I ended up having to trim the mortise walls to loosen the fit a little.  Here's the crack after working on the mortise for a while.  It's small enough that I won't worry about it.
Crack almost closed up
I can't seem to find any decent super glue to wick into this crack.  I've never seen the stuff that Paul Sellers uses that has an accelerator.  The crap I can buy just sucks.  Either I use it once and the rest of the container is horrible (hopelessly cemented or just plain bad), or it doesn't work at all.  I'll probably just leave this crack and hope for the best.  It's in the front left leg where the lower rail fits in.

The chair is coming together.  Except for the lower side rails, the joinery is complete.  It's starting to look like something.
It's a bouncing baby chair
I hope to get the lower side rails done today and then it's on to shaping.

Monday, March 28, 2016

Dining Chair - Part 4

When we last left our intrepid woodworker, the upper and lower backrest rails had been shaped and scraped.  However, he failed to put them together to see how close to the same profile they were.  Turns out that the upper rail needed just a little more material removed to match the lower rail.  This is important so that when the mortises are chopped, the slats will fit right.

The stock for the slats was still fairly rough, so I first looked at the chosen pieces.  One piece did not seem to look like the others, so I chucked it and found another that had similar quarter-sawn grain.
Center piece does not fit with others
This end grain shot shows that the middle board is not like the others and why it didn't look good with the others.
End grain shows why they don't look good together
This is better, though the way the light reflects makes it look sketchy.  They really looked much better in person.
The chosen ones
I planed one side flat, checking with winding sticks, then got the boards within a few 100ths of final thickness and let them sit for a while.  In the mean time I got to the layout of the mortises in the backrest rails.
Mortises laid out
Along the curved edge, I found a center "line" using a finger as a guide, referencing off the front concave surface.  Then added a line 3/16" forward of that.  Before shaping the rails, I had marked the center of the 13.5" length (excluding tenons) across the edge to be mortised.  That line is the center of the center slat mortise.  The extents of the slat and the extents of the tenon were marked using a small homemade wooden dovetail square.  And a 3/8" brass gauge block was used to mark the front and rear extents of the mortise.  The other mortises were marked similarly, leaving 1" between slats.

Well, when it came to chopping the mortises all was going well until I chopped one starting at the extent of the slat - not the extent of the tenon!  Arrgh.  I'm just going to leave it since the slat shoulder will cover the mistake.  And fortunately it's on the underside of the upper rail, so even if it was just barely visible, someone would have to work to see it.
Upper right mortise messed up
With the mortises chopped, I got back to the final dimensioning of the slats.  I'm making these 2 1/4" wide because I'm deviating from Paul Sellers' slat design.  I'm adding an "S" curve for visual interest.  It goes well with all the other curves on the final product, too.
Slat template and slats laid out
I ganged the slats together to mark the extents of the length of the slats.  Continued the knife lines all around, then deepened them and cut the shoulders.  The cheeks were either split or sawn and the router plane was used to fit the tenons to the mortises.  The sides of the tenons were trimmed until all fit together nicely.
Backrest dry-fit together
I had to trim the mortises' front wall (at the bottom) to get the slats to fit properly.  I can't use a mortising guide for these as I did for all the leg joinery.  When cutting the mortises, I used a small square to judge that I was chopping perpendicular to the rail, but I still needed to tweak it a bit to get it right.

All for today - tomorrow it's on to the side rails.  These are angled as the front of the chair is 3.5" wider than the back.  And the lower rail fits into the angled back leg, so we're talking compound angles.  It a challenge when you only have one bevel gauge and you need three!

Friday, March 25, 2016

Dining Chair - Part 3

Only had a little time in the tiny shop yesterday, but had a pretty good day today.  Yesterday I finished the mortising of the legs.  I'm very happy with how square these have been coming out.  The mortising jigs have really helped out, but I can tell they are getting worn, even though the faces are made of relatively hard oak.  I might try facing them with brass when I next make them.
All mortises complete
I love cutting and fitting tenons.  I've had some challenges cutting the shoulders to the line.  But on the last few I did today I made the knife wall a bit deeper and that seemed to help.  The cheeks were either split with a 1" chisel or sawn with my $5 garage sale gents saw, and then brought to thickness using the router plane - love that thing.
This is the fit I like - snug, but not too tight
And once I pared the shoulders to get them at 90° to the faces and edges, the rails fit nicely to the legs with no gap.
No gaps
One thing, though - the rail was a little off-center relative to the layout lines ...
Not quite up to the layout line
... so I pared a little off that edge of the tenon and re-fit the joint.
That's better
The only thing here is that after I plane off my layout lines prior to gluing up, I won't know where to seat this rail.  There will be a little sideways play.  I'll probably knife a light line over that layout line during a dry-fit to make sure I hit it right.

With the rails and legs for the front frame fitted together, it was on to the back frame.  All parts had been pre-cut to length, so I ganged them together and set them in a vise, striking a knife line 7/8" (that's the tenon length) from one end.  Another line was struck 13 1/2" from this line at the other end while the parts were still ganged together, ensuring each of the four parts will be the same length.
Back rails and backrest rails ganged together and line knifed
I cut the shoulders, sawed and/or chiseled the cheeks and fitted the tenons into the mortises without getting any pictures.

Shaping the backrest rails can be a challenging thing, but this is my fourth dining chair and I'm getting better at it.  The Doug fir can be a bit brittle, so you really have to be careful when chiseling out the waste so as not to go beyond your layout lines.
Upper and partially-shaped lower backrest rails, with template
I find it much easier to work with the convex curves.  I chiseled the waste close to the layout lines, then planed to the lines using the #4 1/2, then the #4 for a finer surface, then a card scraper.  For the concave surface, I first chiseled close to the lines ...
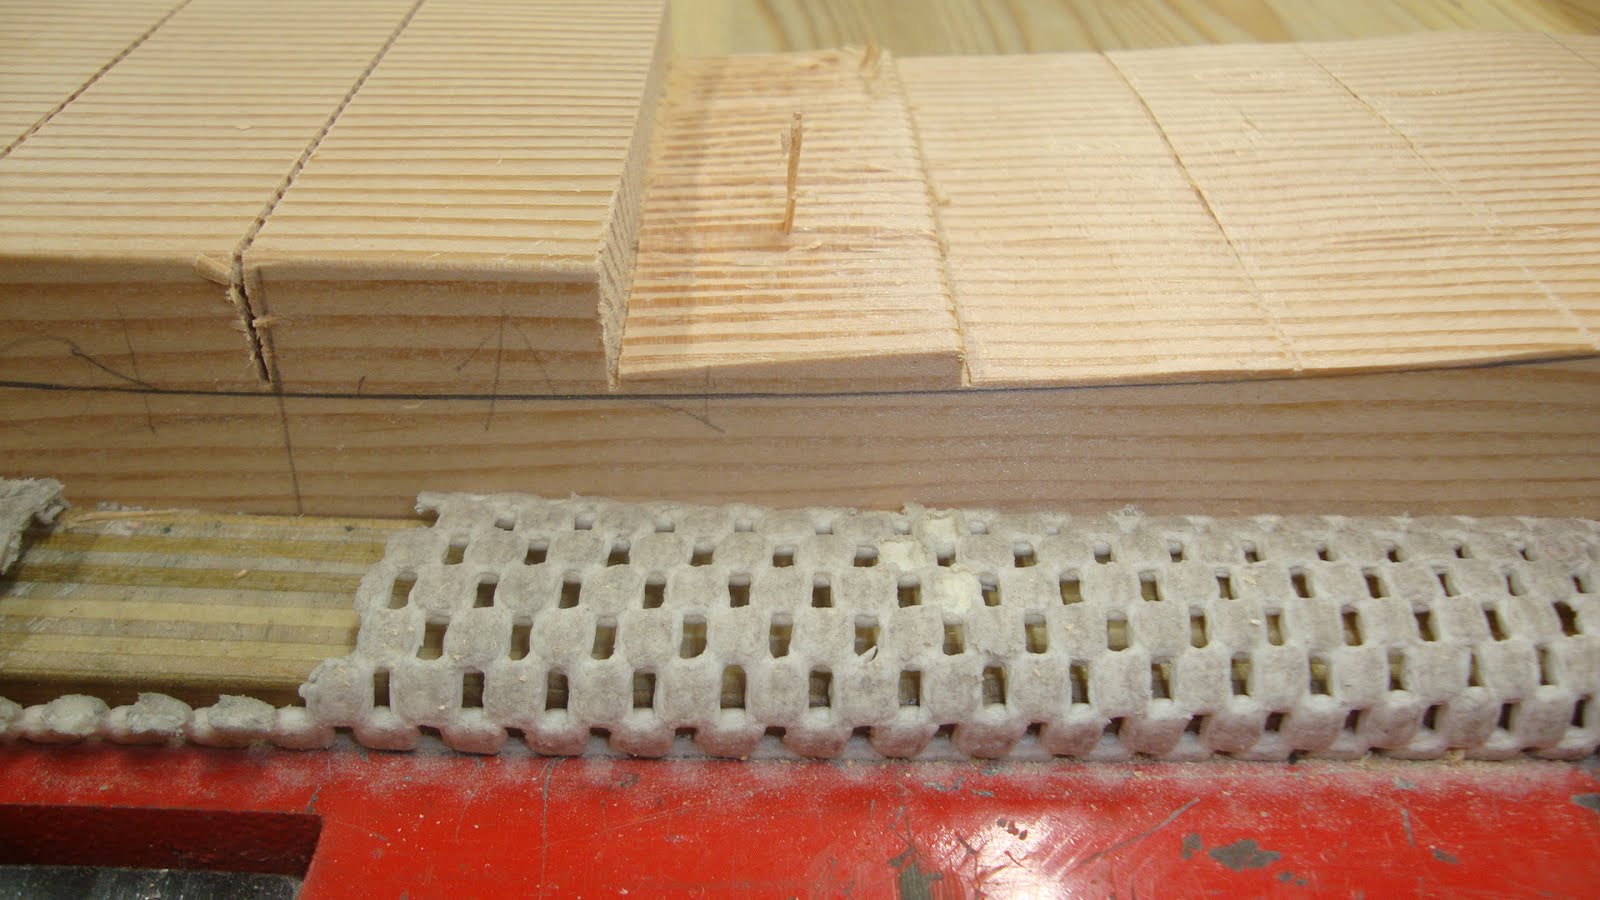
Kerfs cut down to layout lines
... but be careful.  Look at the direction of the grain below where I split off a piece of waste.  I was chopping from right towards the left and the grain was diving.  On this Doug fir, the Spring growth and Fall growth lines are not the same as the grain direction.  It can really be deceiving.
Watch out for the grain direction when chiseling the waste
Here's as close as I came to the layout lines with the chisel.  After this picture was taken, the spokeshave and scraper finished it off.
Chiseled close to layout line

SIDEBAR #1

I've noticed lately that when marking a knife line on four sides of a board, I don't get them to meet perfectly at the last corner.  I believe my material is square and I'm referencing my combo square off the face side and face edge.  The knife I've used for a few years is this crummy "Flexcut" knife that really fits my hand great.  In the following two pics, you can see it's beveled on both sides, so I lean it over when striking a line to compensate for the bevel.
Flexcut knife and Crown Tools knife
Other side of each knife

I decided to try a Crown Tools knife that I've had for several years, but never really liked.  Well short story short, I used the Crown knife for the back frame rails and it seemed to give a better result. Unfortunately it's horribly uncomfortable in the hand.  Maybe after sharpening the Flexcut many times I've given it a steeper bevel angle.  Might need to experiment with this.


SIDEBAR #2

Up to now, I've really sucked at using the spokeshave.  I got my only spokeshave from a gentleman I met on an airplane (Thanks, Phil).  His wife noticed I was reading a WW magazine and she struck up a conversation.  Turns out he had some extra hand tools that he wasn't using and he sent me some (on his dime, too).  I love the generosity of the WW community.
My Marples spokeshave
Anyway, I'm getting better at sharpening and I think I'm finally sharpening the blade well.  But I was getting some really bad chatter and getting frustrated.  Paul Sellers posted (I don't remember if this was recent or older) about tuning up a spokeshave, including flattening the bed.
Spokeshave parts
Turns out I never did that when I got the shave.  So I worked it over a little with a small paddle-type diamond hone.  Here's a close-up of the bed, showing areas where I removed uneven surfaces:
Bed cleaned up
Well, I'm not sure if that small amount of bed flattening is responsible, but today that thing was singing like never before.  I've learned that you can't be timid with the spokeshave - you have to take confident strong strokes.  I feel like I have a much more useful tool now.  Yowzah!!

Wednesday, March 23, 2016

Dining Chair - Part 2

Started late today, but got a fair amount done.  Started by sharpening the chisels that I would use for the mortises - 1/4", 3/8" and 1".  Laid out the joinery on the back legs.
Back Leg Joinery
Together with the front legs, there are 20 mortises to chop.  Plus the six mortises for the slats in the backrest!  I'm using a mortise guide to keep my chisel perpendicular to the leg.  But while the stock is square and so is the mortise guide, the top of the mortise guide angles away from the mortise.
Mortise Guide Not Perpendicular
I'm not quite sure why this is, but it may have something to do with the two vise jaws not being parallel (the tops of the jaws touch before the bottoms do).  Varying clamping pressure did not fix the situation.  So I tried adding shims to the top of the front face of the guide ...
Tape As Shim
... but that was a bad idea as the tape got chewed up pretty fast.  I ended up taping some cut-up pieces of an old health insurance wallet card to the top of the moving face of the vise and that brought the guide perpendicular with the leg.

I got 16 of the 20 leg mortises chopped today.  I'm getting better at stopping my depth where I should, but still a couple were too deep.
Some mortises chopped


Tuesday, March 22, 2016

Dining Chair - Part 1

This is the fourth Sellers dining chair I'm making.  The first was in November and I'm now on the last of three-in-a-row that started in January.  No chance of doing a production style build as the shop is too small to move in if there were three partially completed chairs.

I had pre-prepared the stock for all three chairs before beginning the build.  The 2" x 6" and 1" x 6" Douglas fir boards were quite furry to begin with.
Stock started very rough
After planing to near final dimensions, I let the wood sit for a while.
Back legs, backrest rails, front legs
Yesterday, I started on the last chair.  After bringing the front and back legs to final dimensions with square sides and ends, I laid out the mortises on the front legs.
Inside faces of front legs
Then laid out the shaping on the back legs.
Leg shape laid out
Cutting this out without a bandsaw is not too tough, but there are challenges.  I used a PAX 26" rip saw to remove the two triangle sections and smoothed the cut with a #4 1/2 and #4.  Then used the same saw to saw down the angled cut on back of the legs.  It's tough getting the saw started without having an end to rest the saw on.  Alternating sides, I sawed to the back of the "knee", where the cut angles.  I used a Knew Concepts coping saw to start the straight part of the cut and once there was enough room to fit a saw in there, I finished up with a Japanese style pull saw.

I'm sure I could have made relief cuts (cross-cuts in the wast down to the layout line, and used a chisel and hammer to remove the bulk of the waste.  But I wanted the waste piece whole in case I needed it as a clamping caul.

The angled cuts were smoothed with a #4 1/2 and #4 and then the transitions were smoothed with a Marples (#151 style) spokeshave and card scraper, checking for square as I went.
Leg with cutoff sections
Tomorrow I'll get moving on laying out the back leg joinery.  To be continued ...