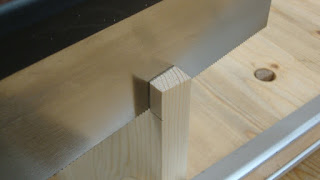
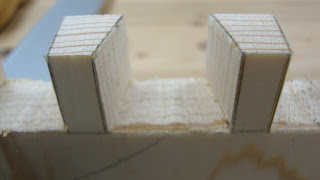
Last time we got as far as laying out the pin board. Here it is with all lines knifed and then penciled in.
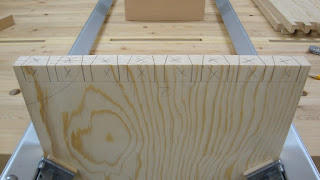 |
| Layout complete |
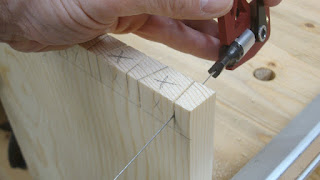
I decided to use my Veritas 14 tpi tenon saw to cut the pins. I've mentioned that this saw hasn't behaved well for me. But I recently sharpened it and it seems to be cutting much better than after the last time I sharpened it. There must be a tooth that is set too wide because it seems to catch on the wood about 2/3 into the stroke. I'll have to look at that later.
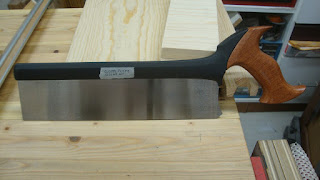 |
| Veritas tenon saw |
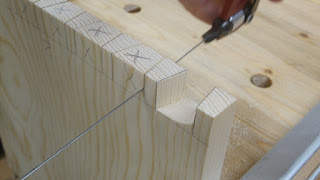
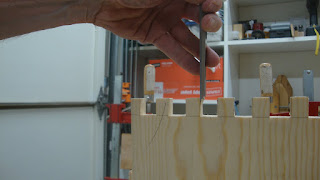
I'm trying to cut just a hair (or a "frog hair", as
Ralph would say) on the waste side of the layout line. I know, I know - it's best practice to cut right to the knife line. In "The Joiner and Cabinet Maker", Schwarz says he puts a pencil line in his knife line so that the pencil leaves a mark on either side of the knife line. Then he saws so that just the pencil line on the waste side of the knife line is removed. Well, I'm just not that good yet. So I'll saw a little away from the line and use the knife line to pare the side of the pin walls to the right size.
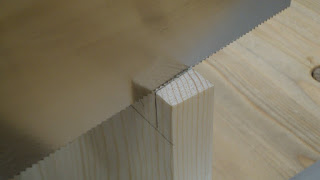 |
| Saw just barely to waste side of line. |
After establishing the cut on the top, I angle the saw down to follow the layout lines.
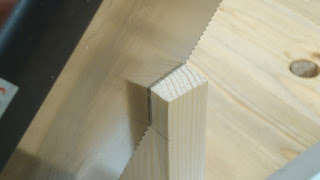 |
| Angling the cut |
Then lifting the hand, I level the cut to get to the baseline.
 |
| Leveling the cut |
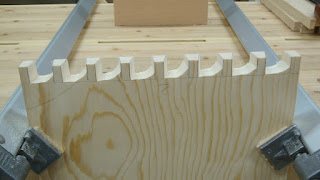
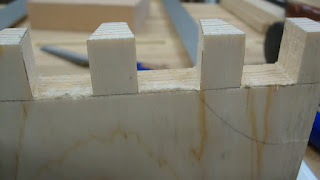
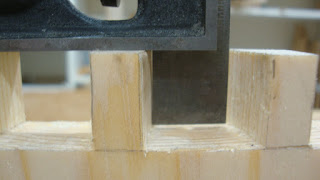
After cutting all lines, it's time to remove the waste with the coping saw. I've learned not to start too low in the existing kerf.
 |
| Start the coping cut midway down the kerf |
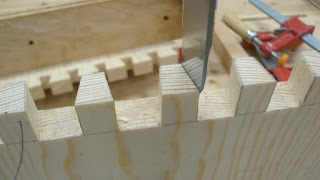
I'm very pleased with how the Knew Concepts saw is cutting the pine. And how well I'm leveling the cut. I have the blade angled a little to the left.
 |
| One cut made, seven more to go |
I make all cuts to the left before going back to the right with the second cut.
 |
| All cuts to the left complete |
I could keep the saw blade angled to the left and turn the board around to make the second cuts, but I think it's better to saw with the outside of the board facing me. That way, the ragged part where the saw exits the wood is on the inside of the board. So I angle the blade to the right. The Knew Concepts saw had a cam mechanism that loosens and tightens the blade.
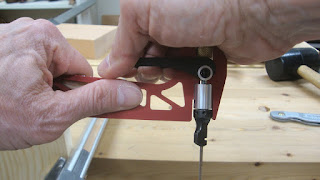 |
| Pulling up the cam mechanism to loosen the blade |
The blade holder (the lower black piece) swivels to allow the blade angle to change. It apparently has 8 settings where small "bumps" hit preset holes in the interior of the works. It's easy to change the angle.
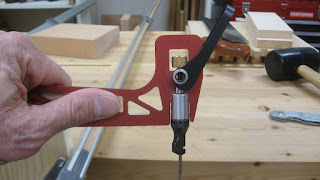 |
| Cam lever up and blade loosened |
Then I cut back to the right to remove the rest of the waste.
 |
| Blurry pic of cutting back the the right |
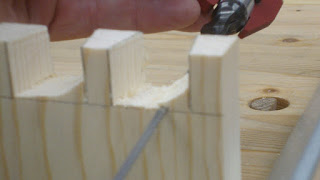
To clean up the bottoms of the recess, I first "pop" a chisel in the baseline. I don't think I would do this in hardwood because I'd want to keep the baseline for registering the chisel when chopping the last of the waste. For this softwood I can't chop on a bench top - this stuff needs to be pared. Maybe I still should have kept the baselines, but it worked for me this time.
 |
| Popping the baseline |
Here is a picture of a popped baseline. Hopefully you can see where wood has been removed.
 |
| Popping the baseline leaves smoother wood at the front |
To pare to the baseline, I hold the chisel as shown below. This way controls somewhat the tendency to blow all the way through to the other side.
 |
| Paring to the baseline |
But it's hard on the fingers and I ended up wearing a glove.
 |
| The designated paring glove |
After going almost all the way through, I turn the board around and pare from the other side to finish it off, popping and paring.
 |
| Back side |
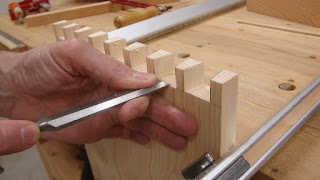
Next it's time to pare the walls. This is fairly easy as the knife lines guide the cut.
 |
| Set the chisel directly into the knife line ... |
 |
| ... and pare down to the bottom |
The only thing tricky here is if the wood grain tries to pull the chisel into the pin. So go carefully. It's very tempting to try the fit the tail board into the pin board at this time (and I succumbed to the temptation), but it's a better idea to check the sides of the pins for square.
 |
| Gap at top - need to pare the lower half of this pin a bit more |
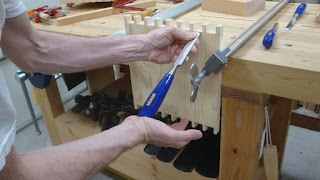
With a small combination square it's easy to check the pin walls. Then pare them down to get a good square side.
Having done that, then it's really time to fit the tail board to the pin board. One note: when fitting I only work on the pin board, making it fit the tail board.
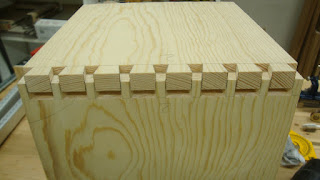 |
| Pretty god fit - maybe just a little more work |
It's not always easy to figure out where the joint is too tight. But a little tapping with the heel of the hand or a small mallet will help. Sometimes I make pencil lines on the mating surfaces and check where they are smeared after trying the fit. In this case I just needed a small amount of additional paring on some of the middle pins and it went together (with a little persuasion).
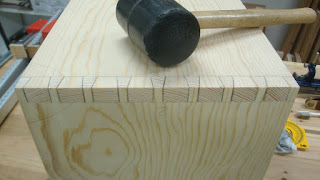 |
| The fitted joint and the persuader |
I'm happy with how this came out. I haven't cleaned up the joint yet (the pencil lines make it look like there are gaps) but when I do I think it'll look pretty good. I did all four corners of a box this way and the DTs got better each time. Still some small gaps, but with some glue I have no doubt that these joints will never come apart.
And so ends this series on dovetailing. I'm interested in your thoughts, if you care to leave a comment.


The joint looks great! One other thing to consider. These will swell slightly when you apply the glue. So small hairline gaps will take care of themselves. It is also surprising how much pine will compress. Play with a few scraps and see just how "fat" you can leave the pins and still knock the joint together without spitting anything.
ReplyDeleteAgain, nice work on this joint and the detailed write up.
Thanks Greg. I'm looking forward to see what happens when I glue these up and then clean them up. (It'll be a challenge to figure out a way to clamp out the cup in each board when gluing up.) I'm sure I'll get more practice as I go along, so I can do some experimenting. This was a great exercise.
DeleteThere is no finer measurement than one frog hair. Take a look at this you tube by Kari Hultman https://www.youtube.com/watch?v=JYW1JQmDa6I
ReplyDeleteI think it's a better way to do the paring if you remove your waste with a coping saw.
Thanks for the link, Ralph. I've seen others use that technique. My problem is that when I try to chop out the waste, I crush the soft fibers and end up tearing out big chunks from the bottom of the recess. That's why I'm trying to pare the waste and not chop. I think my chisels are sharp enough, but maybe that's the real problem.
DeleteHi Matt,
ReplyDeleteYours look as good as mine... :-)
With regard to the chopping : I've found that my chisel had to steep of a bevel. They were somewhere around 30°, probably more, but I've reset the bevel to 25-27°. That cleared my tear out problem with chopping dts.
Diego
Hi Diego. That's interesting about the bevel angle. I recently reset all my chisels under and including 1/2" to a 30° bevel using a honing guide. But my larger chisels I still sharpen freehand using the Sellers method, so there is a slight concave surface to the bevel. I'll have to check to see if my sharpening angle hasn't gotten higher after repeated sharpenings.
Delete