Saturday, June 16, 2018

John S. Fray 12" Sweep Hand Brace

One of the tools I got from my recent good fortune was an old hand brace manufactured by John S. Fray.  According to information on Sandy Moss's Sydnassloot.com website, Fray was in business making braces and other tools from the 1870's until Stanley bought his business in around 1909 (one page of Sandy's site says 1909 and another says 1920, so I'm not sure which is right).  Fray held at least 6 patents related to braces.
The brace as found
The John S. Fray Co.
At one time I believe this read,
"BRIDGEPORT, CONN"
"U.S.A."
No. 123, indicating 12" sweep
I already have a 10" sweep brace, this 12" brace will help with boring larger holes
This is a ratcheting brace.  I cleaned up a lot of grease and gunk from the ratcheting mechanism, as well as from the chuck shell and chuck.  The mechanism works very well, though there is some play in the shaft - something is worn or loose, but I don't think it'll affect function.

The head spins nicely.  I removed it and irrigated the bearing area with 3-in-1 oil.  I also sanded and applied BLO to the head before reinstalling it.

Here's the main thing that's wrong with the brace: the sweep handle is supposed to have two "collars" or "stops" that keep it in the center of it's portion of the shaft.  One of them is missing altogether and the other is so loose as to be non-functional.  So the handle can jam into the bend in the shaft and eventually it'll be damaged or broken.
This collar is free to slide all along the shaft
Note the notches filed into the shaft - I think they are there to help retain an applied collar
I thought for days about how to fix this and finally I contacted Sandy about it.  He's a big brace guy so I thought he might be able to help.  And help he did.  He suggested using plumber's or electrician's solder, basically melting solder in a can and pouring it into a mold of some sort that I'd clamp around the shaft.

I still scratched my head a while about this (because I couldn't find my solder and had no idea how I'd make a mold) and finally I thought about using J-B Weld.  I tried it on a piece of 1/2" dowel (the brace shaft is 1/2") using a couple of pieces of scrap wood to form a mold.
Mold pieces
Mold clamped to the dowel, forming the collar
The result - a little filing and it'll look just right
Now for the real thing:
Brace clamped in vise ...
Larger part of mold clamped onto shaft
J-B Weld applied and top mold clamped on to lower mold
After allowing it to dry overnight and removing the mold, a little cleanup of the excess J-B Weld (that stuff files easily) had the first collar looking pretty good.
First collar done
The next one would be more challenging as there was very little room to move around.  There needs to be about 1/16" play for the sweep handle, though I probably ended up with about 1/8".  And there can be no excess J-B Weld under the handle.

I made a separate piece to clamp around the wooden sweep handle and this helped to set the distance for the second collar.
The large piece of wood clamps around handle
Rubber bands were used as temporary clamps for the molds,
then spring clamps held firmly
Front view
Some J-B Weld squeezed out under the handle and it was tough getting it out.  But some dental tools saved the day.  In the end I'm happy with how it turned out.
There were voids in the J-B Weld, but I can live with that
Showing both newly fashioned collars
This brace is a welcome addition to my tool kit.  The extra 2" sweep will help with boring larger holes.  The ratcheting head is a little loose, but hopefully it won't cause any problems.

Friday, June 8, 2018

A Funky Spokeshave

One of Orvil Heft's tools was an interesting spokeshave.  I'm hoping some of you can help me identify it.  It has no markings on it anywhere - neither on the body nor the iron.
The mystery spokeshave
The front of the body is a bit ornate, which is unlike any I've seen remotely similar to this.
Front part adorned with fancy design
I had never seen a spokeshave (or ever heard of one) that had an adjustable mouth, but that's what this one has.  After some internet research, I see that Stanley made a #53 with adjustable mouth.  This one has a very similar mechanism.
Top screw changes angle of front of mouth
The screw at the top raises or lowers the upper part of the front of this shave.  And because of two pins that pivot the front of the shave, this lowers or raises the front of the mouth.  Springs provide resistance to the pivot action.
Red arrow points to the end of a pivot pin
Yellow arrow points to spring
Unfortunately the pivot pins are not in the best shape.  One of them is bent and this causes the front of the mouth to be a bit cock-eyed.
Bent pivot pin is on left side, causing mouth to be wider on that side
When the top screw is screwed all the way in, the mouth is tighter and the sole is flat(ish).
Sole mostly flat
With the top screw screwed out, the mouth opens up and the front part of the sole is at an angle to the rear part of the sole.
Front of sole angled and mouth opened up
I'm not certain of the purpose of the adjustable sole.  But when it is at an angle, I can get into concave curves much better than a flat-soled spokeshave can.

Here's another interesting thing about this shave.  The 2-1/16" wide iron had a definite camber at the cutting edge.
Cambered iron
The previous owner of this tool (long deceased) was a carver.  He carved birds as a hobby in his retirement.  Perhaps there is some reason a bird carver needed an iron with such a camber.

If anybody has any information about this spokeshave or about its use, please let me know.

EDIT:  Bob Demers came through with all the information I needed.  See his blog entry here.  Apparently this is an E. C. Stearns #8 spokeshave.  Great info - thanks Bob.

Friday, June 1, 2018

Orvil Heft's Tools

I didn't know Orvil Heft.  And it would be an amazing coincidence if any of you did.  Orvil grew up in Wisconsin and spent his adult life in Michigan, where he was a High School principal.  In his retirement, Orvil was a woodworker.  More specifically, he carved and painted birds.
Orvil and birds
I wonder how he got his start in woodworking.  Was he carving all his life or did he pick it up only in retirement?  What other woodworking exploits did he pursue?
Wall cabinet with Orvil's birds
Orvil has been gone for several years now.  His tools have been in the possession of his son-in-law, Jhea.  I stopped at Jhea's garage sale, having read he was selling a table saw.  I don't need a table saw, but figured sometimes where there is a table saw, there are other woodworking tools.  We got to talking about woodworking.  Jhea is quite handy, having done some house remodeling projects himself.  Orvil's tools were not on display, but Jhea took me to a cabinet in the back of the garage to see them.

After speaking with Jhea about my interest in hand tool woodworking, I think he sensed that I would take good care of these tools.  Through a huge act of generosity, I've become the new caretaker of many of Orvil's tools.

When I got home, I laid out the tools.
Workbench completely covered
Here are some details:
Drawknife (unknown maker) and two hand drills
Upper hand drill is a Craftsman No. 9-4230, lower is only stamped "Made in Germany")
The blade of the drawknife is unusual in that it is double beveled.  I'm no drawknife aficionado, but I thought one side was typically flat.  Maybe there is need of a double bevel in carving work.  The German hand drill was missing the side handle and I've made a new one for it.
An old John S. Fray 12" sweep brace and almost complete set of Irwin auger bits 
John S. Fray was in business from about 1870 to 1914 (or 1920?) when they were bought by Stanley.  The bits are mostly old Irwin bits, only missing #12 (3/4" diameter) and #16 (1").  I've cleaned and sharpened them.  There is also an expansive bit and a few other smaller bits, including a counter sink bit, 1/8" twist bit, a 3/16" gimlet bit and a few small auger-style bits with cylindrical shanks (1/4" not shown, 5/16", 3/8" and 1/2").
Odd 'n' ends - tiny Stubs hand vise, Luther clamp-on vise, beefy C-clamp and nice Stanley scraper
Bunch of round rasps and several files, some very fine
Also two Yankee-type screwdrivers, North Bros. No 30A left and Craftsman 195822 right
Stanley Surform cheese-grater-style rasps, No. 21-125, No. H 386 round rasp
I guess with carving birds you need a good assortment of rasps and files.  Many of the files were made in the USA by Heller or Nicholson, back when Nicholson knew how to make good files.  I love finding old files at garage sales - you can't get good ones anymore.

Layout tools: Disston 24" wooden level, Stanley #84 2-foot boxwood folding rule,
Unknown maker bevel gauge, Peck, Stow and Wilcox (PEXTO) 10" dividers,
Unknown maker calipers, Lufkin No. 543 50' tape measure
You can also see two coping saws, one by Maxson, the other unknown, and there were dozens of extra brades.
A very interesting unknown maker spokeshave that I'll post about separately
Some beautiful old chisels:
Greenlee (Rockford, IL) bevel-edged socket chisels:  1 1/2", 1", 7/8"
D.R. Barton (Rochester, NY) firmer socket chisels:  3/4", 5/8", 1/2", 3/8", 1/4"
Jaxon (Made in USA) bevel edge socket chisel:  1"
Stanley No. 750 bevel-edge socket chisel:  1/4" (no handle)
Greenlee and D.R. Barton were known to make very good chisels.  Several of these chisels need new handles.  I'm REALLY looking forward to using them.
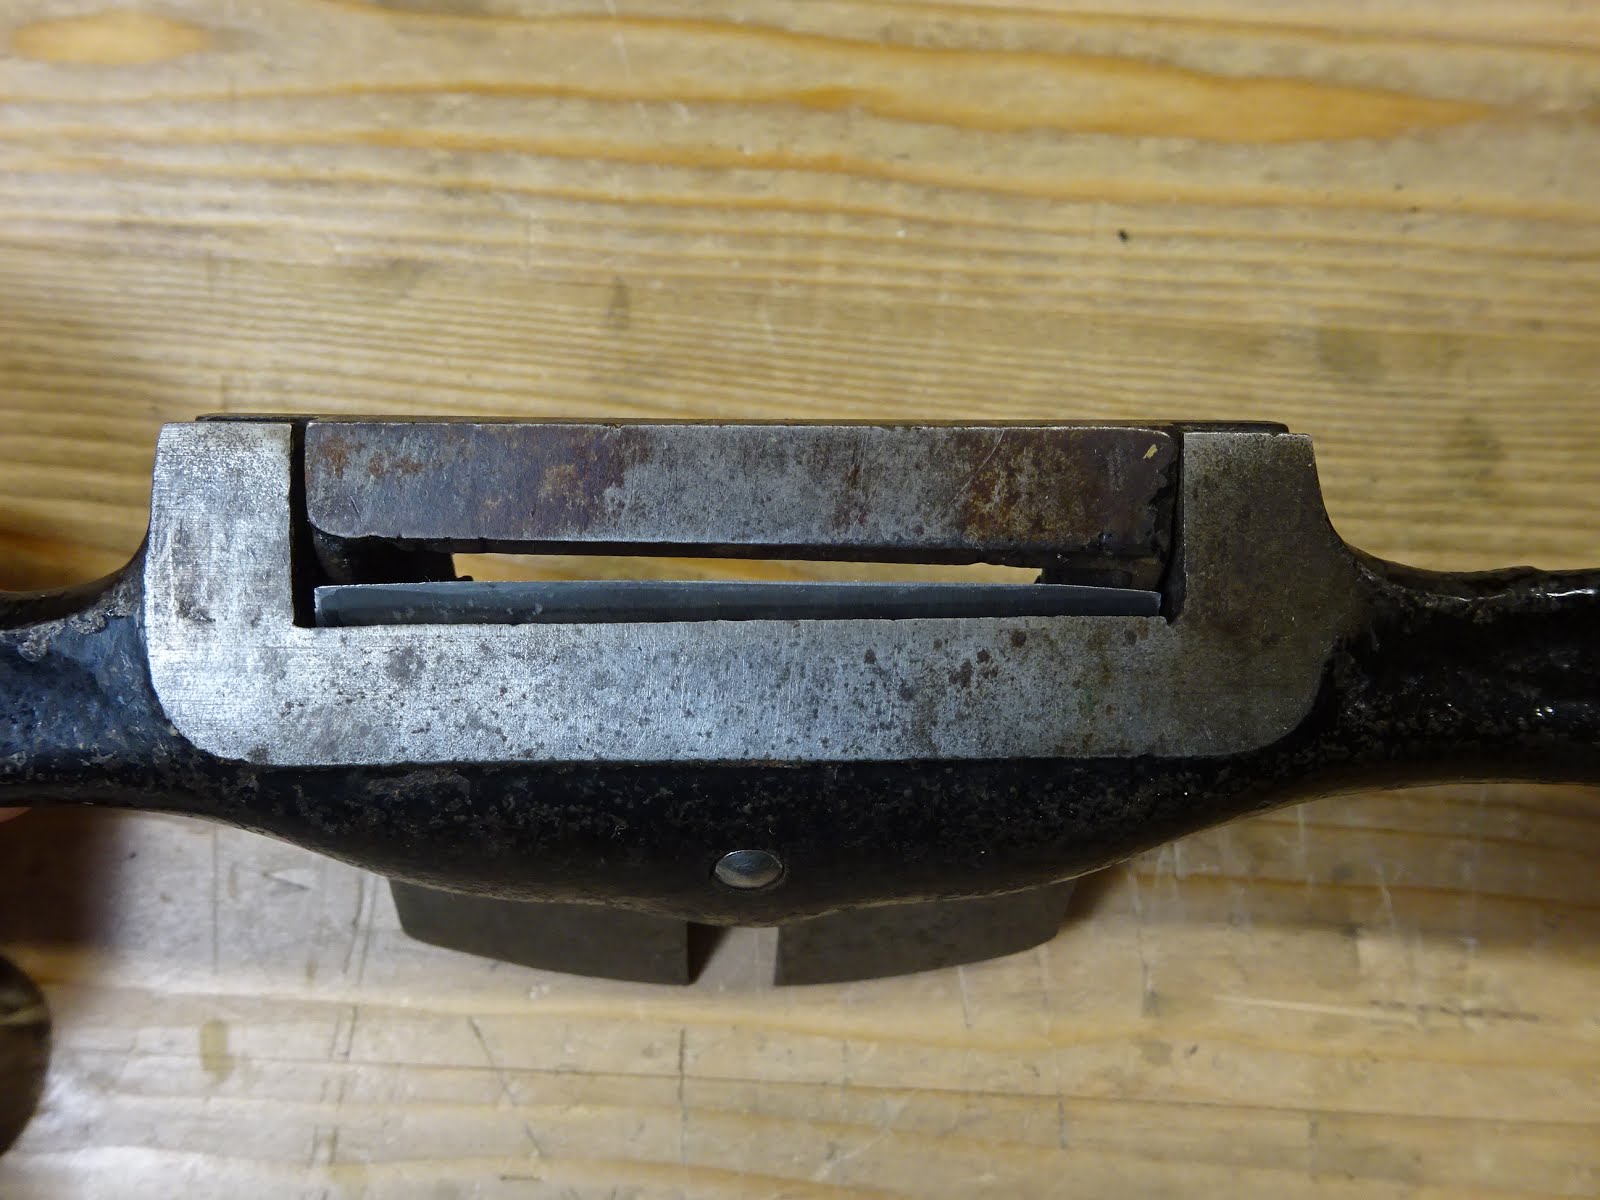
Oil stones - some small and some large, some shaped, some rectangular
I've been thinking about trying oilstones for some of my sharpening.  I know little about use and care of them, but I'm looking forward to learning.  The largest is a Pike "Lily White" Washita stone in it's original wood box.  It's quite dished (about 3/16") and glued into the box.  Not sure if I should flatten it or use it only for curved blades.
Finally, there was this box ...
It contained several Japanese carving tools (lighter handles) and other
standard carving tools
The carving tools had blades of all shapes and were generally fairly small: V-cutters, U-cutters, skews, curved necks, small gouges, etc.  Though I haven't done any carving, some of these tools have already come in handy.

As the new caretaker of these tools, I'll think of Orvil when I use them, just as he might have thought of prior owners of the older tools in the kit when he used them.  I consider it an honor to be able to use them.  And I'll always be grateful for Jhea's generosity.  May the tools impart the wisdom of prior generations to my hands!