This project was a real challenge. It's a serving tray with angled sides dovetailed together. My intent in making it was to hold a bunch of video game joysticks (or whatever they call those things) that are seemingly all over the place in the recipient's apartment.
It's also been a real challenge to try to explain the angles. I'll apologize up front for the lack of clarity in the text. Hopefully the pictures will help.
In November I experimented with angled dovetails, making a step stool. But that was a different type of angled dovetail. This time I'm joining four corners where each side is splayed out at 20°. When I posted about the step stool I mentioned the
YouTube video by "Half-Inch Shy" and that really helped me in this build. But there is something that he didn't cover in that video (or a follow-up video) that had me scratching my head for quite a while. I'll get to that later.
There are a lot of angles to keep track of in this project. I only have one bevel gauge (and it's not even a good one), so I mark the angles on the top of my workbench, referencing off the front edge.
 |
| The four angles I need for this build |
Before getting to the real project, I made a couple of test joints on 3/4" pine. I also made a couple of 20° angle blocks to lean the boards against when laying out. I started by cutting the mating ends at 20°. This will be close to, but not exactly equal to the eventual angle I need on the ends. The method for getting the correct angle goes like this. Lean the two boards against their 20° angle blocks. Arrange them so they are at 90° to one another, and so one overhangs the other by a little bit. Then take a pencil and run it along the inside surface of one of the boards, scribing the other board as you pull the pencil up. The resulting angle is a couple of degrees off of 20°.
 |
| Scribing the angle onto the tail board |
 |
| A previously knifed 20° line and the bevel gauge at the scribed pencil line |
Anyhoo, after re-cutting the ends at the proper angle so that they mate properly when leaning at 20°, I got to marking and cutting the dovetails. But you can't just use a dovetail marker like you can on a board with a square end. Dovetails on an angled end need to be laid out as if the end was square. So I used my DT marker in combination with a square to get the proper alignment.
 |
| Dovetail marker registering on a square to draw in DT layout |
 |
| Tails laid out on one face |
If you mark the DTs square to the angled end, it creates some very weak bits at the ends of the tails that can break easily.
With the DTs laid out on the face, you can't just square these lines across the end grain because of the splay angle. To get the proper angle to mark the end grain, you need to draw a line parallel to the bottom edge of the boards and capture that angle with a bevel gauge (referencing the stock of the bevel gauge on the angled end of the board) to transfer it to the tail board end grain. This is one of the keys to this method: the pin board layout lines are parallel to the benchtop so that with both boards on the benchtop the pin board can just slide right into the tail board recesses.
 |
| Line parallel to the benchtop to get tails board end grain layout angle |
Forgot to get pictures of marking those end grain angles, but here are the tails cut.
 |
| Tails cut - front to back the cuts are not square to the face |
Then it was a matter of transferring the tails to the pin board end grain.
 |
| Marking pin board end grain |
The lines down the face of the pin board are parallel to its sides. Cut to the lines, fit the joint and clean up the surfaces.
 |
| Pins cut |
 |
| The joint after a little fitting |
 |
| And after a little clean-up |
Here's what it looks like from above.
 |
| View from above |
There's one thing I didn't write about - while the tail board end is cut at a little less than 20°, it also needs to be beveled at about 7°. I honestly don't recall how I handled that on the test joints, but I was more concerned when doing the real thing.
With a couple of test joints cut, on it was to the real project. I used oak approximately 5/16" thick.
 |
| Holding boards at proper splay |
After thinking for a long while about angles, I decided to bevel the long edges of the boards so that the edges would sit flat on the benchtop when the parts are splayed.
 |
| Made an impromptu shooting board for the edge bevel |
 |
| Beveling one edge |
 |
| Monitoring progress with pencil lines |
 |
| Lines almost gone |
 |
| And we're done |
This also allowed me to find that 7° angle without measuring. The next picture shows a top view of one corner. The board on the left was crosscut on the end to the "near 20°" angle, and the cut was made square to the face. You can see that when the boards are splayed and the edges mated that the end grain of the board on the left is not in a straight line with the edge of the other board.
 |
| Top view of one corner before layout |
This angle affects how you lay out the joint because you can't just square the lines from one face around to the other face. However, with the edges beveled, you can use a square registered on the face of the left board to mark the appropriate lines.
This is where I didn't get any pictures, but at least I showed my test joints earlier to give an idea. After a lot of head scratching I finally got the joints marked and cut and then test fit.
 |
| Four sides dry fit |
Before gluing up I needed to make some hand holds on the short sides. I decided where and how wide to make them, then bored a couple 1" starter holes.
 |
| Starter holes |
 |
| Used a container lid for marking the curves |
Then cut out with coping saw, smoothed with rasps and files and sanded smooth.
The glue-up went in two stages. I'm just gluing a piece of 1/8" plywood to the bottom.
 |
| Lots of 20° angle blocks needed for glue-up |
 |
| Later gluing on the bottom |
 |
After the glue dried on the bottom, I reinforced it with 24 "tree nails",
1/8" dowels glued into drilled holes |
The oak I used for this project was fairly brittle and the ends of some tails or pins fractured. So I had a few holes to fill. I cut off little bits of oak scraps and glued them in, cutting flush later.
 |
| Little bits glued in |
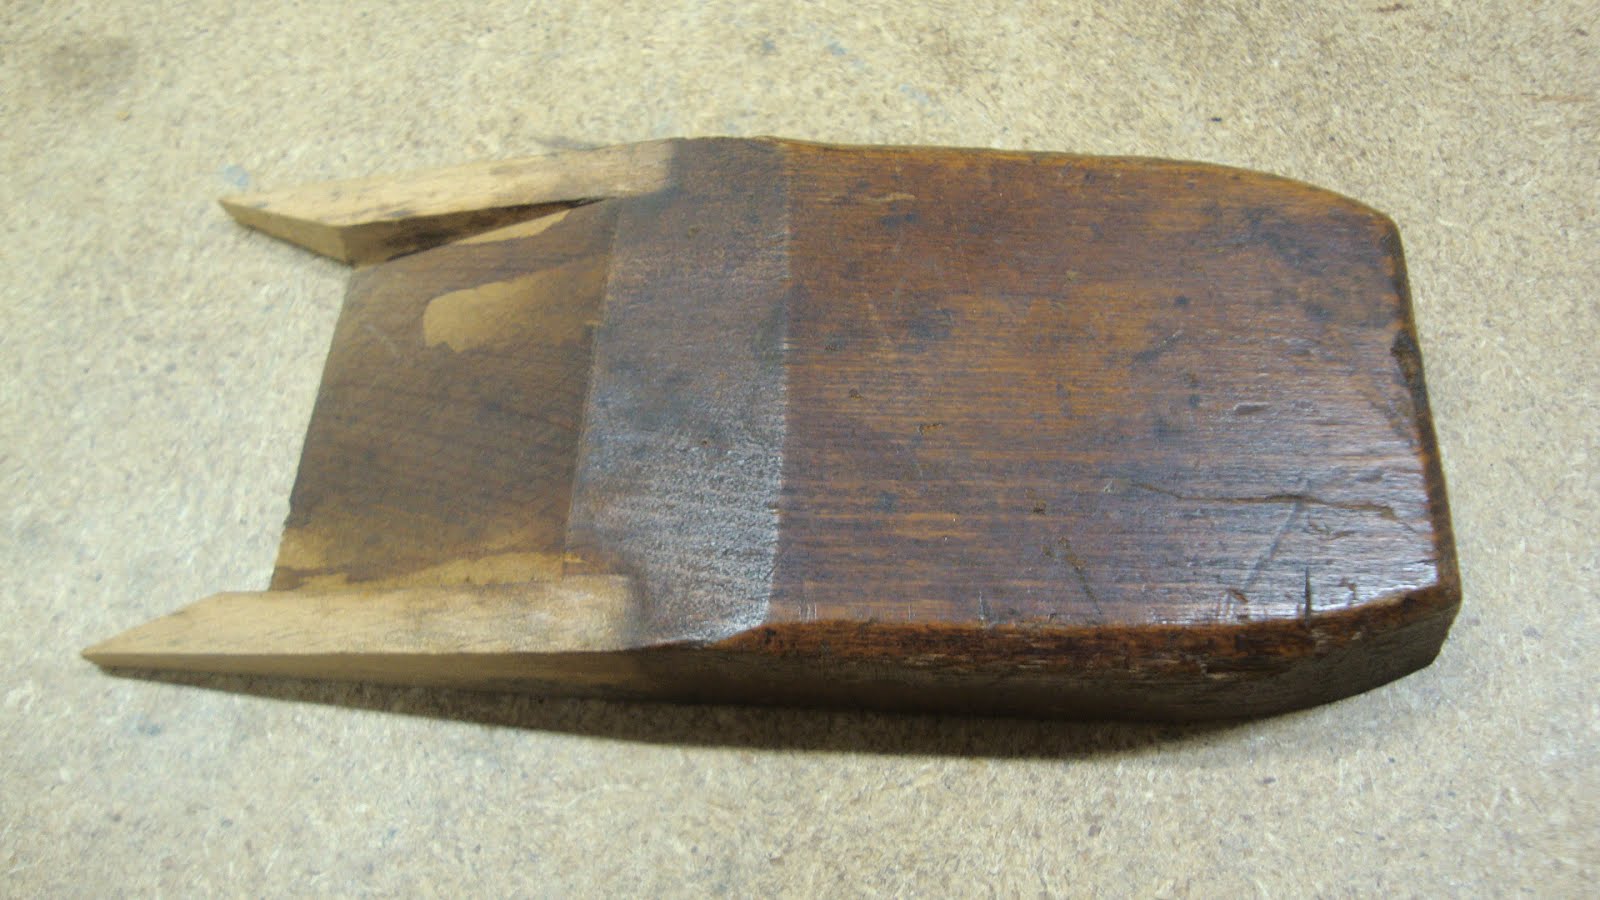
Here's a before and after of one of the holes. Nobody will ever know (don't you go telling anybody!).
 |
| Before |
 |
| After |
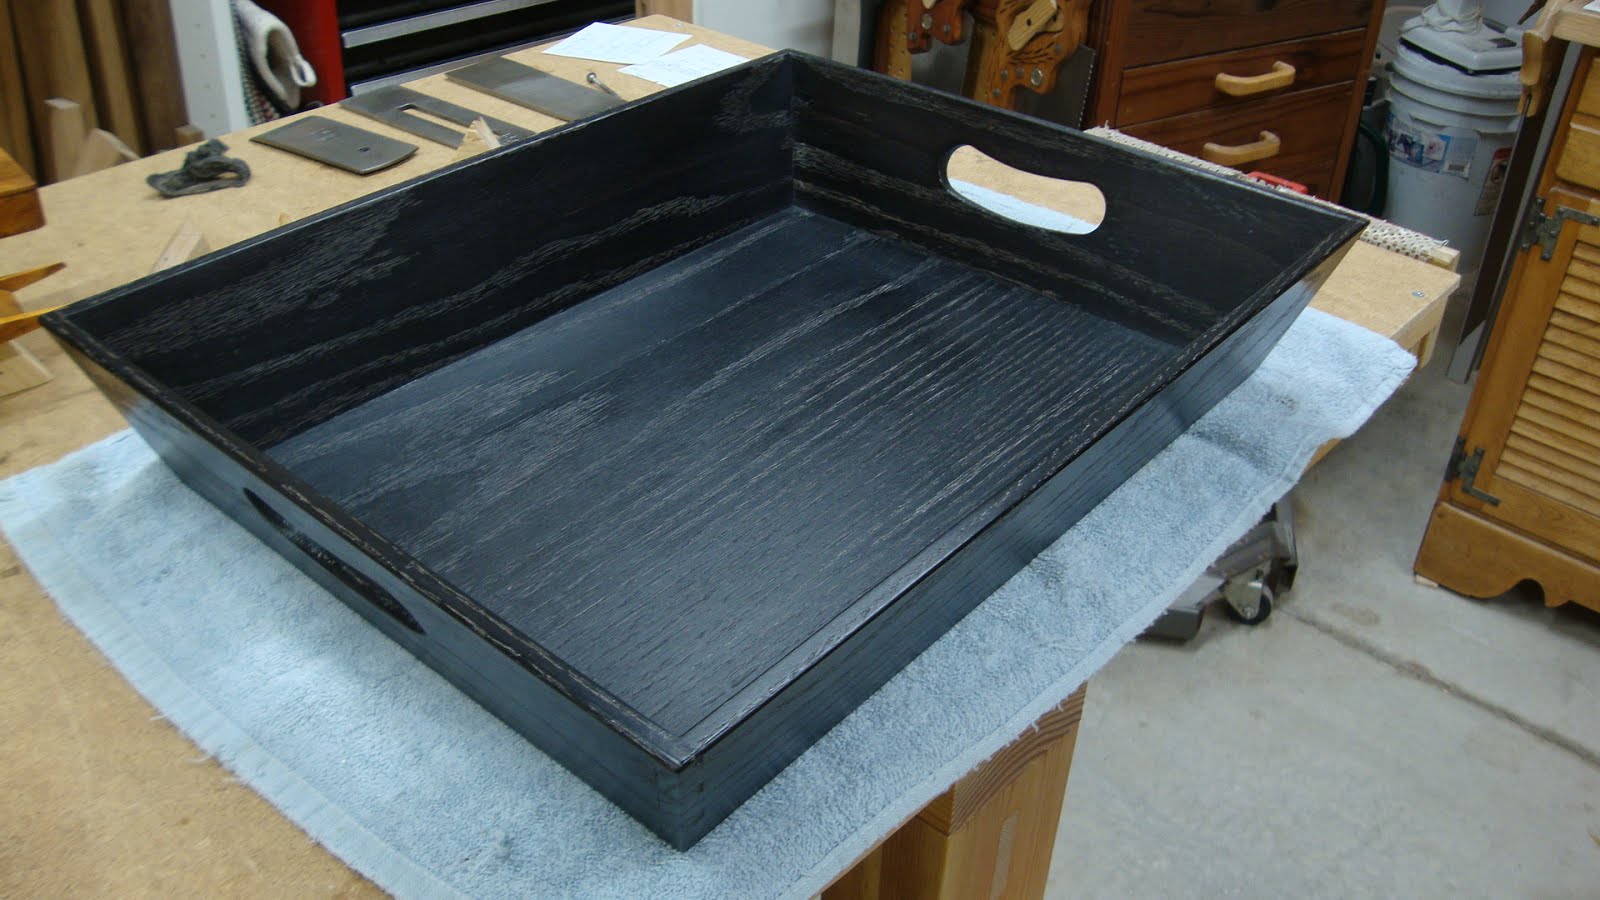
And here's the finished tray.
 |
| Completed except for finishing |
Very happy with how this turned out. I'm going to ebonize it. I still had the iron solution (steel wool and vinegar) and the tannin broth from my last project, but look what happened to the tannin broth.
 |
| Yeah, that fuzzy stuff is mold growing in there |
And the iron solution had a film over the top that made me wonder about it. I dumped them both and started fresh. I'm trying to speed up the steel wool and vinegar reaction by heating it a little using a bean bag cozy (there's probably a better term for these things).
 |
| And yes, those are pink piggies on the cozy - don't ask! |
I'm hoping that by Monday the iron solution will be ready so I can start the ebonizing process. Time is drawing short to get this finished.