For a finish, I tested both shellac and BLO on some scrap to see what I liked better. Well, I asked the wife which she liked, so it didn't much matter which I liked better. She wanted shellac. I didn't get any pictures during the process, but I put three coats of shellac, sanding between coats (both big jobs!), and then applied paste wax, buffing with a cloth and a brush. It looks good. She didn't want a glossy finish and this came out just right.
Getting this headboard installed was a lot more tedious than I thought it would be. I hadn't pre-drilled any holes to bolt it to the frame, so everything had to be done in the bedroom. It's challenging to do this stuff in situ and not on a workbench.
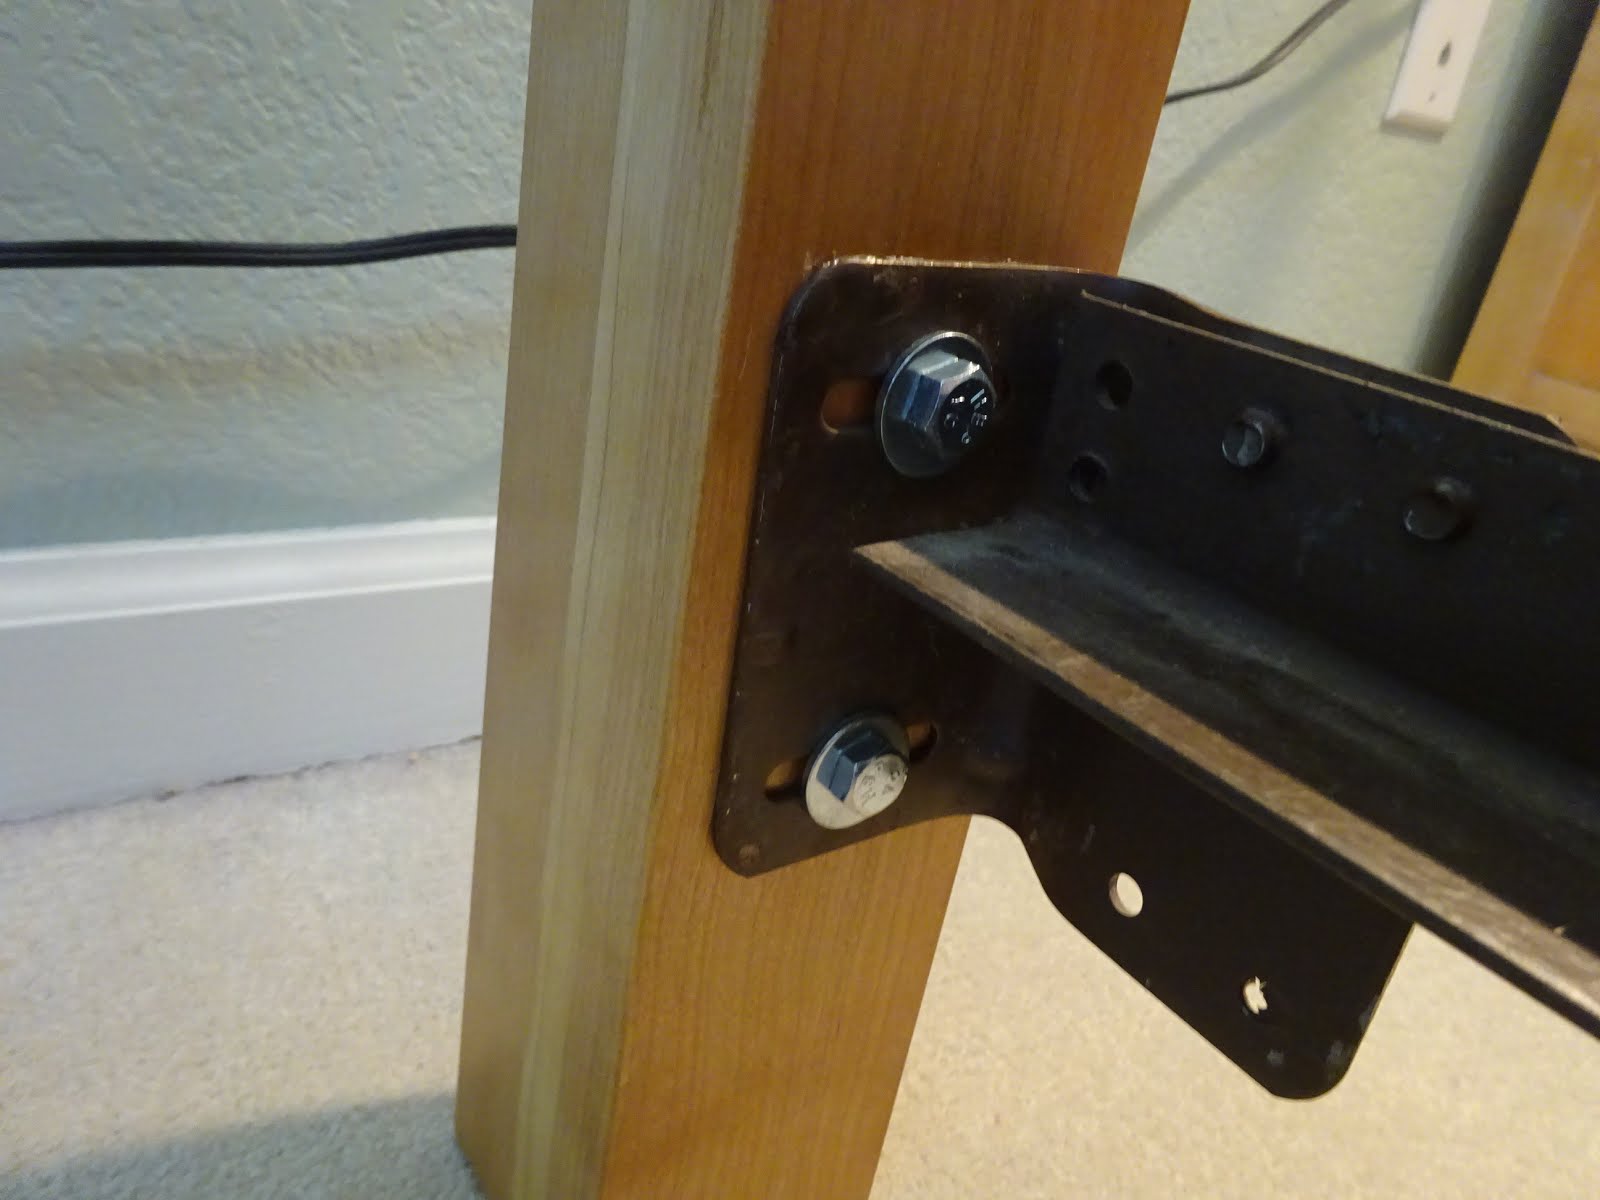
 |
| End of the bed frame, showing mounting holes |
Placing the headboard up to the frame, I traced the hole locations on the posts.
 |
| Marking a line at center of the hole locations, and nicking the inside corner |
From the knife nick on the corner, I transferred the location of the hole to the back side. I used a marking gauge to make sure back and front hole locations were the same distance from the inside surface of the posts. I then drilled with brace and bit a 3/4" hole about 5/8" deep at the back and a 5/16" hole from the front through to the 3/4" hole. I used 5/16" bolts because that was the largest size that would fit through the frame holes.
 |
| 5/16" holes at front |
 |
| 3/4" counterbores at the back |
 |
| It was a little finicky getting the bolts through and threaded onto the nuts, but it all came together |
 |
| The 3/4" counterbore fit 3/4" washers and the right size socket for the nuts |
Whew!
 |
| Before ... |
 |
| and ... after |
 |
| Another view |
I had expected that I'd leave the headboard out in the sun for a few days (or weeks) to darken the cherry. But when it was finished, we realized that it looked really good and the color matched other furniture in the room, so no sun-darkening was done.
And yes, those are sea otters on the bed (not mine) next to the alligator (mine - I was a Florida Gator, after all).
And yes, that red book on my nightstand is my copy of LAP's "The Joiner and Cabinetmaker".
All-in-all, a great project with lots of challenges. So glad it's done!


very nice addition to your bed.
ReplyDeleteSylvain
Thanks Sylvain.
DeleteGood job, looking good. What is next?
ReplyDeleteBob
Well, no further plans for similar pieces to make a bedroom "suite". But my wife needs an end table in the spare bedroom and my sister needs a TV stand that I'll be getting to shortly.
DeleteNice work. When is the foot board coming?
ReplyDeleteNo footboard for this one, Ralph. That purpleheart was so difficult to work with, so I'm glad there's no footboard!
Delete