Part 1 of this series is
here.
Part 2 of this series is
here.
Part 3 of this series is
here.
Note: this post is picture heavy.
Many people would probably just have bought a new tote. I thought I'd try to fix this one.
 |
| Tote condition as found - broken off horn and who knows what under the tape |
Hmm ... Wonder what's under that tape.
 |
| Removed from the plane |
 |
| Tape removed. Yikes! |
 |
| A nail in the back and resulting crack |
 |
| Nail showing through bottom of top portion of tote |
Well, that wouldn't have been my choice of how to fix this tote, but there it is. To start this going, I placed the tote on a piece of paper and drew the outline.
 |
The horizontal lines in center show where the break is.
The break angled from the upper line on the near side to the lower line on the far side |
The break may have been clean years ago. But many years of rubbing against each other rounded over the mating surfaces, so I didn't think that I could simply glue them back together without further modification.
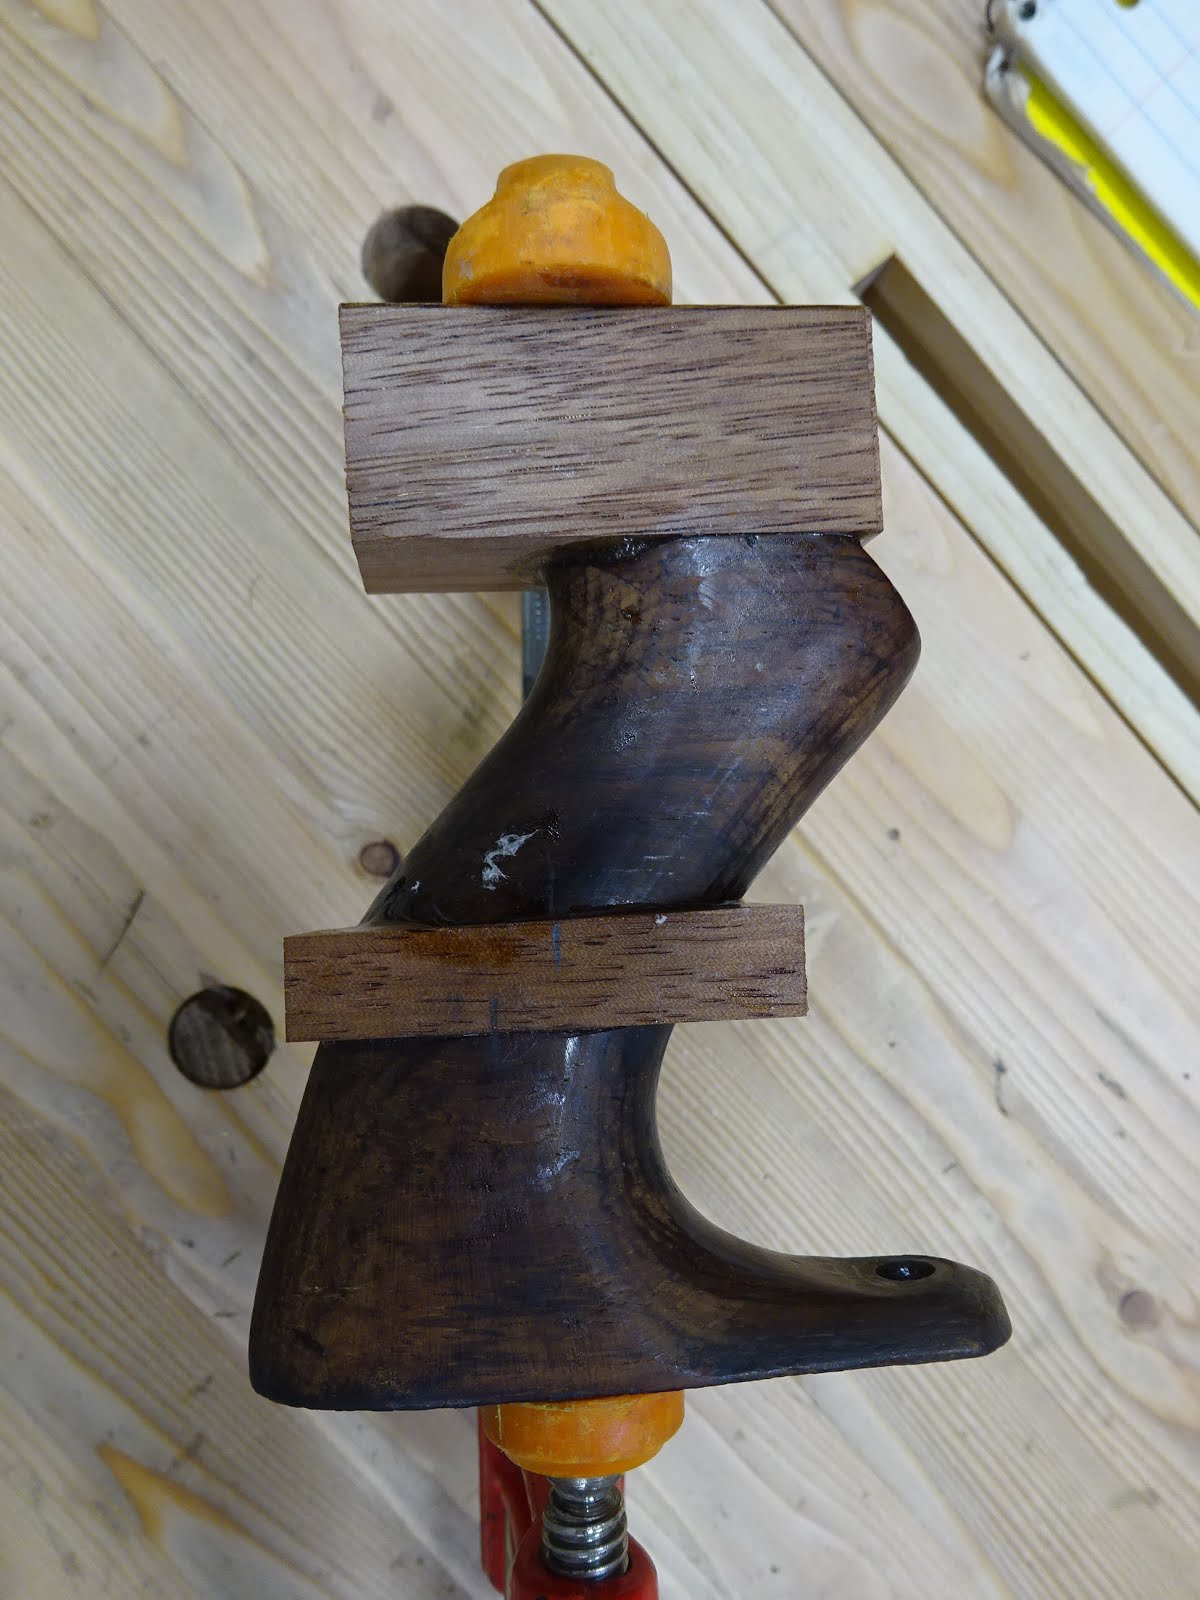
Some years ago i fixed the horns of two #5 totes and to do so I made a planing jig to level off the broken surface.The jig comprises two equal sized pieces of pine, each with identical rabbets. The broken plane part sits between the jig parts and the whole she-bang is clamped in the vise.
 |
| Jig with upper part of tote clamped |
 |
| The rabbets act as a planing ramp |
 |
| View from other end |
 |
| Broken surface planed flat |
 |
| This is the bottom of the upper portion that was cracked from the nail |
For this crack, I thinned some PVA glue, forced it into the crack and clamped it overnight. That and gluing the newly flattened surface to a piece of wood should keep the crack from ever propagating and letting the big chip fall out.
 |
| Gluing the crack in the upper section |
I planed the lower portion the same way, trying to keep it level so that the new flat surface would be parallel to the upper portion's flat surface.
 |
| Compared to the template to see how big a block I needed to glue in (about 1/2" thick) |
Man, the rosewood planed beautifully! Look at these dark shavings!
 |
| Beautiful dark wood shavings |
 |
| Used hide glue to glue on a piece of (what I think is) mahogany |
 |
| Gluing on a piece for the horn repair |
 |
My usual hide glue setup - microwaved water, candy thermometer to monitor temperature,
glue in plastic cup |
 |
| Drilling out the new horn using the existing hole to guide the 5/16" bit |
Gluing the horn piece to the upper portion and the mahogany block to the lower piece gave me flat surfaces to clamp against when gluing the whole thing together.
 |
| Not yet gluing the whole thing - just seeing how they align |
I used a 5/16" dowel rod to align the mounting holes in the upper and lower portions of the tote. The upper portion didn't mate just right with the mahogany block glued to the lower piece, so I planed the mahogany piece until they aligned properly.
 |
| Then glued them together |
For shaping I used coping saw, rasps, files and scrapers to shape and smooth the new parts.
 |
| Tools for shaping |
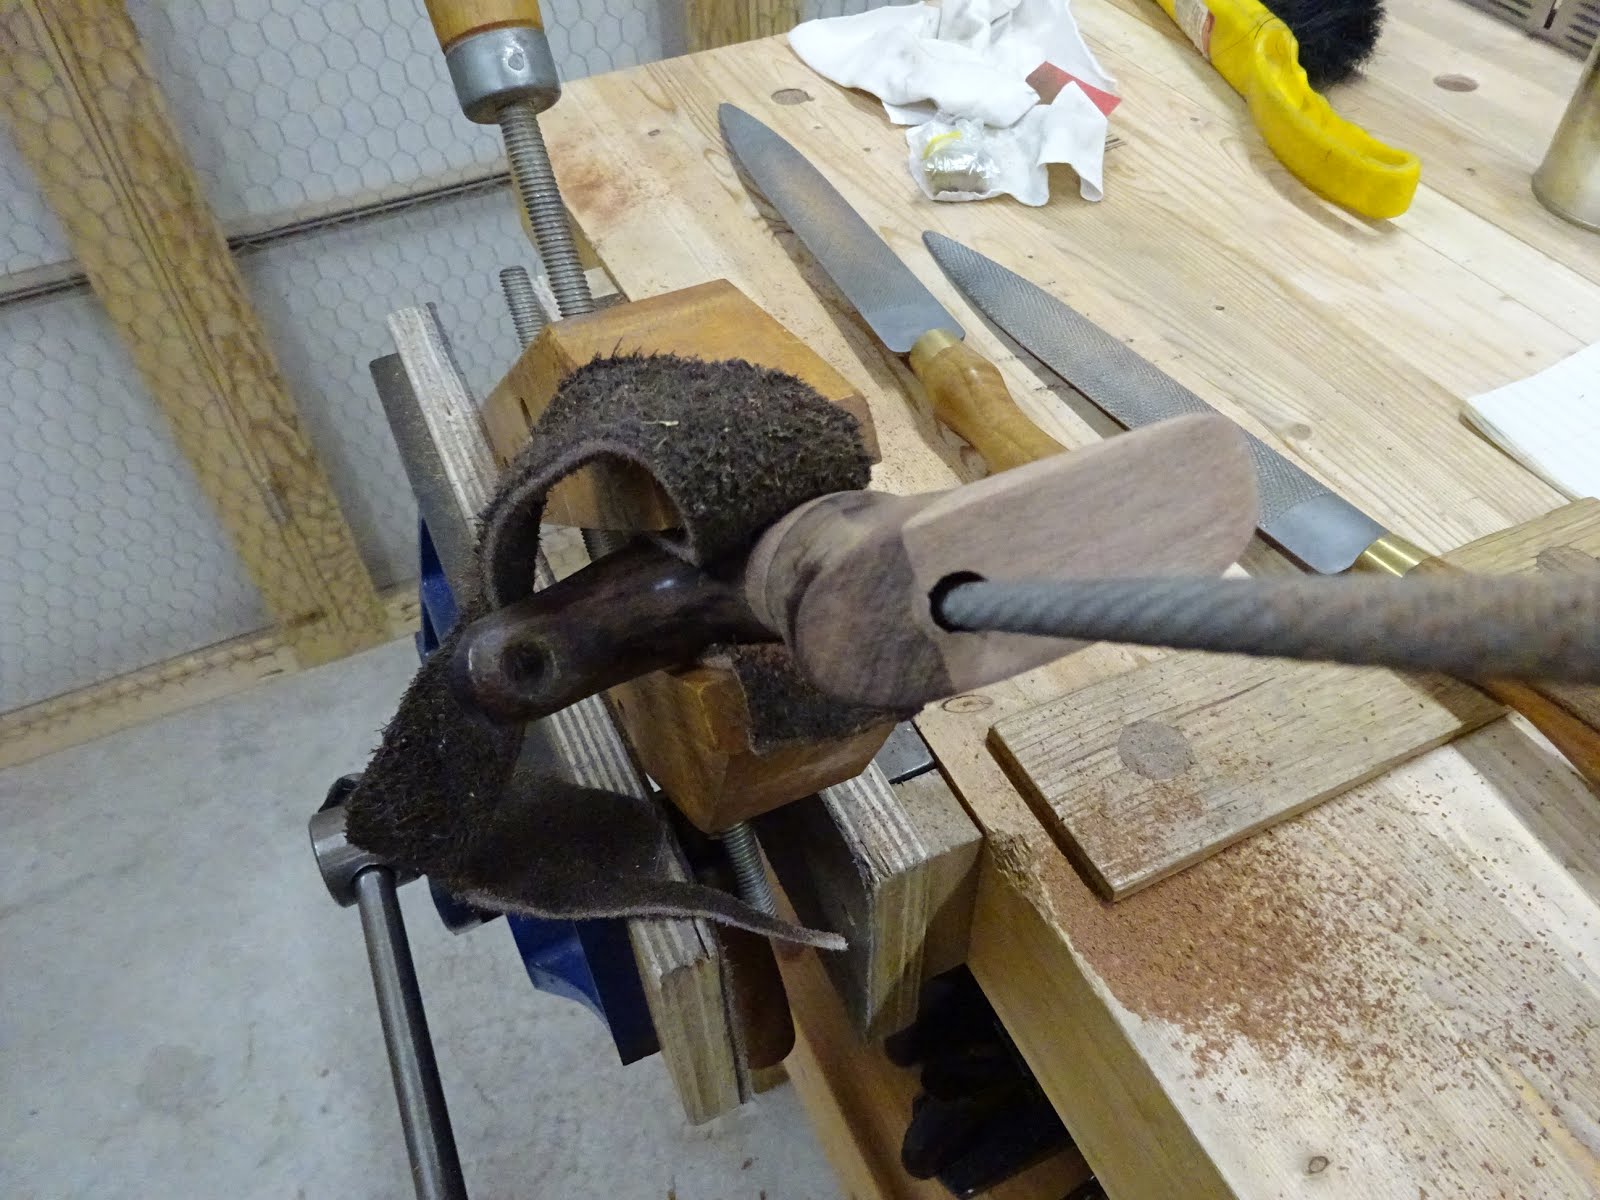
Clamping the tote so that I could work on the horn was challenging. But a hand-screw clamp in the vise was the right call. A little scrap of leather also helped.
 |
| Clamp in a clamp technique |
 |
| Still a little shaping to go |
The last step was to enlarge the 5/16" hole in the horn so that the 7/16" brass nut would fit. For this I used a round rasp and tested for fit every few strokes when I got close.
 |
| Rasp to enlarge the hole |
And there it is.
 |
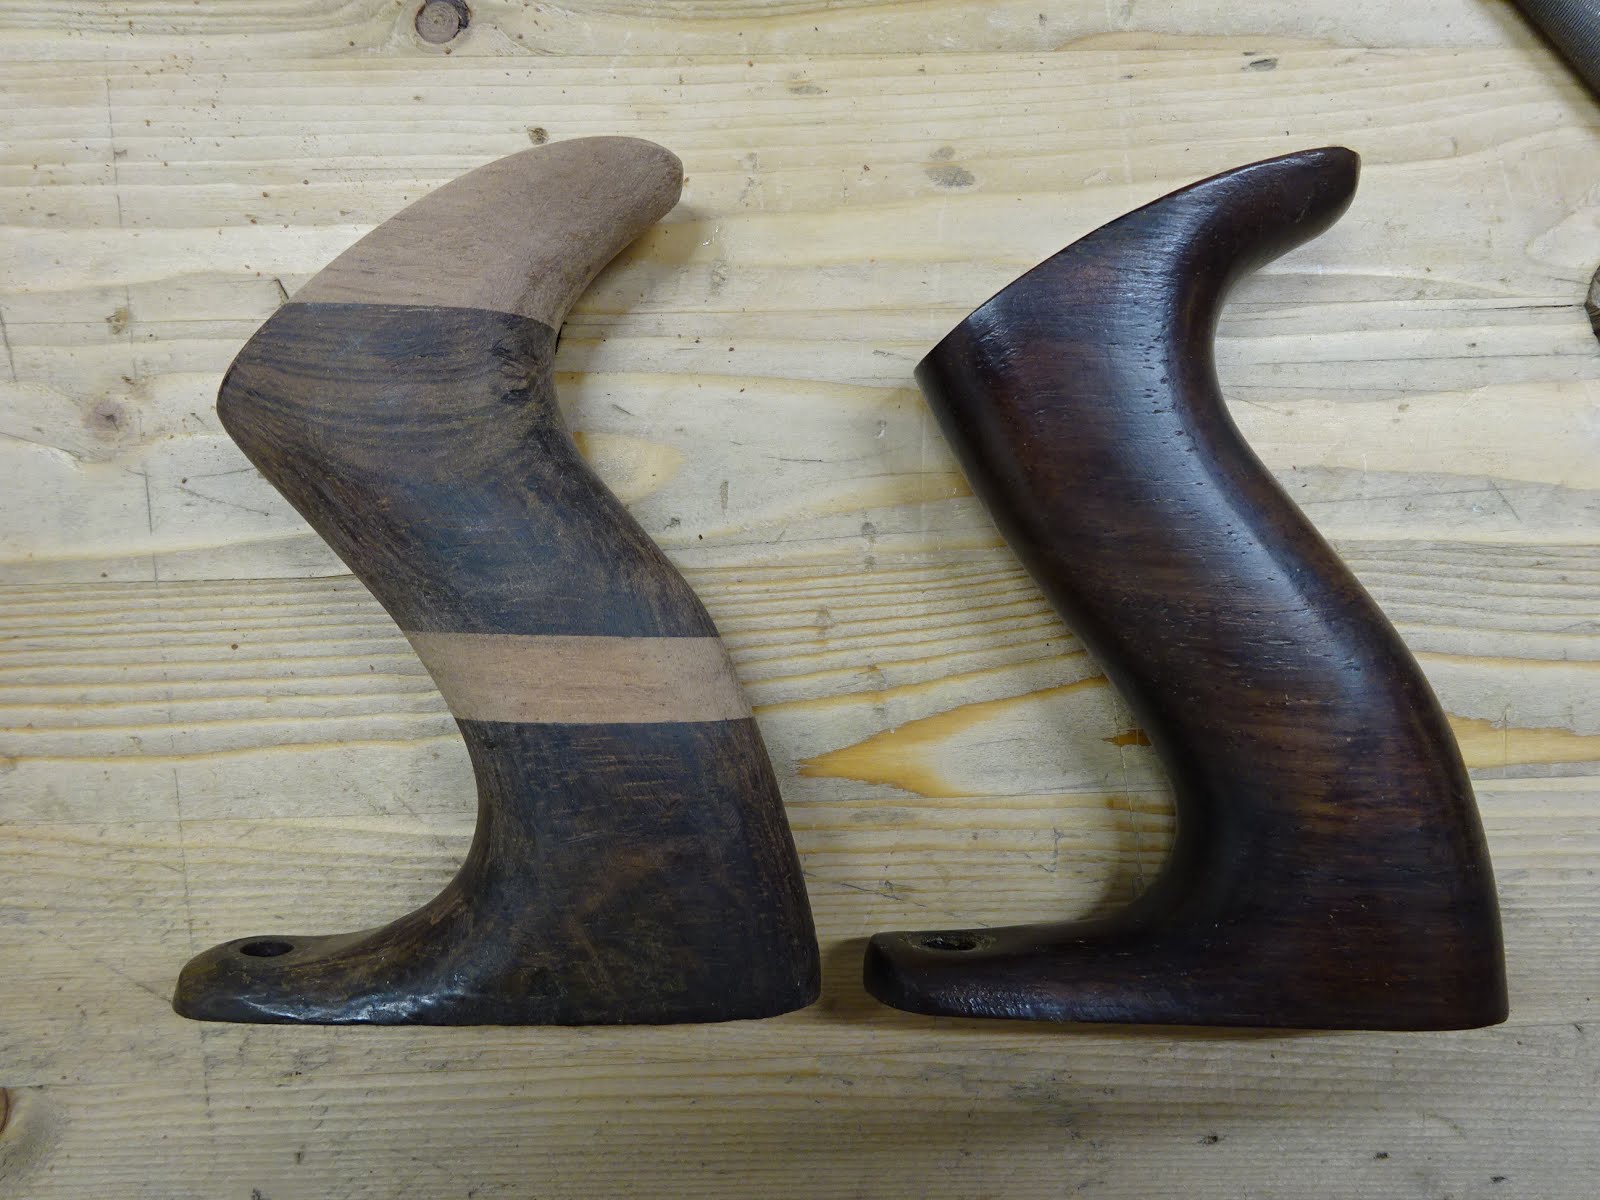
| My zebra striped tote |
I had thought the mahogany would be darker, but not so much. After scraping all the old finish off the original parts of the tote, I tried staining the mahogany with three different stains that I had, but none of them was dark enough. After staining I applied several coast of BLO, waiting a day between each coat. Then a coat of wax and it was done!
 |
Won't bother me that you can see it's been fixed.
In fact, I kind of like it that way |
 |
| Knob was scraped, sanded oiled and waxed too. Looks beautiful! |
 |
| And there she is, ready for work |
Out of curiosity, I compared it to my LN #8. Man that #8 is HEAVY! This #7 is so much lighter - maybe I'll have less fatigue when using it instead of the #8.
 |
| 100+ year old Stanley #7 and 5-10 year old LN #8 |
BTW, I mentioned in an earlier post that the japanning was a bit rough. Here are the pics. What do you think - should I repaint? (OK, I know what Ralph thinks about that!) I have no stripper and don't like working with harsh chemicals, so not sure how I'd go about it.
 |
| Heel end japanning mostly gone |
 |
| Around the tote (where it's relatively protected), it's mostly intact |
 |
| Some japanning missing in frog area |
 |
| Front end missing some, but not too bad |
So ends the rehab of the Stanley #7C. Fun project and I'm looking forward to many years using it. Thanks for following along. Questions and comments are most welcome.


That tote looks pretty good. When Woodcraft has a sale on turning blanks, you may be able to pick up something close to the old rosewoods. I used a "brazilian rosewood" to replace the top of a tote and while the color match was OK the texture of the pores was a lot different. Turns out that is not a true dalbergia rosewood.
ReplyDeleteThe split from the nail would be a good candidate for a thin CA glue. Those will flow right into a crack.
Thanks for the tips, Steve. I never had good luck with CA glue. Usually it hardens in the tube before I ever use it a second time. Now I keep it in a sealed glass jar with kitty litter (dessicant) to keep it fresher. But I've never been able to get a decent CA glue that will work for me. Either the nozzle is no good or for whatever reason I can't get the glue where I need it. Any suggestions?
DeleteObviously, you have to use the CA glue the first time.
DeleteThe little tubes can be a drag. Probably storing them nozzle up would help. I have a bottle of Loctite 420 on my desk for a couple of years now and it's been good when I've reached for it. It can get a little crusty but never hardens into the tip. Don't ask the price because I get it out of the supply cabinet at work.
That grade of Loctite is thin like water. DO NOT store it near your eye drops!
CA cures in the absence of air - hence the name anaerobic. If the tubes get squeezed to the extent that the air is out you get curing. The bottles cant get squeezed to that point.
Good tip, Steve - I'll try not to mix up CA glue with eye drops! (Ha!)
DeleteTry scraping it first. You will be surprised by how much will come off doing that. Based on your pics I would bet with scraping and sanding you could remove 99% of it.
ReplyDeleteKrud Kutter seems to works at stripping this stuff too.Think wet sanding with it.
I like the planing jig for the tote repair.
Maybe I'll try scraping, Ralph. But it'll have to wait as I've got other things to get to.
DeleteThat planing jig worked a treat. You just have to make sure the tote piece doesn't move in the jig while planing.
Awesome tote repair. The wood species that Stanley used back in the days is now on the endangered species list (forgot the name off hand, Rosewood...) So shipping old Stanley's into Europe can get barred in customs.
ReplyDeleteAll that to say, we owe it to both the tool history and that poor piece of endangered wood to be salvaged into a useful tote yet again. And you are right about the resulting look, be proud of it, you succeed into salvaging it for future generations
As for the bed, I would attend to rust issues, perhaps touch up the paint were needed the most (under the frog and other places were shavings and crapolla (Ralph Tm) accumulate) There are many things you can do in between complete strip and repaint and just treating some spots. But whatever you do, clean and protect.
Bob, the tool caretaker
An excellent point, Bob. I feel the same wayt i about salvaging the tote due to its history and the sacrifice that the rosewood made for this plane.
DeleteAs for the plane bed, I really should re-paint. Fortunately out here in California things don't rust much, if at all. I might try Ralph's suggestion of scraping it and then painting. I've never done that before, but it's always good to learn something new. Gotta figure out what type of paint to use and whether or not to prime first.