This post covers the cleaning and fettling of the wooden plane.
When cleaning the body and wedge, it was clear that the grunge was shellac, as alcohol and steel wool cleaned it off with a bit of rubbing. Everything got sticky before it eventually got smooth.
 |
| Cleaning up the body - looking far better |
 |
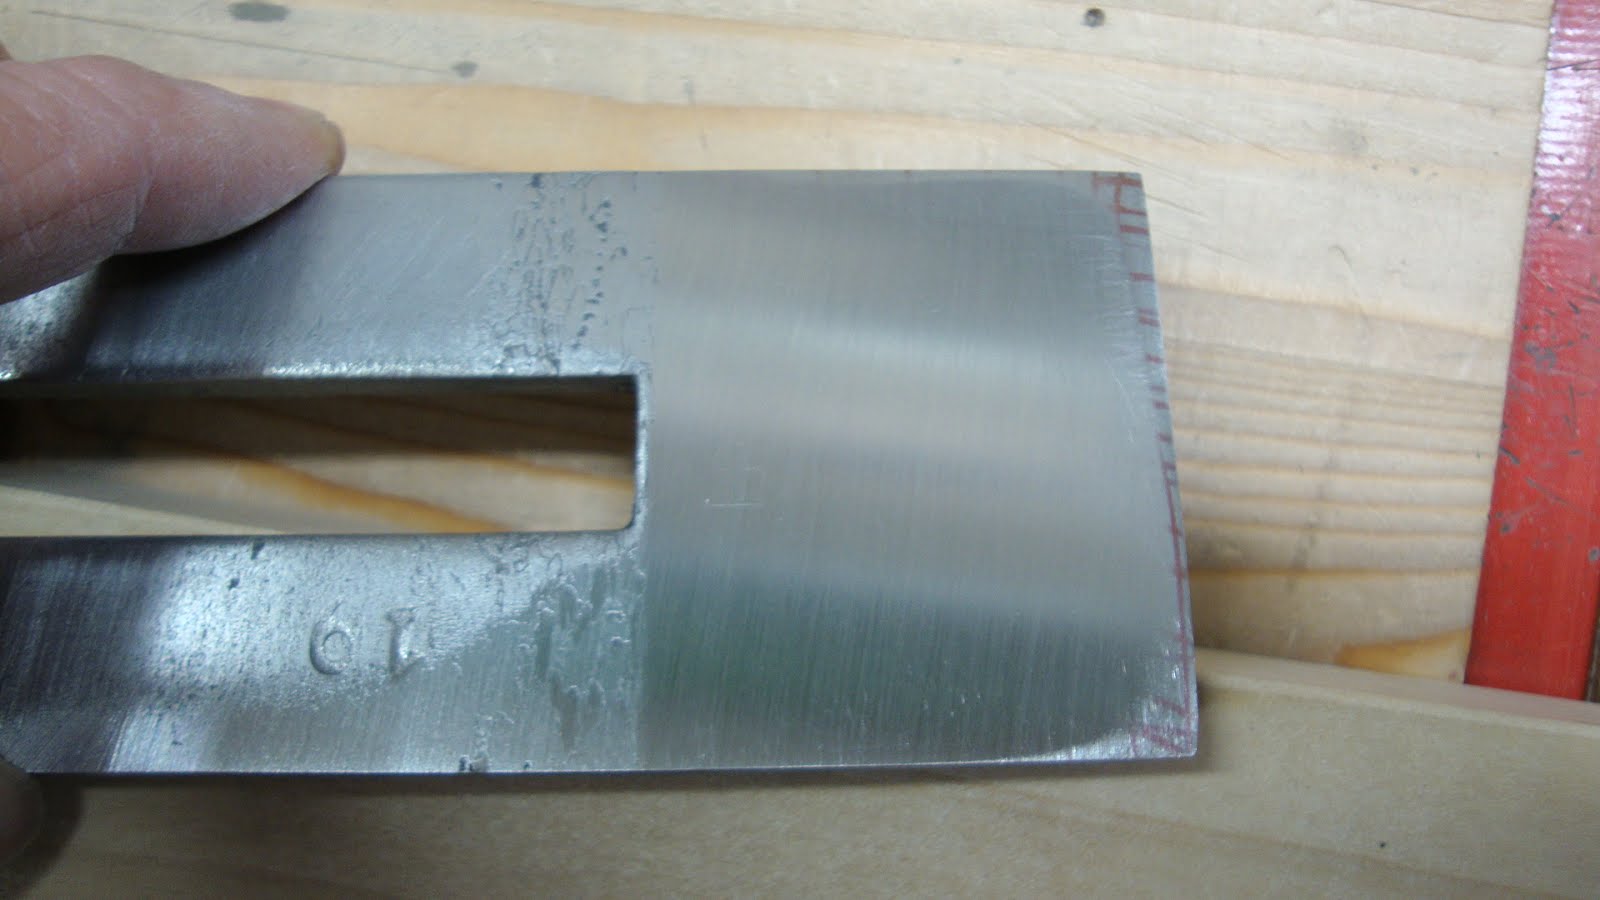
| Can now see the stamped mark much better |
 |
| And on the heel is the number "2" |
Inside the throat, there was a little "ledge", or shim, on the bed that might have lifted the bevel slightly. I found when I removed it that it was either paper or paper-thin leather. Maybe it was just tape.
 |
| Bed is at bottom in this pic, cheeks at sides in this pic. See the added shim on the bed near the mouth? |
Here's the sole after I cleaned it up for a better view of the chunks missing.
 |
| Toe area |
 |
| In front of mouth |
So I made some pencil marks on the sole and hit it with a jointer plane.
 |
| Marking the sole |
 |
| After just a few swipes, showing spots that are still low |
A couple more swipes did the trick. I was very surprised that the seemingly large divot in front of the mouth cleaned up with just a few strokes of a plane. [Edit: After all fettling was complete, I flattened again with the wedge, iron and cap iron tightly in place. Having the iron wedged in place made the area of the sole just to the rear of the mouth a little proud of the rest. A few jointer swipes fixed it.]
And here she is with the body and wedge all cleaned up. I gave it a couple coats of BLO and let it sit for several days.
 |
| Wood parts all cleaned up |
 |
| The pre-clean picture for comparison |
Here's something odd. The grain on this plane is not like typical wooden planes that are made from quartersawn wood. Usually you can see the ray pattern on the side of a wooden plane. But if you look at the sole in one of the pictures above, you can see rays on the sole.
 |
| Growth rings running almost vertically. |
If this plane was very old, I would expect it to be made from quartersawn stock. Perhaps German planes are different. Or maybe the wood it is made from is known to be very stable. I found that V. C. & Co. was in business from 1873 until 1925, so this plane is probably early 20th century. I suspect that the Peugeot Freres iron is not original to this plane. It fits in the throat and the wedge fit it very well, but the wedge (with its large recess on the back) seems to have been made for another type of iron.
The iron and chip breaker cleaned up pretty well. I used sandpaper, followed by a citric acid bath for 3-4 hours and then some more sanding.
 |
| Breaker cleaned up |
 |
| Iron cleaned up |
The iron was mushroomed over from many hammer blows, mainly at the top and the side next to "Freres". Interesting that the other side never needed hammer adjusting. Some collectors might be appalled by this, but I used a flat file to smooth over the mushroomed areas on both front and back.
 |
| Front of iron filed on top and right |
The bevel and back were in poor condition. And I don't have the equipment it takes to flatten the back and grind a bevel. So it's a lot of manual labor on sandpaper and diamond stones.
 |
| Marking the flat side |
 |
| After rubbing on coarse sandpaper adhered to plate glass |
 |
| The marked areas are VERY low |
 |
| Getting close |
I decided I would have to remove too much metal to make the back flat, so I made an executive decision to create a back-bevel on the back. My diamond stones are close to 1/2" tall, so I used a block that was 11/16" tall to rest the back of the iron on and created the back bevel on the stones. The angle is about 2°.
 |
| Adding back bevel |
Even this had trouble getting a flat all the way across the back. The corners were very low.
 |
| This is not the bevel side of the iron - this is a small back-bevel |
 |
| Here's the back bevel viewed at an angle |
I worked on it a little more until it was all the way across the edge. I didn't get any pictures of sharpening the bevel side. The bevel had been about 25°, so I cleaned that up at a similar angle, and then honed at 30°. Subtracting the back bevel, that gives roughly a 28° edge. I honed by hand since the iron was so bent and twisted that it would never sit properly in a sharpening jig.
The chip breaker cleaned up pretty well, but the edge where it contacts the iron needed some extra work. I did this on a diamond stone with the back of the breaker on the table and the front on the stone. This gives just about the proper angle to work with.
 |
| Cleaned up the edge of the breaker |
The chip breaker still didn't mate with the iron perfectly. Where I went wrong was on the iron's back bevel. I ground that with a little hump in the middle. If I hold that 11/16" block at an angle to the iron, it sharpens one side more than the other. And if I hold the 11/16" block at the opposite angle to the iron, it sharpens the other side more. It was difficult to hold things still. I needed to rig up something to hold that steady and give it another try.
So I made a block that would cradle the back end of the iron and hold it steady while grinding the back-bevel. The recess holds the iron 11/16" off the table.
 |
| Cradle to hold the iron steady while grinding |
 |
| The cradle in use |
Because the iron was a little twisted, I had to shim the right side with four thickness of paper. This worked out great and I got a nice back-bevel all the way across the iron. Took a long time, though.
 |
| This looks like the bevel, but it's a back bevel |
Then I sharpened and tried it out. After loading the iron and wedge and several rounds of trying to set it just right, I got my first shavings.
 |
| First shaving |
This was a bit thick, so I tapped the back end to withdraw the iron a little. After a few tries I was able to get shavings 0.001" thick! And with the refinements to the back-bevel I was able to get very thin shavings the full width of the iron.
 |
| See-through shavings |
 |
| Now that's thin!!! |
I found the front horn comfortable to use. However the rear end was not so comfortable for my right hand. I'm sure this type of plane takes a while to get used to. And here she is all gussied up and ready to go.
 |
| Glamour shot |
I'll have a little information on V. C. & Co. and Peugeot Freres in another post.


Nice job and recovery of a twisted blade. It does not show in your pics, but i hope that you kept the pencil marks on the wedge and body? They are important artifacts to the plane. If not, at least they were documented in your before shots.
ReplyDeleteThe nice thing about recovering such a plane is that it really make you understand how planes are designed to work. Pretty soon, they will have no more secrets for you :-)
Good job
Bob, with Rudy on his lap. Somebody wants a treat
Thanks, Bob. Yes, I kept the penciled numbers that are on the wedge and body. Who knows if a previous owner put them there (and why) or if they are factory numbers. We'll probably never know.
DeleteOh yeah, one last thing, the No 2 in the back probably refer to its size I.E. 2 in blade
ReplyDelete