In Lee Valley's July, 2016 newsletter there is a short interview with Paul Sellers. One of the questions he was asked was what was the most important skill to master. His answer: sharpening. This is not new to students of Sellers who may recognize that Paul's three important skills to master are accuracy, sharpness and technique.
Sometimes I think I've gotten pretty good at sharpening, but sometimes I feel like I'm just OK. While I'm sticking with my system of three diamond stones and a strop, I am open to suggestions and read a fair amount about it.
Steve Branam of the
Close Grain blog did a two-part blog in June called "
Two Stones and a Strop". In these posts he presents a method of sharpening based on writings of Charles Hayward from "The Woodworker". As part of the method, Branam introduces a simple angled block of wood to help hold the chisel or plane iron at the proper angle.
Up until I read that, I've used either a clear plastic 30-60-90 drafting triangle or a bevel gauge to guide my angle. I knew that had limitations. I would place the iron on the bevel gauge's blade (which is set at 30°) and try to keep that angle as I move from the bevel gauge to the sharpening stone, but it's anybody's guess how much I've moved in the process.
 |
| My former angle setting method |
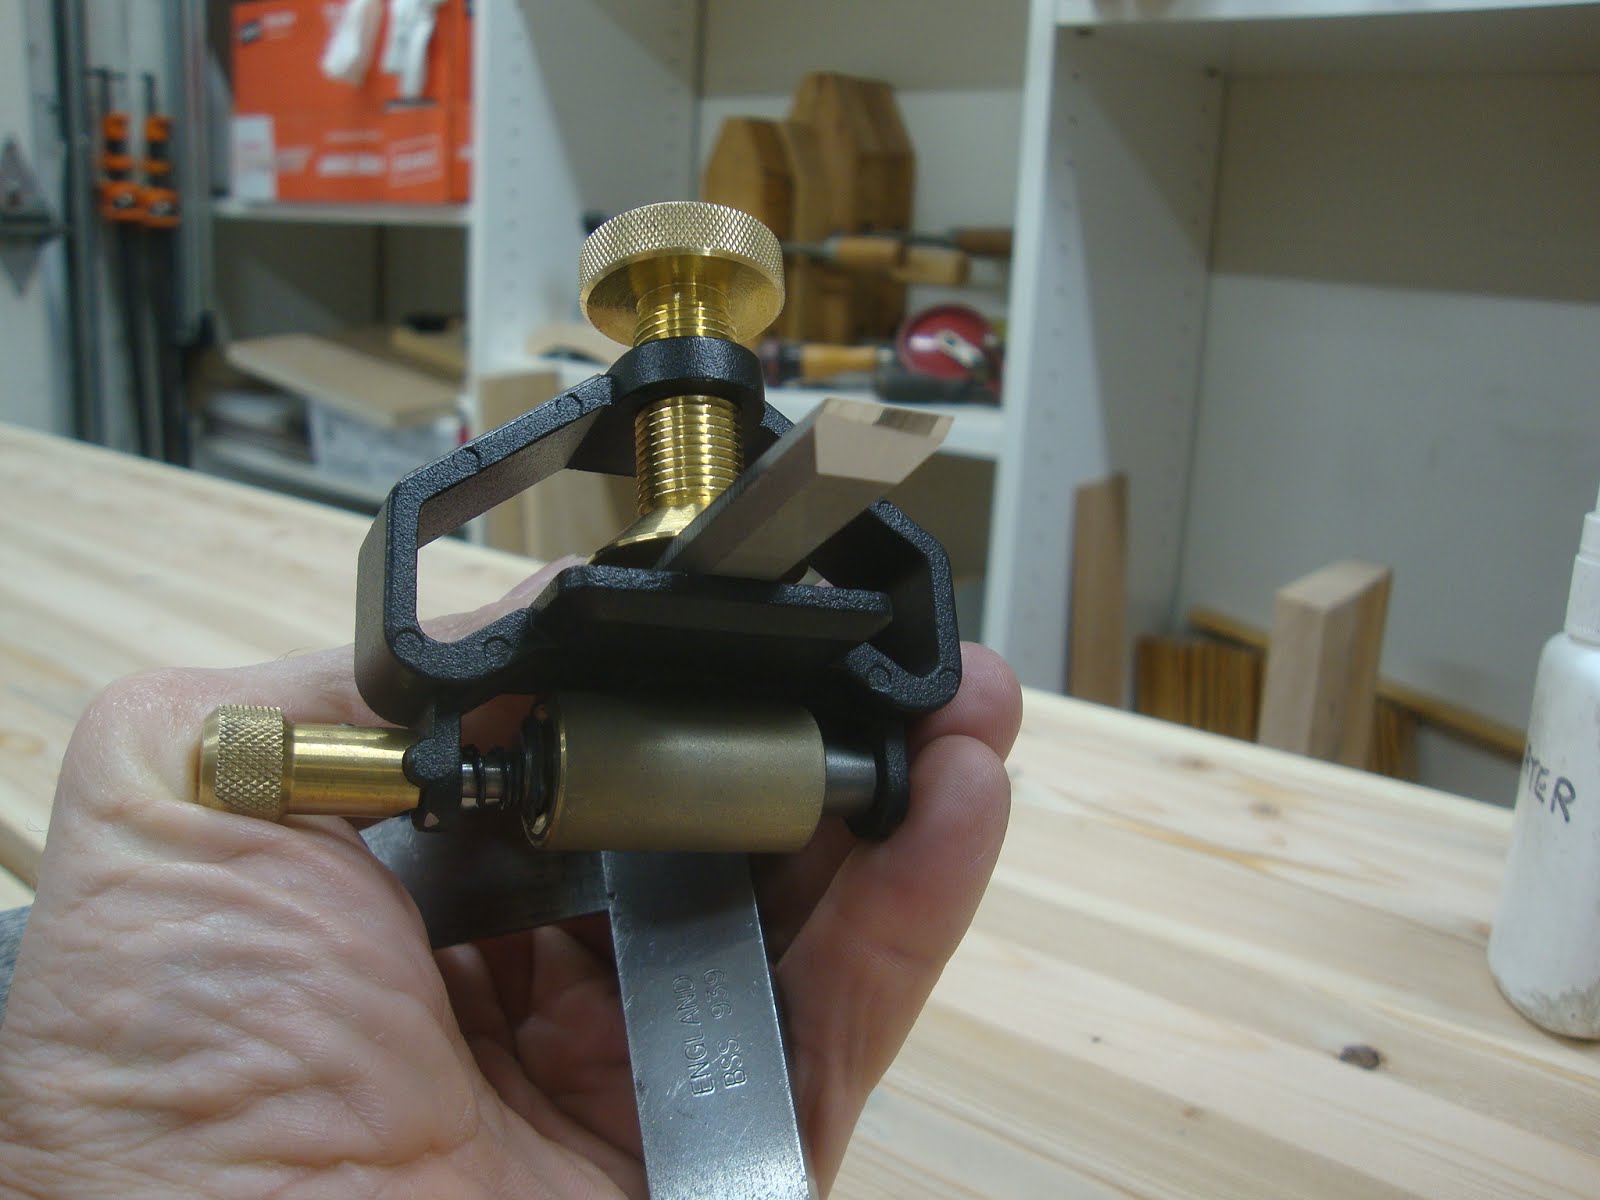
Well, I thought I'd find out. I'm using the same bevel gauge to see if my sharpening angle matches the bevel gauge.
 |
| Iron set in bevel gauge |
Let's get a closer look at that.
 |
| Holy crap! I'm probably sharpening 2-5° too high an angle! |
OK, well that doesn't seem that much, does it? Depends on who you read or listen to.
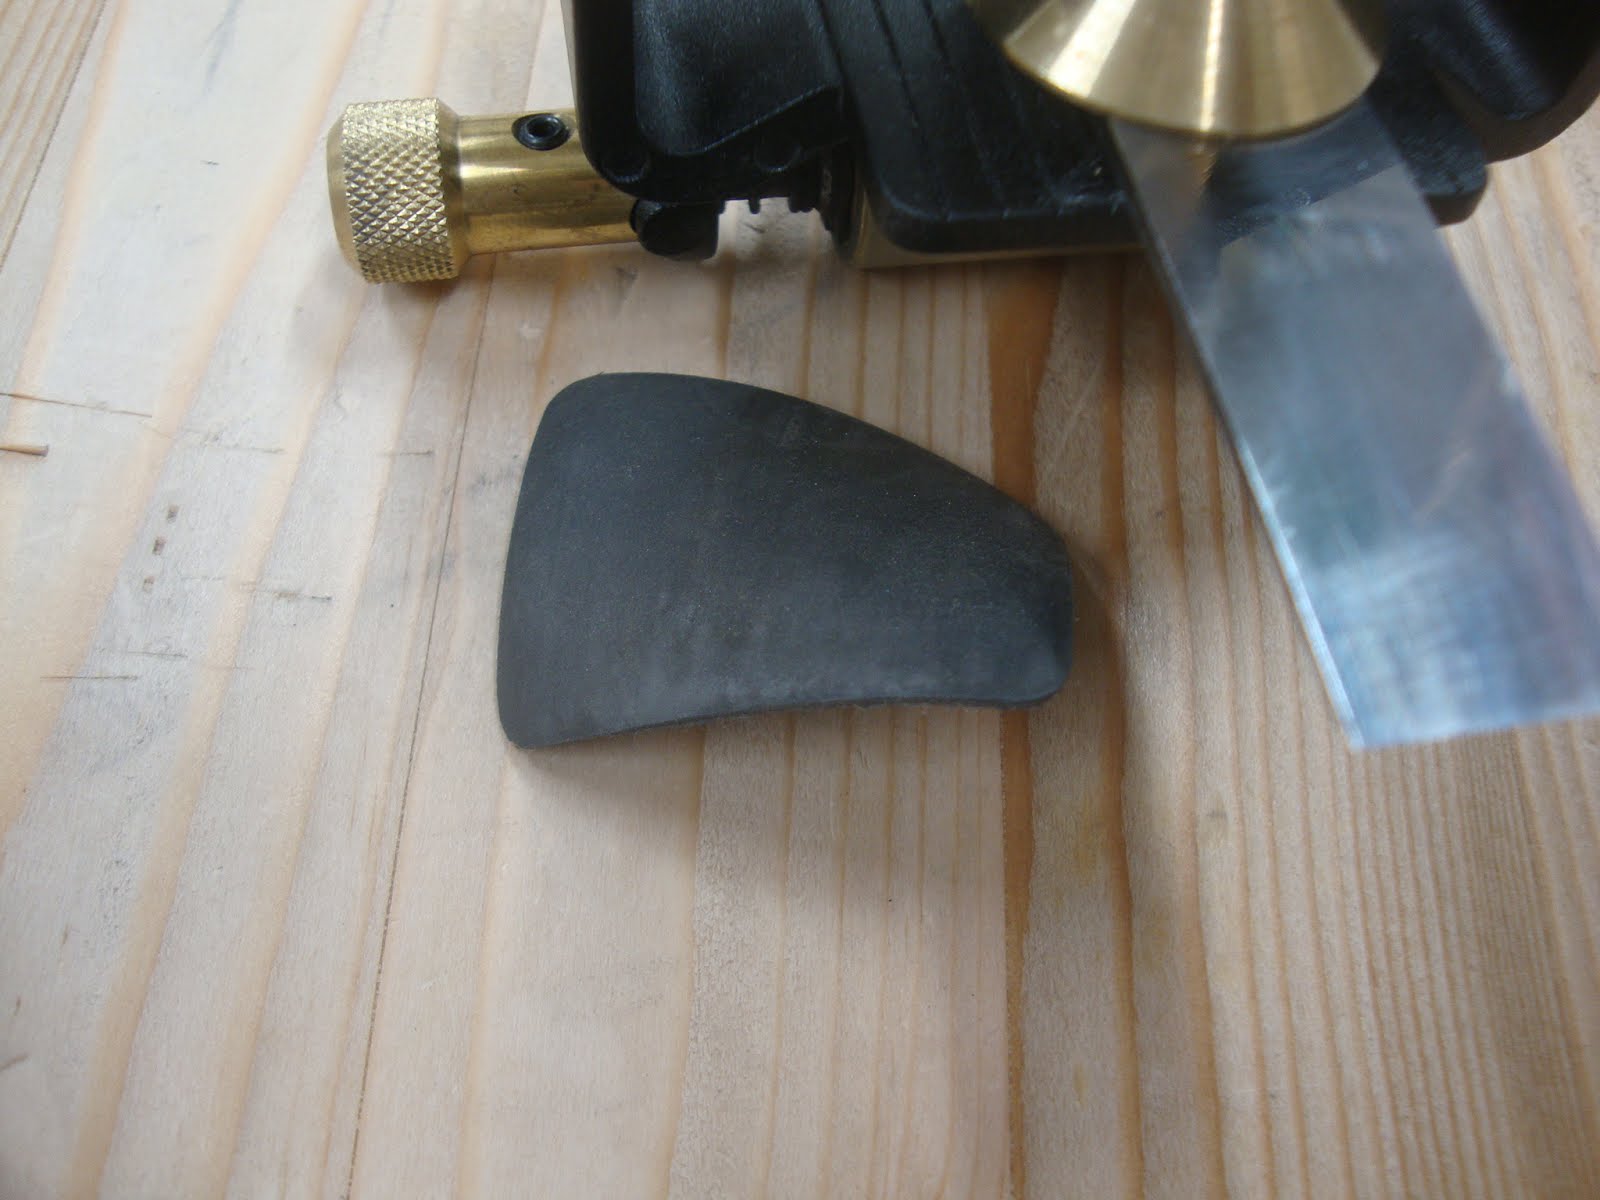
I really liked Steve Branam's idea of the angled wooden block, so I made one at 30°.
 |
| Branam's angle jig sitting on diamond stone |
In use, you hold the iron to the block and start pushing the iron on the stone from there.
 |
| Proper angle. Ready, set, sharpen. |
Unlike as shown above, I actually use the block at an angle to the stone.
 |
| Action shot - I've got the block (and iron) angled here |
And guess what? After a few strokes I see more evidence that I've been sharpening at too high an angle.
 |
| Scratch pattern not even close to the edge |
So I sharpened several plane irons today using the block. But I had to use sandpaper on plate glass first because I had a lot of metal to remove (and I have no grinder). I'm not using the Hayward system that Branam blogged about, but I may do that in the future.
As long as I'm on sharpening, I have a beef with the Veritas honing guide that I use for 5/8" and smaller chisels. It's virtually impossible to clamp the chisel down tight enough that it won't move, and it's equally difficult to set the chisel so the edge is sharpened at 90°.
 |
| Veritas honing guide sans rubber pad |
The honing guide is sold with a rubber pad that can (optionally) be adhered to the platform that the chisel is clamped to. I've been using it with this pad for a few years, but the rubber gives a little and the chisel moves slightly during sharpening.
 |
| I removed this rubber pad today |
I'm not sure if this helped to remove the rubber pad. Without the pad, the chisel still can move fairly easily. But I persevered. To get the chisel straight (90° to the width of the guide) I'm using the two curved machined edges just below the platform as a reference.
 |
| Hoping the edges of this guide are square to its width |
Holding the stock of a square to these curved edges, I try to align the chisel with the blade of the square.
 |
| Aligning blade with square |
But when you crank down on the clamp screw, everything goes out of whack, so you have to tap the guide back into square and test again. Arrgh!
Well, through it all I got my chisels and plane irons sharpened. Got decent end grain pine shavings.
 |
| Proof is in the shaving |
Sure would be nice to have a better guide.


I chased my tail and tried more ways to sharpen than I care to recount. A lot of it had to do with me not understanding what sharp was and how to get it. I finally did with Norton water stones based on what Chris Schwartz was doing at that time. (about 4 years ago)
ReplyDeleteI've since settled into 3 diamond stones and a strop like you. I'm not changing anything anymore not matter what I read or see. Mr Sellers have been using this system for many moons and I'll follow his lead.
This system gets my tools sharp enough for me to do what I need to do and that's the bottom line.
The thing that bothers me is that since I don't know anybody locally who works with hand tools, I have nothing to compare to. Nobody else's really sharp chisel to check out. Obviously sharpness is so important to being able to do fine work. But how do you know when you're there?
DeleteThat last pick cutting the end grain is still crushing fibers, not quite sharp enough.. Sorry. But you are getting very close. That LV sharpening jig and any others that clamp from the top all have the same annoying problem, it is impossible to hold straight, it will move!!
ReplyDeleteThe all around best design remains the good old side clamping Eclipse. Pick up an inexpensive one, quick tweaking with a file ( see a previous blog
entry of mine how i do that). The new LN version is top notch but way too expensive for my taste
Dang Bob, you're a real taskmaster. I wonder if it's possible to get that sharp (so I don't crush fibers) with my current sharpening supplies. I'll keep trying.
DeleteTotally agree about the price of the LN guide. I looked for your post about modifying your Eclipse honing guide, but couldn't find it. Can you help me out? Is it the same modification as Schwarz did by filing out the hump in the middle?
Hi Matt,
DeleteI lately found this: https://www.youtube.com/watch?v=ojzzCXq5ook
I guess this is what Bob is writing about and what Mr. Schwarz is reporting about.
Give that a try. I've done that these days and was really impressed.
Cheers,
Stefan
Thanks Stefan. That really helps. Interesting - at the start of the video, Deneb says "this is an inexpensive honing guide that we [Lie-Nielsen] carry ..." That must be an old video because the only one they carry now is the very expensive one. Haha. Now if I can just find an old Eclipse type guide.
DeleteYes, it is the same mods that Chris and Deneb talked about. To find my blog entry look under the label "sharpening station" that was in May 2015.
DeletePst LN still carry the cheap guide, but you will find it under Tom's toolbox tab on their site.
Bob and Rudy
OK, I found it now. I just ordered the cheapie guide from LN. Funny - I found it while googling, but couldn't find it on their website. I'm sure LN would like you to buy the 10X more expensive one, so they bury the cheap one in another part of their website.
DeleteHmm...knowing what sharp is, is a tough one when working in a vacuum like most of us do. Ideally, sharp yields a polished surface on the end grain on softwood. I typically keep one chisel and one plane (#4) at this level, but the edge will quickly degrade. Most of my tools are sharpened to a utility edge. Not super sharp, but leave a clean surface and lasts quite a while.
ReplyDeleteI have no idea what the bevel on any of my edges actually is. Nor have I ever used a guide. My plane irons have the rounded bevel like Paul Sellers recommends. My chisels are Japanese and are designed to have a flat bevel, so that is how I sharpen them. Still no idea what the angle is though.
Sharp makes everything easier for sure. The tool needs to be sharp enough to do what you intend it to do with minimal effort while leaving a clean surface. Find a system that works for you that is quick and yields repeatable results, but don't get bogged down in the minutia of sharpening.
Hey Greg, thanks for the perspective. I've been sharpening by hand for about three years using the Sellers system of three diamond plates and a strop. I intend to stick with it, but I can't help but wonder if a finer water stone or oil stone would get me a better edge.
DeleteI understand the lure of the sharp edge. I have a full set of water stones. They produce a nice edge, a little keener than the diamond stones and strop. But that edge quickly degrades after just a few strokes and is then the same as the edge from the diamond stones and strop.
DeletePaul did a blog post on sharpening to just the lower grits and the usable edge that can be had. Well worth a read and maybe an experiment.
https://paulsellers.com/2013/11/sharpness-mean-real-terms/
DeleteI remember that Sellers blog post. Sharpen to task is the key message there. I'll need some more experience before I can FEEL any difference. I can certainly plane wood with the sharpness I've been getting, though I usually sharpen up before finish planing to get a better surface. The chisels are a different story. I feel like I can do a better job to make their cuts enter the wood more easily. I'll keep at it.
DeleteI had one of the veritas guides to and had the same problem with chisels shifting in it. Now I just use a cheap plane iron/ chisel holder and have had better luck.
ReplyDeleteLike you also I struggle not knowing if an edge is sharp enough. I let the work at hand tell me, if it's not going well then it's back to the stones.
I mostly use the 3 diamond stones and a strop, but after preparing some pretty bad irons on my coarse stone it doesn't cut like it used to.
I've been using a Shapton ceramic 5000 lately for finishing up before stropping. I like it, their harder than water stones and easier to maintain. I got mine off Amazon, if anyone is looking into them, don't buy the professional series stones, their the exact same as the regular Shapton ceramic only more money.
Stephen
You bring up a great point - I need to "feel" how my tools are cutting. Probably I don't sharpen up enough and if I become more sensitive to how they respond I'll be able to feel and hear when it's time. Oh, and good tip on the "professional" Shapton stones!
DeleteHi, I just got the Veritas MKI jig and Ive also been having issues.
ReplyDeleteFirst some background: I am just getting into woodworking as on offshoot to my electronics hobby as I am wanting to make some nice wooden boxes for some vacuum tube clocks. I bought a nice Bosch Router and a Leigh Superjig, but while I have been finishing troubleshooting my clock, I figured I'd try to learn manual woodworking skills. So far I'm on my 7th set of handcut dovetails, I do see improvement each time (no where near what the Leigh can do though). Currently I'm using a 14 degree Lee Valley Guide which I love, a full blade Ryoba saw, a coping saw for waste and chisels for cleaning up, but recently I've been trying to skip the coping saw to practice my chisel work.
I use an array of sandpapers glued with spray photomount glue to plate glass. I thought buying the Veritas jig would make sharpening trivial, but I've had some issues with it.
1. Keeping the Chisels square is an issue, I also notice they can shift while sharpening, technically this would be a problem called "yaw" IMO this isnt the biggest issue, I just check the progress of the bevel, adjust and continue. I havent put on the rubber pad, but some 1/8" squares of Silicone Rubber I cut seem to help.
2. My biggest issue is not in the "yaw" but in the "roll". Even after setting chisels using the guide, I can still notice a yaw (meaning the chisel is square, but off axis. When sharpening over a polished bevel this looks like a pattern that is even across the middle of the bevel referenced to the center of the pattern, but it tapers from one side to the other. Through trial and error I try adjusting as I go and sometimes I have the chisel about 20 degrees off of being square with the jig just to get an even grind pattern on the bevel. I think this is due to the circular brass clamp only making several points of contact and transfering the torque from tightening into an uneven application of pressure causing one side of the chisel to be clamped tighter( raising the other end) and causing a "roll". Practically, I can square chisels using a small square, and after sharpening the blade would be skewed.
I know this is hard to describe without photos, but has anyone else had issues with that? Since my goal is dovetails on relatively small boxes, most of my chisels are under 1/2" and I think the issues are worse with narrower chisels. The only temporary solution so far is a square of silicone between the bottom of the chisel and the jig, AND a square of silicone between the brass clamp and the top of the chisel. I was also thinking attaching a small strip of wood (maybe V notched) to the bottom of the round brass clamp so that contact is from the chisel to the wood instead of the round clamp, that might distribute the pressure more evenly.
Hi Efram and thanks for the comment. Sounds like you've got a lot of stuff going on.
DeleteI'm not sure I understand the "yaw" problem, but I think you're seeing the same limitation of the Veritas Mk1 jig that I saw. You just can't keep the chisel square in the jig. And you are right - it is far worse with narrower blades than wide ones.
I once made wood blocks that would fit tightly inside the jig on either side of the blade I was sharpening to try to keep the blade centered and square. I had limited success (read - it sucked!).
Eventually I've just gotten more comfortable sharpening without a jig. Even for thin chisels. I just have to keep checking as I go that I'm not sharpening out of square.
Good luck to you.