Since I'm between projects, it's a good time to get to some of the shop projects or maintenance tasks that have piled up. I've been keeping a list of things that I'd like to do - as long as I can remember to write them down there's a chance that I'll actually do them.
 |
| The "To Do" List |
Two of the items on the list are to fix the handle on the 4 1/3 TPI 26" Pax rip saw and to sharpen the 7 TPI Disston 26" crosscut saw.
I've had the Pax saw for a couple of years (bought new) and it's always had a small problem. The handle moves a little while sawing. I even exchanged it for another saw and the new one had the same problem, so I've lived with it. The following two pics show how much movement there is.
 |
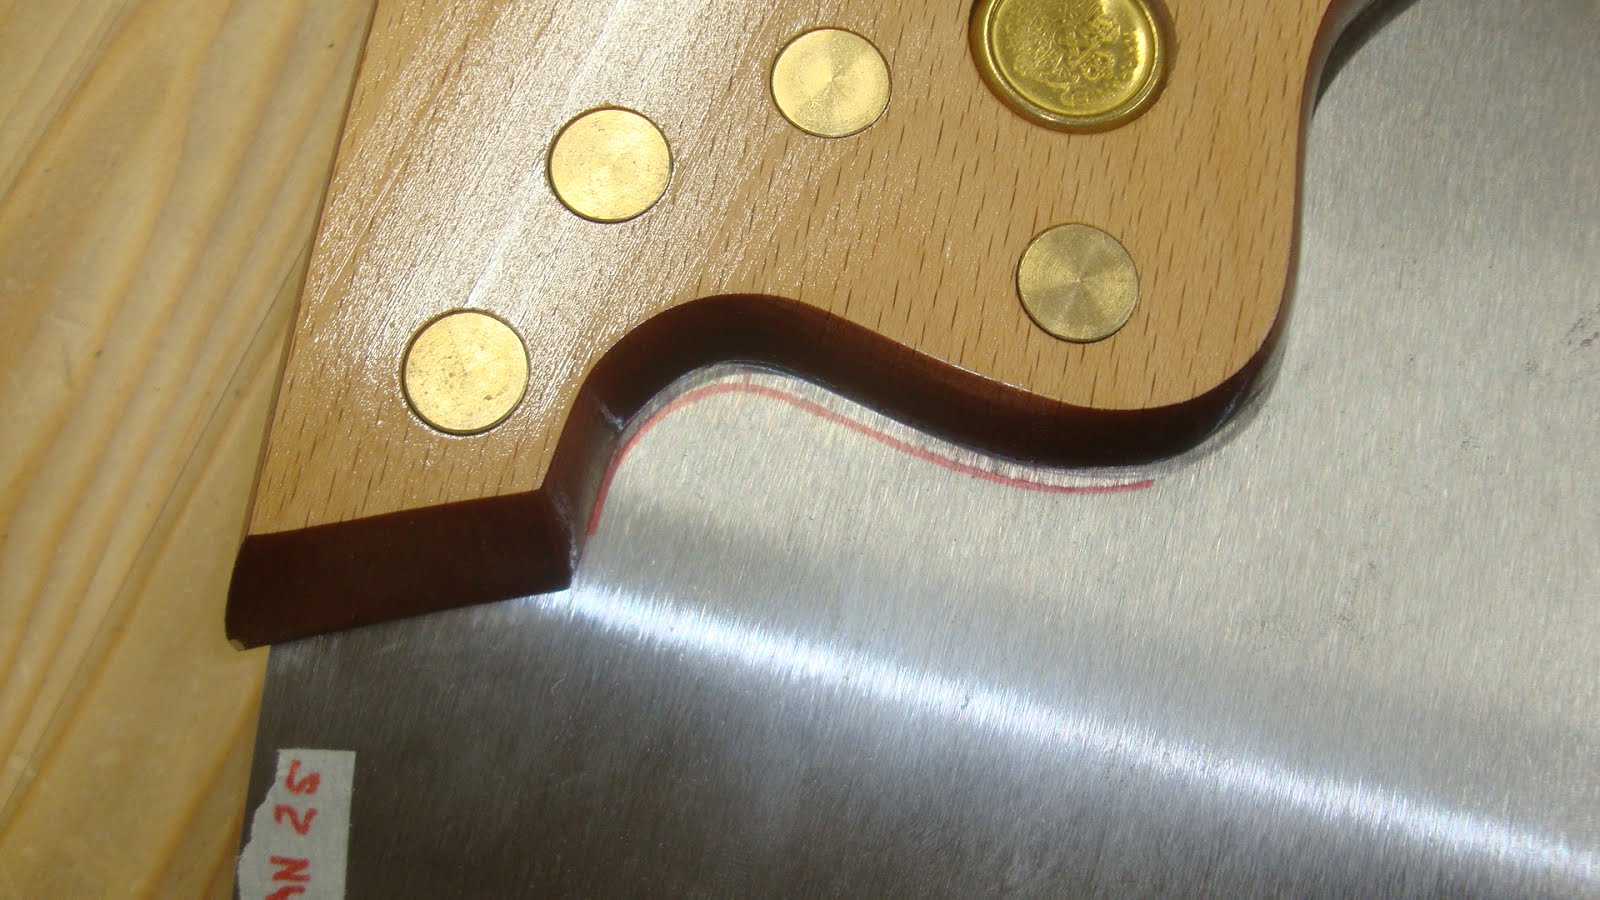
| I've drawn a red marker line on the plate along the curvature just below the bolts |
 |
| Now after jiggling the handle, there's about 3/32" movement |
I have another (totally crappy) saw that I shimmed the saw blots with pieces of an aluminum can to fix a similar problem and that worked fine. But there is so much space between the saw bolts and the drilled holes that this won't work. The bolt OD is 3/16" and the plate holes are 5/16". The holes in the handle are slightly smaller at 19/64".
 |
| Piece of aluminum can wrapped around saw bolt as shim |
My next choice is to get some nylon spacers and use them to shim the bolts. The one in the picture below (that I had on hand) won't fit, so I'll look on McMaster-Carr for something (unless anyone else has an idea ...).
 |
| Nylon spacer shown with bolt and plate |
So I've got to shelve this for now.
My other 26" saw is a Disston crosscut that I got at a garage sale. It has needed sharpening for a while and I got to it today. The first thing I did was to check the set. The plate is about 0.040" thick at the teeth and the total set was about 0.054". This was too much - I like to have about 20% greater measurement than the plate thickness, or 0.048". So I set up my "anvil" - a heavy hammer clamped in the vise - and hammered the teeth (both sides) until the set was where I wanted it.
 |
| My "anvil" |
 |
| Hammering the teeth lightly until the set was just right |
Next up was to joint the tops of the teeth just enough to get a small flat on the top of each tooth. I had made a little jointing jig for a standard file last year and it works great.
 |
| Jointing jig with file loaded. Note the bolts that clamp the maple strip onto the file. |
The next picture didn't come out as good as I wanted, but hopefully you can see the shiny flats on each tooth.
 |
| Shiny "flats" on tops of teeth |
My indispensable tools for this process are shown next. The magnifying goggles with head lamp are fantastic. And before I upgraded my shop lighting I had purchased a small LED desk lamp. Between the two of these I can actually see what's going on. And you really need to see what's going on.
 |
| Magnifying goggles with LED headlight and freestanding cordless LED desk lamp |
My saw vise is a homemade affair from plywood and strips of pine, clamped into my end vise. The bottom is hinged. The vise doesn't apply enough pressure, however, and you'll see in a later picture that I add a long-reach clamp to really clamp down in the middle of the saw vise.
 |
| Saw in the vise |
I use a homemade rake and fleam angle jig while filing. I don't remember where I first saw this jig, but it works fine. Made from an approximately 1" x 3" x 3/4" piece of softwood. The file is stuffed into a hole drilled in the edge and then one face of the file is lined up with a line drawn on the edge of the jig at the rake angle of 14°.
 |
| Rake and fleam jig |
It's not accurate to align a face of the file to the rake line by eye, but if I hold a small ruler flat to the face it makes it much easier to tell if I'm close.
 |
| Aligning one face of the file with the rake line |
The jig has a 20° angle at the end. Actually the angle is 160° to the edge so that in use I file 20° off perpendicular to the saw teeth. Lining up the 20° bevel of the jig with the saw plate does the trick. This picture is from over my shoulder.
 |
| Holding the jig level gets the rake, the 20° angle gets the fleam |
After that it's just filing from heel to toe. Some people say to go from toe to heel, but if I start at the heel I get in some "practice" with teeth that rarely touch wood and I get into a good rhythm by the time I get to the more used teeth. My saw vise is not long enough to file the entire saw, so I need to adjust the saw in the vise to get the second half.
 |
| Filing away (see the long reach clamp in this photo?) |
Here's halfway done. Note the red marker has been removed on every other tooth and the flats that are still reflecting some light.
 |
| Halfway there |
After turning the saw around and filing the other teeth I checked to see if all flats were removed. Many were not and so I filed the teeth that needed more, focusing pressure forward or backward (rather than straight downward) to remove material where needed to get rid of the flats. This way I don't remove more of a tooth that already had it's flat removed.
When I was satisfied, I took my coarse diamond stone and LIGHTLY rubbed it down the length of each side of the plate to even off the teeth and remove a bit of burr.
 |
| Evening off the teeth and removing burrs |
A test cut felt pretty good in a 2" x 6" piece of Douglas fir. I could tell a big difference from before sharpening.
 |
| The obligatory test cut |
And the sawn surface looked pretty good. I didn't get exactly to my lines, but at least the surface is relatively smooth.
 |
| The newly sawn surface |
So I get to mark this item done on my list and hopefully I'll get some spacers to fit the rip saw handle holes and get that one off the list soon, too.


You might try to make spacers with copper wire.
ReplyDeleteTake AWG#15, make a little ring with pliers, then hammer it to bring it to the desired dimension, or
take AWG#14, hammer it to 1/16 and make a ring (you might need to file it to the blade thickness).
Sylvain
Oops,
ReplyDeleteI should read all your post before making comments on old material.
I thought only the blade holes were too large.
Sylvain
. Most use a crude pivot system that is difficult to set and may get rapidly clogged with sawdust making the mechanism stiff. Although these saws that serve a purpose, you will likely want to upgrade as your woodworking skills evolve. tool reviews
ReplyDelete