Making the spokeshave body is not that tough. The woodworking is straightforward, but fettling the shave after all the woodworking is complete can be tedious. I started with a maple blank, 1 1/4" x 7/8" x 12" (the second shave blank was 1 1/4" x 13/16" x 12"). Laying the iron on the bottom (the sole) of the blank with the iron's front edge 3/8" from the front of the blank and back edge 3/16" from the back, draw the shape.
 |
| Iron shape drawn on the sole, kerfs cut for waste removal |
The business part of the blade is 2 1/2" wide. These extents were marked with a knife and the lines extended to the rear edge, to about 3/16" from the top.
 |
| Remove the waste that becomes the escapement |
 |
| Then chop the mortises that house the iron's tabs. I used a router plane with 1/4" iron to flatten the bottoms. |
Install the blade and mark for the holes for the iron fixing screws. Here's where I changed something for the second shave. Notice in the picture below how close the smaller hole is to the escapement. It leaves only about 1/8" of wood and I was concerned it would blow out when drilling or tapping the hole, when or installing the set screw. On the second shave, I moved the two holes over 1/16" to give me more meat to hold the set screw.
 |
| Large hole is for the iron fixing screw. Smaller hole gets threaded and a set screw is installed. |
 |
| The set screws adjust blade height (cutting depth) and are adjusted using a 3/32" Allen wrench |
Next was to plane a 5° chamfer on the front 3/8" of the sole. Rozaieski uses 8° and a couple other sources used from 1° to 3°, so 5° was a compromise. In retrospect, it seems about right.
 |
| Planed the 5° chamfer on the front of the sole |
In the area directly in front of the iron, I inlaid a 3/32" piece of brass for wear resistance. I'm sure it could have been thinner, but that's what I had. The bottom of the mortise was leveled by hand with a wide chisel.
 |
| Test fitting the brass strip |
After roughing up the underside of the strip, it was glued into the recess with CA glue. It later fell out and was re-glued using two-part 5-minute epoxy.
 |
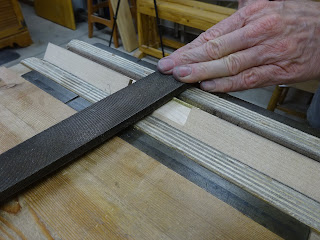
| After gluing in the brass strip, filing the rear edge flush with the escapement |
I used the template provided by Bob Rozaieski (see part 1 for the link) to lay out and cut the shape of the handles. Five points go to the first person who catches the mistake I made.
 |
| Handles shaped. Also carved indents for thumb placement. |
 |
| First shavings on edge grain pine |
 |
| Shavings on end grain cherry |
So far so good. I found when shaving the cherry that the leading edge of the brass strip was digging in. So I eased that edge with a file and it worked much more smoothly.
 |
| Add a round-over to the front edge of the brass strip |
I made a second shave from some dense mystery wood that looks akin to mahogany. It came out better than the first.
 |
| The second shave. See the mistake with the first one yet? |
And here are the two shaves after a couple coats of BLO. BTW, the iron fixing screws were made from 12-20 threaded rod and brass thumb nuts. At first I didn't use thread-locker and they worked fine, but later I locked them together.
 |
| The two completed shaves |
The iron in both these shaves (above picture) is pointing away from us. I had shaped the handles of the maple shave backwards! Little mistake in layout, but c'est la vie. It works anyway. I had actually seen shaves with handles in both orientations on the 'net. And the Boggs shave sold by Lie-Nielsen and metal-body shaves have handles straight out to the sides. But I do think the darker shave is a little more comfortable in use.
Fettling the shaves has been challenging. At times I've gotten nice clean shavings. Other times I've gotten bad chatter, leaving a rough surface. I'll have to continue messing around with the shaves to get them dialed in for consistently smooth cuts. This had a lot to do with mouth size.
 |
| Chatter marks (3/32" Allen wrench for scale) |
Lastly, I made a sharpening jig to help with grinding and honing.
 |
| Sharpening jig ... |
 |
| ... uses the shave's screws with spacers to affix the blade |
I can't believe this was on the to-do list so long. It's a fairly quick project, but it would have been really fast if I had bought a blade from Hock Tools.
Spokeshaves are one tool that I have yet to get a warm and fuzzy feeling with consistently. I have a couple of wooden ones waiting for me to give them some love.
ReplyDeleteYeah, I've had limited success with my metal spokeshave. Time will tell if the new woodies will be any better. But I have a feeling that it's all in the fettling. Get them properly set and they'll work well.
Delete