Front to back, this side table will be 24" and the bottom corners are joined using dovetails. By far, this was the longest run of dovetails I've attempted. I had squared up the sides and bottom carefully, so I'm starting off on the right foot.
I started with the sides by penciling in the baselines and drawing the shape of the tails. I used 1/2" pins at each end and stepped off the dovetail spacing with dividers. Note that at the rear of the side panel, the first dovetail started 1/2" from the rabbet's shoulder.
 |
| That's 11 tails (plus a "straight" tail for the rabbet), for those who are counting |
I got my baseline measurement from the thickness of the mating piece and ran the gauge line on all four sides of the tail boards. I've never marked the baseline this way before. On my projects so far, my pin boards have not been nearly this wide, and I've been able to mark the baseline using a square referencing from a face edge. Knowing that I was going to reference off the end of the board led me to be extra careful when planing the end straight and square. Fortunately the poplar end grain planed nicely using a freshly sharpened plane.
 |
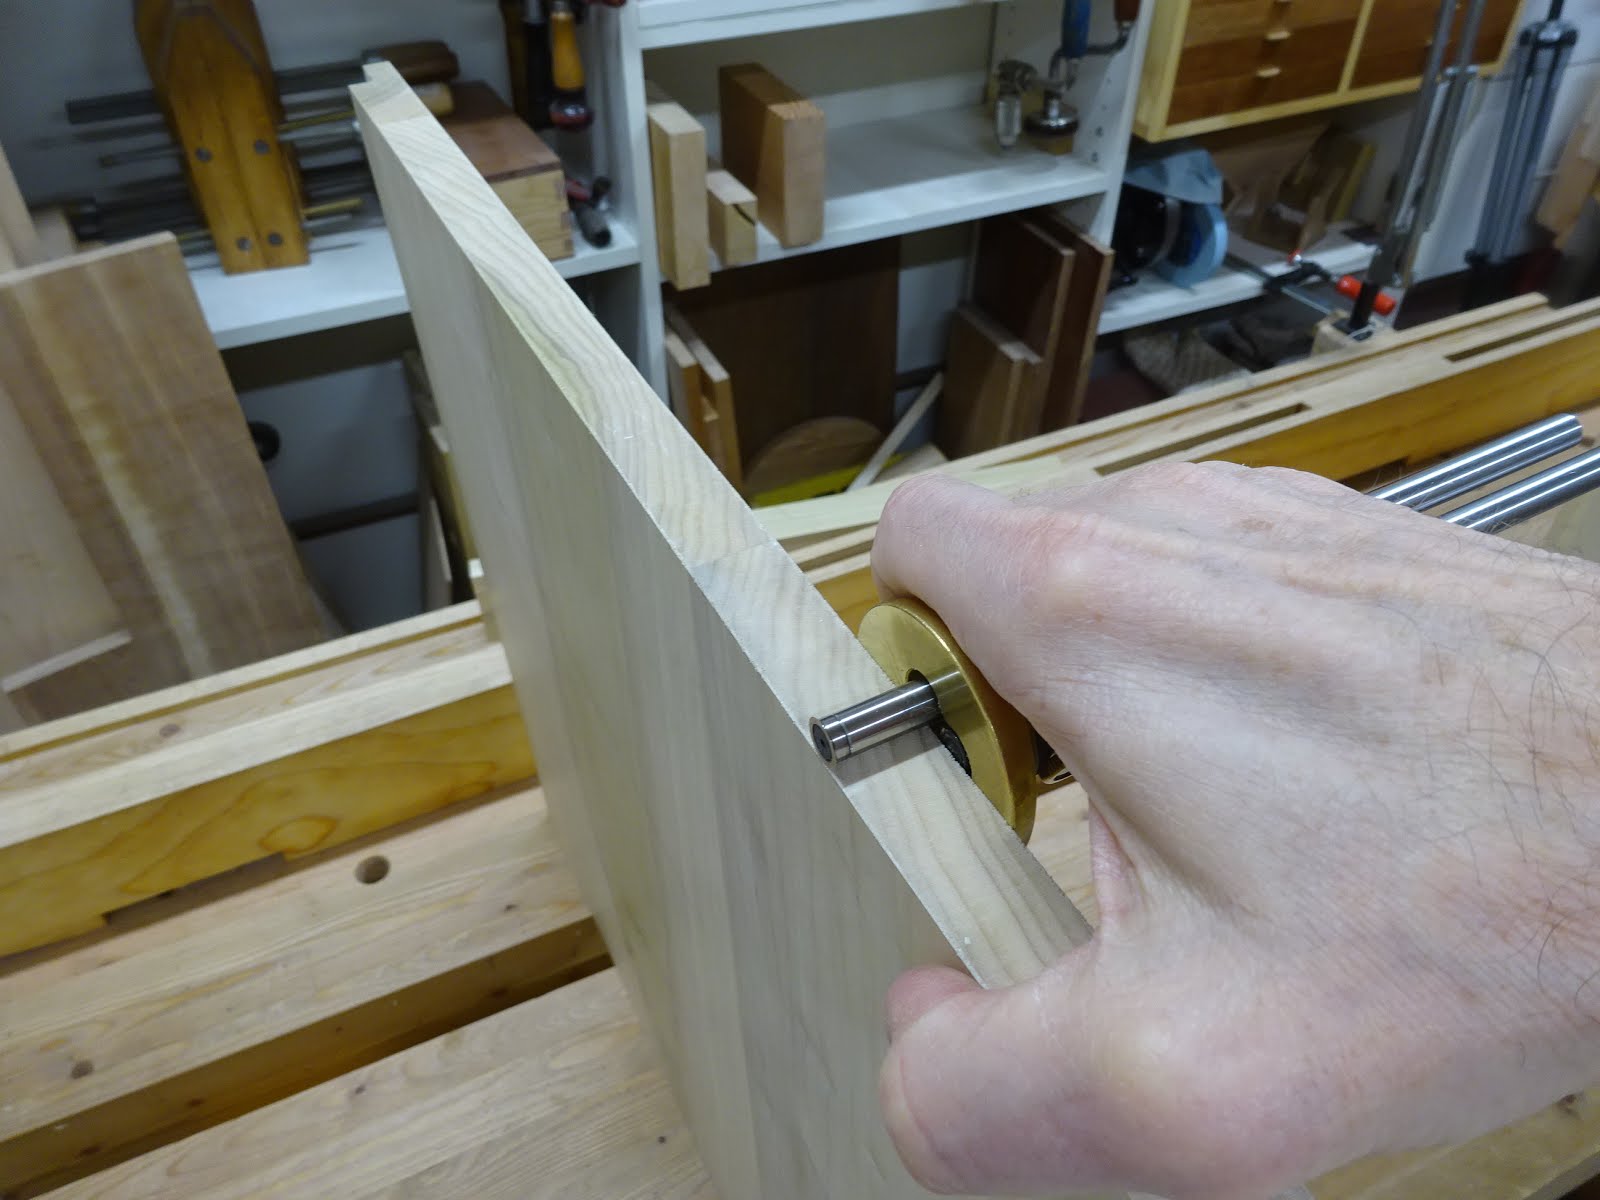
| Setting the marking gauge to the thickness of the pin board |
 |
| Gauging the baseline on the tail board, referencing off the end |
Then I got down to sawing.
 |
| Clamped the board creatively and sawed to the lines |
 |
| Used a coping saw to remove most of the waste |
After chiseling to the baseline, I realized I forgot to use the trick that Schwarz wrote about in "The Joiner and Cabinetmaker". So I added the approximately 1/64" rabbet to the inside face of the tails using a router plane after they had been cut. For the second tail board I made this rabbet ahead of the cutting.
 |
| Pencil points to the shoulder of the shallow rabbet |
The tiny rabbet makes it easier to transfer the shape of the tails to the pin board. It worked fantastically well.
 |
| Tail board resting on the pin board, ready for marking the pin board |
The case bottom (the pin board) had cupped a little, so in the picture above you can see that I've clamped a straight piece of wood to it. After that, the tail board fit nicely on the pin board with no gaps showing.
I didn't get any pics of working on the pin board, but I was very careful to cut straight and the long row of tails fit into their sockets with only a few rounds of trimming and fitting.
 |
| First corner done |
Following is a close-up of the right corner in the above picture. That's the rear of the cabinet where the rabbets are. I had included one "straight" dovetail the width of the rabbet. Because of the rabbet, the tail piece is only 3/8" thick there. So I only removed half the material as I did for the other dovetail sockets so that the straight tail would fit right. This was a great solution for keeping the rabbets invisible from the outside.
 |
| Close-up of the right-most dovetails |
After dovetailing the second bottom corner, I worked on the upper joinery. For this cabinet, the sides are joined at the top by three rails using half-blind dovetails. And here's where I made an error that I hope doesn't come back to haunt me. I'll get to it at the end of this post.
 |
| Used the baseline of the pin board to mark the shoulders of the top rails |
 |
| Created the 1/64" rabbet on the inside of the uncut tails |
 |
| After cutting the tails, transferring the shape to the upper edge of the side |
 |
| Carefully sawed and chiseled the recess |
 |
| All 6 joints fit very nicely |
 |
| Right side with three blind dovetail sockets |
 |
| And the first test-fit of the main carcase |
So here's where I went wrong. This design is odd in that the lower edges of the sides are dovetailed, but the upper edges of the sides have dovetail sockets (aka, they are pin boards). Because of the 1/64" rabbets cut on the inside face of the tail boards, the sides will overlap the (carcase bottom) pin board shoulders by 1/64". When assembled, that makes the distance at the bottom between sides 1/32" less than the distance between the bottom board shoulders. But I marked the top rail shoulders from the bottom board shoulders - I should have assembled the bottom with the sides and marked the top rail shoulders from the inside dimension of the sides at the bottom. As it is, when dry-assembled, the width is more than 1/32" greater at the top than at the bottom.
I'm hoping that I can live with this. I know how important it is to have a perfectly square carcase. This is going to make it challenging to get the length of the mid-rails right. But assuming I get them right, I think this discrepancy will have minimal effect on drawer fitting.
Next up: dadoes for the drawer dividers.


Very nice!
ReplyDeleteThanks, Lionel. So far, so good - it's coming out nice.
DeleteLooking good!
ReplyDeleteAs to your dilemma, a solution: simply cut in your pins on one side of the bottom another 1/32 shouldn't take long, and now you're square, all future measurements are adjusted accordingly.
Thanks for the suggestion, Carl. Probably I wasn't clear enough describing the problem. At the top, I'm almost 1/16" wider than at the bottom. So I would have to move the shoulders of the half-blind tails in about 1/32", and similarly, remove about 1/32" from the ends of the dovetails. But that would cause the tails to be loose in their sockets. I suppose I could glue a shim to each side of the dovetail to make them fit right. But in the end, I think I can live with the small discrepancy. The case is dry-assembled now and there is barely any difference in the width of the drawer openings.
DeleteIn my humble experiences, a wide drawer opening can get nightmarish trying to fit drawer box inside. I tend to keep my drawers not as wide ever since :-) How wide? The drawers (4) were sized to hold 200 CDs each (about 4 ft wide) and were therefore mounted on extendable rails rated at 175 pounds each. Yes, it was heavy :-) That was in the 90s in my power tools days. I don't remember how off square I was but it was a real challenge, compounded by the rails which wants to be running true the whole course. Never made drawers that big again :-)
ReplyDeleteBob
Bob, fortunately my drawers are only about 16 1/2" wide. But I'm still a little worried about the slight out-of-square situation. But it's not a "racking" type of unsquare as is more often the case, it's more of a "trapezoidal" unsquare with the top a little wider than the bottom. If I get the diagonals equal during glue-up, I'll have less than 1/32" on each side. And that's over the height of the carcase, so each drawer will have only about 1/3 of that. I think I'll be OK, but time will tell ...
Delete