I picked up this saw for $3.00 at an estate sale a few weeks ago and I've been anxious to give it a little love. The plate was dead straight as found, so I was hopeful that it would make a good user saw. When I got it, I could just barely make out anything on the etch. The medallion just said "Warranted Superior", nothing about Disston.
 |
| Disston Keystone K1 12" backsaw |
 |
| Can't make out much of the etch |
 |
| Medallion |
After turning it in the light and using lighted magnifying goggles, I could read Keystone K1, made by Disston U.S.A. I googled that to get a better idea of the etch.
 |
Photo from Jim Bode Tools (jimbodetools.com)
A similar saw in 14" length, with good etch |
From Erik von Sneidern's "
Disstonian Institute" website, I read that the Keystone line of saws was aimed at "lower end" buyers - homeowners and hobbyists. But the quality was reasonably good so as not to sully the Disston name.
The first thing I did was disassemble the saw and clean up the handle.
 |
| Did not take the back off the saw plate |
 |
| Scraping to remove old finish |
 |
| Quartersawn beech handle |
 |
| Scraped, filed and sanded |
Over three days, I gave the handle three coats of BLO. I just love the feel that it gives.
The saw plate wasn't in bad shape - no major rust or pitting anywhere - just years of crud and I worked on that with sandpaper, mostly 220 and 320 grits.
 |
| Right side of the plate shows how dirty it was in comparison to the part embedded in the handle |
 |
Outlined the etch so that I wouldn't destroy it by sanding.
I destroyed an etch via sanding once before and was extremely disappointed - never again! |
I did go lightly over the etch area with sandpaper wrapped around a flat piece of wood and that helped. It's not perfect, but I'm happy how it turned out. I can read the etch easily.
 |
| Plate finished |
I used a wire wheel in the drill to work on the saw bolts and medallion. Two of the three screws needed a little filing at the rim of the driver slot.
 |
| Medallion cleaned up a little, others as found |
 |
| After clean-up |
Now it was decision time. As found, the saw had 12 tpi and it was tough to tell, but it was filed cross-cut. I already have a 12 tpi x-c saw, so I thought about filing off the teeth and changing the saw's configuration. The saw plate is 0.030-0.031" thick, whereas my other x-c saw is 0.026" thick. I like the thinner plate, but I like the handle on this new saw much better. I decided to keep the 12 tpi x-c config. I'll show the two saws together later.
The funny thing about the teeth was that they weren't exactly 12 tpi - there was some drift over the length of the toothline.
 |
| Tooth peaks line up with a 12 tpi template at left, drifting away from the lines at right |
 |
| The teeth were not too badly shaped, but definitely not all even |
I've only sharpened my cross-cut saws about a half dozen times and have a fair amount of room for improvement. So I took this slowly.
 |
| Jointing the teeth - had to file a lot as some teeth were quite a bit lower than others |
 |
| Tops jointed - note how some teeth were barely touched |
 |
Started the sharpening by filing straight across to make the teeth uniform.
Left half of teeth in this photo are done - aiming to make the gullets line up with the template marks |
 |
Used a brand new Bahco file that lost its teeth on one corner very quickly (see upper edge),
but that could have been due to my technique - or not! The same file got me through the sharpening. |
Because the teeth had "moved" from their original 12 tpi position and were not exactly lined up with the template marks, I filed aggressively to move some teeth to where they should be.
 |
After filing straight across, I jointed again and found where to file further.
It took three jointings and filings to get to where I was happy with the location and shape of the teeth. |
 |
| The teeth were fairly even, though not yet filed for cross-cut |
 |
| Next added a little set to the teeth |
After applying some set, I filed cross-cut with 14° rake and 20° fleam (my standard). I filed carefully, so as not to remove the entire flat spots on the tops of the teeths after filing from both sides. I rejointed a couple times, trying not to end up with "cows and calves" - small and large teeth.
 |
| Not too shabby, but still far from perfect |
For the set, I was aiming for about 0.037" total set, but as always I got more set than I wanted - and it wasn't consistent either. I first lightly hammered back the set, using a larger hammer in the vise as an anvil. Then I "stoned" the teeth on both sides with a diamond plate to get the set more even along the whole saw.
OK, just for picture comparison, here is the pre-rehab picture:
 |
| As found |
And here she is, all gussied up. The plate looks pretty good. And a couple of test cuts convinced me that I did OK on the sharpening.
 |
| Glamour shot |
 |
| Starboard side |
 |
| Handle closeup |
 |
| Ditto |
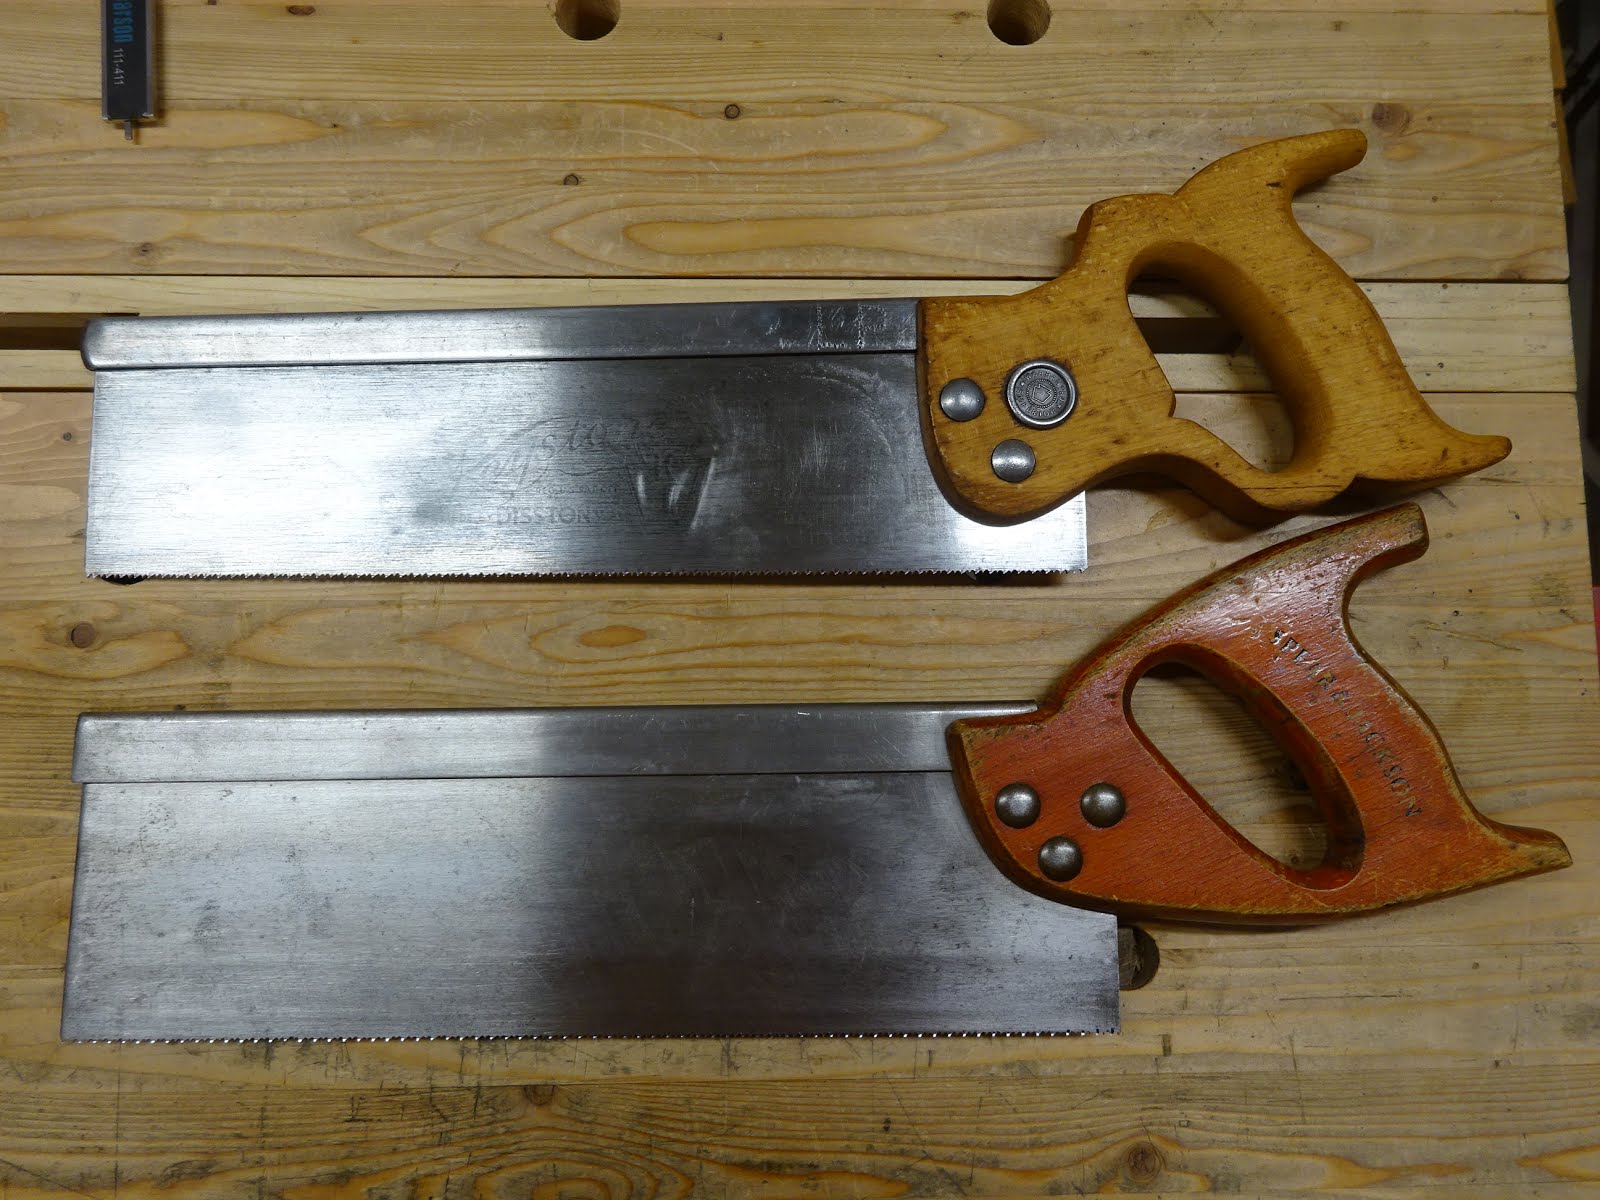
And for comparison, here it is with my Spear and Jackson 12" cross-cut backsaw (with a butt-ugly handle).
 |
I like the Keystone's handle much better.
Both perform about the same. |
Now I just need to find a spot for it - might need to move a few things around on the rolling cabinet that I use as a saw till.
UPDATE: I've now used the saw a number of times and find that it doesn't seem to cut as easily as the S&J. I'm guessing that's because it cuts a slightly wider kerf. Perhaps I'll use the S&J for joinery work and the Keystone for rougher work.


Have you thought of swapping out the handle or making a new one? Agree that the bottom one isn't all the desirable.
ReplyDeleteThought of that many times, Ralph. Maybe one of these days, but it's low on the priority list right now.
DeleteIf you swap the handle careful not to change the hang of the saw. I would make a new one, one that fit your hands just right.
ReplyDeleteGood rehab btw
Bob
Good point, Bob. I have thin hands, but normal length fingers. I've been thinking more lately about making better-fitting handles. Someday ...
DeleteThe angle of your filing is a little off, which is why it wont cut as well as it should. Paul Sellers instructions on you tube might prove helpful. Good luck with it. :-)
ReplyDelete