I'd been thinking about obtaining a wooden rabbet plane and I found an interesting one at
a tool show I attended last week up in Sonoma, CA. It's an old D. R. Barton skewed rabbet plane.
 |
| The plane, as found |
 |
| The D. R. Barton logo |
According to info on the
Davistown Museum website, who got their info from Nelson's 1999 "Directory of American Toolmakers", David R. Barton was in business under various company names from 1832 until his death in 1875. His name and logo were used for another 5 years by the people who bought his company. The logo above was used from 1874 until 1880.
The back end of this plane is stamped "24", which was probably a catalog number for Barton's skewed rabbet planes. This number was probably not for a specific size of rabbet plane. I had seen a picture of another D. R. Barton skewed rabbet plane, stamped on back with "1 1/8" (the width) and the number "24"; my rabbet plane is about 1 1/2" wide. It's possible that the width was originally stamped on the back, but it seems the back end has been hammered a few times too many and no mark can be seen.
 |
| Catalog no.? 24 |
As found, the plane was under 1 1/2" wide - just under 1 7/16". I'm guessing it started out about 145 years ago at 1 1/2". It is just under 9 5/8" long and about 3 7/16" tall.
 |
| Width across the sole |
A prior owner had attempted to flatten the sole, so that part didn't have the same patina as the rest of the plane. If you look closely, you can see bad chatter marks where the sole had been planed.
 |
| Chatter marks on the sole |
The skew of the bed is about 24° from the perpendicular.
 |
| Skew angle approximately 24° |
OK, old tool collectors might want to avert their eyes - otherwise you'll see where I've planed away the patina. I'll be writing in another post about my work to restore this plane be a user.
The cutting angle (the bed angle) is about 47-48°, though due to the skew, the effective cutting angle will be something a little less than that.
 |
| The bed angle |
I wanted to document some aspects of this plane that we don't always think about. But if I ever attempt to make one, these things will come in handy.
 |
| The bed line begins about 3" from the toe |
 |
| On the other side, due to the skew angle, the bed line is about 3 5/8" back from the toe |
The mortise for the wedge and iron was interesting. It's just under 7/16" wide, though the walls are anything but flat and straight these days. The rear wall of the mortise (bottom in the photo below) has the same angle as the skew angle, of course, but the funny thing is that the front wall of the mortise has a slightly different angle. I don't know why this would be.
 |
| View of top of plane - toe is towards top |
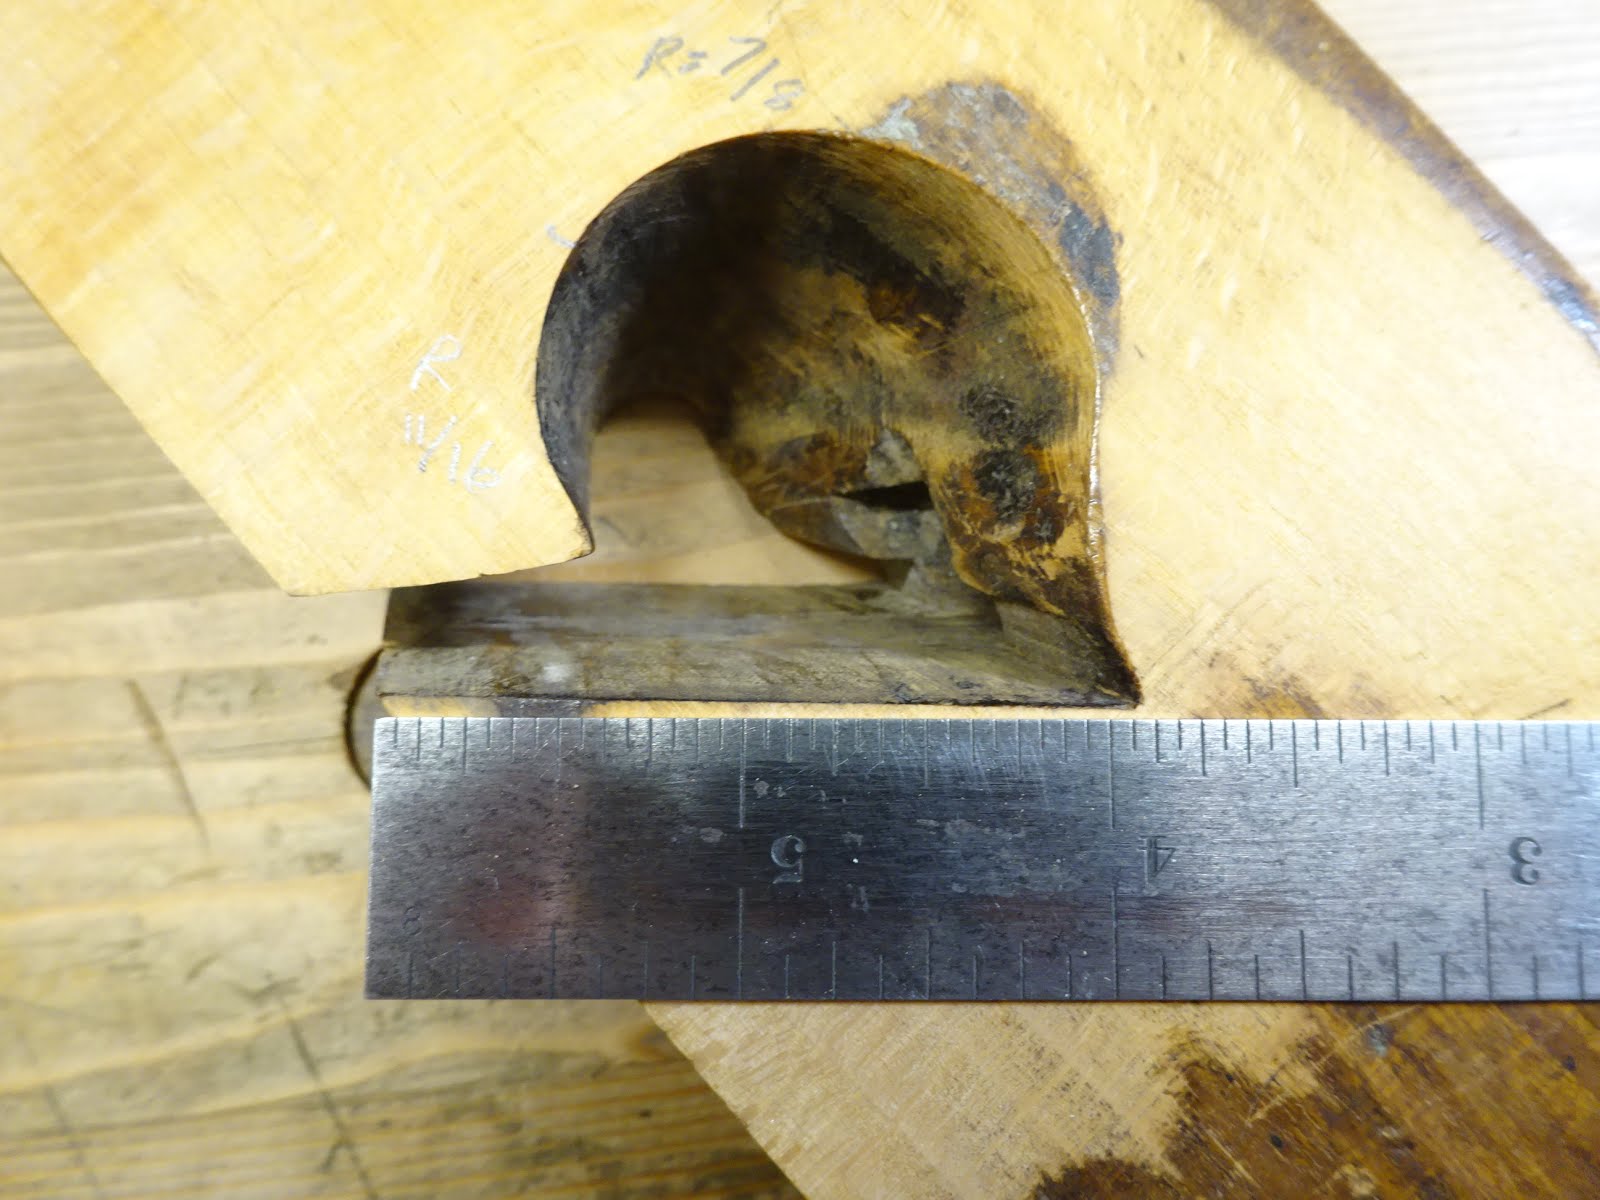
The conical escapement fascinates me - I just love the curve and how it works. The wedge starts to curl a shaving and the escapement forces it out the left side.
 |
| Escapement area |
 |
| Just documenting some escapement dimensions |
 |
| The curve starts with about 11/16" radius and gets progressively greater |
 |
| Right side of the lower mortise area |
 |
The conical escapement starts 3/4" from the sole and
top of escapement area is 2 1/4" from sole |
The 5 3/4" long wedge is usable, but is in tough shape. It's about 25/64" thick - a little loose laterally in the mortise. It's got some cracks on the back end and along one edge.


Hi Matt.
ReplyDeleteGreat looking little plane.
I am amazed that the body seems to be without any attacks of beetles/worms.
I tried to restore an old Johan Weiss & Sohn plane, and that thing was totally eaten up on the inside. The outside looked fine with just a couple of visible small worm holes. But after flattening the sole, the outer crust came off, and the inside was like a pulverized sponge.
Brgds
Jonas
Wow, that's amazing. I've planed both sides, the sole and the top of this plane and have found practically nothing. Maybe I got lucky with this one.
DeleteTry rubbing some chalk on the heel and see if that reveals anything. Those chatter marks look like they came from a powered jointer.
ReplyDeleteThanks for the chalk tip, Ralph. Wouldn't be surprised at all if they were powered jointer marks. Fortunately they cleaned up very easily with a couple swipes of a smoother.
Delete