A few years ago I made myself a large mallet from maple and that thing has been great. The head is laminated from three layers of 1" thick material. But sometimes I find a need for a smaller wooden hammer, for example, when tapping the wedge of moulding planes (not that I use them much).
So I squared up two pieces of maple and marked out some joinery.
 |
| Already looks a little like a hammer |
 |
| Tenon on end of handle |
 |
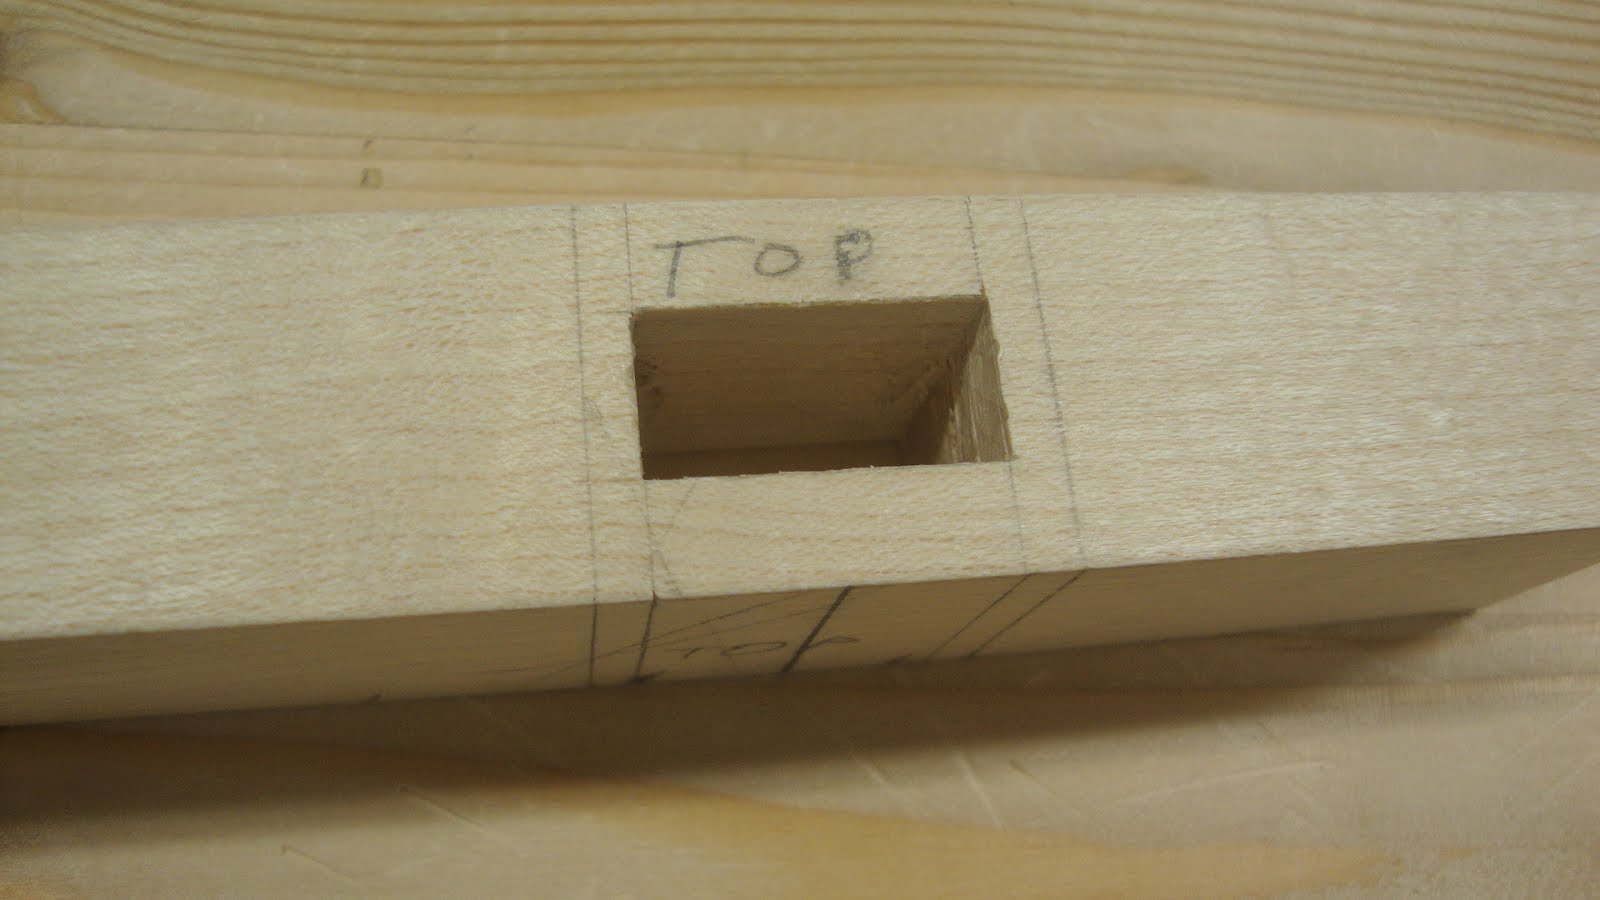
| Mortise on head |
I've been trying a mortise-chopping technique that I read about on Dennis Laney's excellent blog "
A Woodworker's Musings". He suggests to line up the board with your eye so you can better tell whether you are chopping vertically. The following photo shows the alignment.
 |
| Length of mortise aligned with the chopper's eye |
I do find that this helps me with chopping vertically, but I have a tougher time holding the chisel comfortably and seeing my end lines. Anyway, after chopping from top and bottom, meeting in the middle, the mortise was made.
 |
| Nice and square with clean walls |
This mortise is square now, but later I angled the mortise end walls for wedging the tenon. Pencil lines in the picture above show the extent of the tenon shoulders and those lines are 1/8" from the ends of the mortise. Later I made the mortise wider by 1/8" (1/16" on each side) on the top.
Then to the handle. After sawing the tenon cheeks ...
 |
| Cheeks sawn, ready to saw the ends |
... I did a dry fit and all looked good.
 |
| You can see the extra space for the wedges |
Before gluing anything together I wanted to do the shaping of the handle and the bottom of the head.
I used a small ball peen hammer as a model for the handle shape, made cardboard templates and transferred the shape to the wood.
 |
| Shape for the thinner aspect of the handle marked out |
 |
| And for the thicker aspect |
I cut some relief cuts with a crosscut saw, then used chisel and spokeshave to get roughly to the lines.
 |
| Handle shape roughed out |
Then spoke shaved the corners and scraped and sanded for a smooth feel.
 |
| Smooth |
I also did a little shaping on the underside of the head. With that done it was time to glue up and wedge the joint. I had some oak wedges from a prior project that worked fine. I fine tuned the width of the wedges by swiping the wedge's edge across the sole of a #4 plane held upside down.
 |
| Cooking ... |
The next day I cleaned up the joint. I didn't need to make it look so nice (because of the subsequent shaping), but I just love to look at the joint cleaned up.
 |
| All cleaned up |
Then it was on to shaping the top of the head. It was a challenge clamping it in the vise and having enough room to plane the edges from square to round. But round it got. Then I chamfered around the business ends.
 |
| Head rounded and ends chamfered |
 |
| The finished and shaped joint |
Finally I gave it a couple coats of oil and let it dry.
 |
| The completed hammer, with hanging hole |
And here it is in it's new home under the bench, hanging out next to it's big brother, Bruno.
 |
| Hanging out in the dark |
Fun little project. And I hope it proves useful next time I need to hammer something made of wood without damaging it.


I take it your bigger laminated hammer is holding up? I had all of the laminated ones I've made fall apart on me eventually.
ReplyDeleteI like the smaller one and I do have some maple somewhere in the shop.....
The big mallet is fine so far. I recall your comments about laminated mallets in a previous blog, but so far, so good for me. For the small one, I might find after a while that I should've shaped it differently - time will tell.
DeleteNice little project, good use of left over. So if the big one os called Bruno, whats the little guy name? :-)
ReplyDeleteBob and Rudy
Ha! That's a good question, Bob. Maybe something like Sheldon or Drexel or some name I don't identify as being very big or strong (apologies to anyone named Sheldon or Drexel).
DeleteNice one! Could work as plane adjustment hammer.
ReplyDeleteMaybe I can borrow your idea.
Cheers,
Stefan
Exactly what I was thinking about this hammer. It's too light for chisel work, but it might be good for adjusting plane irons.
Delete