Thursday, October 31, 2024

Cleaning and Fixing Up My Garage Sale Finds

In early August I posted about finding some tools at a garage sale.  These tools were incredibly dirty and grungy.  Finally I've had a chance to clean them up.  The first up was a small pair of Stanley 84-120 needle nose pliers (made in Japan).  All they needed was some Simple Green, a brass brush and a little sanding.  These cleaned up beautifully and are already proving quite useful.

As found

Cleaned up

Next was a C. E. Jennings & Co. #10 auger bit, 11/16" diameter.  I used the rust remover that I posted about a few weeks ago and it came out great.  A wire wheel in a drill cleaned it up nicely.  It's now sharp and the spurs and cutting lips are in good shape.  And a bonus - this was one of the sizes missing from a set of bits I found at another sale recently.

As found

Cleaned up and sharpened

Next was the Stanley #51 spokeshave.  This needed a little more work.  After de-rusting the parts, I flattened the sole.  A wire wheel in a drill helped to make the other parts shiny and presentable.

As found

The sole was far from flat before this

Cleaned up

I've not used a #51 before, but I found the adjustment of the iron to be less of a problem than I thought it might be.  I advance it with a hammer, and if I need to retract the iron, I've got to loosen the lever cap and pull it back manually.  But it seems to hold it's position fine.  I had thought it might shift left or right in use.  I'll judge later how it performs in the long run.

Next up is the Stanley #5, WWII era.  I think this is a type 17 because it has the hard rubber depth adjuster knob and black (or very dark) painted/lacquered hardwood (not rosewood) tote and front knob.  It was disgustingly dirty, but cleaned up pretty easily with Simple Green and a toothbrush and brass wire brush.  The iron and some screws needed some de-rusting as well.

Stanley #5, type 17 from WWII era.
It's got the hard rubber depth adjuster and an inappropriate tote toe screw.

The iron says "VICTORY" and "MADE IN USA

Filthy, disgusting! (said with a French accent, from some childhood cartoon)

Starting to flatten the sole - this needed a lot of work

Good enough

The VICTORY iron de-rusted and cleaned up

I scraped off the old paint/finish from the tote and knob, then added some "Dark Walnut" stain and about 5 coats of shellac, sanding between coats.  Then I removed the sheen with some 0000 steel wool and waxed them.  They look and feel great.

Almost finished

In the picture above, I had borrowed a tote toe screw from another plane.  But since then I made one from a 1/4-20 bolt.  I'll post about that separately.

It took a few tries to set the frog properly for a thin shaving, but once I got it, the shavings felt great.  I think this has potential to be a great user plane.

Finally, there's the Starrett combination square with all three heads.  This was also incredibly dirty and needed a fair bit of work to clean up.

Starrett combo square with all three heads - what a find!!

First up was cleaning with Simple Green

The blade and blade-locking hardware were then soaked in rust remover and then cleaned with a wire wheel.  The protractor head had its scale wire-wheeled and the flat surfaces were rubbed briefly on sharpening stones and lightly sanded.  On all three heads, I used a tip from Alfred, who commented on my earlier post about these garage sale tools.  He said to make sure to clean out the slot for the rule, especially the grooves on each side of the raised ribs on which the rule sits.  I used some cardboard, sliding back and forth until all was clean.

Here's the protractor head looking a lot better

All parts cleaned up

The blade looking much better

Unfortunately, there are three issues with this set.  First, the blade locks firmly into place in the centering head, but it will not lock into the protractor head or combination head.  It seems the small crimp on the clamp screw is slightly off of where it should be.  I've got to look into this some more to figure out what to do about it.  It's possible that the clamp screws were made for a blade of greater width.

Here's one of those clamp screws.  The little crimped nub is
on the left side near the middle.  It keeps the screw from going 
too far down its hole and from rotating in the hole.

Second, the protractor head has a tiny screw that locks the rotation at the angle you want.  This screw has had half of it's head broken off.

That little screw goes in the hole I'm pointing to and the screw head locks the round part

Here's a close-up shot of that screw missing half its head

The thread is something like a #3-56 or something near that size.  It's tough to count the threads on something that small.  I'll take it to my local hardware store and see if they have a thread gauge that small.

And third, the scribe could not be held in place in the 90 / 45 degree head.  I think the grime is the only thing that held it in place all those years.  After I cleaned it up, the scribe was free to fall right out.  But thanks to a Bob Rozaieski video that addressed this exact problem, I was able to fix it.

Back end of the 45/90 head.  See the brass bushing in the scriber hole?

I got it out with a bent paper clip and pliers

Those fingers on the brass bushing should be bent inwards to provide
a tight grip on the scribe

This was a great fix.  So glad to have found that video.

All-in-all, great finds at a garage sale for little money.  I'm very happy about how easily they cleaned up.  And they all should become user tools.


Wednesday, October 16, 2024

Stool for the Granddaughter

Felicity is walking and climbing now and soon she'll need to get up to a sink or countertop.  So I was asked to make a small stool.  I've made a lot of stools and just love these small projects.  I didn't take many photos this time, so here's a quick post.
Here's one that my wife painted for her daughter many years ago.
I'm copying the main dimensions of this one.

Here are the sticks for the undercarriage:
4 legs, 2 rails, 1 stretcher

I'm not doing fancy leg turnings like in the first photo.  But I did make them tapered octagonal (with bulge in center), then 16 sided, then tapered round using planes and scrapers.

When time came to bore holes in the seat, I made a jig that I had seen in Aldren Watson's book, "Hand Tools: Their Ways and Workings".  Great book.

Bored a hole through squared-up stock, then cut the bottom at a 17.5
degree angle (resultant).  Cut out top right portion for clamping.

Here's that jig in action.  Stick your auger bit through the jig
and put it's point at the boring location.  Then line up the jig with the sightline, 
clamp it in place and bore the hole.

I tapered the 3/4" holes in the top and made tapered tenons at the ends of the legs.  The legs were wedged into their mortises with walnut.  The mortises and tenons for the rails and stretcher are all 5/8" and cylindrical.  The 8 1/2" x 13" oval maple top is 7 1/2" off the ground.  The legs, rails and stretcher are pine (or some other soft wood).  The legs max out at 1 1/8" diameter, while the rails and stretcher are 1" at their thickest.

The completed stool

Top view

The plan is to paint this stool, but my wife has to finalize just what she wants.  I'll probably give a sealing coat of shellac before that.  Hopefully that will happen soon.


Sunday, October 6, 2024

New Square Tapered Shank on an Auger Bit

I saw these two large (unusual sized) auger bits at a tool show last year and ever since then I've kicked myself for not buying them.  Well, there was another tool show recently and I found them again, but remembered why I didn't pick them up last year - the larger one had had its square tapered shank cut off, presumably for use in a drill press.  Sacrilege!!!!

1 1/8" and 1 1/4" diameter Craftsman bits

I tried using it with my largest brace, a 12" Fray, but the two-jaw chuck could not tighten sufficiently to keep it from slipping as I tried to bore a hole.

One of the guys at the show offered to help me fix it - he's a metal worker and would probable be able to weld on a donor shank.  But he lives a little far from me, so I thought about it and decided to try something myself.  I don't know if this will stand the test of time, but for now it is working.

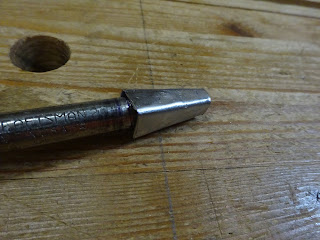
I first traced the shank from the 1 1/8" bit onto a piece of metal,
then cut it out and bent it into approximate shape

Here's the too-large shank next to the two bits

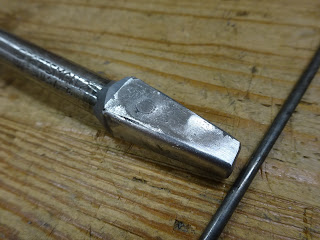
After cutting and filing it down a little, a test fit on the round shank.
I had filed a bit of a square taper on the round shank for a better fit.

Then I filled the new shank with JB Weld and stuck the bit
into it and let it set up for a couple of days


I had a piece of 7/64 wire, so drilled that size hole to pin the new shank in place

Here, you can see the pin if you look carefully.
I had epoxied the pin in place, then peened the ends and filed them down.

And a test cut worked perfectly.

I'm really happy about this.  I hope it works permanently, but only time will tell.  If I bore holes in tougher wood, the stresses might crumble the JB Weld.  But it's good for now.  Being able to save an old tool (maybe this one is not too old) and put it back to work  is so damned satisfying!

Wednesday, October 2, 2024

DIY Safe Rust Removal

I've got to share this.  A couple weeks ago I saw on YouTube a video by a gun restorer who had developed his own homemade version of Evaporust.  The video is fantastic and I highly recommend it to anyone who needs to remove rust from old tools (or other items).  He gives a formula which depends on what ingredients you use, but for me this was:

Citric acid (powder) - 100 g

Baking soda - 63 g

Water - 1 liter

Dish soap - about a spoonful


I had to try this out and it worked fantastically well.  Into the water, put the baking soda and mix until dissolved.  Then add the citric acid.  This will cause an immediate reaction with the baking soda, so add this slowly and use a container that has a wide opening.  I used a tray about 18" long, 6" wide and 2" tall.  After the reaction has completed, add some dish soap.  This reduces surface tension of the liquid and helps the solution "wet" the metal pieces that are placed in it for rust removal.

I've placed some things in it for a few hours and also for about 24 hours.  I didn't see any removal of base metal - the maker marks on auger bits were not damaged at all.  But I did get great results with the rust - both after a few hours and after a day.  It leaves an "oily", dirty residue that cleans off with a rag and then I used a brass brush to really get things looking nice.

Check out these two pics of a few auger bits.

Bits as found

Bits after the rust bath and cleanup with a brass brush

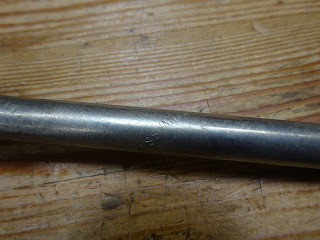
Here's the maker's mark on the largest of those three bits.  It's from The James Swan Co.

Honest - there really is a name on there

Now you see it

I've de-rusted several auger bits, a couple chisels and some other bits and bobs, and the solution is performing very well.  The only extra thing I had to buy was a kitchen scale to weigh out the ingredients.

I'm really chuffed about this and felt I had to spread the word.  I've never used Evaporust, so I can't compare the two.  I've used citric acid by itself, but didn't get results quite like this.  I've wanted to find something safe that can be made at home and disposed of without worrying about environmental consequences.  This fits the bill.  I'd love to get comments about this.  Have any of you had similar results?